

In this Article
Selenium は単体でも Web 自動化に役立ちますが、プロキシと組み合わせれば、プライバシーを守りながら接続を安定させ、コンテンツに継続してアクセスしやすくなります。Selenium は Jason Huggins が開発したオープンソースツールで、Web アプリケーションの自動化やテストに使用されます。Selenium IDE、Grid、Standalone Server、WebDriver などのコンポーネントが含まれています。
このガイドでは、Web スクレイピングで使うために、Python で Selenium にプロキシを設定する主な手順を説明します。
はじめに
まず、Python と pip(Python のパッケージマネージャー)がインストールされていることを確認してください。まだの場合は、公式サイトから Python をダウンロードし、.pkg ファイルを開いて、画面の指示に従います。基本的な手順を見ていきましょう。
1. Terminal または Command Prompt を開きます。Mac の場合は、Dock の Launchpad アイコンをクリックし、検索欄に Terminal と入力して起動します。Windows の場合は、[ファイル名を指定して実行]に「cmd」と入力します。Command Prompt または PowerShell が開きます。
2. ターミナルで次のコマンドを入力します。
python --version
Python 3 を使用している場合は、Python の後に 3 を付けます。他のコマンドでも同様に必要になることがあります。
python3 --version
pip は通常、Python 3.4 以降に自動で含まれます。インストールされているかどうかは、pip に次のコマンドを入力して確認できます。
pip --version
pip3 --version

3. pip を使って Selenium パッケージをインストールします:
pip install selenium
Python 3 を使用している場合は、 pip3 を使います。Python 3 にインストールするには、次のコマンドを実行します。
pip3 install selenium
4. インストールが完了したかどうかを確認します。
インストール後、次のコマンドを実行して、Selenium がインストールされていることを確認できます。
pip show selenium
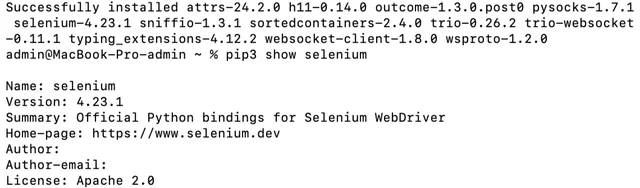
Selenium で WebDriver を使う
Selenium で Chrome や Firefox などのブラウザを操作するには、WebDriver が必要です。適切なドライバーをダウンロードし、システムの PATH から利用できることを確認してください。ここでは、多くの自動化プロジェクトで使われている Chrome を例にします。
1. 公式 ChromeDriver ダウンロード ページに移動します。
https://developer.chrome.com/docs/chromedriver/downloads
2. Chrome のバージョンに対応するリンクを見つけ、macOS 用の ChromeDriver をダウンロードします。
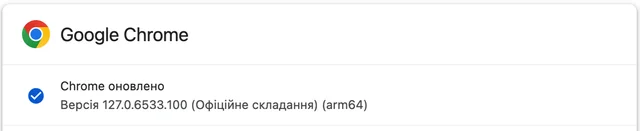

ダウンロードしたファイルは ZIP 形式です。ダブルクリックして解凍すると、ChromeDriver 実行ファイルが作成されます。
簡単に利用できるように、ChromeDriver ファイルをシステムの PATH に含まれるディレクトリへコピーします。一般的な保存先は次のとおりです。/usr/local/bin または /usr/bin。次のコマンドを使用します。
sudo mv ~/Downloads/chromedriver /usr/local/bin/
***「そのようなファイルまたはディレクトリはありません」というエラーは、通常、コマンド内のファイルパスが誤っているか、指定した場所にファイルが存在しないことを示します。ChromeDriver ファイルがあるディレクトリにいること、ChromeDriver のファイル名の拡張子やスペルに誤りがないことを確認してください。
ファイルを次のようなディレクトリに移動するため、mv と sudo コマンドを使用して /usr/local/bin に移動すると、macOS ではパスワードの入力を求められます。これはユーザーアカウントのパスワードです。入力して Enter キーを押してください。入力中は文字や記号が画面に表示されません。
ChromeDriver が正しくインストールされているかどうかを確認するには、ターミナルに次のコマンドを入力します。
chromedriver --version/
基本的な Python スクリプトの作成
次に、テキストエディタ(ここでは VS Code)または IDE で、新しいファイルを作成します。ファイル名は selenium_test.py です。
基本的な Python スクリプトを作成するには、webdriver-manager モジュールが必要です。
- pip を使ってパッケージをインストールできます。ターミナルで次のコマンドを実行します。
pip install webdriver-manager/
pip install selenium webdriver-manager/
上記のコマンドを実行すると、スクリプトは正常に動作するはずです。
# pip install selenium webdriver-manager
from selenium import webdriver
from selenium.webdriver.chrome.service import Service
from webdriver_manager.chrome import ChromeDriverManager
from selenium.webdriver.chrome.options import Options
# set Chrome options to run in headless mode
options = Options()
options.add_argument("--headless=new")
# initialize Chrome driver
driver = webdriver.Chrome(
service=Service(ChromeDriverManager().install()),
options=options
)
# navigate to the target webpage
driver.get("https://httpbin.io/ip")
# print the HTML of the target webpage
print(driver.page_source)
# release the resources and close the browser
driver.quit()/
次の結果が表示されます。

Selenium での無料プロキシのセットアップ
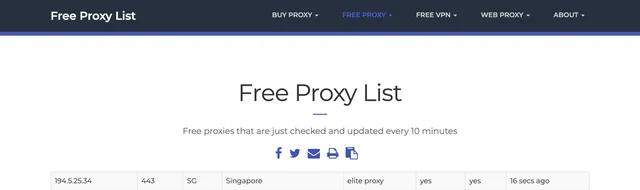
このパートでは、Python で Selenium にプロキシを設定し、無料プロキシを試す方法を説明します。次の Web サイトにアクセスして、https://無料プロキシリスト.net/からテスト用の無料プロキシを選びます。スクリプトでは、プロキシのアドレスとポートを指定する必要があります。例として、次の無料プロキシを使ってみましょう。
from selenium import webdriver
from selenium.webdriver.chrome.service import Service
from webdriver_manager.chrome import ChromeDriverManager
from selenium.webdriver.chrome.options import Options
from selenium.webdriver.common.by import By
# define the proxy address and port
proxy = "194.5.25.34:443"
# set Chrome options to run in headless mode using a proxy
options = Options()
options.add_argument("--headless=new")
options.add_argument(f"--proxy-server={proxy}")
# initialize Chrome driver
driver = webdriver.Chrome(
service=Service(ChromeDriverManager().install()),
options=options
)
# navigate to the target webpage
driver.get("https://httpbin.io/ip")
# print the body content of the target webpage
print(driver.find_element(By.TAG_NAME, "body").text)
# release the resources and close the browser
driver.quit()/
ターミナルには次の応答が表示されます。
{
“origin”: “194.5.25.34:443”
}
これは、Selenium がプロキシサーバー経由でページにアクセスしていることを示します。ただし、無料プロキシは低速だったり、データを販売したりする可能性があるため注意してください。
Selenium Wire
Selenium Wire は、ネットワークトラフィックの傍受と分析を可能にする Selenium の強力な拡張機能です。HTTP のリクエストとレスポンスを確認することで、Web アプリケーションとサーバーのやり取りを詳しく把握できます。ChromeDriver はユーザー名とパスワードを自動処理しないため、Selenium Wire のようなサードパーティ製プラグインが必要になります。
Selenium Wire をインストールするには、ターミナルで次のコマンドを実行します。
pip install blinker==1.7.0 selenium-wire/
pip3 install blinker==1.7.0 selenium-wire/
Selenium の DataImpulse プロキシ
ここからは DataImpulse プロキシを使用します。必要なものをすべてインストールしたので、プロキシ認証を設定できます。この手順では、DataImpulse ダッシュボードで選択したプランのセクションにあるユーザー名、パスワード、アドレス、ポートが必要です。ここでは住宅用プロキシを使用します。
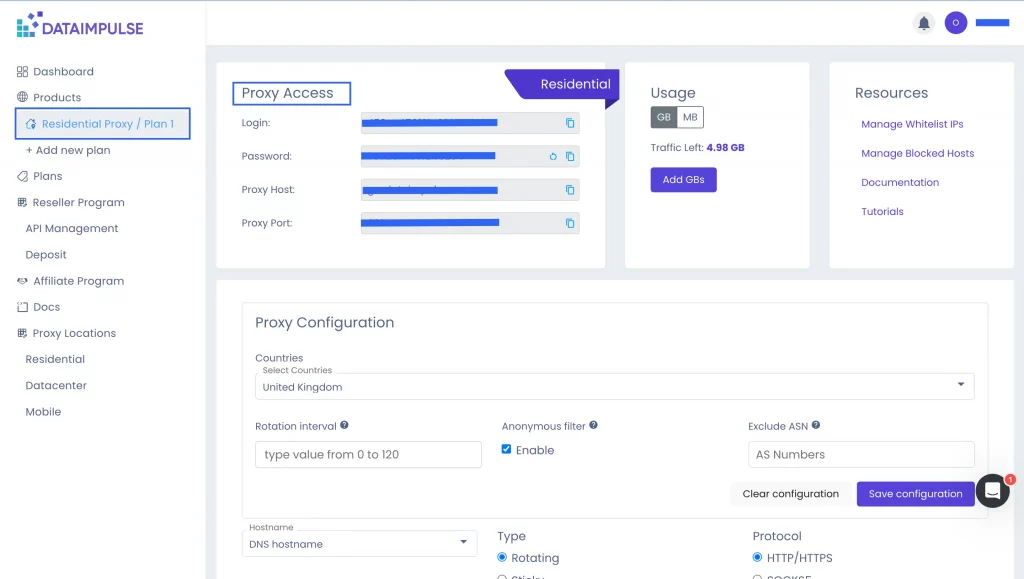
スクリプトを見てみましょう。
from seleniumwire import webdriver
from selenium.webdriver.chrome.service import Service
from webdriver_manager.chrome import ChromeDriverManager
from selenium.webdriver.chrome.options import Options
from selenium.webdriver.common.by import By
# configure the proxy
proxy_username = ""
proxy_password = ""
proxy_address = "gw.dataimpulse.com"
proxy_port = "823"
# formulate the proxy url with authentication
proxy_url = f"http://{proxy_username}:{proxy_password}@{proxy_address}:{proxy_port}"
# set selenium-wire options to use the proxy
seleniumwire_options = {
"proxy": {
"http": proxy_url,
"https": proxy_url
},
}
# set Chrome options to run in headless mode
options = Options()
options.add_argument("--headless=new")
# initialize the Chrome driver with service, selenium-wire options, and chrome options
driver = webdriver.Chrome(
service=Service(ChromeDriverManager().install()),
seleniumwire_options=seleniumwire_options,
options=options
)
# navigate to the target webpage
driver.get("https://httpbin.io/ip")
# print the body content of the target webpage
print(driver.find_element(By.TAG_NAME, "body").text)
# release the resources and close the browser
driver.quit()/
VS Code では、次のようになります。
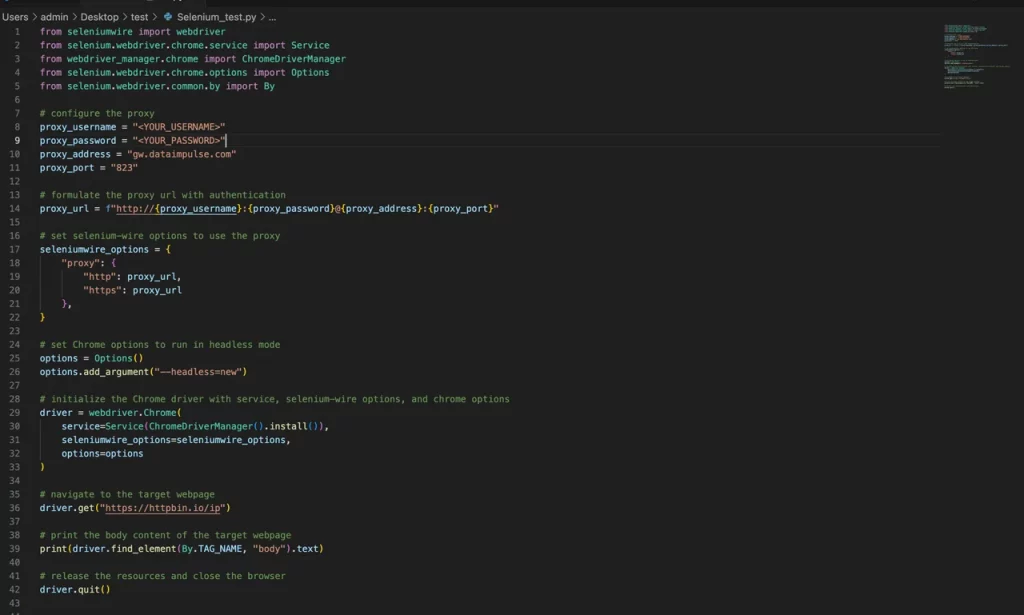
実行結果には origin が表示されます。これは認証が正常に完了したことを示します。

ヒント
- 公式サイトだけを利用する – 必要なプログラムはすべて安全な公式サイトからダウンロードしてください。
- 互換性を確認する – Selenium と ChromeDriver のバージョンがブラウザと互換性を持つことを確認してください。
- 定期的に更新する – Selenium、ChromeDriver、その他のツールを定期的に更新し、最新機能を活用してください。
- ログイン情報を安全に管理する – 認証情報は安全な方法で保護、管理してください。
- 仮想環境を使用する – 仮想環境を作成して依存関係を整理し、パッケージの競合を防ぎます。
- エラー処理を行う – プロキシの使用時や Web 要素の操作時に起こり得る問題に対処できるよう、スクリプトにエラー処理を追加します。
結論
Selenium のセットアップを検討しているなら、ぜひ試してみてください。Selenium でプロキシを使うことで、より柔軟な制御と運用が可能になります。この手順とヒントに従えば、初めてでも必要なパッケージを適切に導入できます。速度、セキュリティ、安定性を重視するなら、無料プロキシではなく信頼できるプロキシを選ぶことをおすすめします。