

In this Article
Selenium 本身就很适合网页自动化,而与代理配合使用,则有助于保护隐私、维持稳定连接,并减少访问内容时的中断。Selenium 是 Jason Huggins 开发的一套开源工具,用于自动化和测试 Web 应用程序。它包含 Selenium IDE、Grid、Standalone Server 和 WebDriver 等模块。
本指南将介绍如何在 Python 中为 Selenium 配置代理,以完成网页抓取任务。
入门
首先,确保您安装了 Python 和 pip(Python 包管理器)。如果尚未安装,请从官网下载 Python,打开下载的 .pkg 文件,并按照说明完成安装。基本步骤如下:
1. 打开 Terminal 或 Command Prompt。 如果您使用 Mac,请点按 Dock 中的 Launchpad 图标,在搜索栏输入 Terminal 并打开它。如果您使用 Windows,请在 Run 窗口中输入 cmd,这会打开 Command Prompt 或 PowerShell。
2. 在您的终端中输入:
python --version
如果您使用的是 Python 3,只需在 python 后加上 3。其他命令也同样适用:
python3 --version
pip 通常随 Python 3.4+ 自动安装。但最好确认 pip 是否已安装,可运行以下命令检查:
pip --version
pip3 --version

3. 使用 pip 安装 Selenium 包:
pip install selenium
如果您使用的是 Python 3,请使用 pip3,以确保将其安装到 Python 3:
pip3 install selenium
4. 检查安装是否完成。
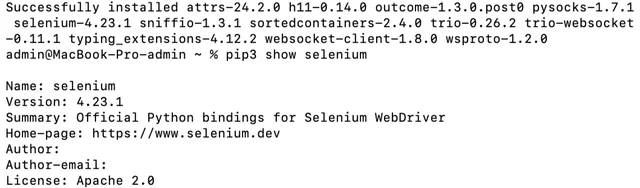
安装后,您可以通过运行以下命令来验证 Selenium 是否已安装:
pip show selenium
在 Selenium 中使用 WebDriver
Selenium 需要 WebDriver 才能与 Chrome、Firefox 等浏览器交互。您必须下载相应的驱动程序,并确保系统 PATH 中可以找到它。我们将使用 Chrome,这是大多数自动化项目的首选浏览器。
1. 打开 ChromeDriver 官方下载页面:
https://developer.chrome.com/docs/chromedriver/downloads
2. 找到与您的 Chrome 版本匹配的链接,然后下载适用于 macOS 的 ChromeDriver。
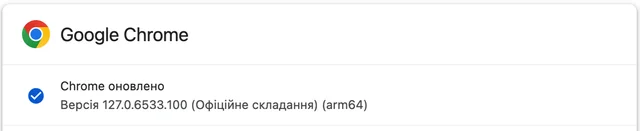

下载的文件为 zip 格式。双击解压后,您将得到 ChromeDriver 可执行文件。
为便于访问,建议将 ChromeDriver 文件复制到系统 PATH 中的目录。常见目录包括 /usr/local/bin 和 /usr/bin。使用以下命令:
sudo mv ~/Downloads/chromedriver /usr/local/bin/
***如果看到”没有这样的文件或目录”错误,通常表示命令中的文件路径不正确,或指定位置不存在该文件。请仔细确认 ChromeDriver 文件所在目录、文件名,以及是否有多余扩展名或拼写错误。
使用 sudo 和 mv 命令将文件移动到 /usr/local/bin 等目录时,macOS 会要求您输入密码。这是您的用户帐户密码。输入并按 Enter 键。请记住,您输入的密码不会显示在屏幕上(不会出现任何字符或符号)。
要检查 ChromeDriver 是否安装正确,请在终端中键入以下命令:
chromedriver --version/
创建基本 Python 脚本
接下来,下载任意文本编辑器,例如 VS Code,或使用 IDE 创建一个名为 selenium_test.py 的新文件。
要创建基本的 Python 脚本,我们需要安装 WebDriver Manager 模块。
- 可以使用 pip 安装它。在终端中运行以下命令:
pip install webdriver-manager/
pip install selenium webdriver-manager/
运行上述命令后,脚本应能正常运行:
# pip install selenium webdriver-manager
from selenium import webdriver
from selenium.webdriver.chrome.service import Service
from webdriver_manager.chrome import ChromeDriverManager
from selenium.webdriver.chrome.options import Options
# set Chrome options to run in headless mode
options = Options()
options.add_argument("--headless=new")
# initialize Chrome driver
driver = webdriver.Chrome(
service=Service(ChromeDriverManager().install()),
options=options
)
# navigate to the target webpage
driver.get("https://httpbin.io/ip")
# print the HTML of the target webpage
print(driver.page_source)
# release the resources and close the browser
driver.quit()/
您将看到以下结果:

在 Selenium 中设置免费代理
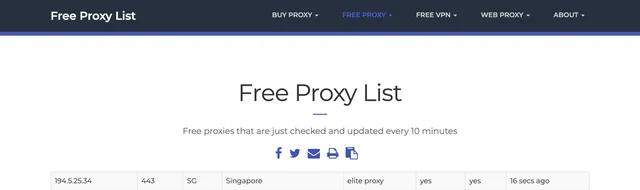
本节将介绍如何使用 Python 为 Selenium 设置代理,并测试 免费代理。访问 https://free-proxy-list.net/ 并选择一个免费代理进行测试。在脚本中,您必须定义代理地址和端口。例如,让我们选择这个免费代理:
from selenium import webdriver
from selenium.webdriver.chrome.service import Service
from webdriver_manager.chrome import ChromeDriverManager
from selenium.webdriver.chrome.options import Options
from selenium.webdriver.common.by import By
# define the proxy address and port
proxy = "194.5.25.34:443"
# set Chrome options to run in headless mode using a proxy
options = Options()
options.add_argument("--headless=new")
options.add_argument(f"--proxy-server={proxy}")
# initialize Chrome driver
driver = webdriver.Chrome(
service=Service(ChromeDriverManager().install()),
options=options
)
# navigate to the target webpage
driver.get("https://httpbin.io/ip")
# print the body content of the target webpage
print(driver.find_element(By.TAG_NAME, "body").text)
# release the resources and close the browser
driver.quit()/
在终端中,您将收到以下响应:
{
“来源”:”194.5.25.34:443”
}
这意味着 Selenium 正在通过代理访问该页面。不过请注意,免费代理可能速度很慢,还可能出售您的数据。
Selenium Wire
Selenium Wire 是 Selenium 的强大扩展,可让您拦截和分析网络流量。通过查看 HTTP 请求和响应,您可以更好地了解 Web 应用程序如何与其服务器交互。 ChromeDriver 不会自动处理用户名和密码,因此需要使用 Selenium Wire 等第三方扩展。
要安装 Selenium Wire,请在终端中运行以下命令:
pip install blinker==1.7.0 selenium-wire/
pip3 install blinker==1.7.0 selenium-wire/
DataImpulse Selenium 中的代理
现在可以使用 DataImpulse 代理了。完成所有安装后,即可继续进行代理身份验证。此步骤需要您从 DataImpulse 仪表板中所选套餐的对应区域获取用户名、密码、地址和端口。我们将使用住宅代理。
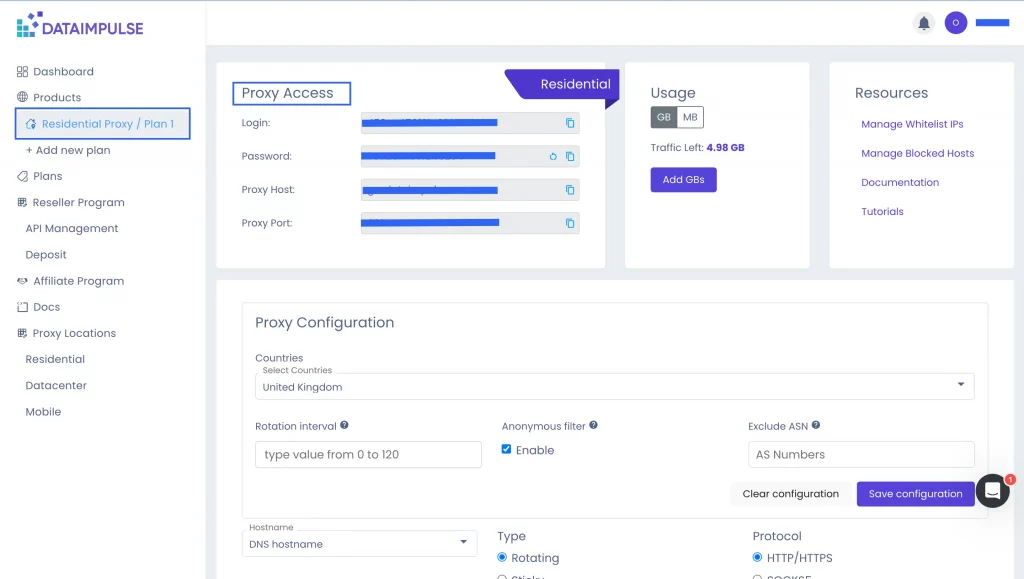
接下来编写脚本:
from seleniumwire import webdriver
from selenium.webdriver.chrome.service import Service
from webdriver_manager.chrome import ChromeDriverManager
from selenium.webdriver.chrome.options import Options
from selenium.webdriver.common.by import By
# configure the proxy
proxy_username = ""
proxy_password = ""
proxy_address = "gw.dataimpulse.com"
proxy_port = "823"
# formulate the proxy url with authentication
proxy_url = f"http://{proxy_username}:{proxy_password}@{proxy_address}:{proxy_port}"
# set selenium-wire options to use the proxy
seleniumwire_options = {
"proxy": {
"http": proxy_url,
"https": proxy_url
},
}
# set Chrome options to run in headless mode
options = Options()
options.add_argument("--headless=new")
# initialize the Chrome driver with service, selenium-wire options, and chrome options
driver = webdriver.Chrome(
service=Service(ChromeDriverManager().install()),
seleniumwire_options=seleniumwire_options,
options=options
)
# navigate to the target webpage
driver.get("https://httpbin.io/ip")
# print the body content of the target webpage
print(driver.find_element(By.TAG_NAME, "body").text)
# release the resources and close the browser
driver.quit()/
在 VS Code 中,它看起来像这样:
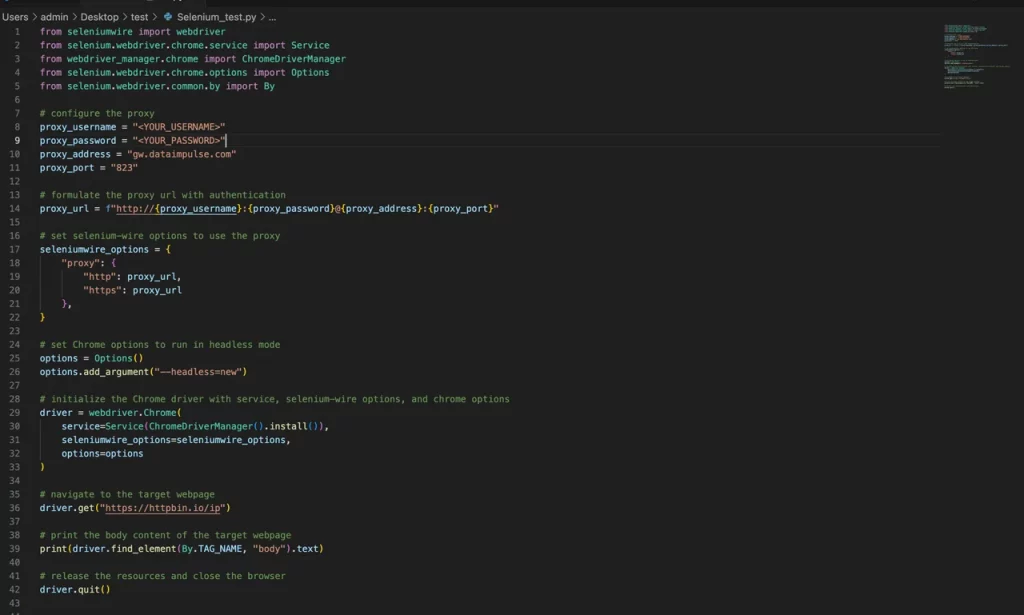
随后,您将收到包含”来源”的响应。这表示身份验证已成功完成。

提示
- 仅访问官方网站 – 请从安全的官方网站下载所需软件。
- 验证兼容性 – 仔细检查 Selenium、ChromeDriver 与浏览器版本是否相互兼容。
- 定期更新 – 定期更新 Selenium、ChromeDriver 和其他工具,以使用最新功能。
- 安全管理登录信息 – 请安全地保存和管理身份验证信息。
- 使用虚拟环境 – 创建虚拟环境,以清晰管理依赖项并避免包冲突。
- 错误处理 – 在脚本中添加错误处理机制,以应对使用代理或操作 Web 元素时可能出现的问题。
结论
如果您正在考虑配置 Selenium,值得试一试。将代理与 Selenium 搭配使用,能带来更强的功能和更高的控制力。按照这些说明和提示操作,即使是第一次尝试,也能顺利完成安装和整合。请记住,如需更好的速度、安全性和稳定性,可靠的代理通常比免费代理更合适。