Setting up a proxy on your iPhone or iPad
If you’re an iOS owner, setting up a proxy on your iPhone or iPad can provide a range of benefits, from masking your IP address to improving online privacy. A proxy helps you explore various content from creators across the globe and protects your device from potential malware by filtering and routing internet traffic. Whether you’re looking to enhance security or change your online location, this guide will show you how to easily configure a proxy on your iOS device.
Here’s a guide on how to set up a proxy on your iPhone or iPad:
To configure proxy settings on a Wi-Fi network, follow these steps. Please note that the following screenshots were taken using iOS 18.1.1.
NOTE: iOS supports HTTP proxies only, so SOCKS5 proxies cannot be set up.
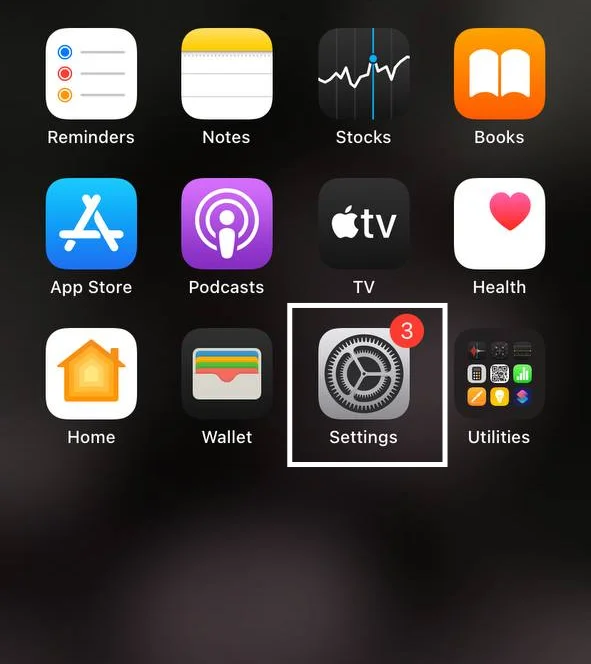
- Open the Settings app on your iPhone. If it’s already installed, simply tap to launch it.
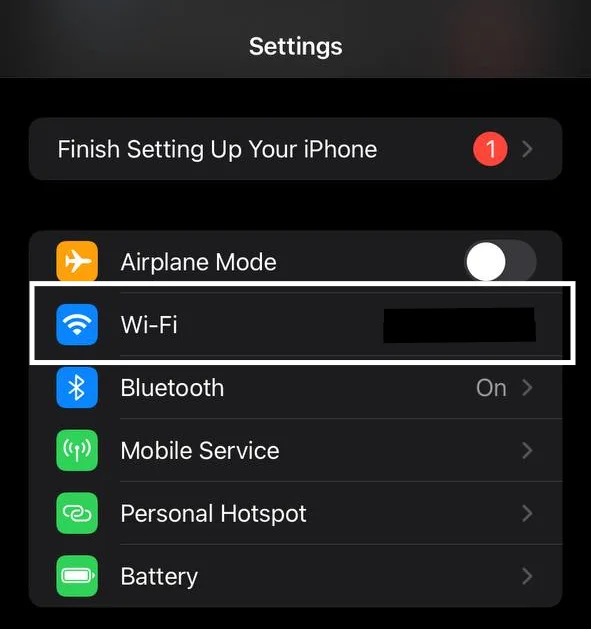
- Select Wi-Fi.
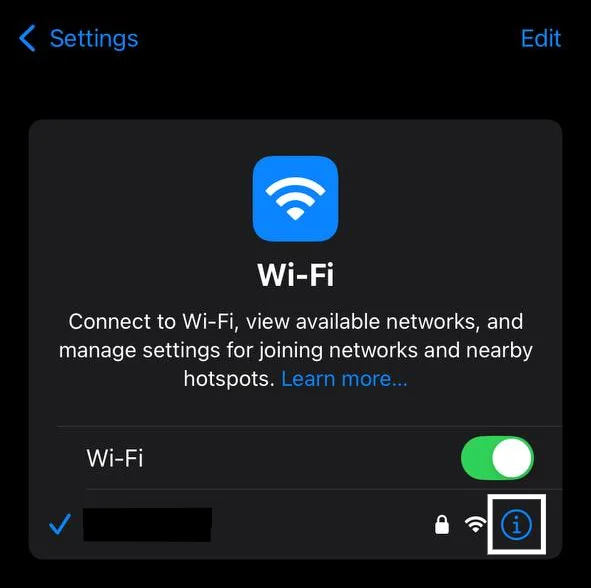
- Locate and tap on the blue information icon next to the Wi-Fi network that you are currently connected to (identified by a blue checkmark).
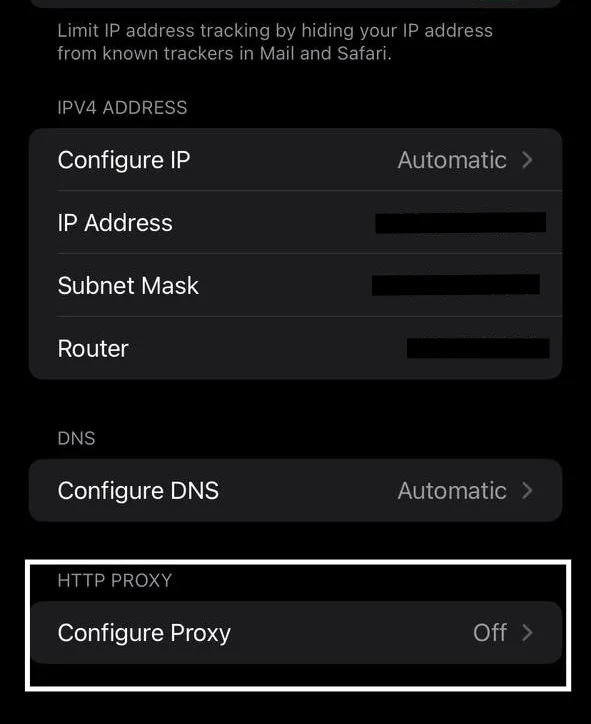
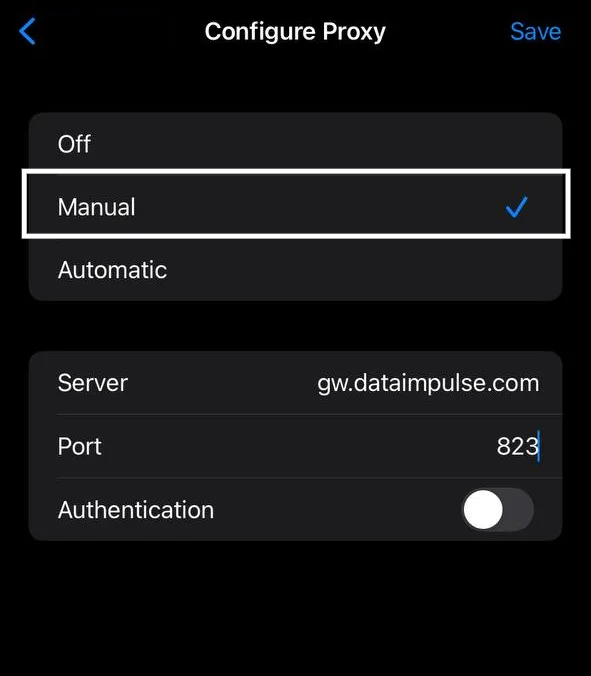
- Scroll down to the HTTP Proxy section at the bottom. By default, it will be set to Off. Tap on it and choose Manual.
- Once you have selected the manual configuration, you will see the proxy server settings. If your proxy requires a username and password, toggle on Authentication and enter the username and password provided by your proxy service. Tap Save.
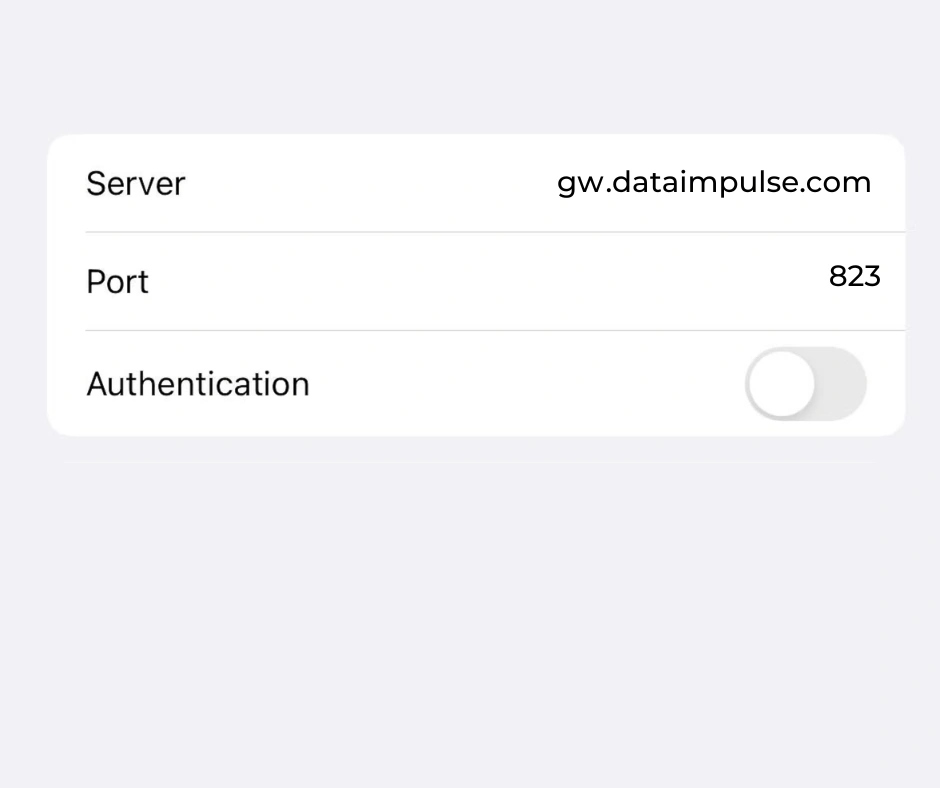
NOTE: If you are using a whitelisted IP, you can keep the “Authentication” toggle switched off. However, if authentication is required, turn on the toggle to reveal the “Username” and “Password” fields. Enter the credentials of your DataImpulse sub-user. These credentials are the same as the ones you used when creating a new sub-user in the DataImpulse dashboard.
Residential Proxies
Server: gw.dataimpulse.com
Port: 823
Authentication: on
Username: DataImpulse user’s username
Password: DataImpulse user’s password
Here is an example of how your settings should appear if you are using a whitelisted Residential IP. In this case, the authentication setting should be toggled off.
- Your proxy settings are now set up! To confirm the connection, go to IP-Api and see if your IP address is replaced with the proxy’s. If you’re unsure of your original IP, check it before connecting to the proxy and compare the two.
Disabling the proxy server on your iPhone or iPad:
If you have configured a proxy server on your iOS device, it will attempt to route all your connection requests through that proxy. However, certain applications have automatic proxy detection and may not allow the connection. In such cases, you will need to disable the proxy server.
To turn off the proxy server connection, follow these steps:
- Open the Settings app on your device.
- Tap on Wi-Fi.
- Select the network you are currently connected to.
- Scroll down and choose “Configure Proxy.”
- Tap on “Off” to disable the proxy server.
By following these steps, you can easily disable the proxy server connection on your iPhone or iPad.

