In this Article
Running out of traffic while dealing with tasks may seriously delay you. This is not to say that checking your balance in the morning, noon, and night won’t work either. An auto-charge feature can help you eliminate the tedious routine of paying bills manually yet always have enough GBs on your balance to scrape the web, verify your ads, etc. Scroll down to read a complete step-by-step tutorial about creating an automated subscription.
How to set up an auto-charge for your DataImpulse account?
First, log in to your account.
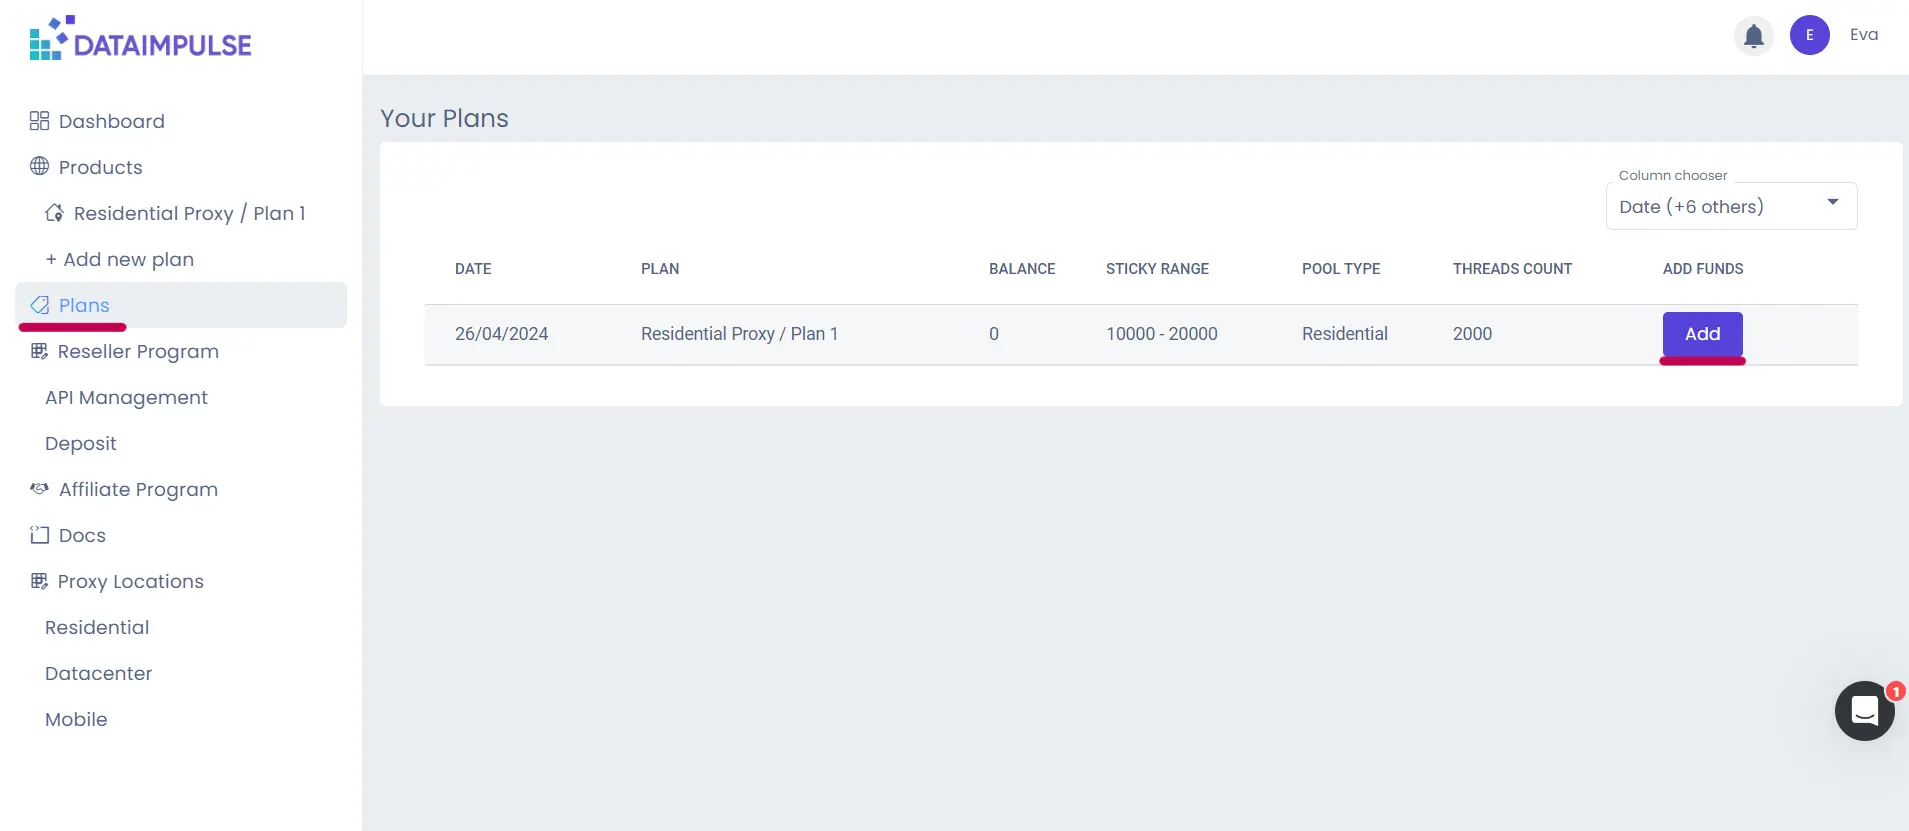
Navigate to the “Plans” tab and press the “Add” button.
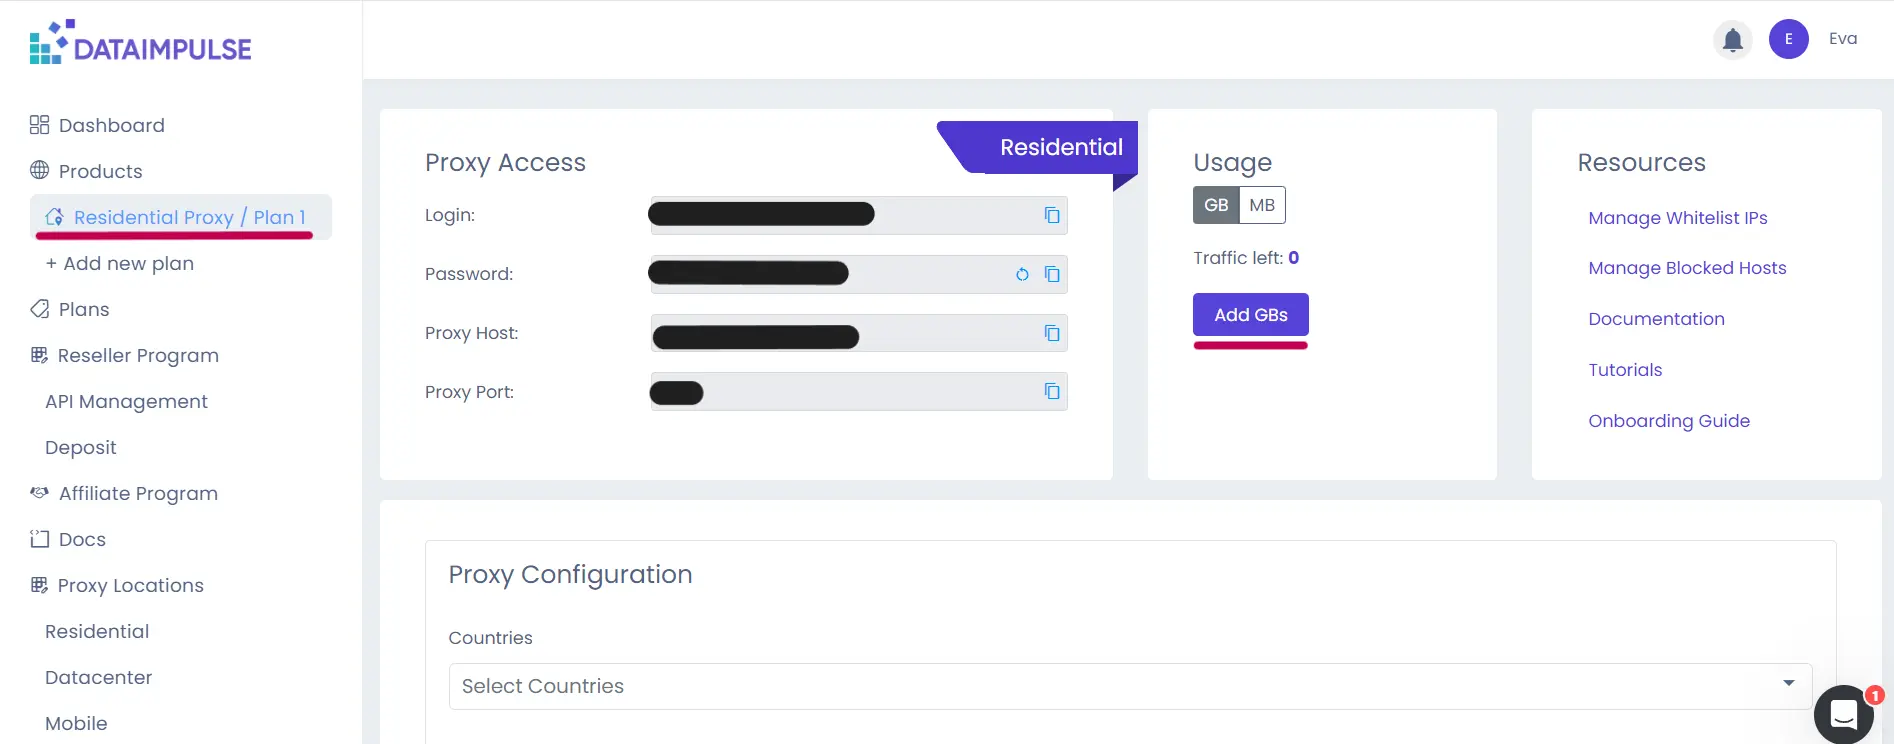
If you are currently on a plan’s tab, you can also use the “Add GBs” button. The system will automatically redirect you to the “Plans” tab. Again, you need to press the “Add” button.
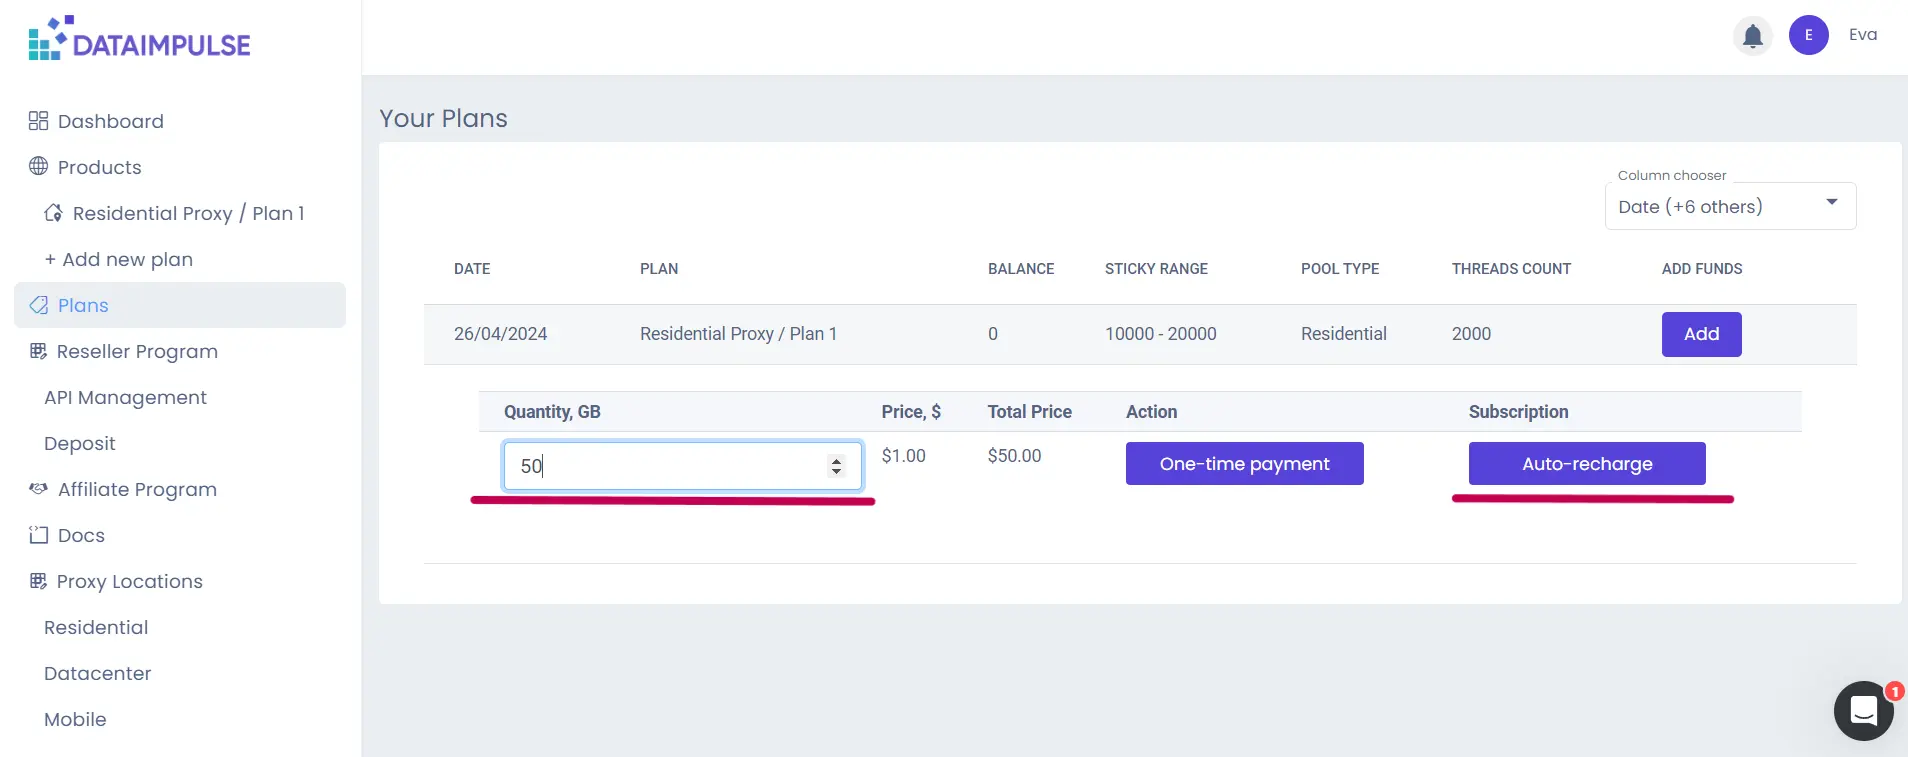
A small form will appear after you use the “Add” button. You can adjust the number of GBs our system should add to your balance here. Pay attention that you can make any payment of $50 or more. When you’re done, press the “Auto-recharge” button.
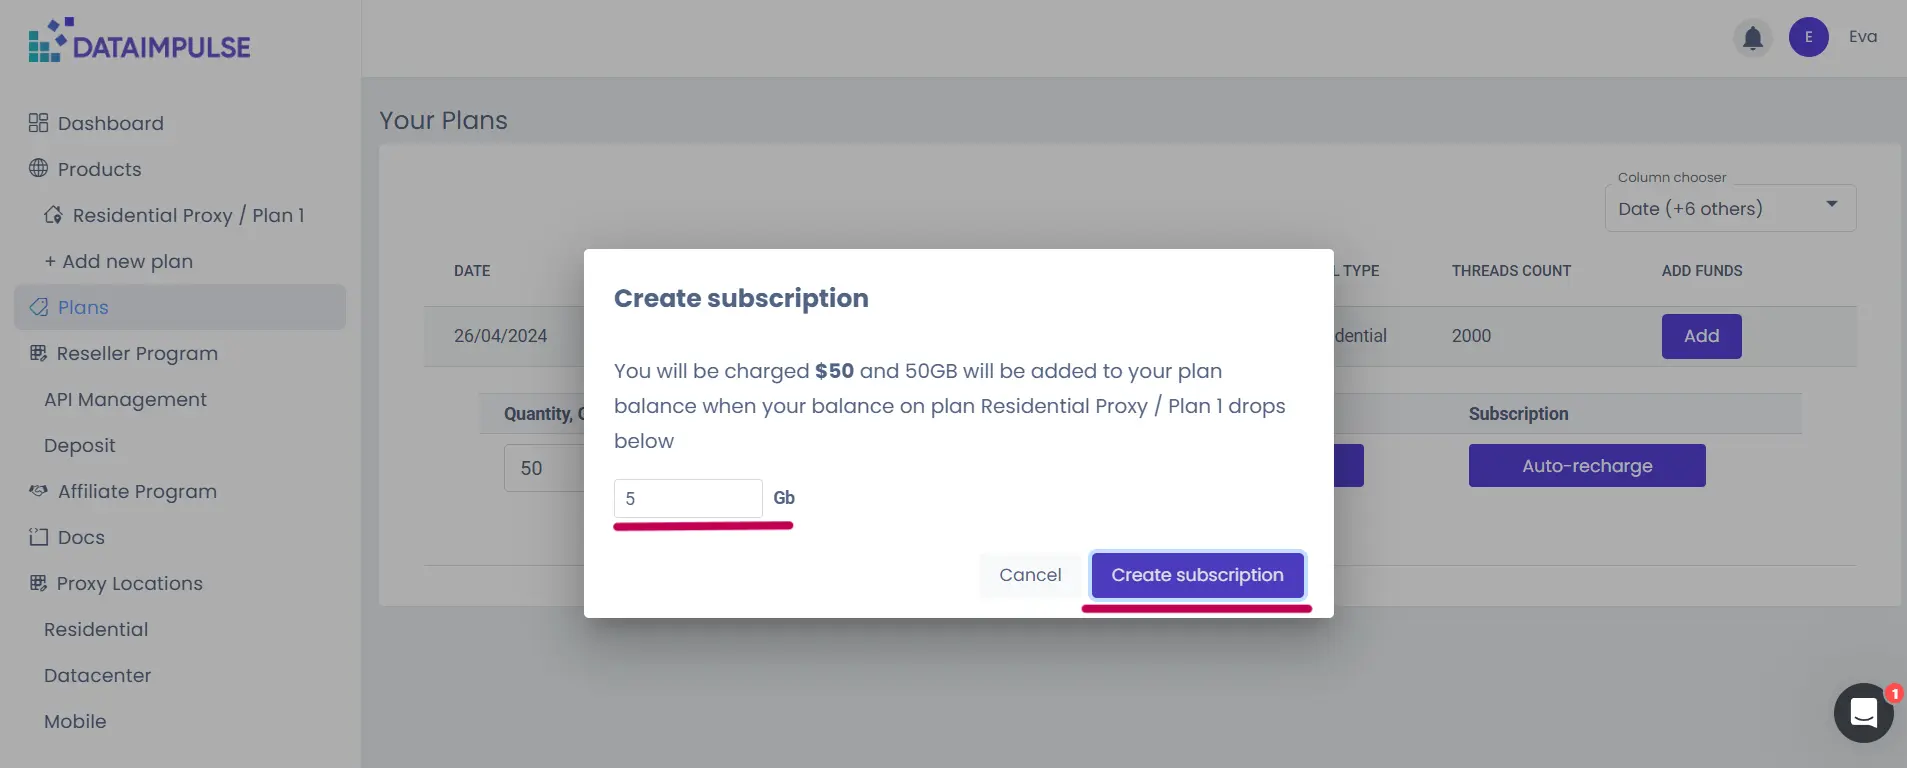
Now, you will see the “Create Subscription” window. Here, you need to set an amount of GBs. Once your balance on a given plan drops below this number, the system will auto-charge you and replenish your balance. Then, press the “Create subscription” button.
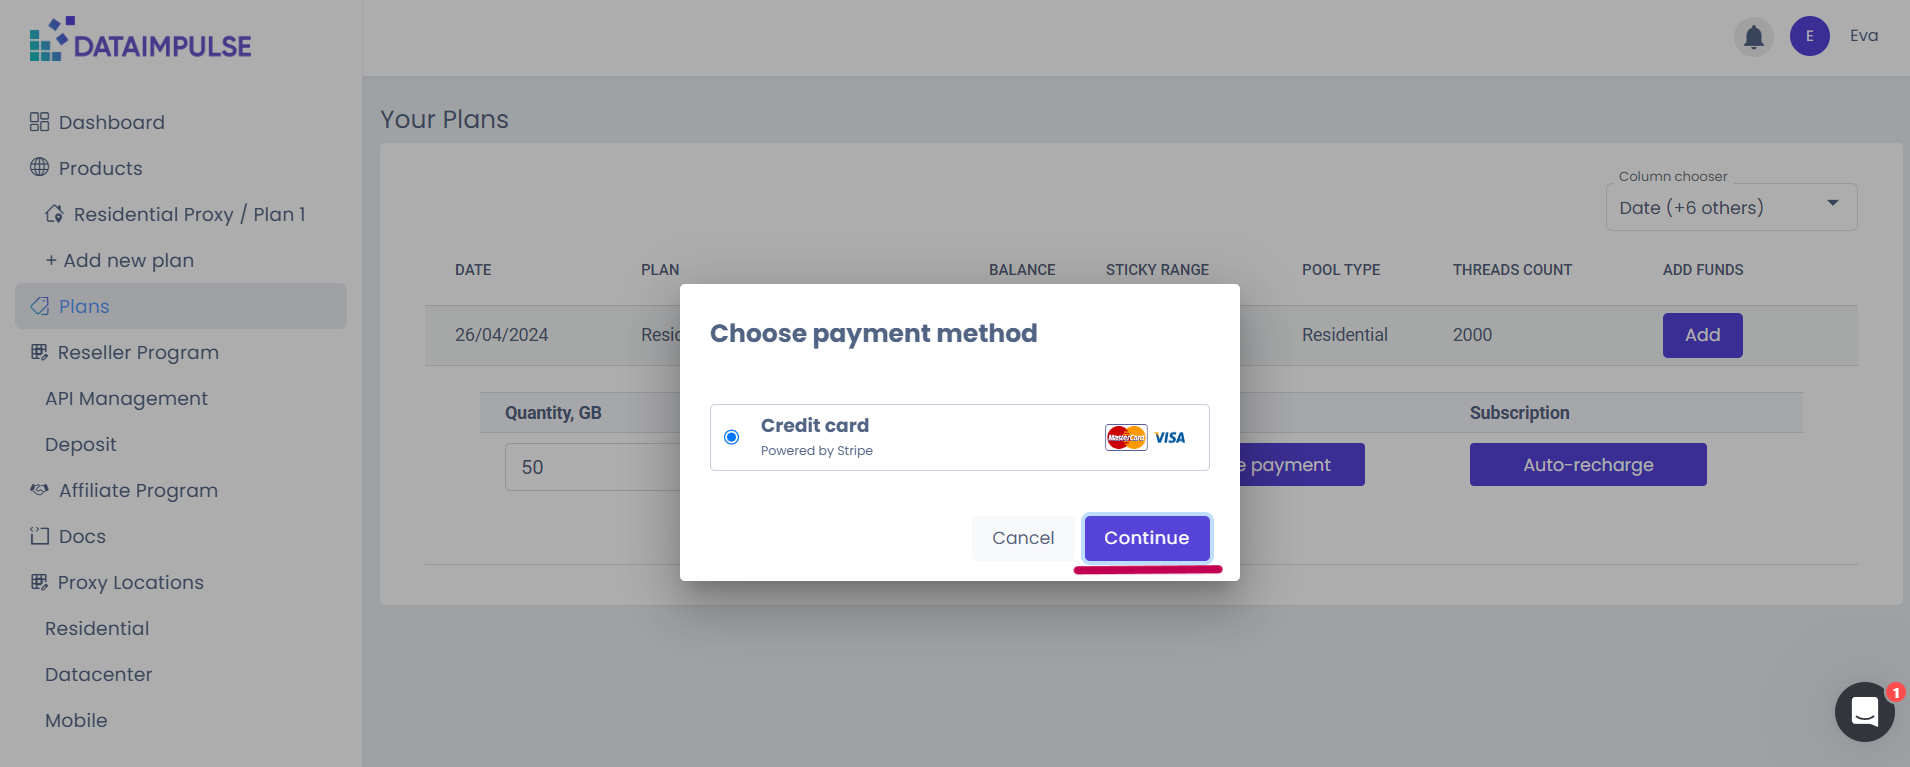
When the following window appears, choose “Continue”.
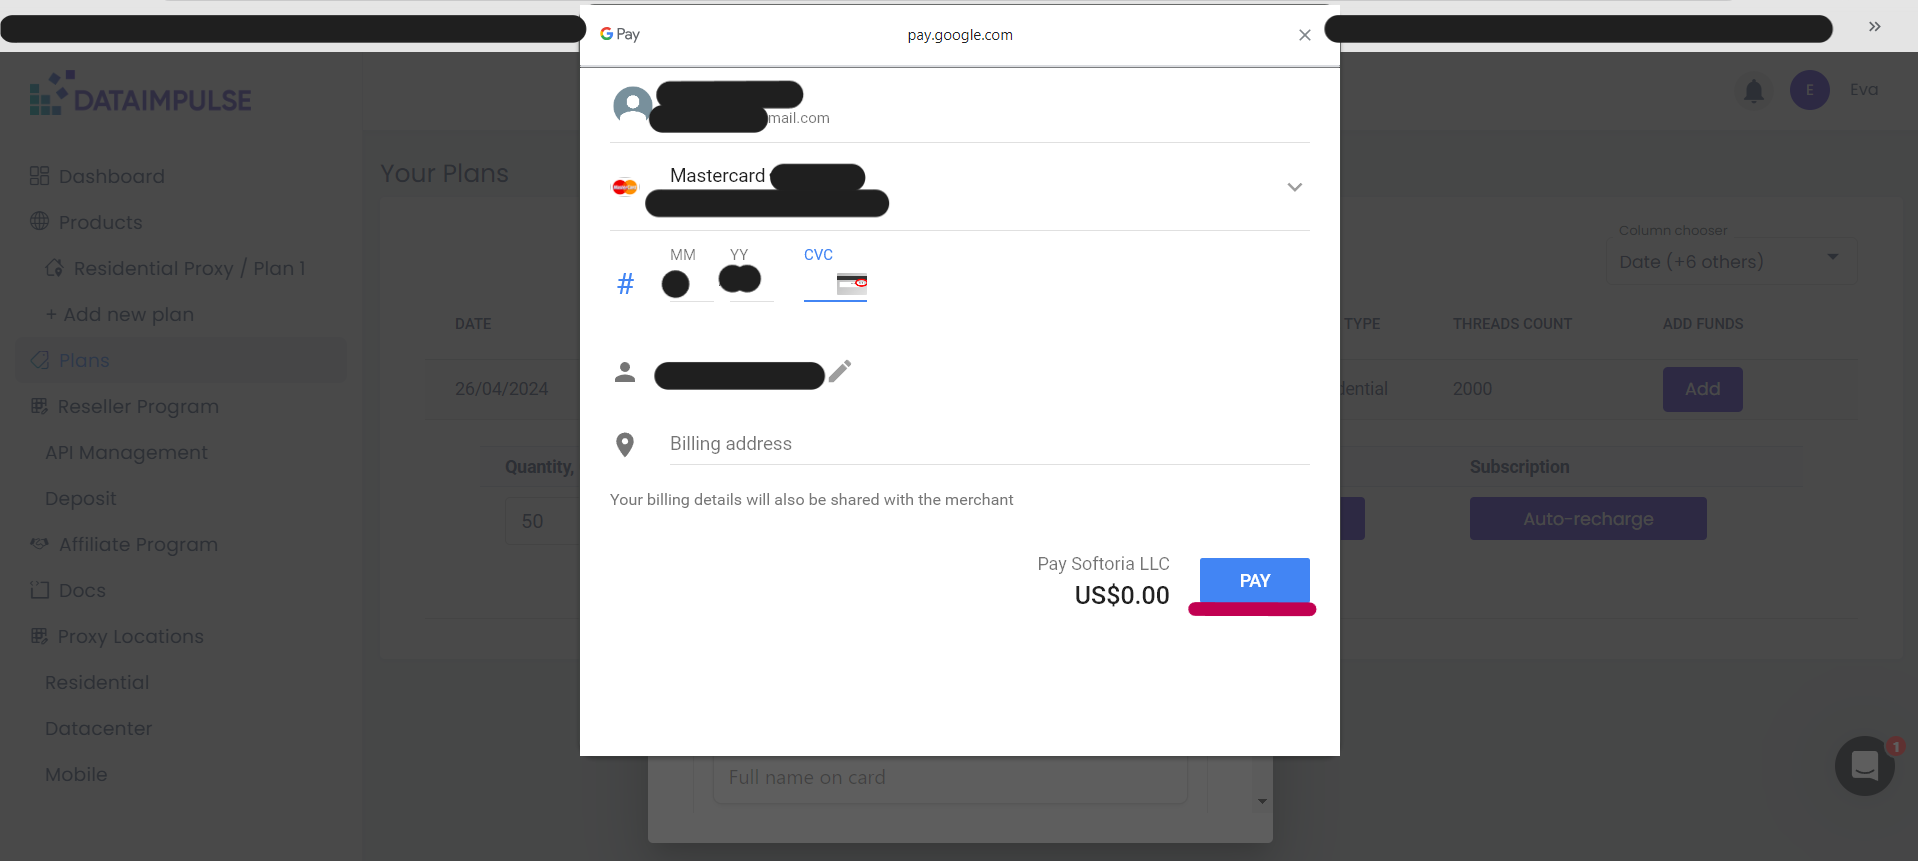
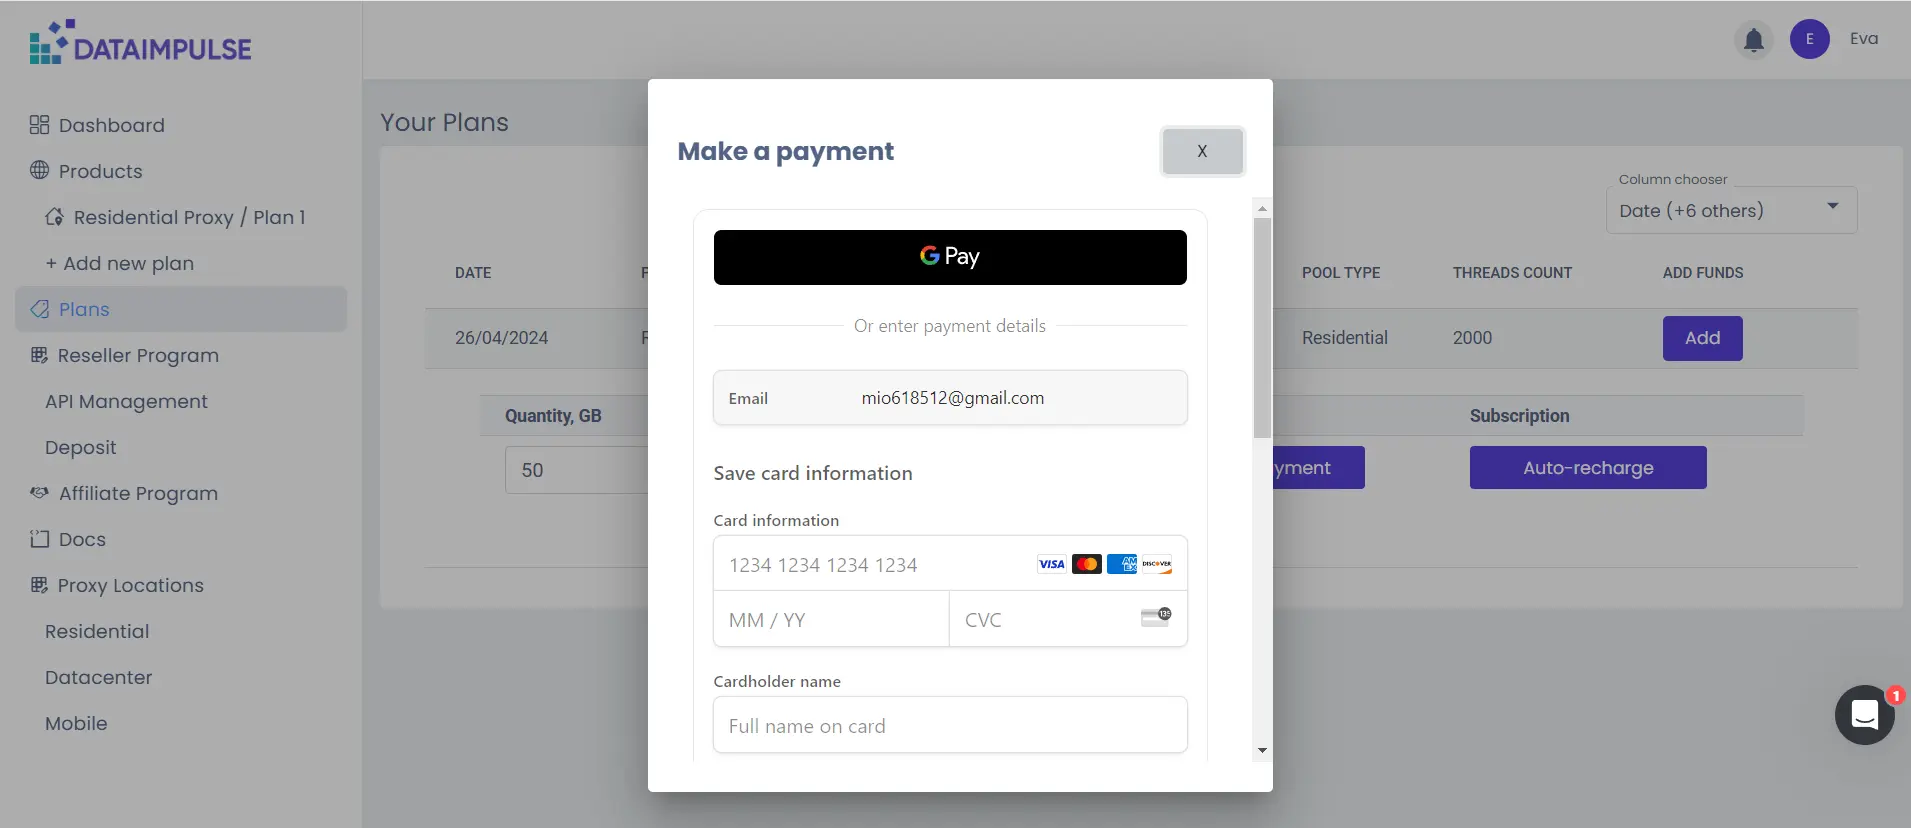
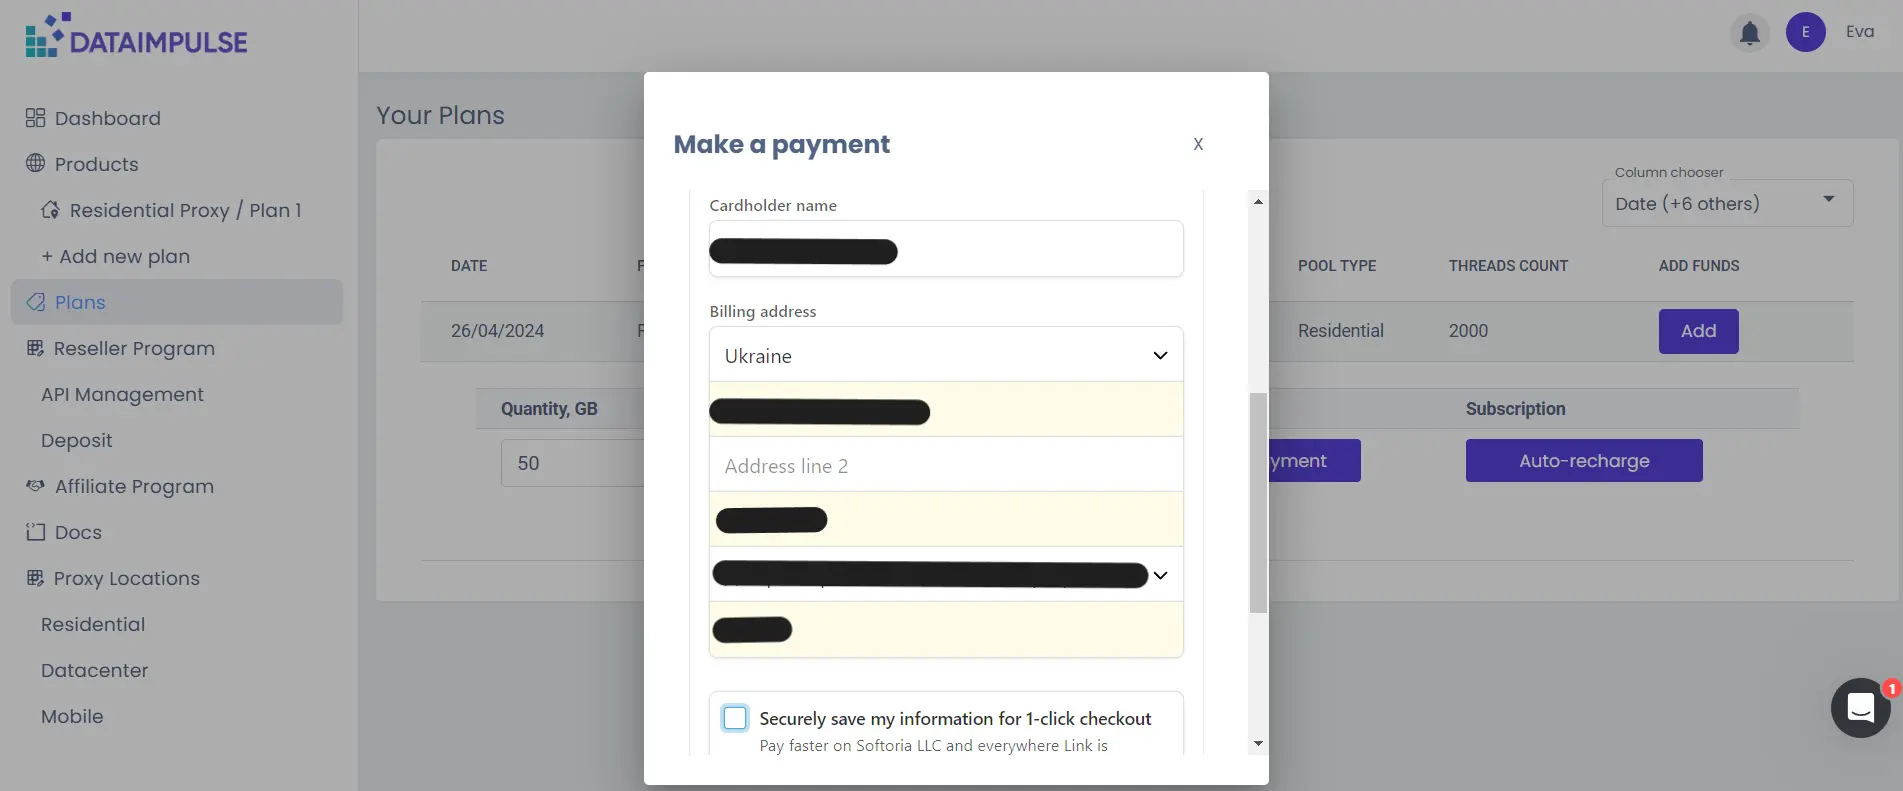
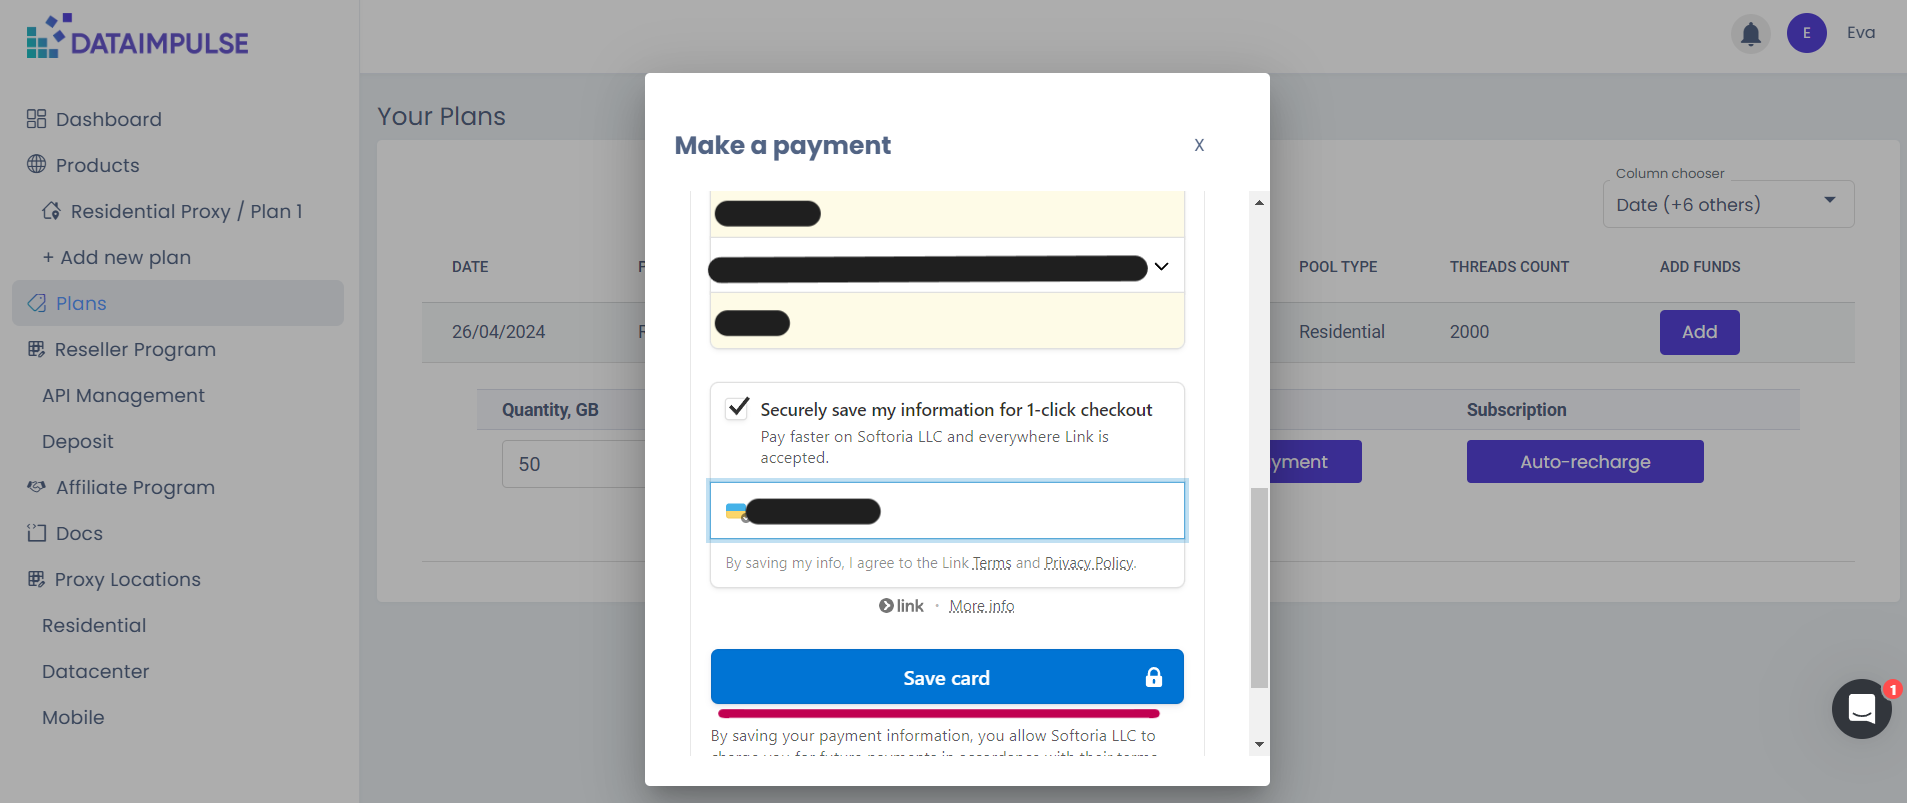
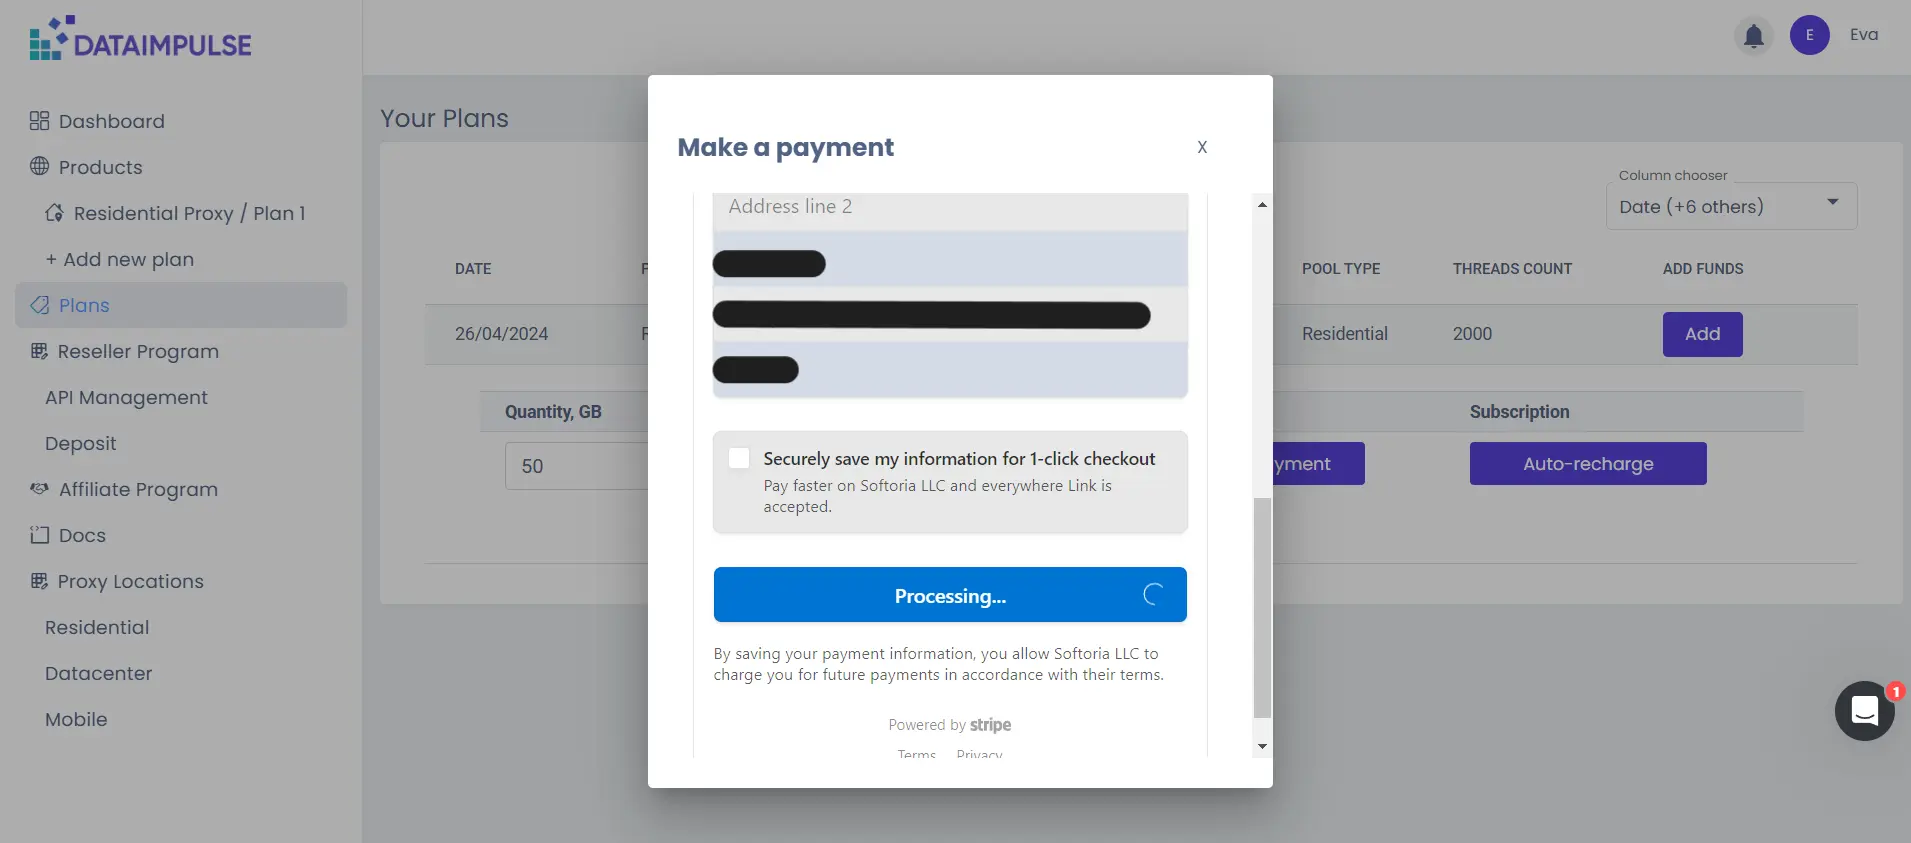
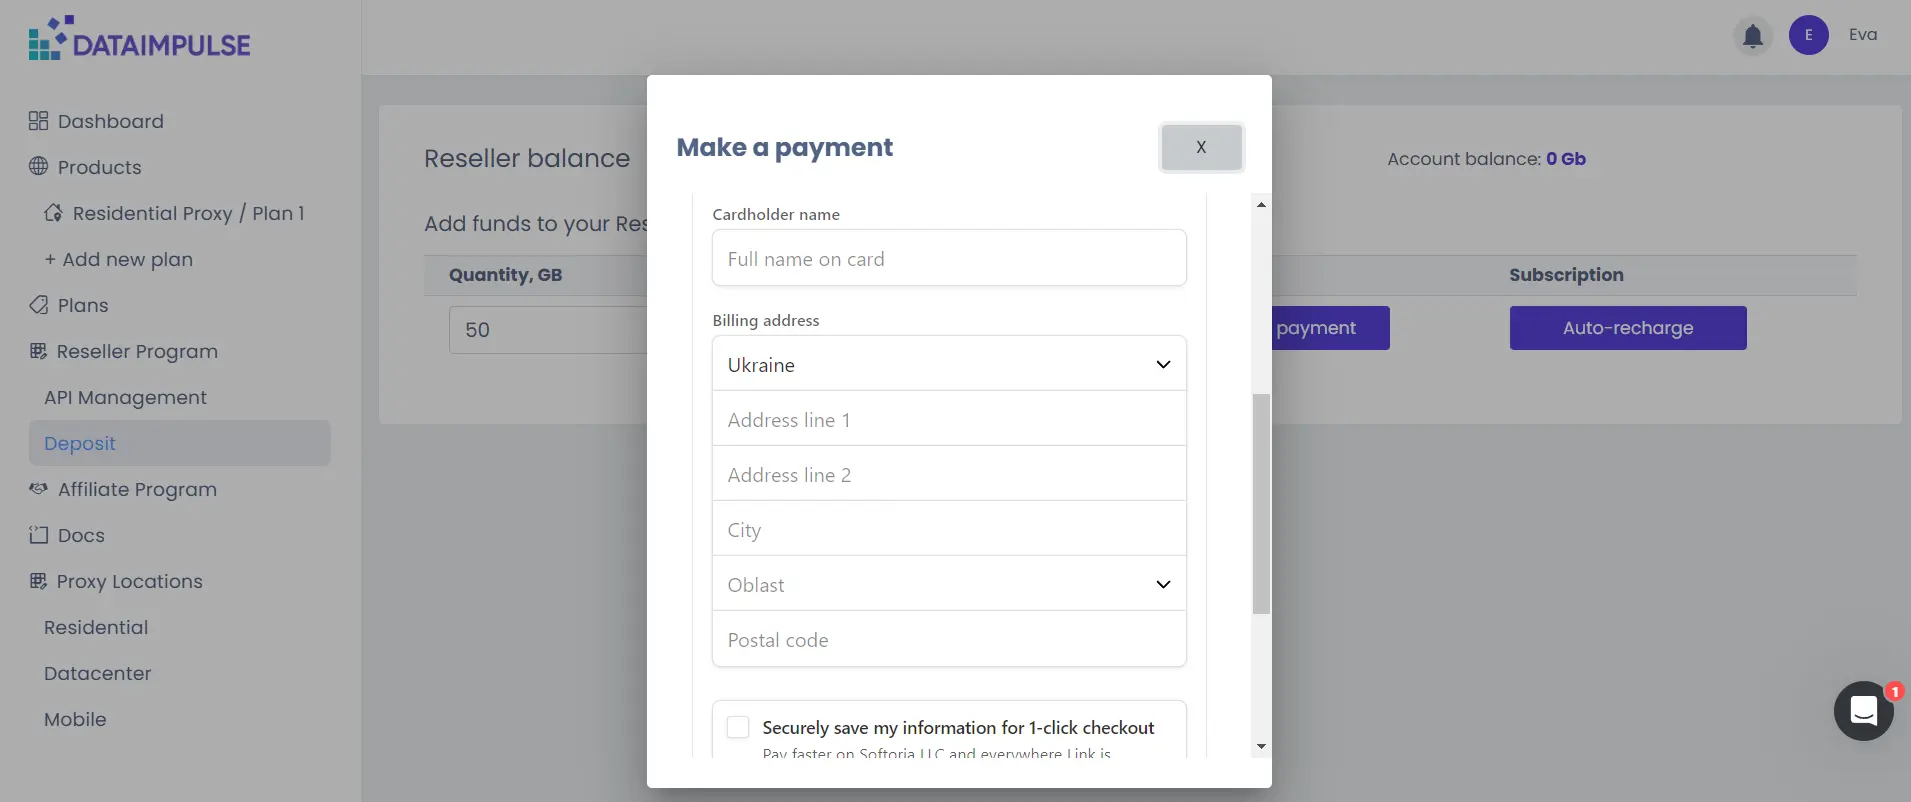
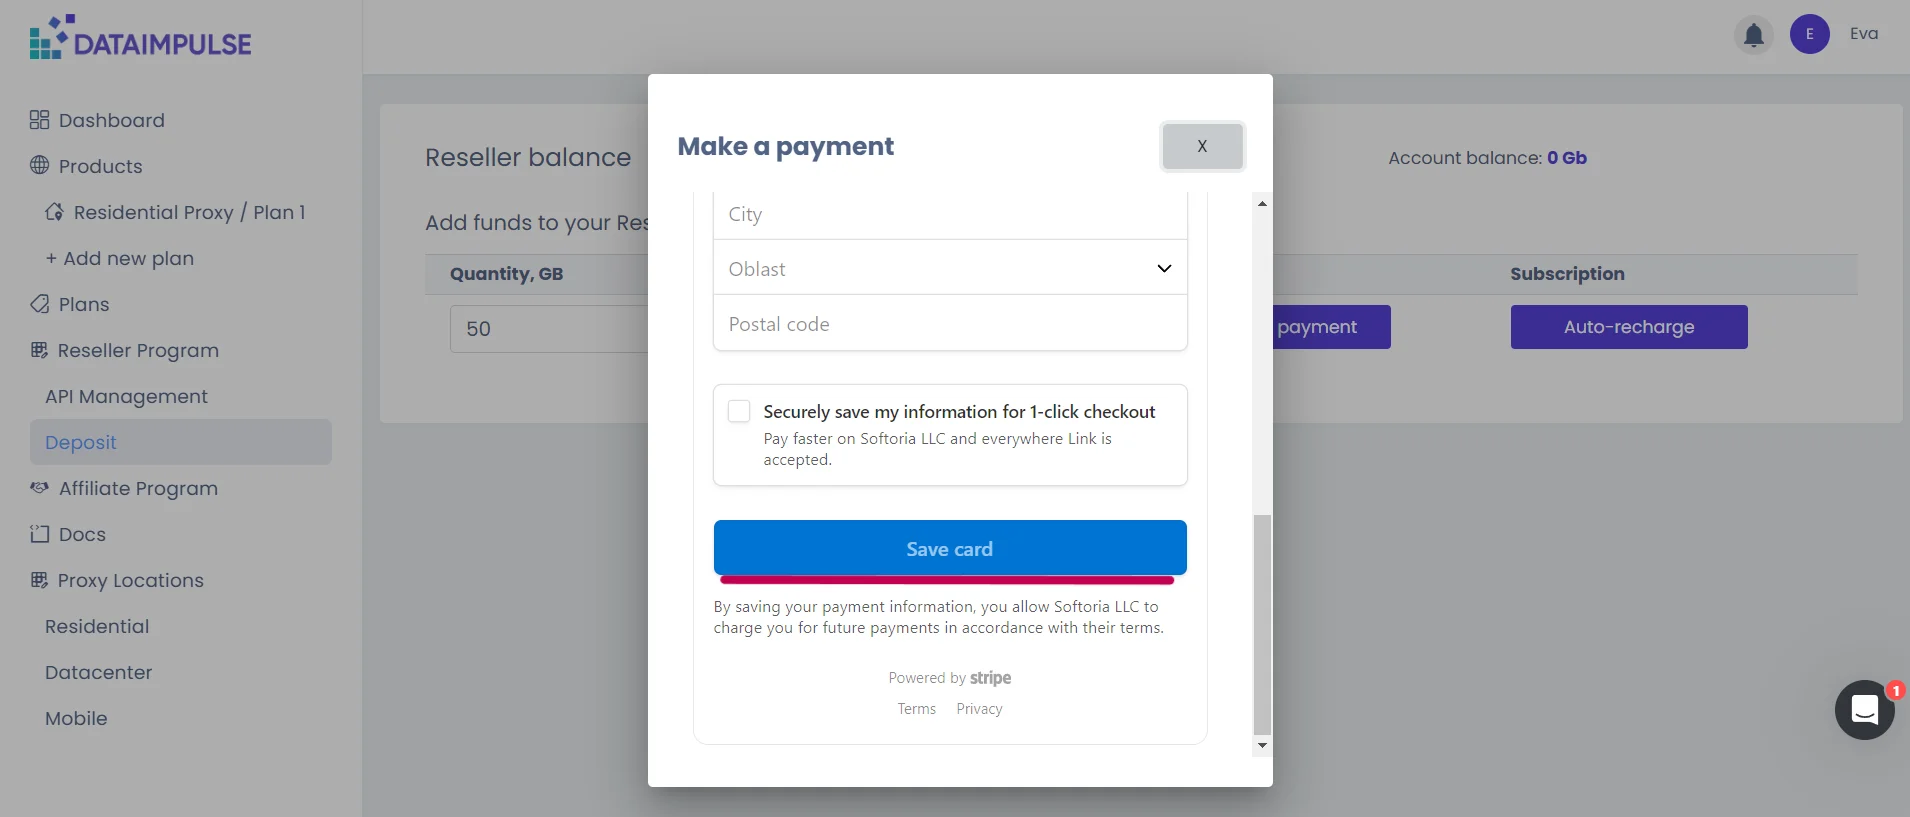
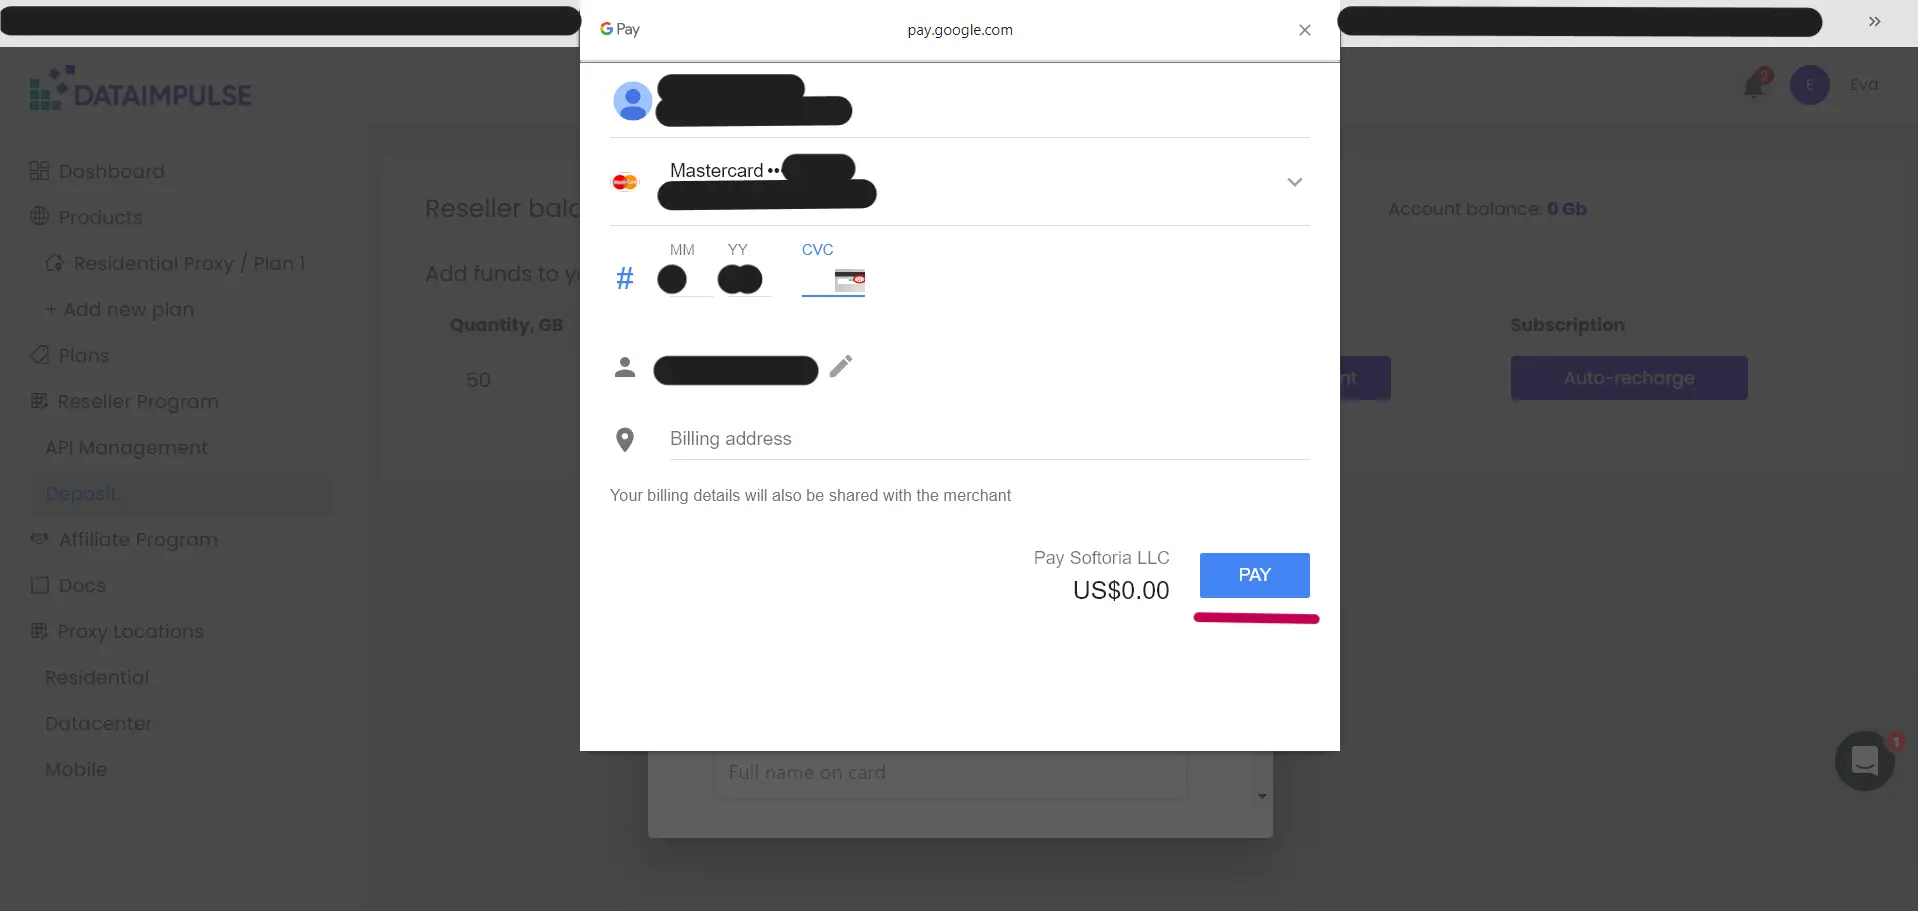
Now, you need to make a payment. You can pay using Google or with a card. Fill in all the necessary information in the required fields. For some fields, you need to choose from a drop-down list; for others, you must type information in. Some fields may stay empty. You can save your data so you do not have to enter it again next time you buy services from Softoria. To finish, press the “Pay” or “Save card” button, depending on your payment method. You may need to check your online banking and confirm the payment there.
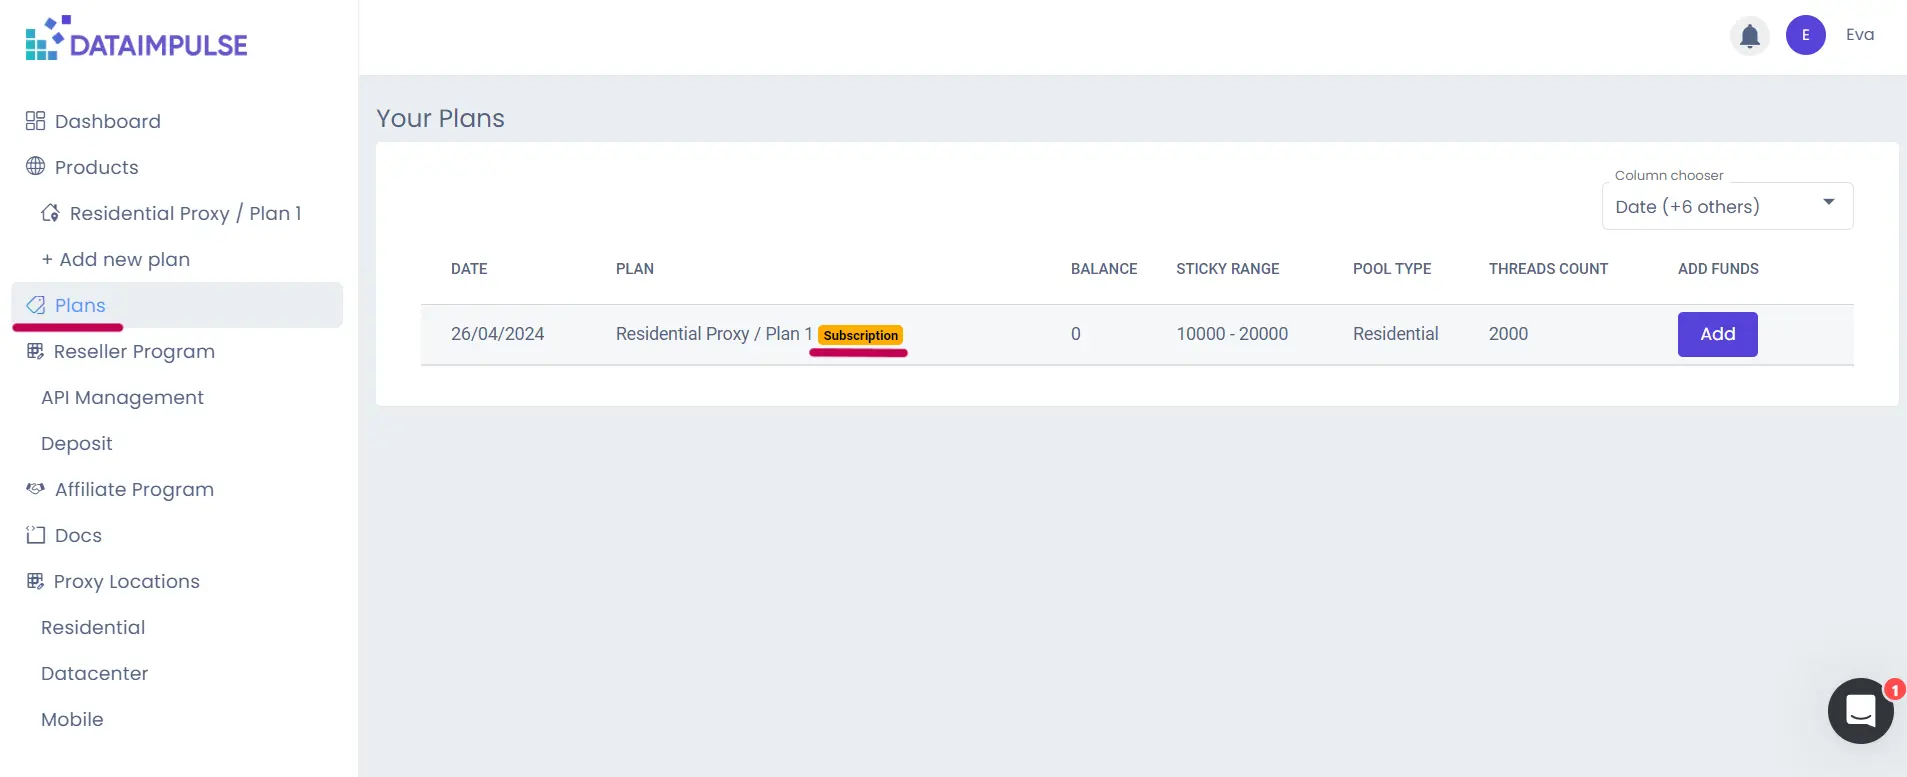
Once you’re done, you will be back to the “Plans” tab. An ochre sign “Subscription” must appear next to a corresponding plan’s name.
Pay attention that you cannot change the settings of an existing subscription; instead, you have to cancel it and create a new one.
How to cancel your subscription?
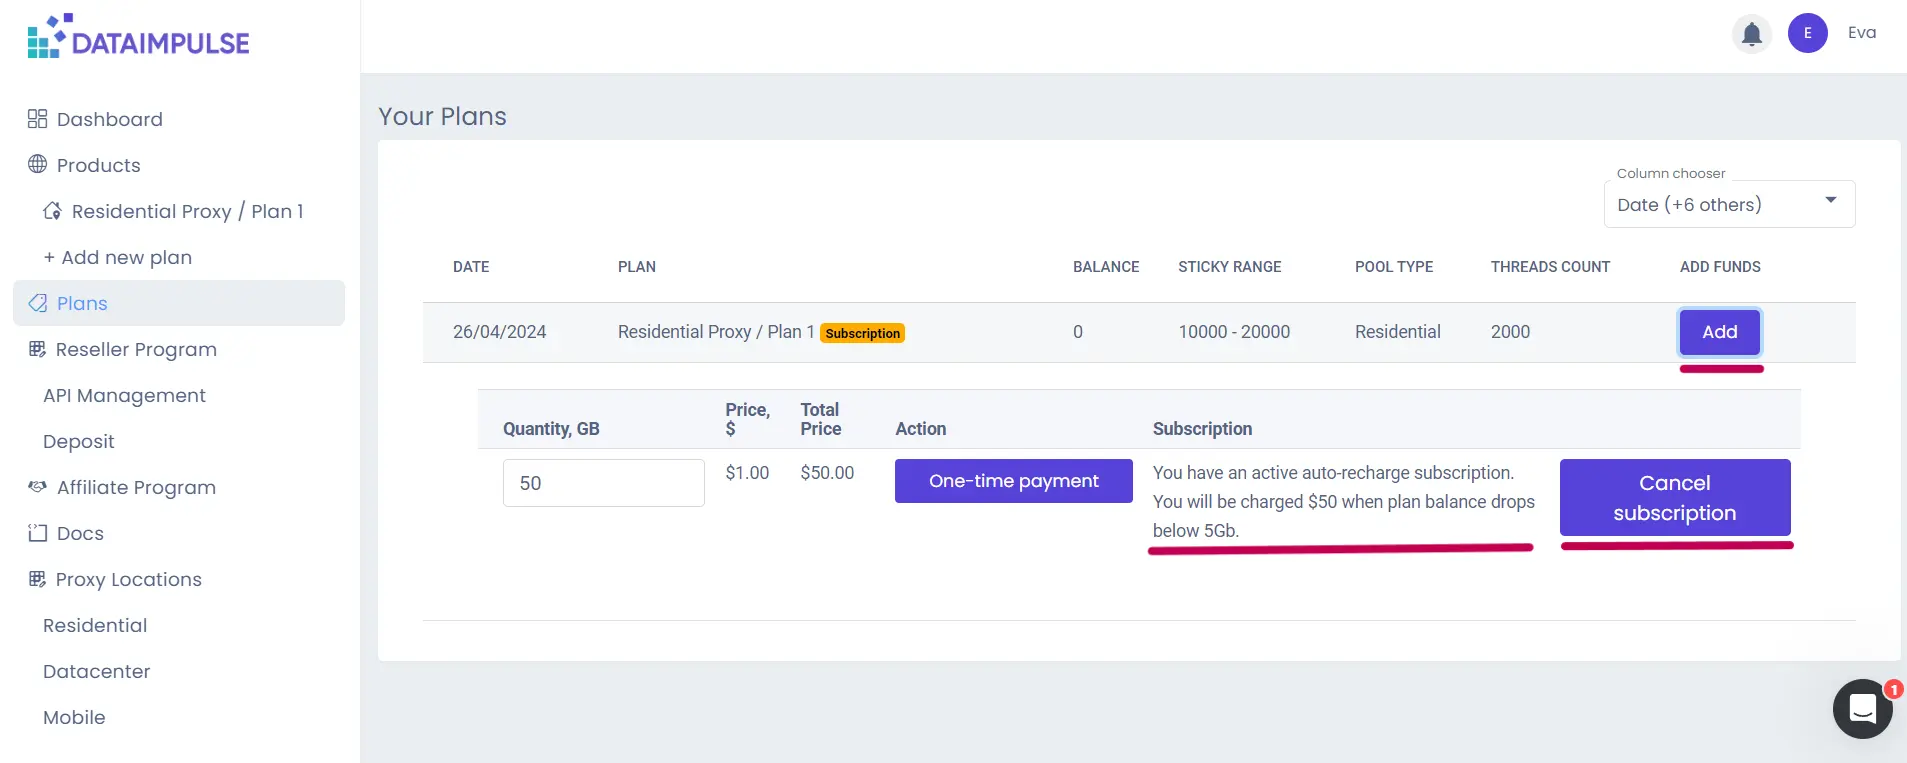
To halt your subscription, start by pressing the “Add” button. You will see details about your subscription and a “Cancel subscription” button.
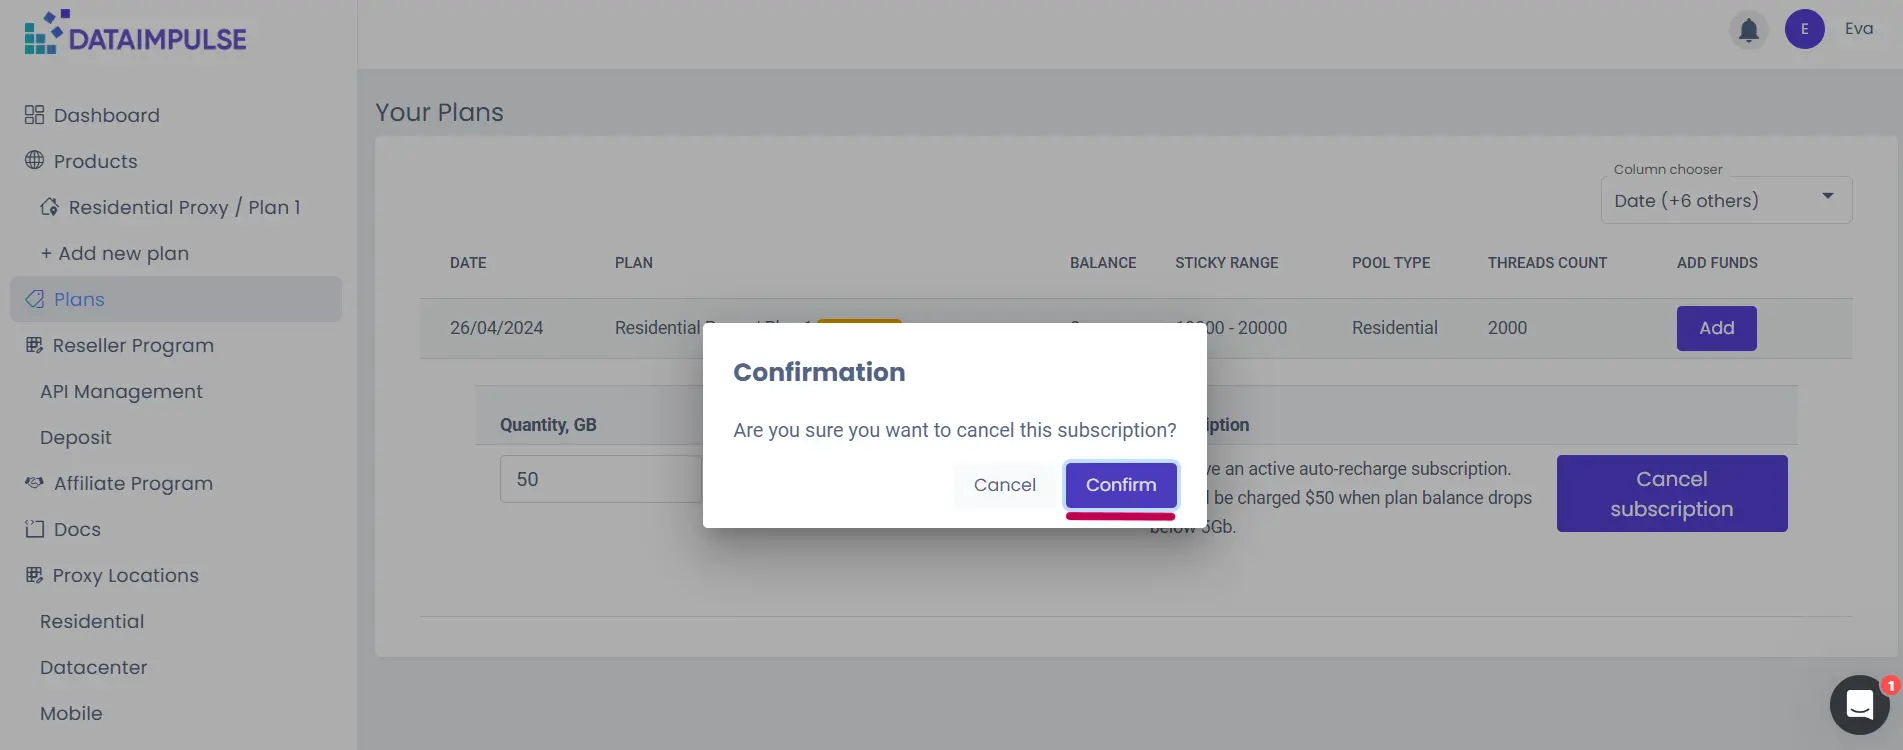
Press the “Cancel subscription” button. A confirmation window will appear. Here, press the “Confirm” button.
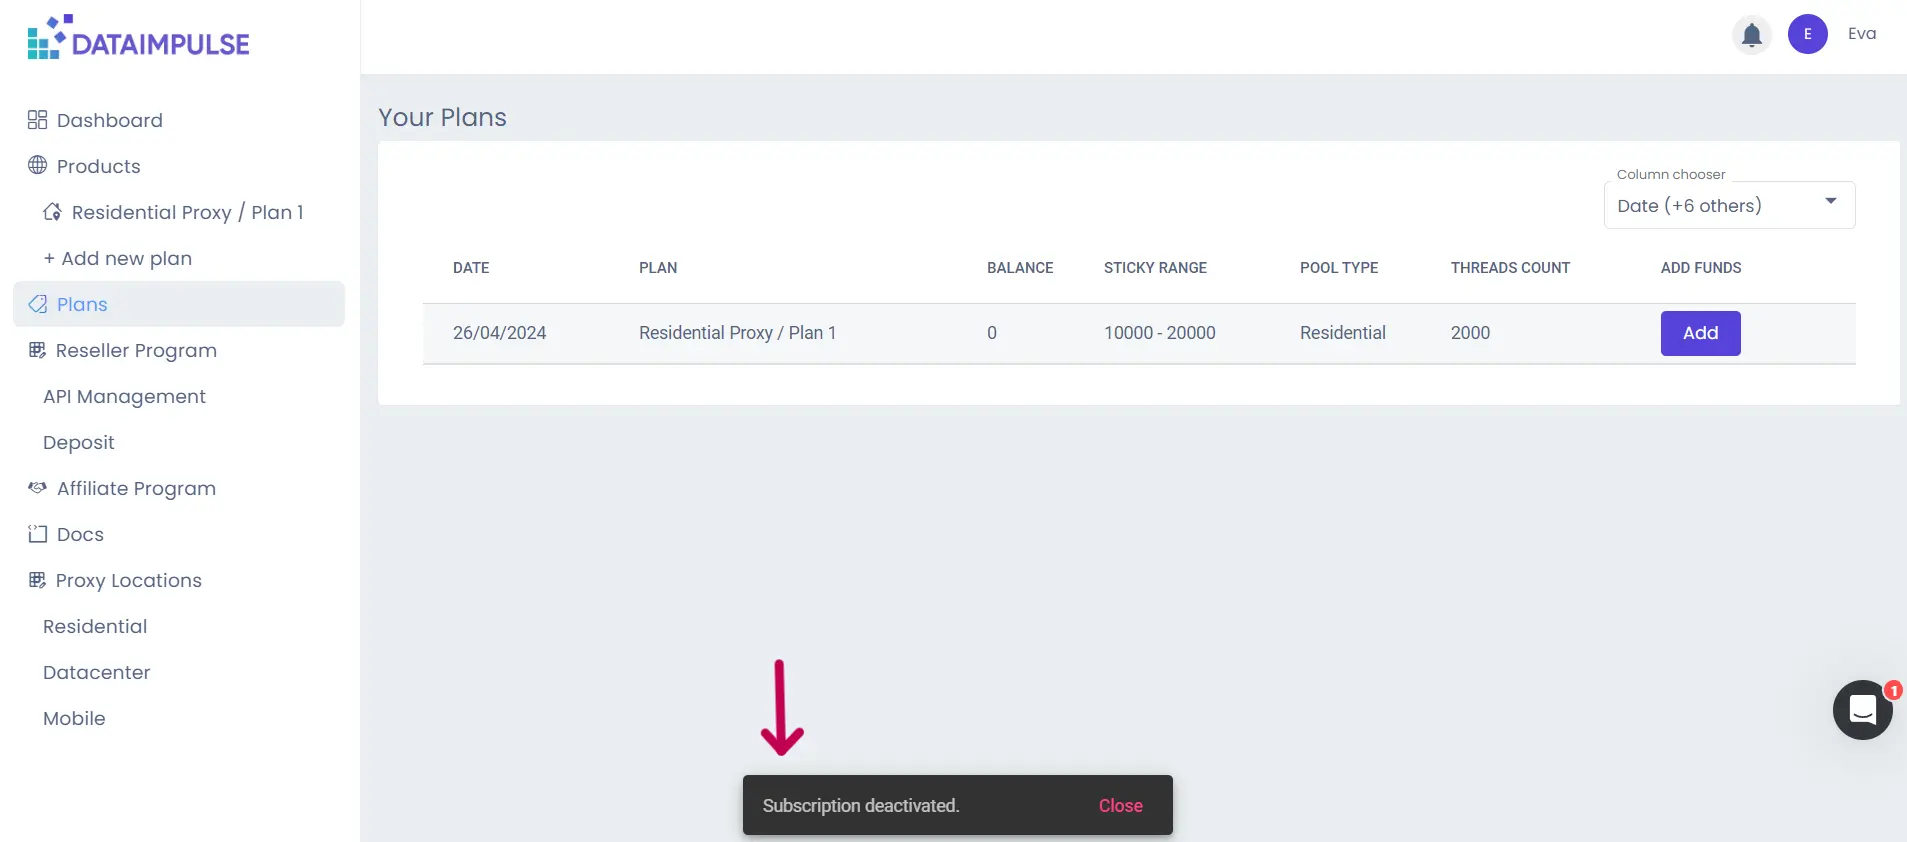
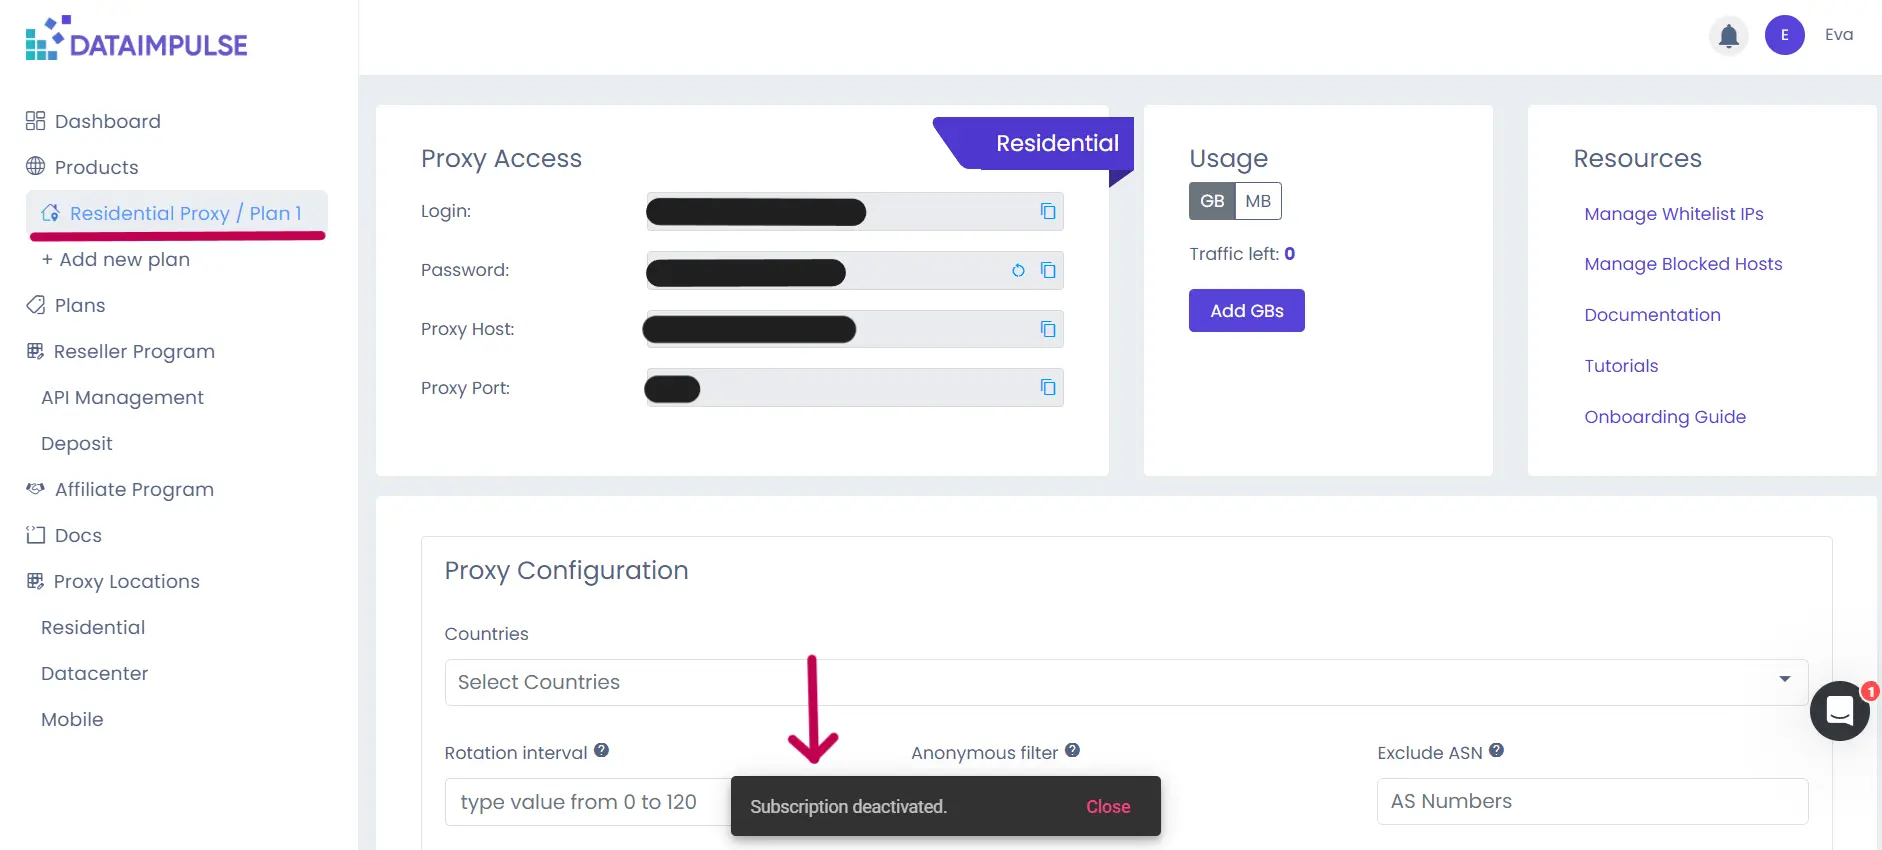
That’s it. You will see a sign at the bottom of the screen that a subscription has been deactivated.
Creating a subscription with your reseller account
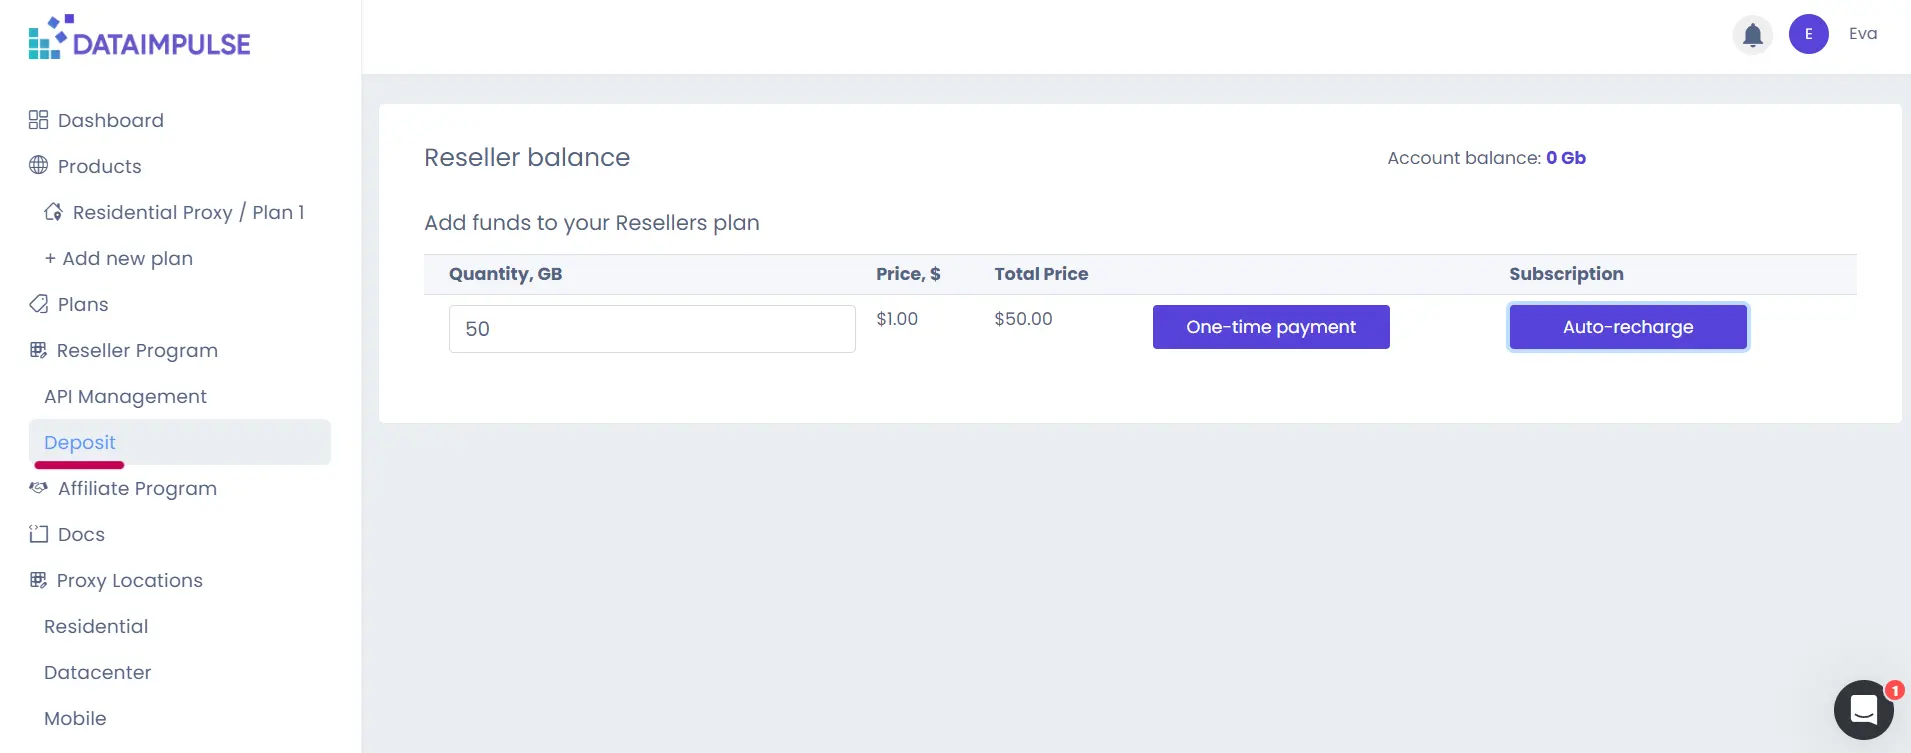
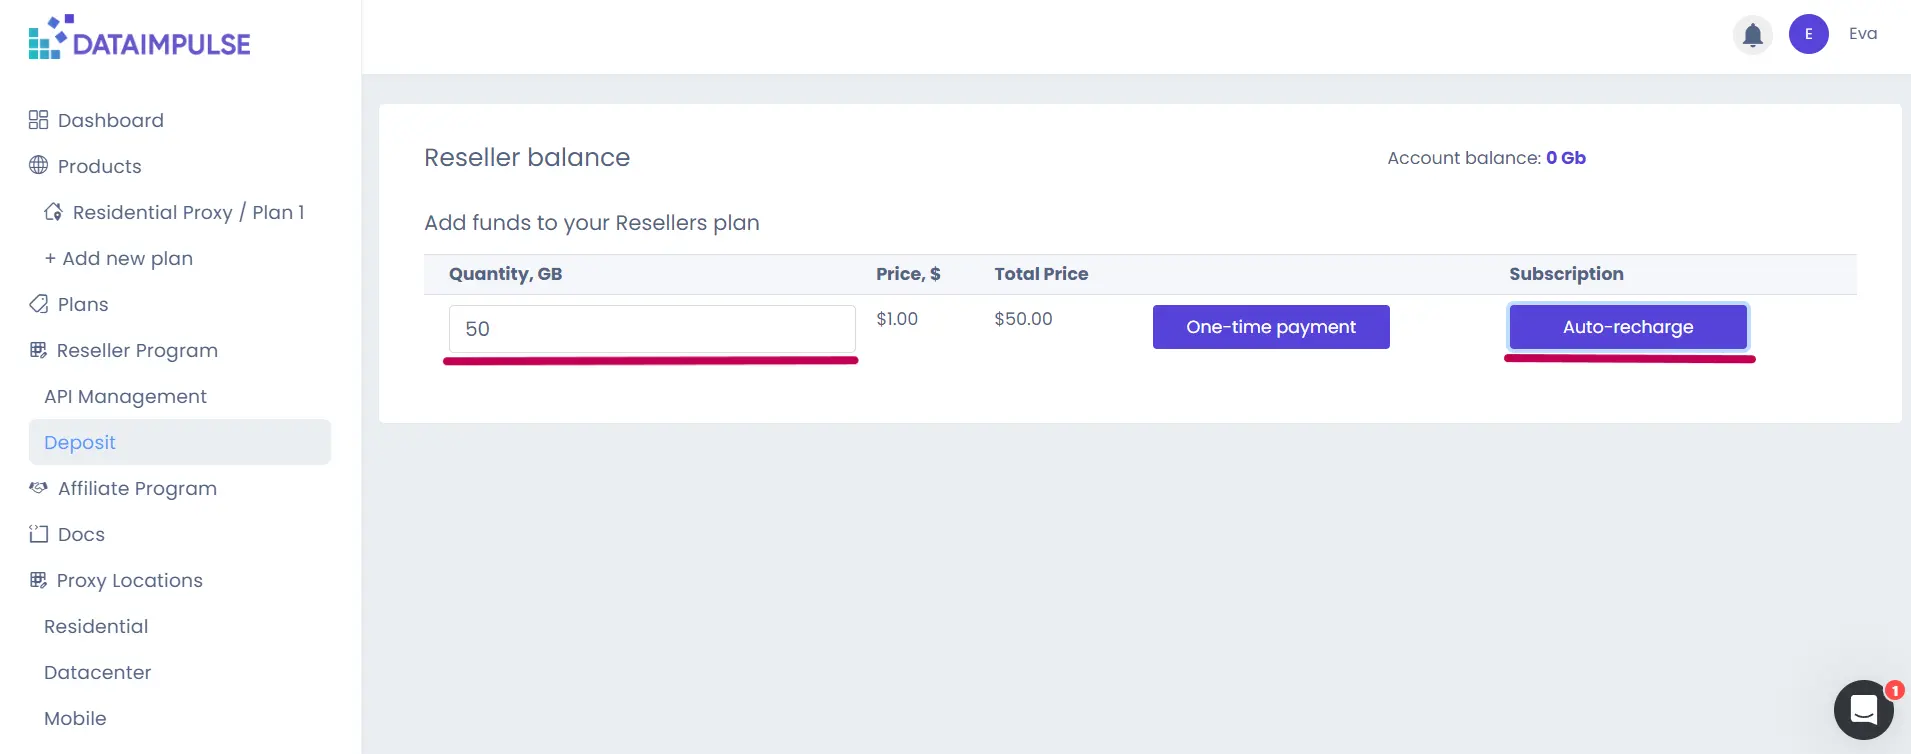
You can also create a subscription with your reseller account. First, switch to the “Deposit” tab.
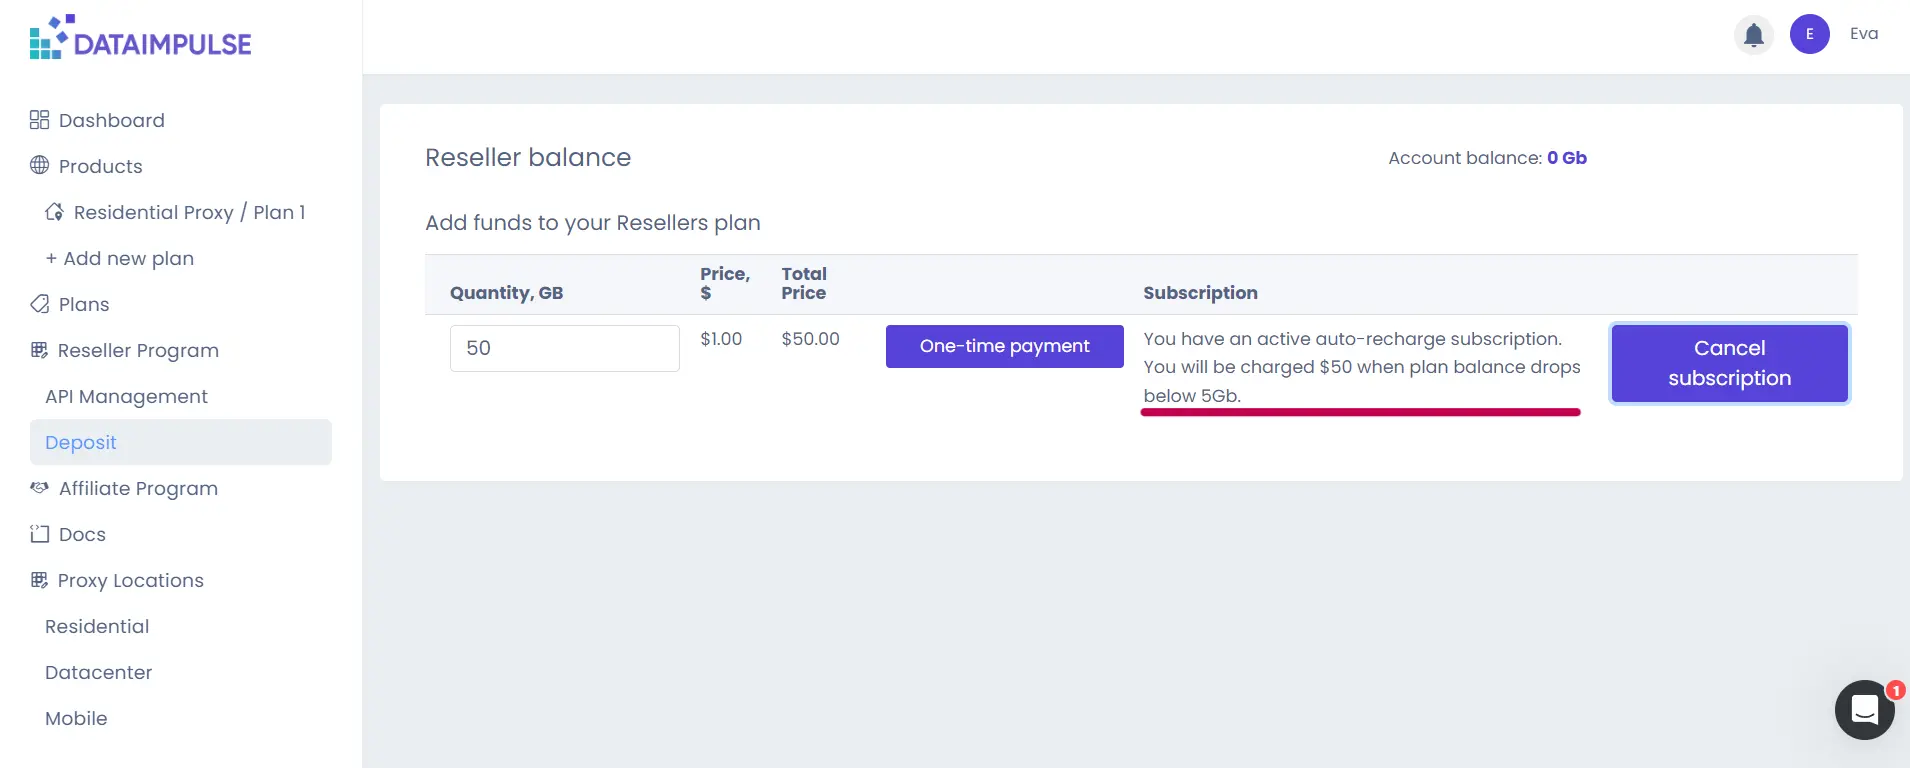
On the “Deposit” tab, choose how much traffic you want our system to automatically add to your balance and press the “Auto-charge” button. The following process is similar.
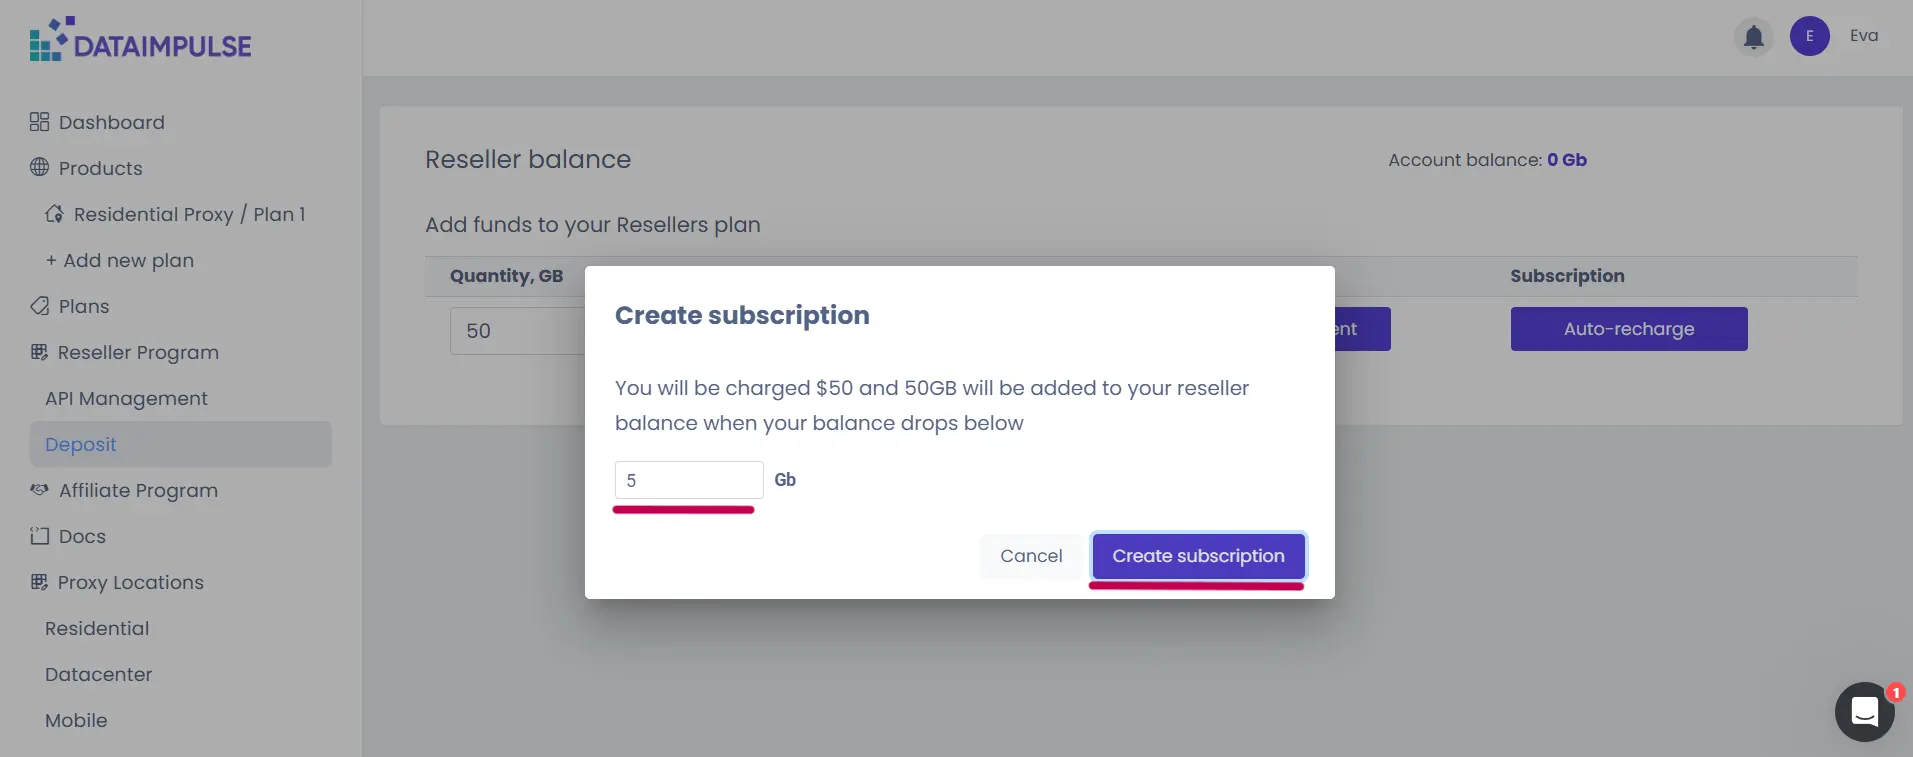
1. Specify how much traffic must be left on your balance for an auto-charge feature to replenish it, then press the “Create subscription” button.
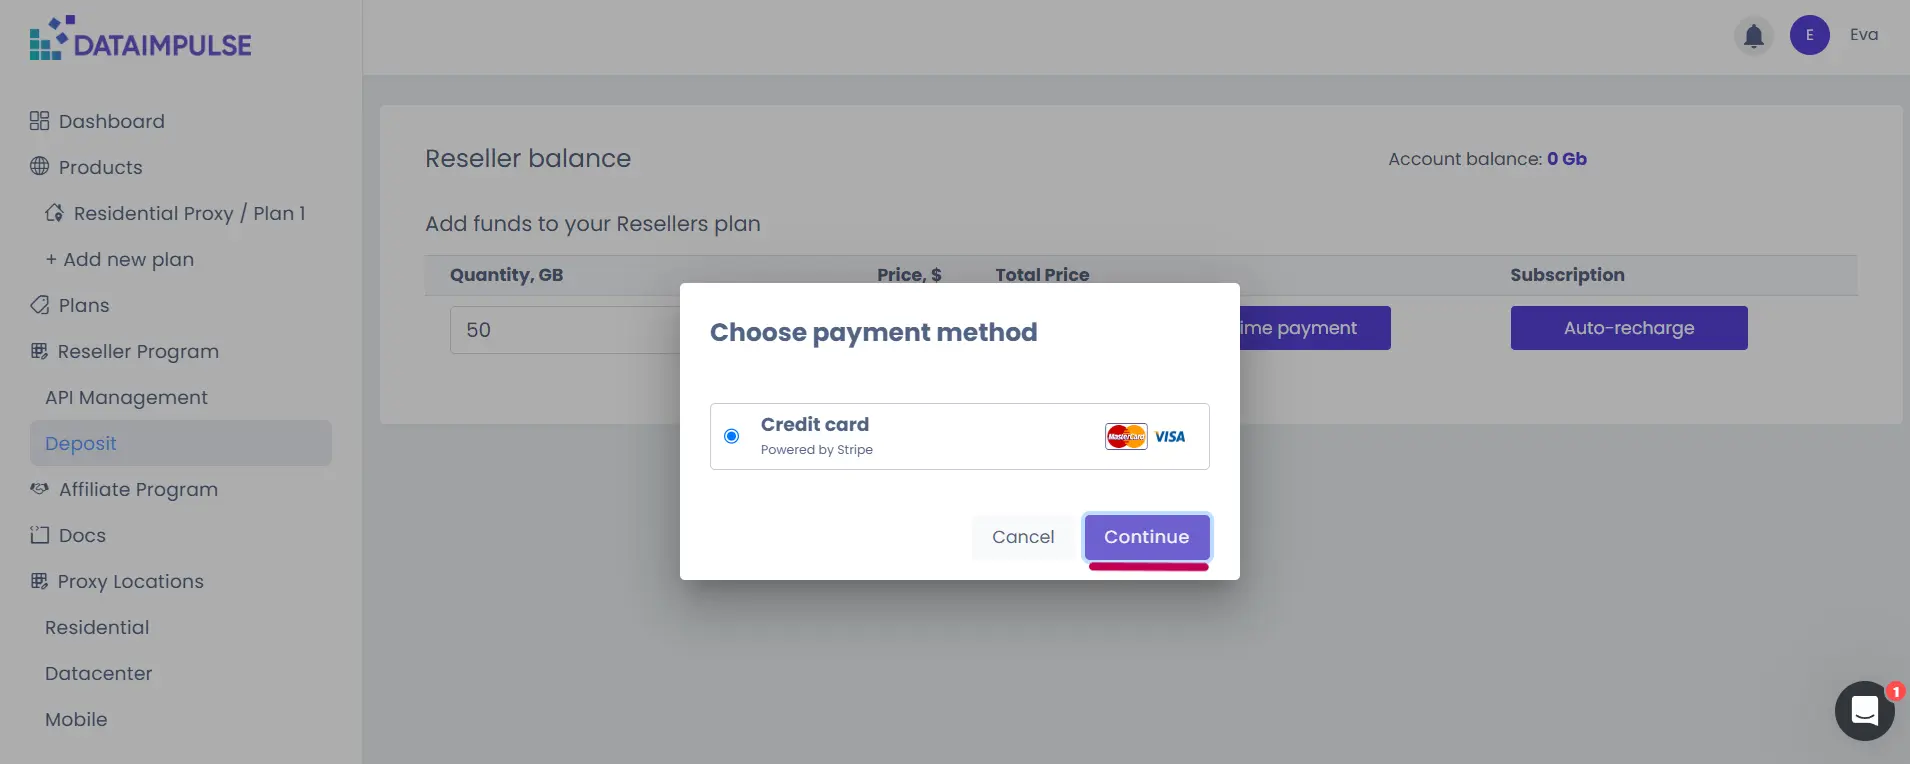
2. The payment window will appear. Click on the “Continue” button.
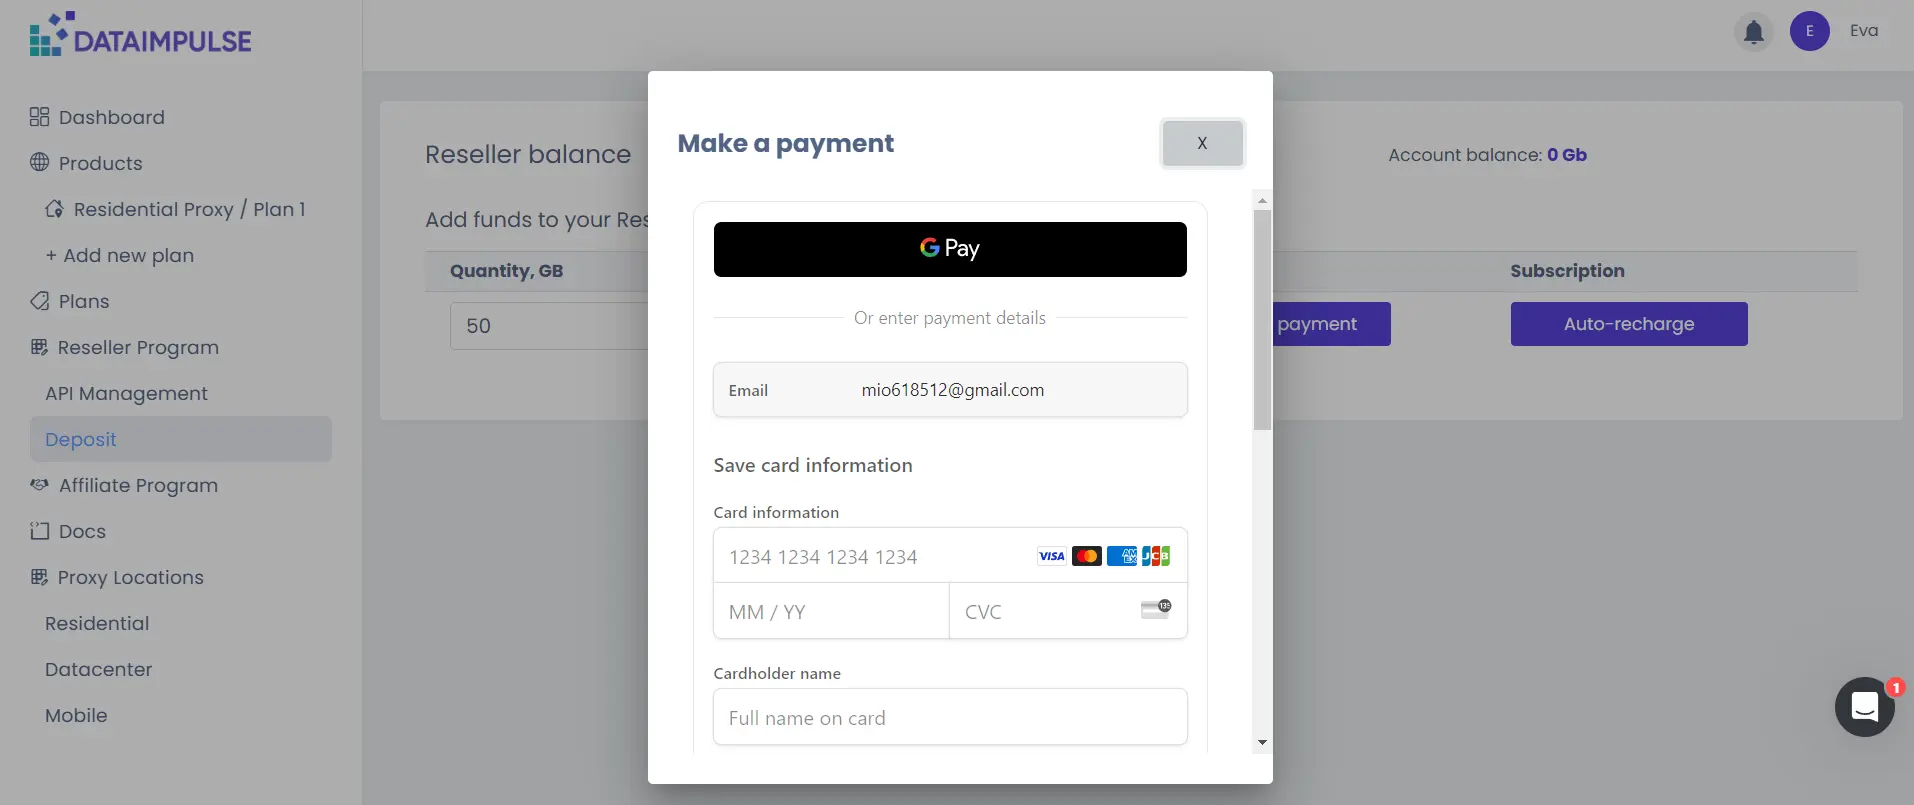
3. Select a payment method and fill in all the necessary details. After you finish, press the “Save card” or “Pay” button.
4. Now, a subscription is created. The page looks slightly different from when you create a subscription on your personal account. Here, you don’t see any signs, and you also don’t have to press any buttons to see the details of your subscription. If you need to change settings, you must nullify the current subscription and create a new one.
Deactivating a subscription with your reseller account
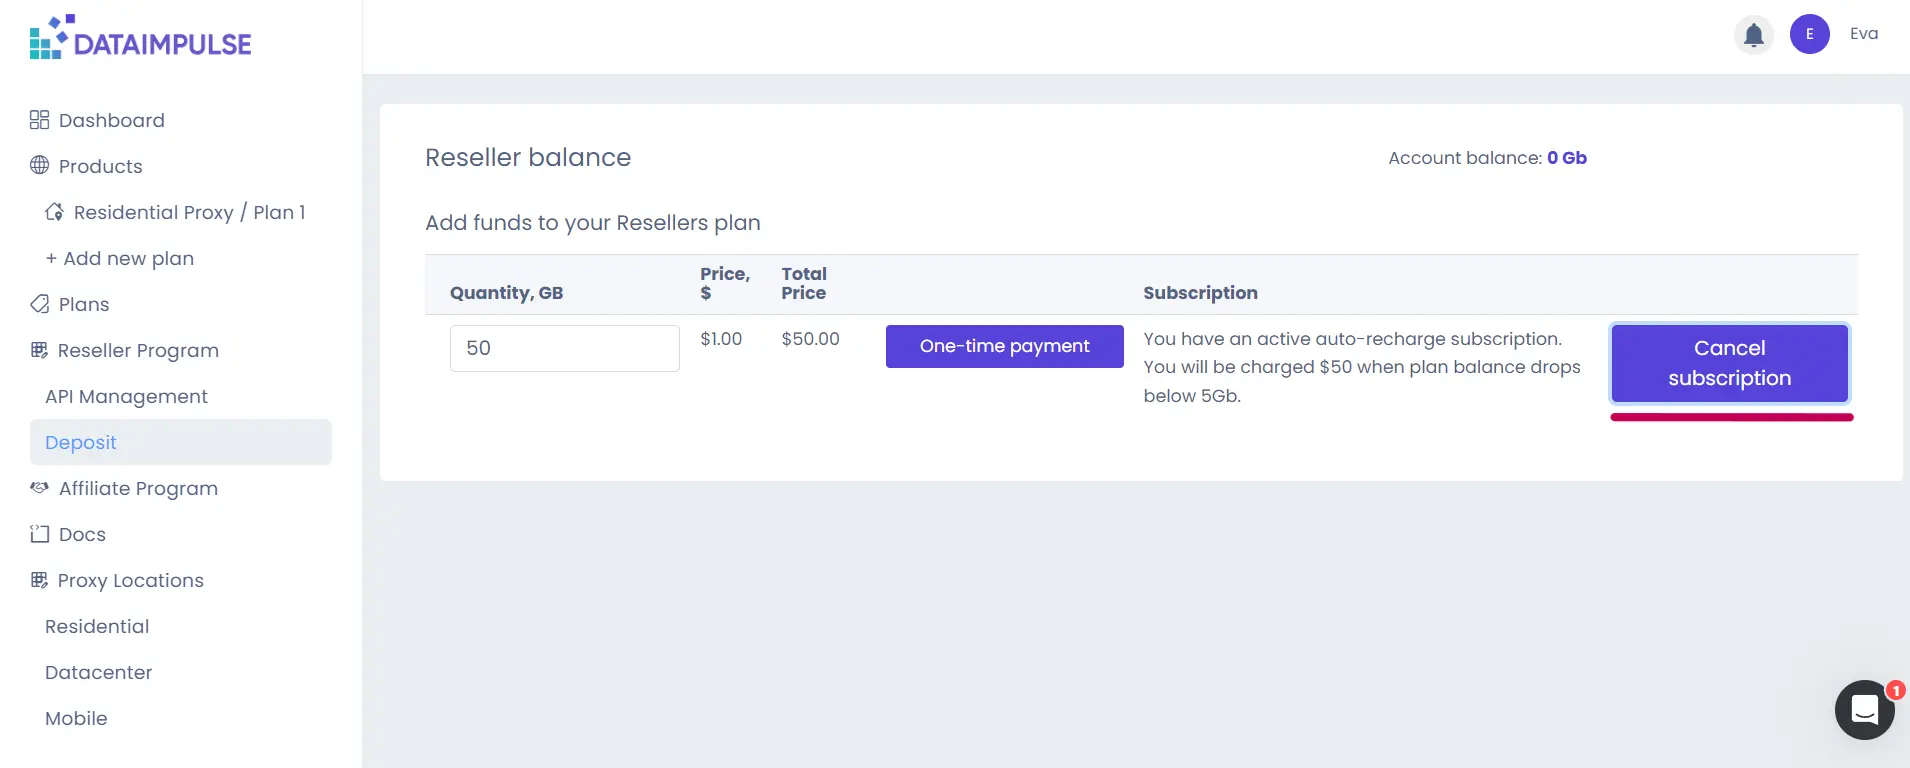
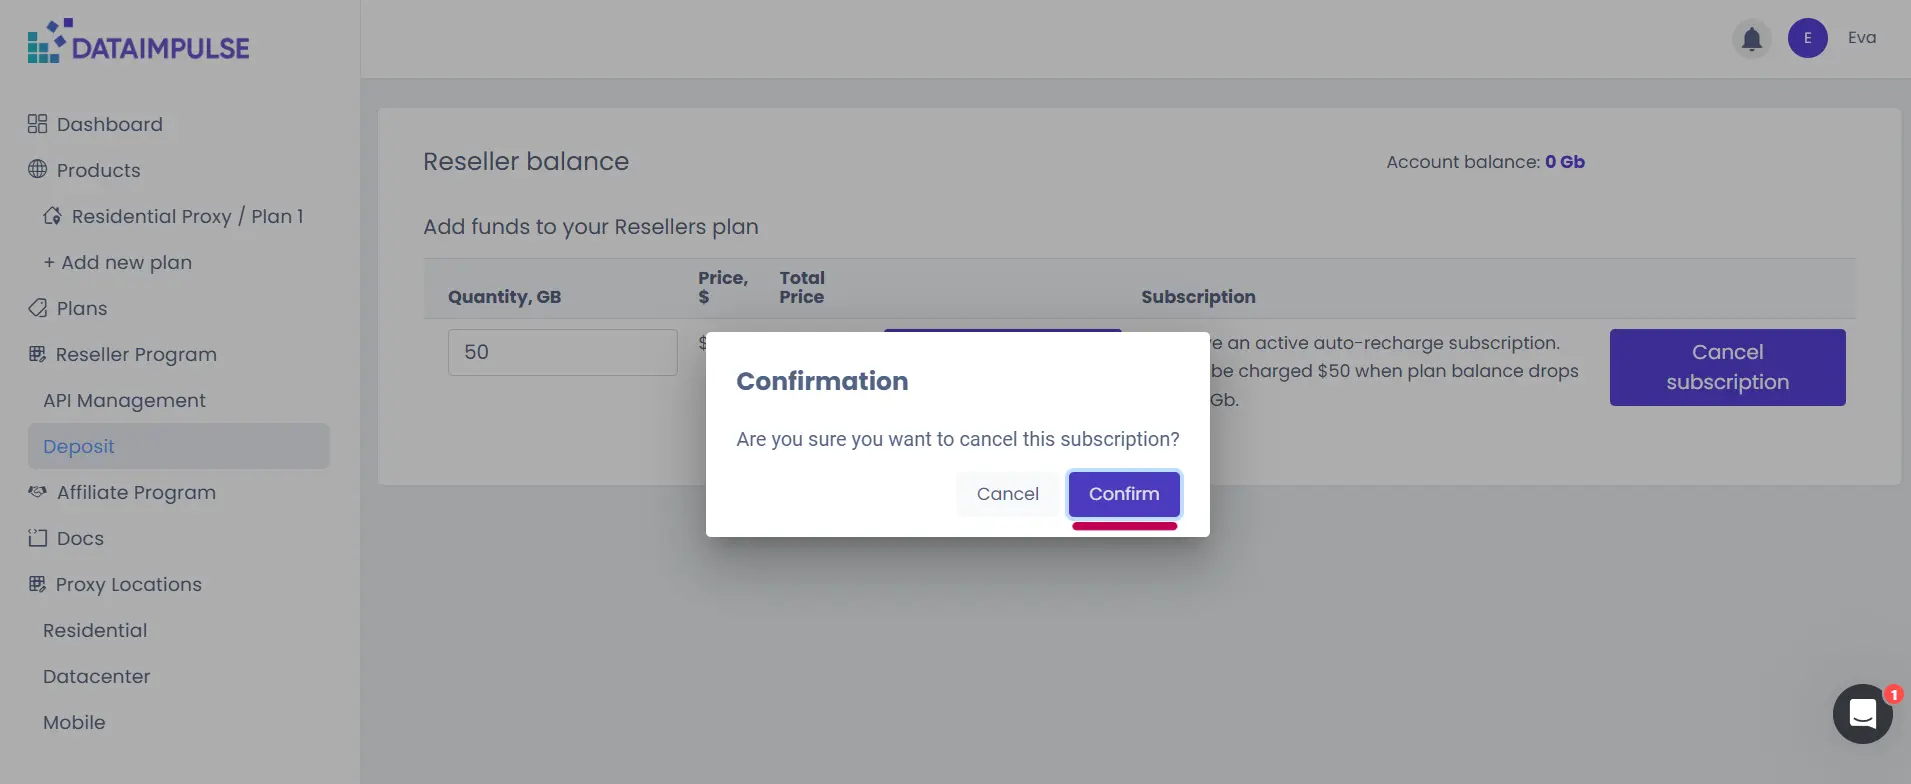
1. To deactivate a subscription, press the “Cancel subscription” button. Again, a confirmation window will appear, where you need to press the “Confirm” button.
2. Now it’s all done. A “Subscription deactivated” sign will appear at the bottom of the screen; however, the system may redirect you to your plan’s tab.
That’s all it takes to manage your subscriptions with DataImpulse. If you have several plans, you can create subscriptions for all of them. If there isn’t enough money on your card or you entered the wrong information so we cannot charge you, we will notify you via email.
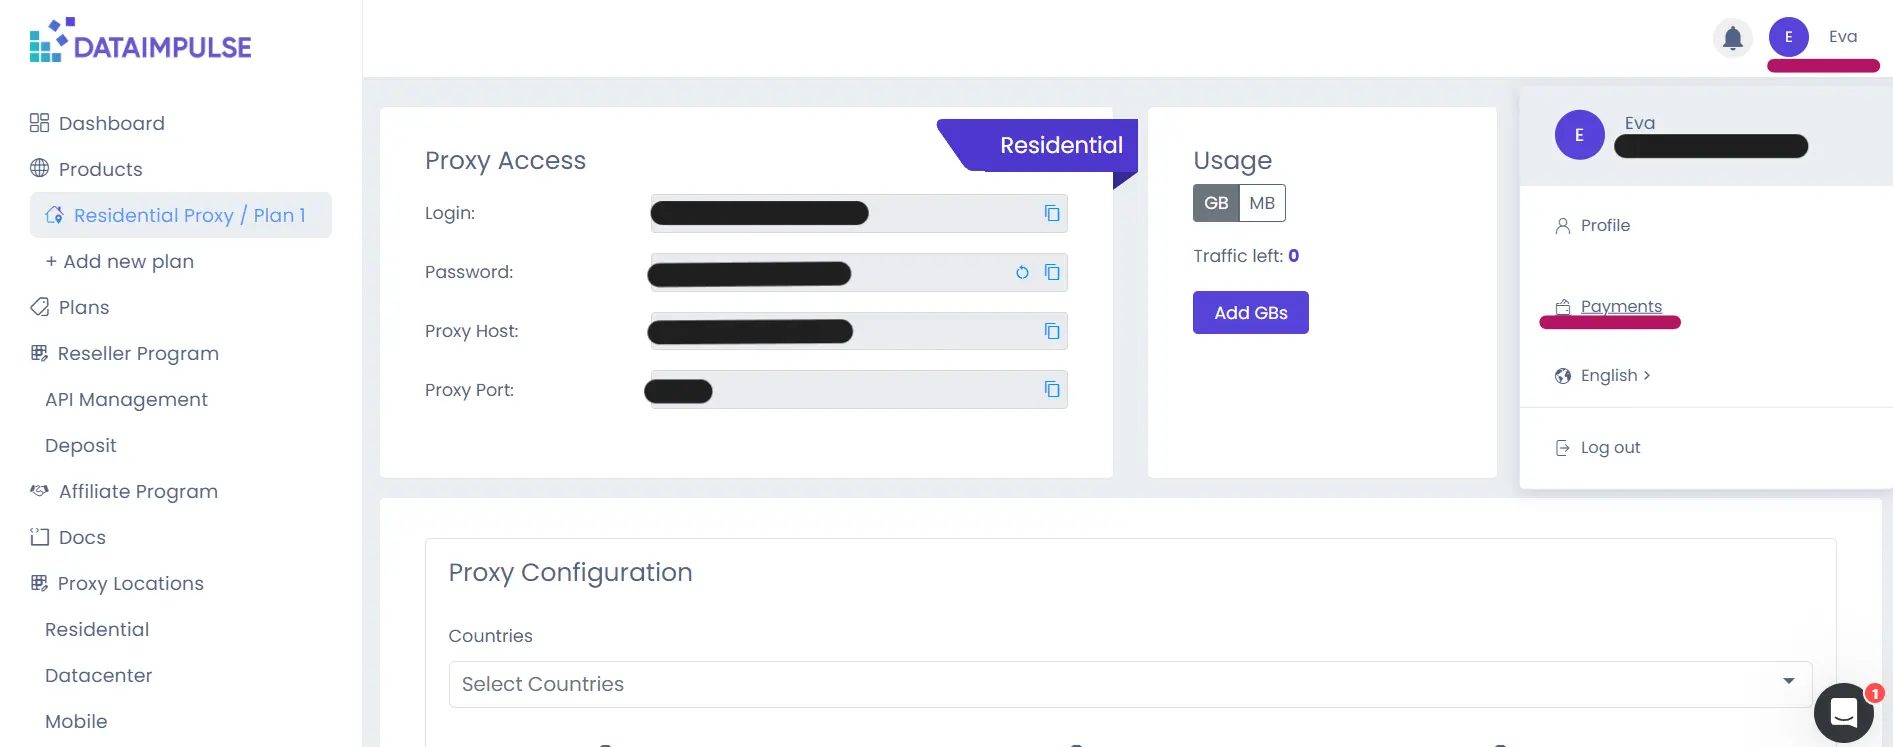
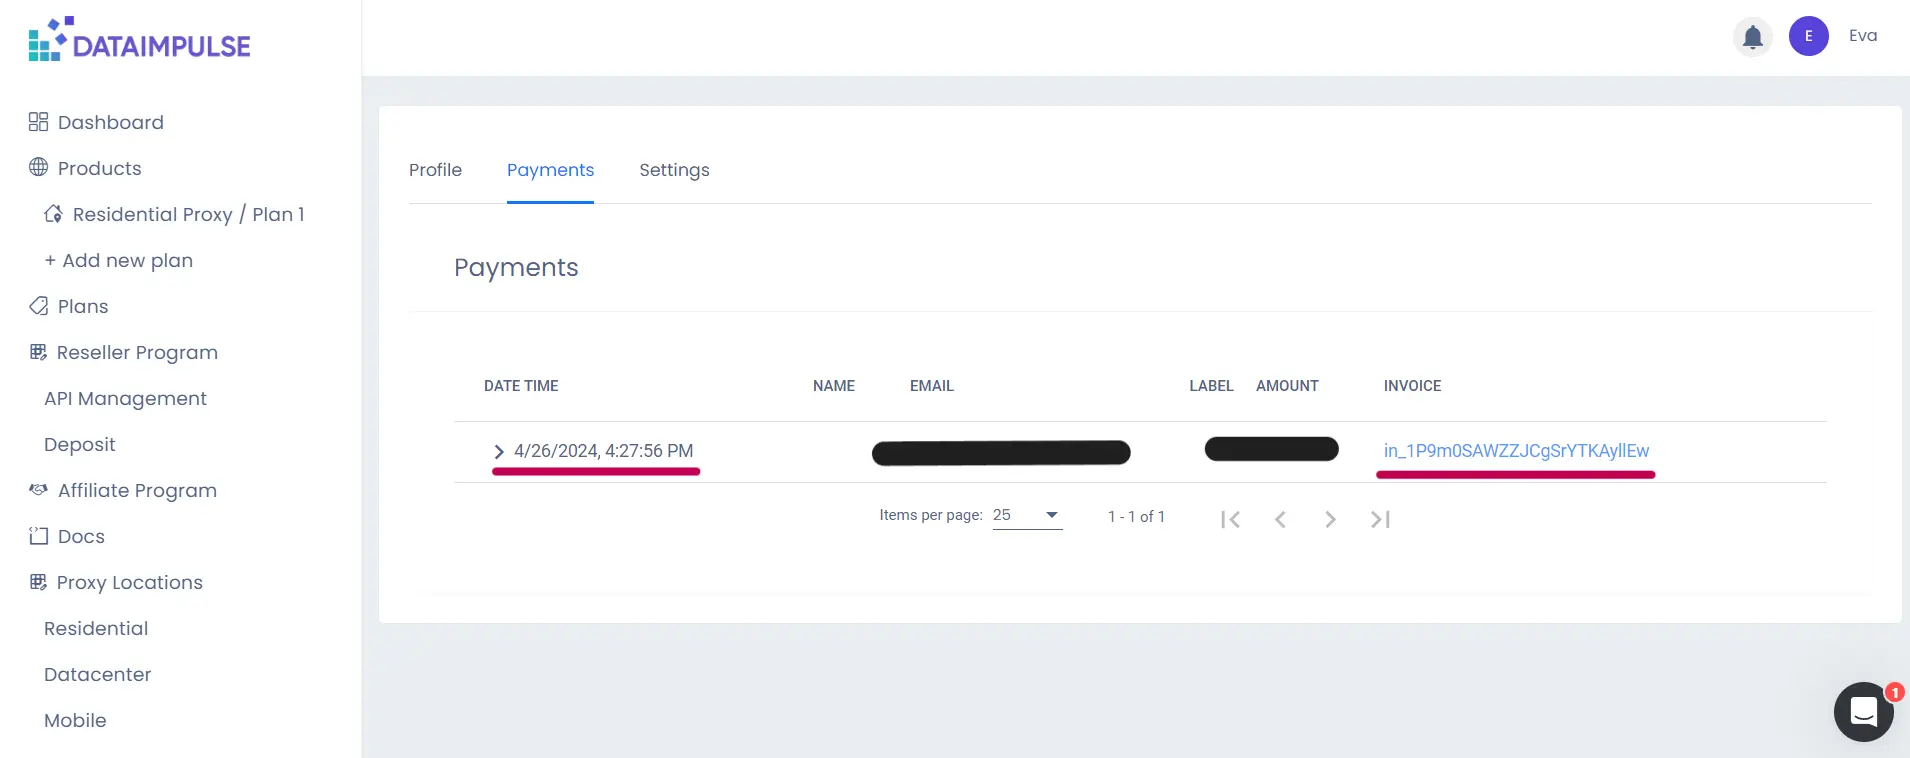
You can also check your payment history by going to your account and then to the “Payments” tab. Here, all of your payments and details, including precise times and invoices, will be listed.
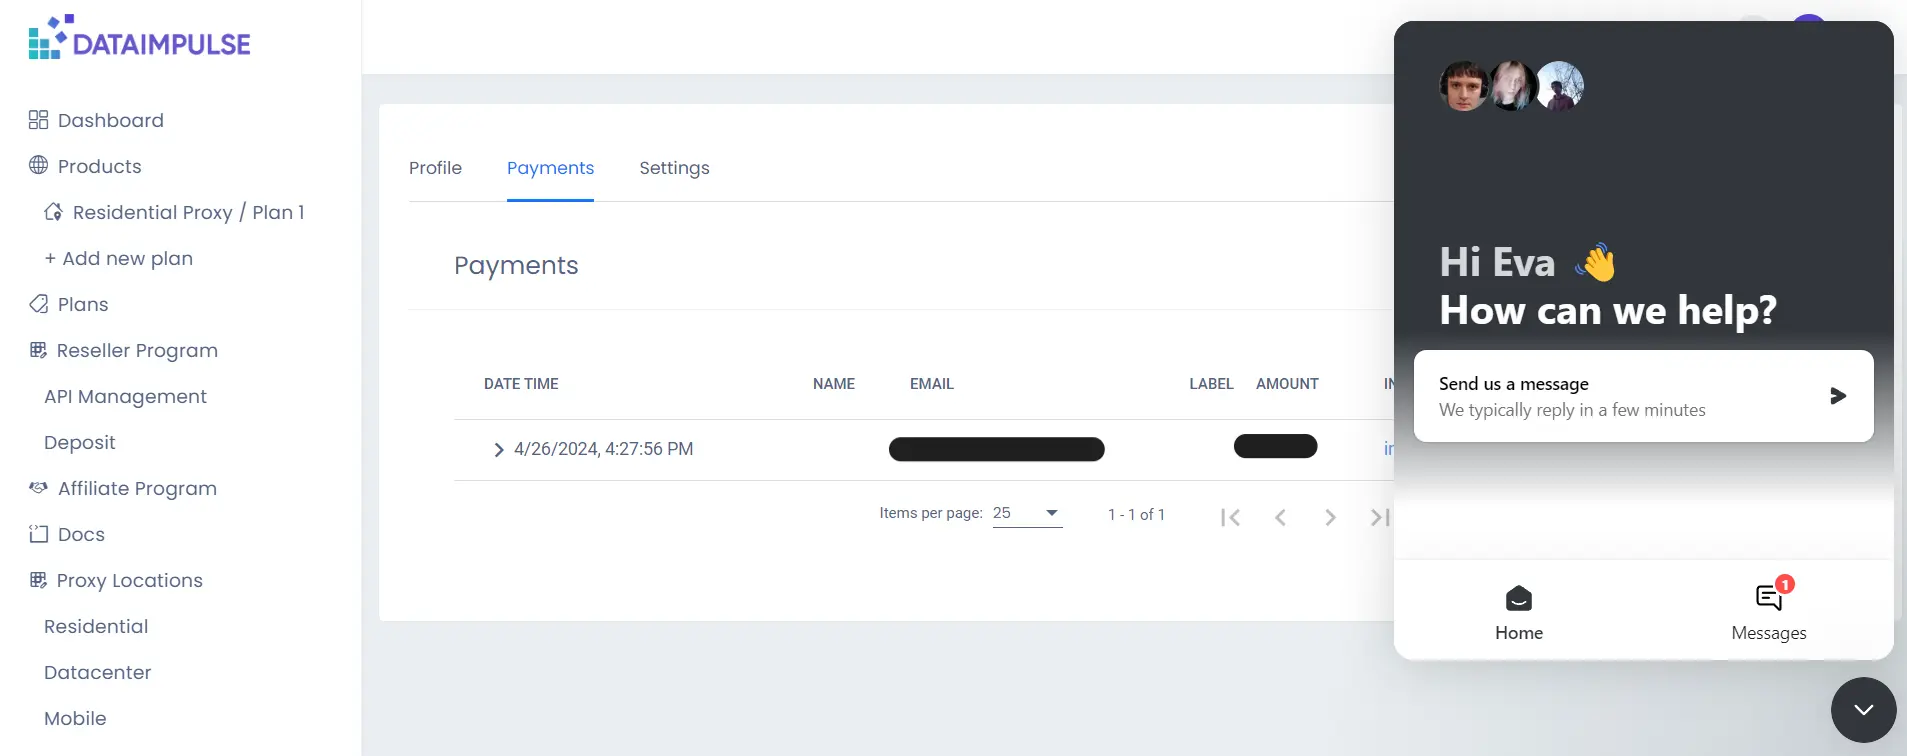
If you need help, don’t hesitate to write to [email protected] or use a widget in the bottom-right corner of the screen.
Our support agents are in touch 24/7, so you can receive help within several minutes.

