How to set up proxies in Google Chrome

Here are the steps to configure proxy settings in Google Chrome:
- Open Google Chrome
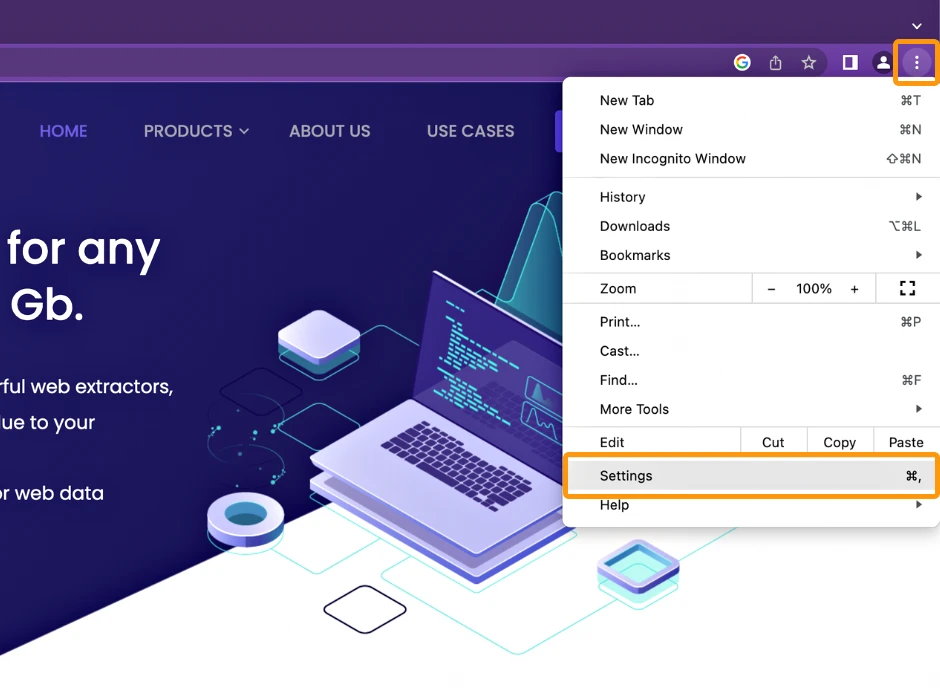
- Click on the three dots in the upper right corner of the browser window and click on “Settings“
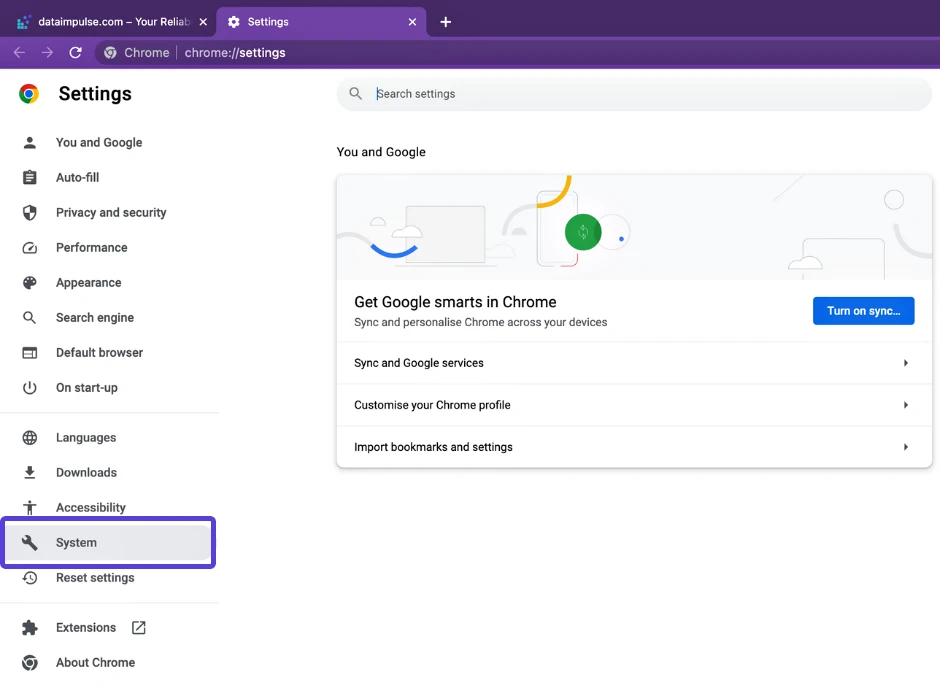
- Scroll down and select “System“
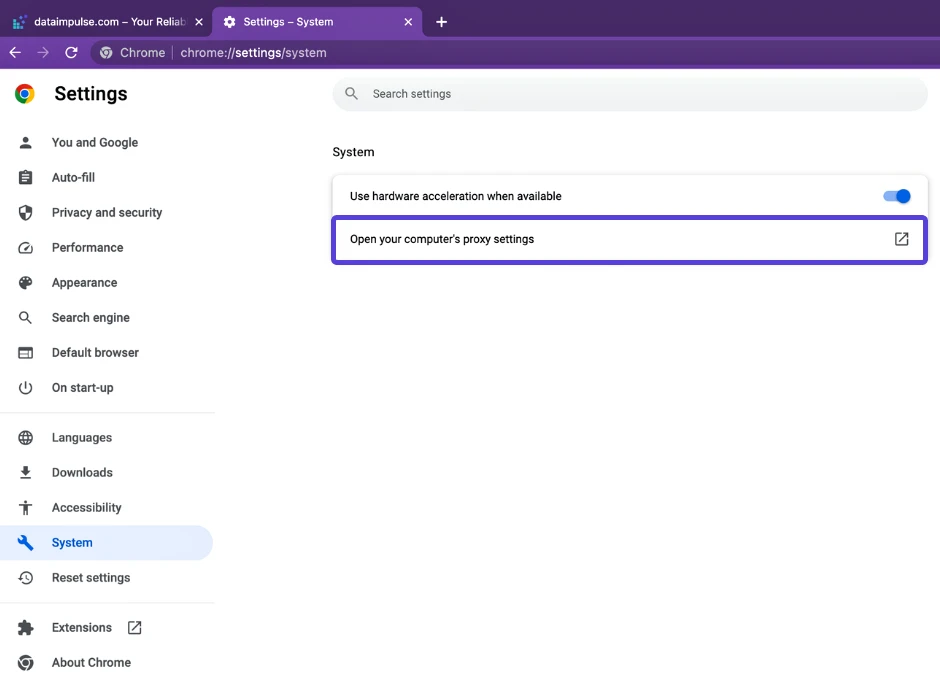
- Choose the “Open proxy settings” option for your computer.
Please note that these proxy settings will be applied to the entire system, and not just to the Chrome browser alone.
The proxy settings described in the instruction are applicable to the Windows OS. If you are using macOS, the appearance of the settings may differ, and you can refer to our macOS proxy integration guide for specific instructions. (To access the guide, click on the following link.)
- Click on the “Change network settings” button.
- In the “Local Area Network (LAN)” section, select “Use a proxy server for your LAN (These settings will also apply to other protocols such as HTTP and FTP)”.
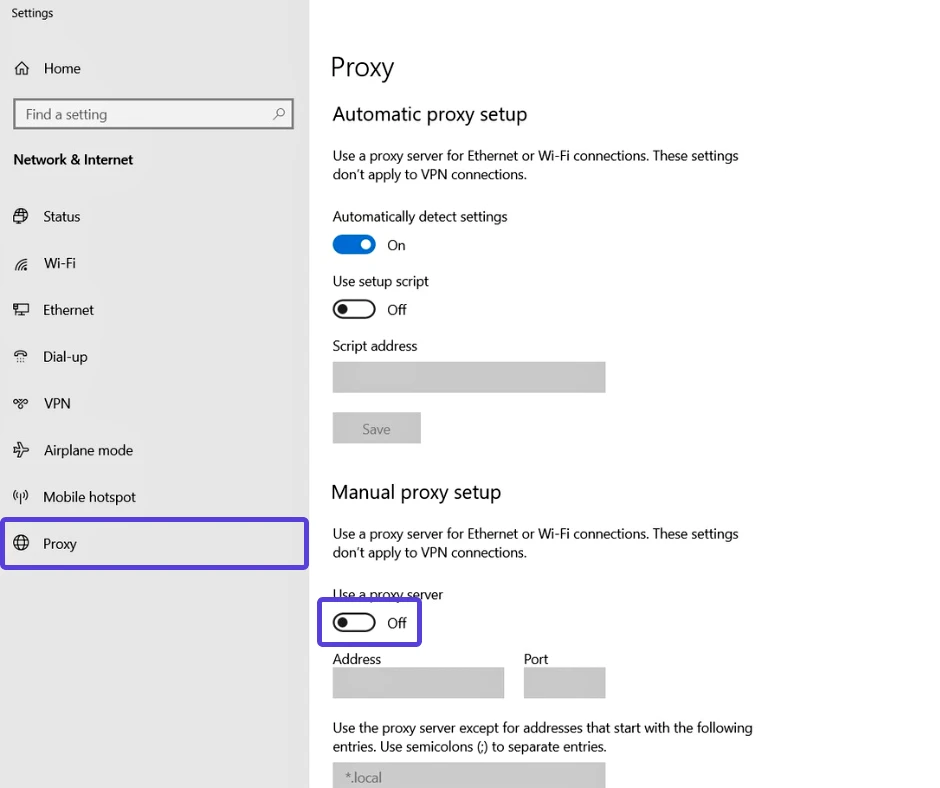
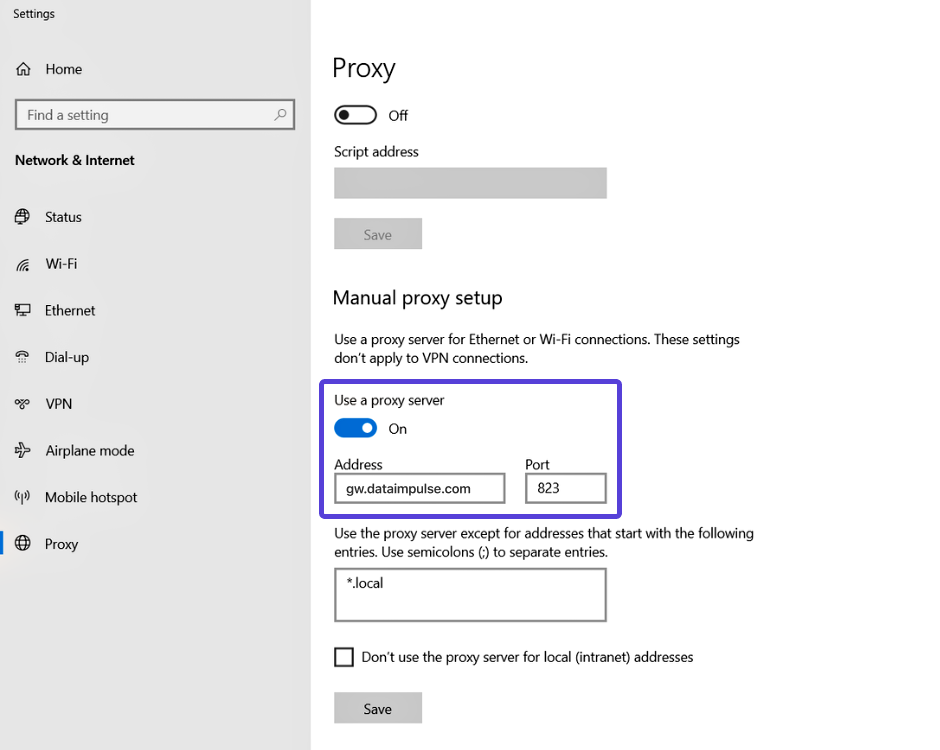
- (acc to the screen) In the “Proxy” section, switch on the button “Use a proxy server“
- Enter the IP address or hostname and port number of the proxy server in the corresponding fields.
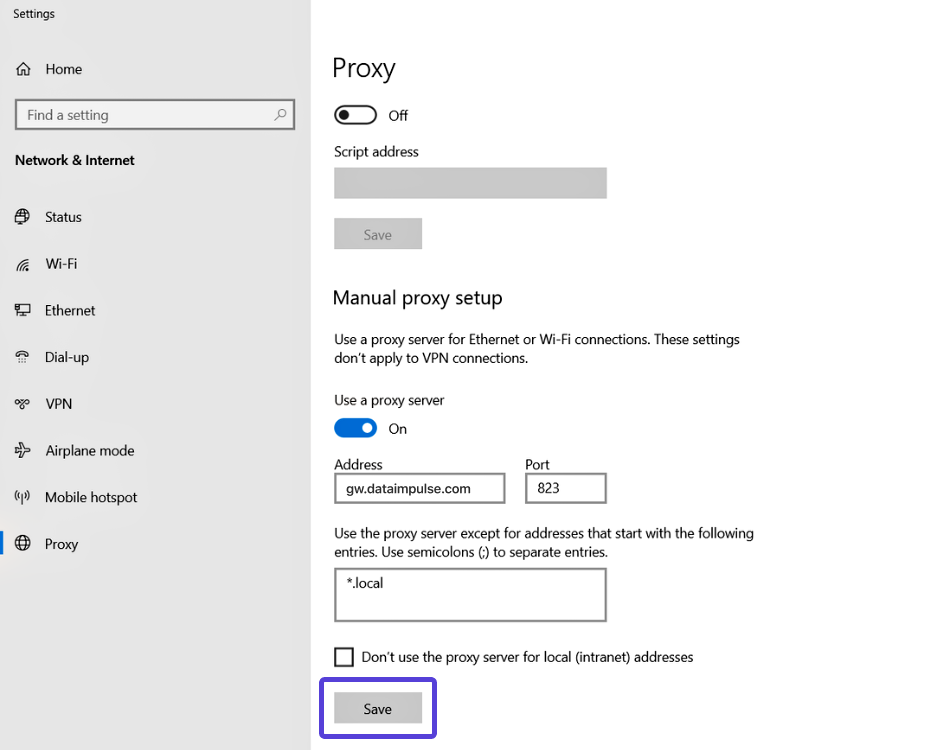
- Press the “Save” button to preserve the changes.
- If you are using a proxy server with login and password authentication, an authentication window will appear when accessing any website, where you will need to enter their login and password.

