Setting up proxies with Octoparse is a straightforward process
Octoparse is a user-friendly data extraction tool that makes it easy to scrape public data without coding. It provides features like automatic IP rotation and extended session time to comply with traffic guidelines. With advanced machine learning algorithms, Octoparse can quickly identify and extract data from complex websites. It can capture various types of data, including text, links, image URLs, and HTML code.

Setting up proxy settings in Octoparse is a simple process. Here’s how you can do it:
Before proceeding with Octoparse setup, you need to add your IP address to the whitelist. This will allow you to connect to the proxy without using a login and password in the future.
To add your IP address to the whitelist, please follow these steps:
- Select the desired plan for the proxy connection;
- Go to the “Manage Whitelist IPs” section;
- Click on “Detect my IP” or manually enter your IP address;
- Click the “Add new IP” button.
That’s it! Your IP address has been added to the whitelist. Now let’s proceed with the Octoparse program setup.
Step 1: Download and install Octoparse from the official website. Open the application once it’s installed.
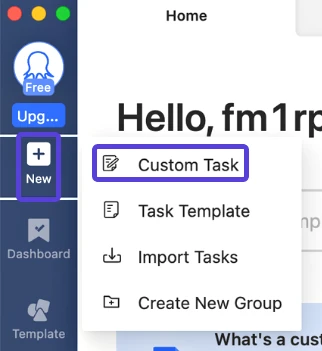
Step 2: Click on the “+New” button in the top-left corner to create a new task. Choose “Custom Task” from the options available.
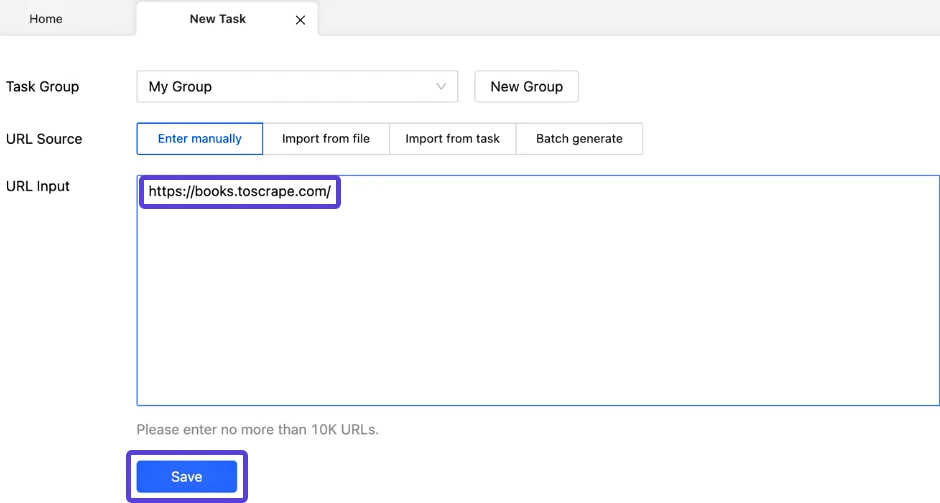
Step 3: Enter the URL of the webpage you want to extract data from in the URL Input field. Let’s use “books.toscrape.com” as an example. Click the Save button.
Step 4: Once the selected URL loads, click the Settings button located in the top-right corner.
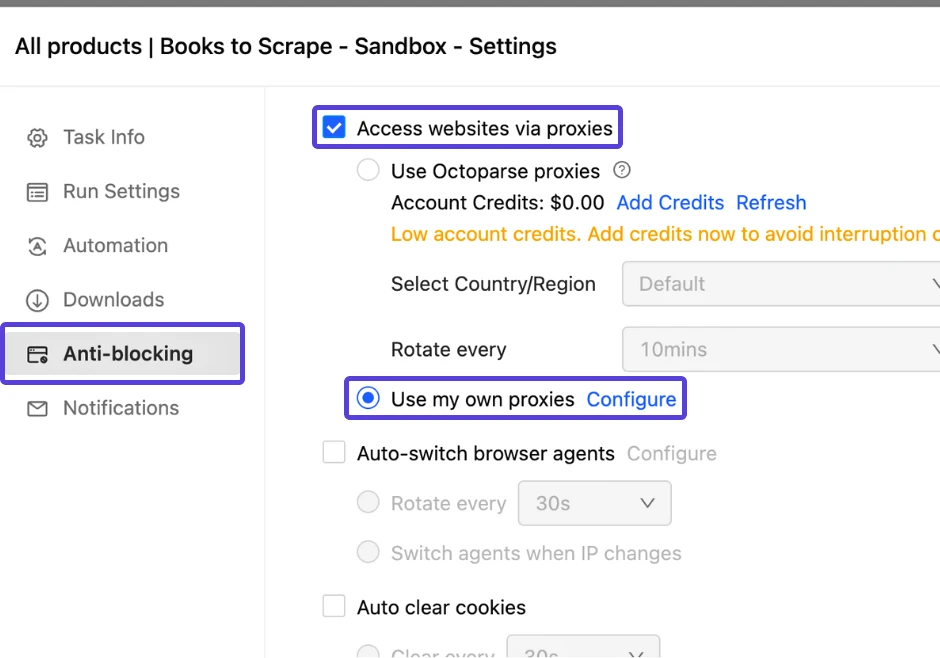
Step 5: Scroll down to find the Anti-blocking Settings section.
Step 6: Check the box that says “Access websites via proxies.” This will reveal the options to use your own proxies and the Configure button.
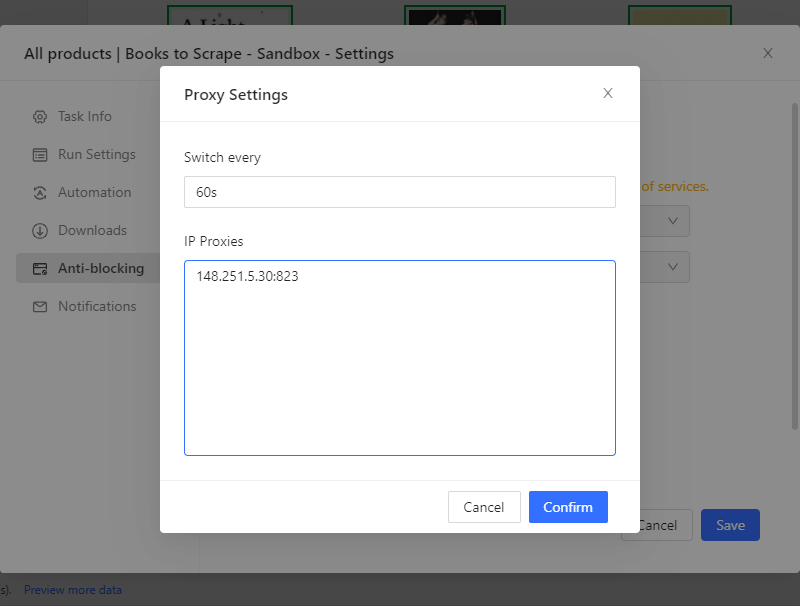
Step 7: Click the Configure button, and a pop-up window will appear. Copy and paste the IP addresses of your DataImpulse” proxies into the field. Make sure the format is in IP:PORT.
Rotating Residential Proxies:
IP Selection: Specify the IP address for the rotating proxies. For instance, we’ll use the IP address 148.251.5.30:823
Step 8: Set up the Switch interval based on your preference, depending on whether you’re using a rotating or sticky session type.
Step 9: Click the Confirm button to save your changes.
Step 10: To verify the successful integration of Octoparse, check for a checkmark next to the Configure button in the Anti-blocking settings section.
Step 11: Save your changes by clicking the Save button.
Step 12: You’ll be taken back to the main screen of the page you’re scraping.
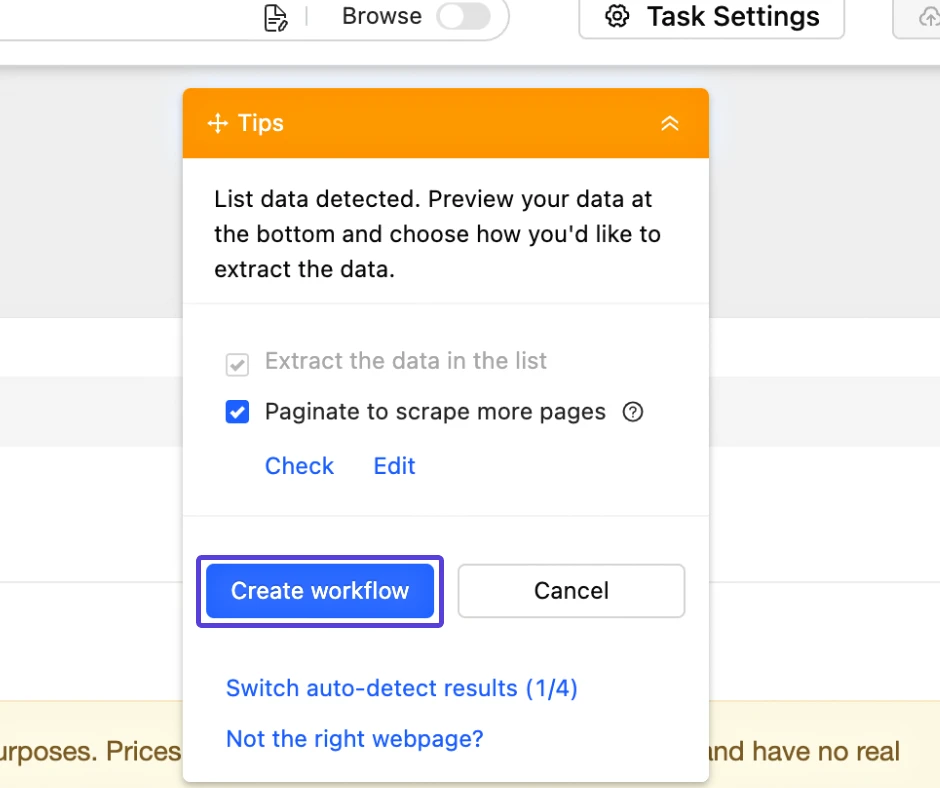
Step 13: Click on the lightbulb icon to expand and choose whether to paginate or add a page scroll.
Step 14: Once you’ve made your selection, click the Create Workflow button.
Step 15: Select the page element you want to extract, such as “Mystery.” Click on it and choose “Extract text of the selected element.”
Step 16: A pop-up will appear. Click “Save” on the top right and then “Run.”
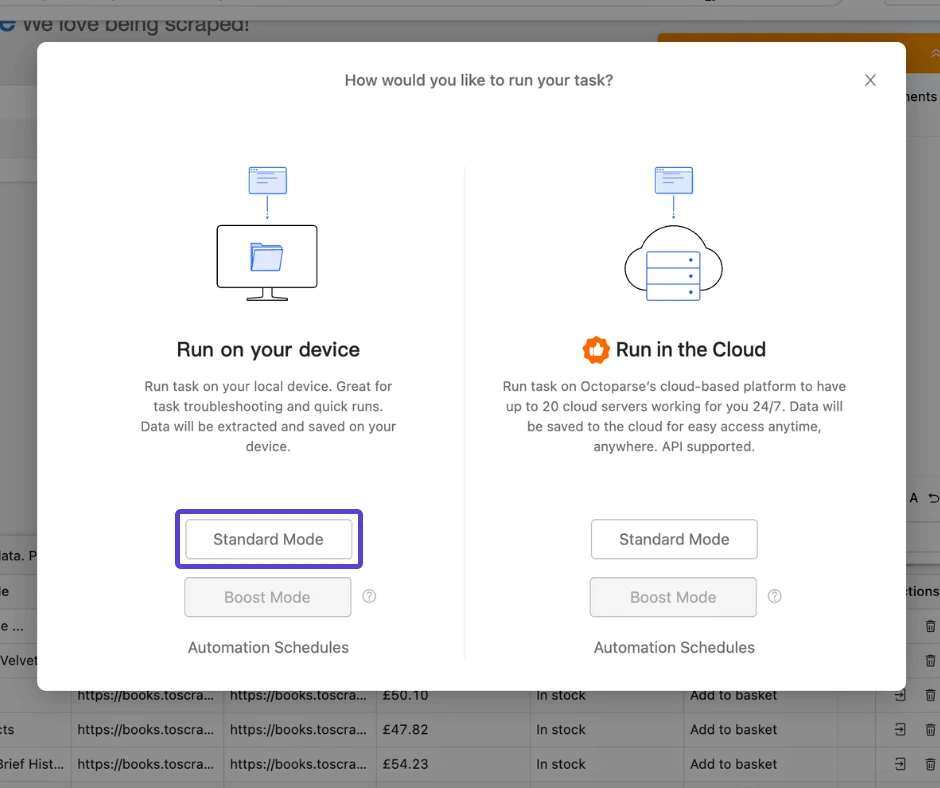
Step 17: Another pop-up will show different options. Choose the most relevant one for you (some options may require payment). For our example, we’ll select “Run on your device” and “Standard mode.”
Step 18: A new page will open, and the scraping process will start. You can pause and resume it as needed.
Step 19: Since this is just an example, we’ll stop here. Confirm to stop the run.
Step 20: You’ll see some statistics for your scraping task. Choose whether to export the data now or later; for now, we’ll select “now.”
Step 21: The last pop-up will appear, allowing you to choose the data format for extraction.
Step 22: Select the format that suits your needs.
That’s it! You’re all set up and ready to focus on your web scraping tasks with Octoparse.


