Setting up a proxy in Postman
Postman is a software application that helps developers design, build, and test APIs (Application Programming Interfaces). It provides a user-friendly interface for making HTTP requests and interacting with APIs. With Postman, developers can send requests, view responses, and test different endpoints and parameters of an API. It is widely used in the software development industry to simplify the process of API development and testing.
When using Postman to design, build, and test APIs, you may need to configure a proxy for your requests. The proxy acts as an intermediary between Postman and the destination server, providing an additional layer of security and handling HTTP(S) responses on your behalf.

Configuring Proxy Settings in Postman
To configure proxy settings in Postman, you have two options: using your system’s proxy settings or manually configuring the proxy settings within Postman.
Using System Proxy Settings:
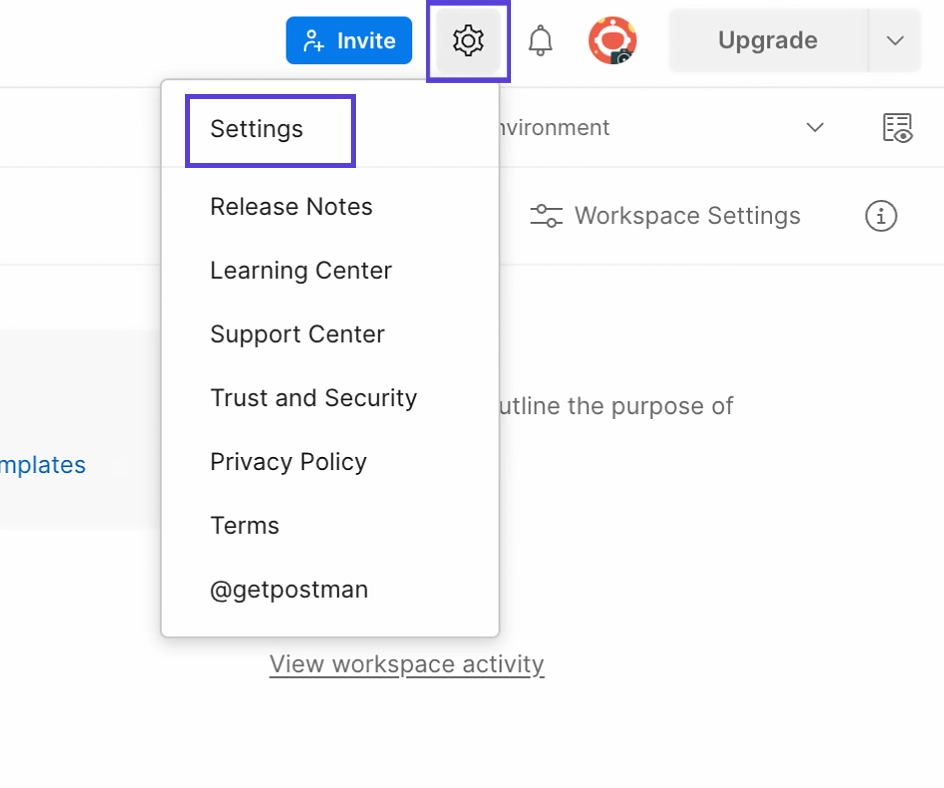
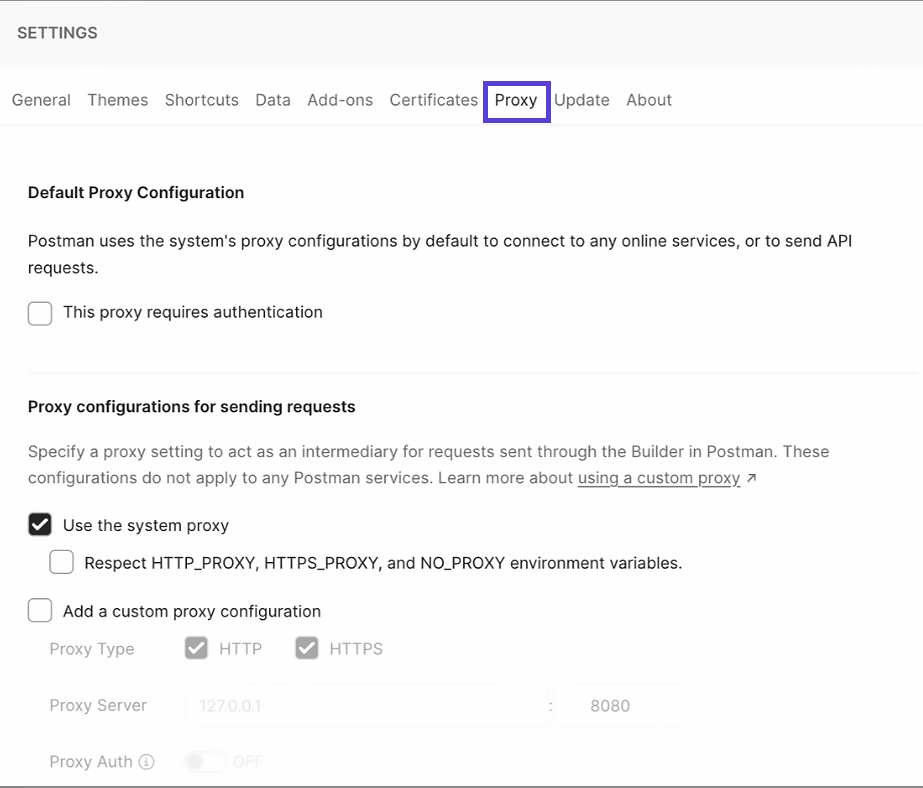
- Download and open Postman and go to settings (⚙️) > Settings > Proxy.
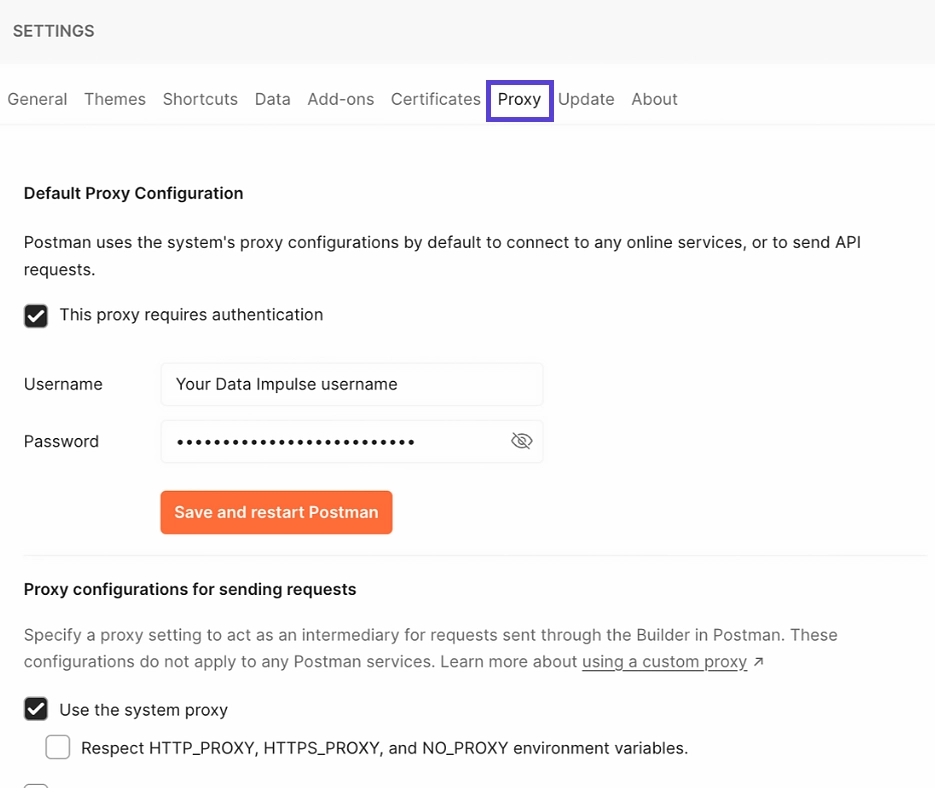
- If your system proxy requires authentication, you can enable the option “This proxy requires authentication” under Default Proxy Configuration. Make sure to enter the credentials of your DataImpulse user, the same credentials you used when creating the user in the DataImpulse dashboard.
- After making the changes, click on Save and then restart Postman.
The Builder can now send requests through a proxy.
To use a system proxy for requests in the Postman Builder, follow these steps:
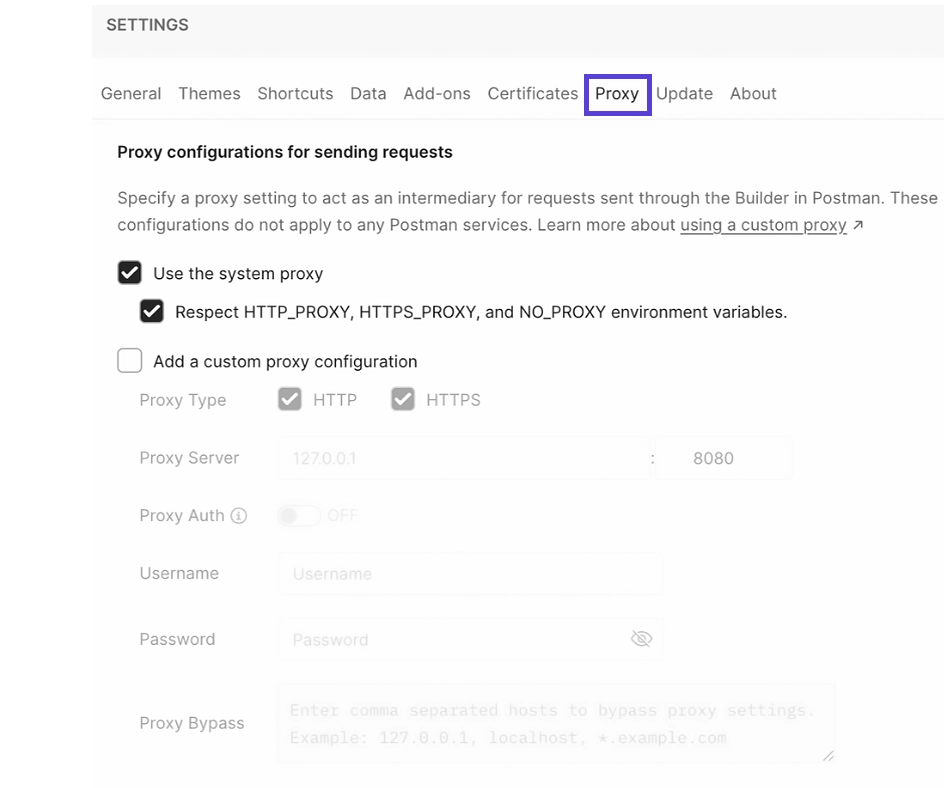
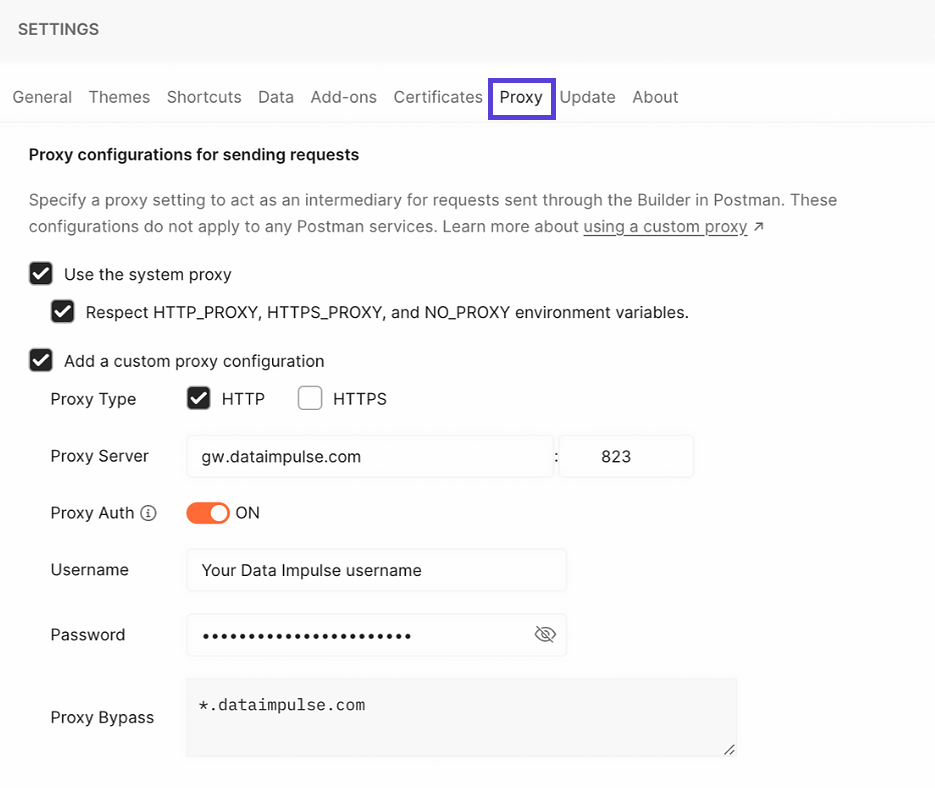
- Go to the Proxy configurations for sending requests section and enable the option “Use the system proxy”.
- Optionally, you can enable the “Respect environment variables” option to use your system’s preferences for proxy types.
NOTE: Make sure to disable the “Add a custom proxy configuration” option to prevent Postman from disregarding the system proxy and using a custom proxy instead.
That’s all it takes! With these simple instructions, you can effortlessly set up proxies for specific applications, tailoring your proxy usage to suit your individual needs. Enjoy a customized browsing experience with ease.
Custom proxy settings
To use the DataImpulse proxy for sending HTTP(S) requests in the Postman Builder, follow these steps:
- Go to the settings (⚙️) > Settings > Proxy.
- Enable the option “Add a custom proxy configuration”.
- Configure the proxy settings by providing the necessary details, such as proxy type, host, port, username, and password.
Residential proxies
Proxy type: HTTP
IP address: gw.dataimpulse.com
Port: 823
- Enable Proxy Auth and enter your DataImpulse sub-user credentials. Use the same credentials you entered when creating a new sub-user in the DataImpulse dashboard.
NOTE: You can use Proxy Bypass to specify a list of hosts that will be ignored by the custom proxy configuration.
You’re all set up! Now you can send your requests through a proxy in the Builder to enjoy enhanced security and anonymity.
Common issues with Postman proxy configuration
If you encounter any proxy-related issues while using Postman, here are some common solutions:
Missing proxy settings – Ensure that you have the latest version of Postman installed and verify all the proxy configuration settings mentioned in this guide.
407 proxy authentication error – Make sure to provide your username and password either in the system proxy or custom proxy settings, and double-check the proxy configuration in your operating system.
Missing postman-proxy-ca.crt – Install OpenSSL on your system and restart Postman to resolve this issue.

