ProxyCap
ProxyCap is a versatile software application designed to seamlessly redirect your entire network traffic through either a single proxy server or a series of interconnected proxies. It boasts an extensive range of features, including the ability to channel network requests from any software application.
One of ProxyCap’s standout capabilities is its compatibility with SOCKS 5, HTTP, and HTTPS proxies. Additionally, it offers an integrated performance checker for monitoring proxy efficiency. The application starts automatically with your operating system and provides easy access through the system tray.

Setting up proxy servers in ProxyCap is a breeze! Just follow the simple step-by-step instructions below.
- Install ProxyCap on your computer. You can do this right here.
- Launch the program.
Once the download is finished, you will receive a pop-up notification instructing you to restart your computer for the app to start working. Simply go ahead and restart your computer.
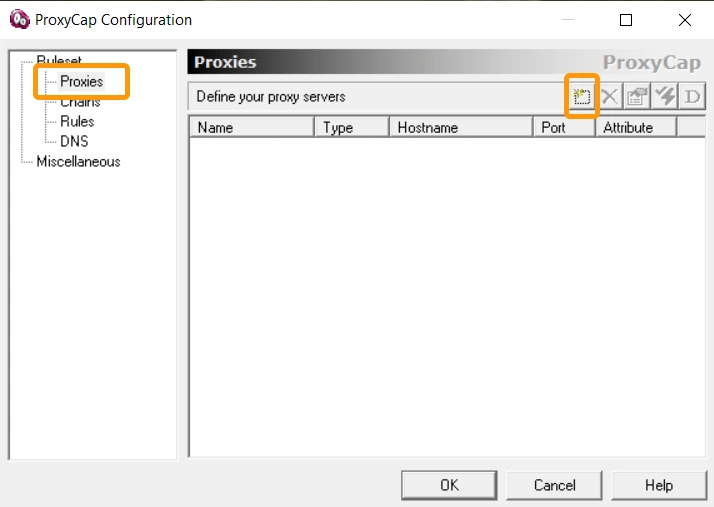
- Upon the first launch, you’ll see the settings window with the “Proxies” tab open. To add a new proxy server, just click “New Proxy Server”.
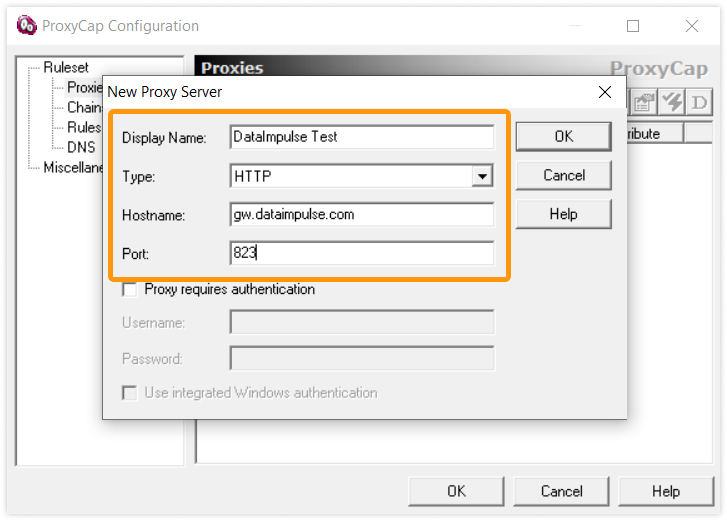
- In the opened window, enter your proxy server details:
Display name: you can give your proxy a name
Proxy type: HTTP
Hostname: gw.dataimpulse.com
Port: 823
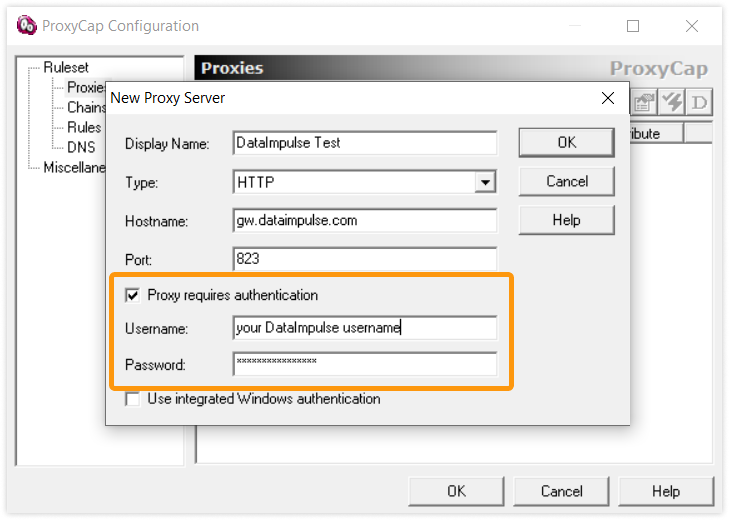
For login credentials:
Username: your DataImpulse username
Password: your DataImpulse password
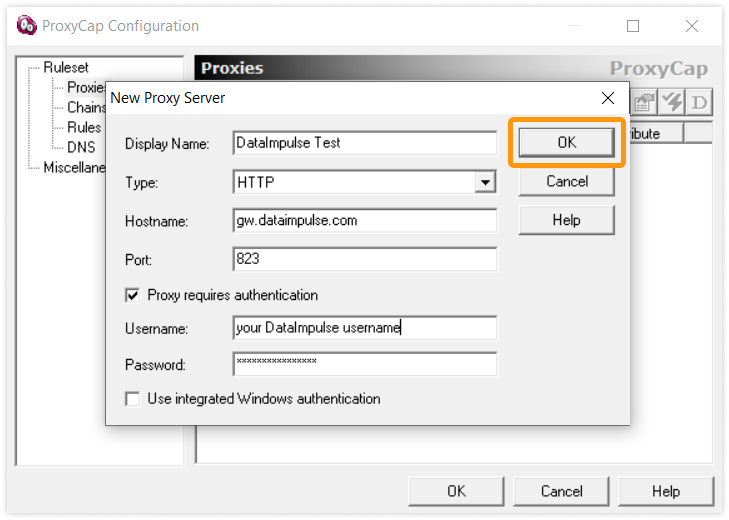
- Once you’ve entered your proxy server details, hit “OK”
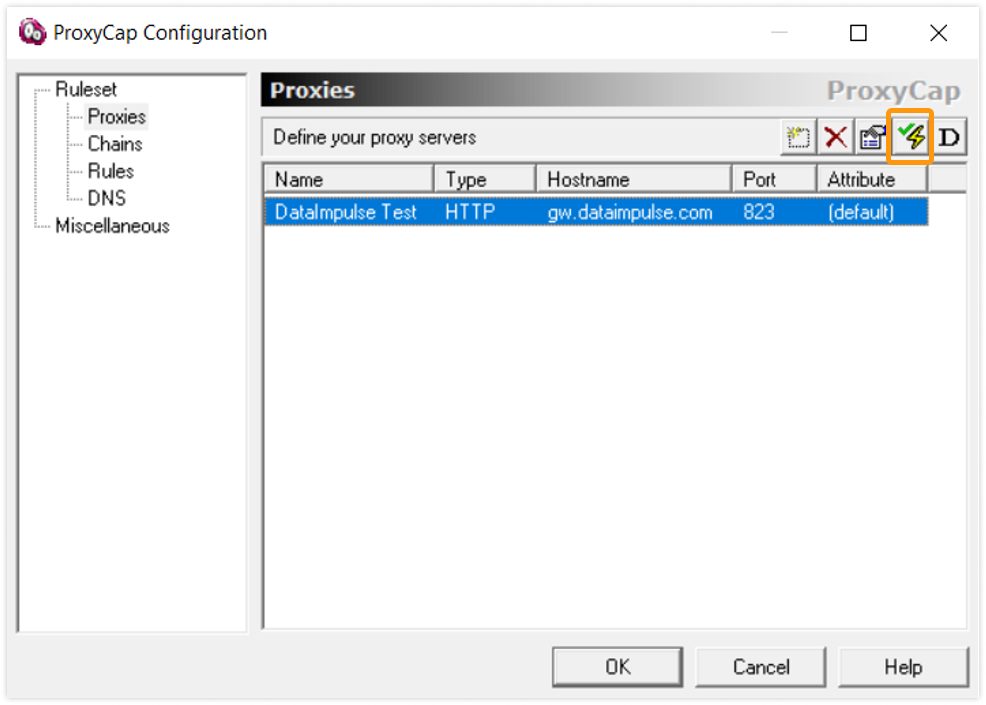
- Then, select the added server from the list and click on the “Check Proxy Server” button to verify the proxy’s functionality.
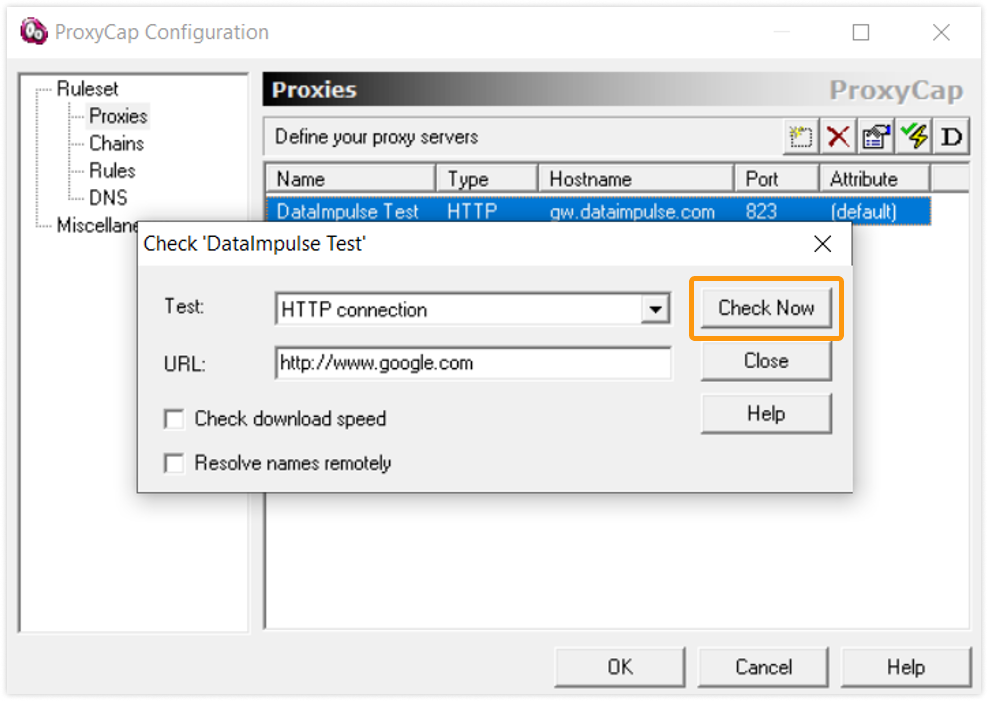
- In the window that pops up, type in a test URL (you can stick with the default, google.com) and hit the “Check Now” button.
- After a few seconds, you’ll get the test result: either “SUCCEEDED” (the test was successful) or “FAILED” (the test did not succeed).
If the test results were negative, please correct the proxy data you entered incorrectly. If everything looks good, then let’s move on.
Setting Up Rules
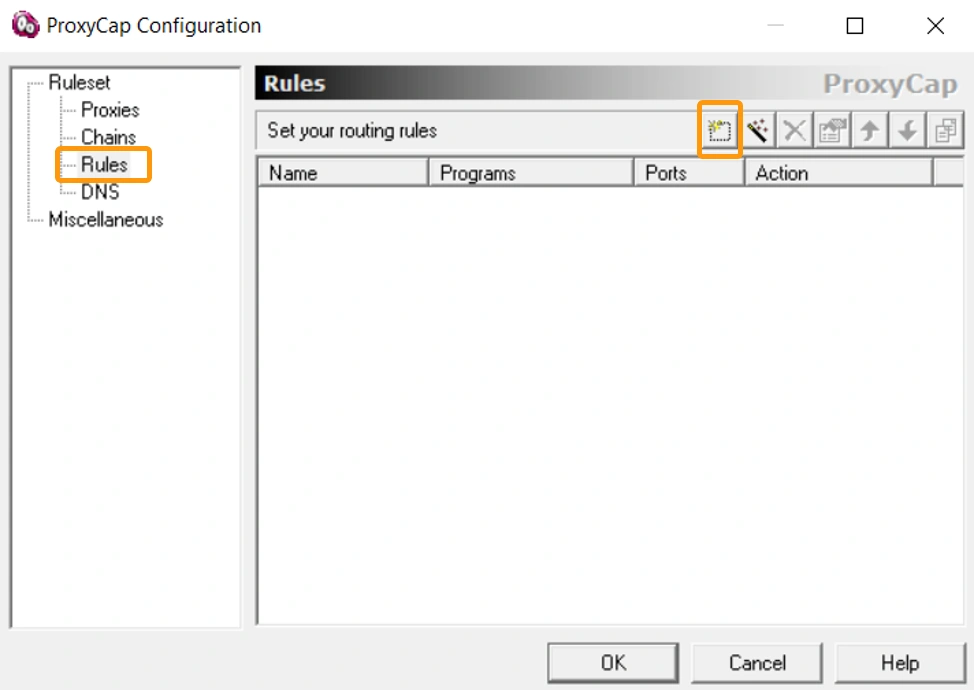
Navigate to the “Rules” tab to configure traffic tunneling rules. This can be done as follows:
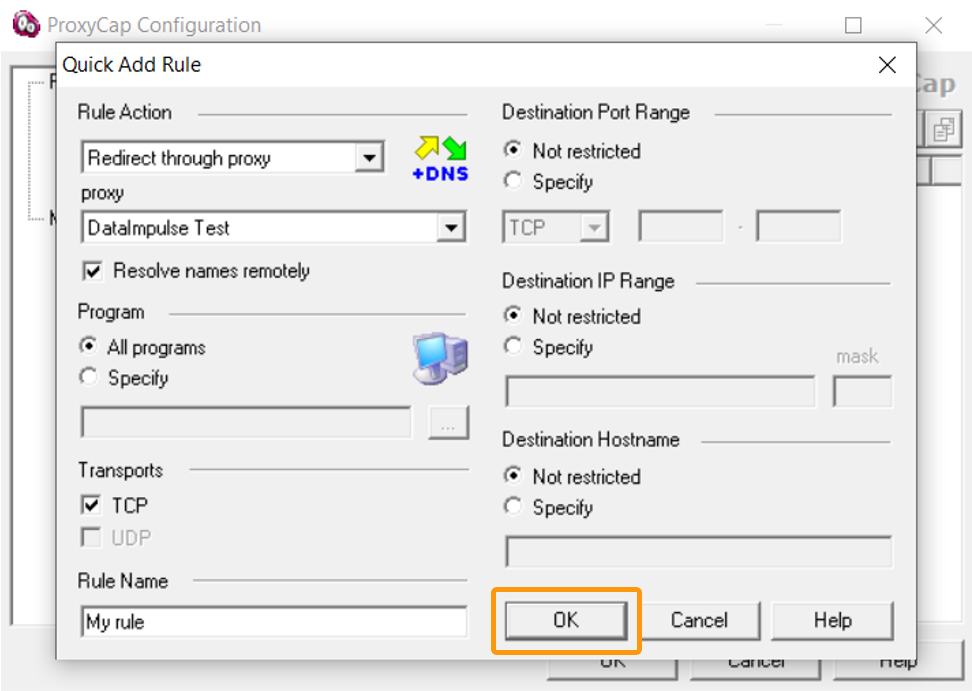
- Within the “Rules” tab, create a new rule by clicking on “Quick Add Rule.”
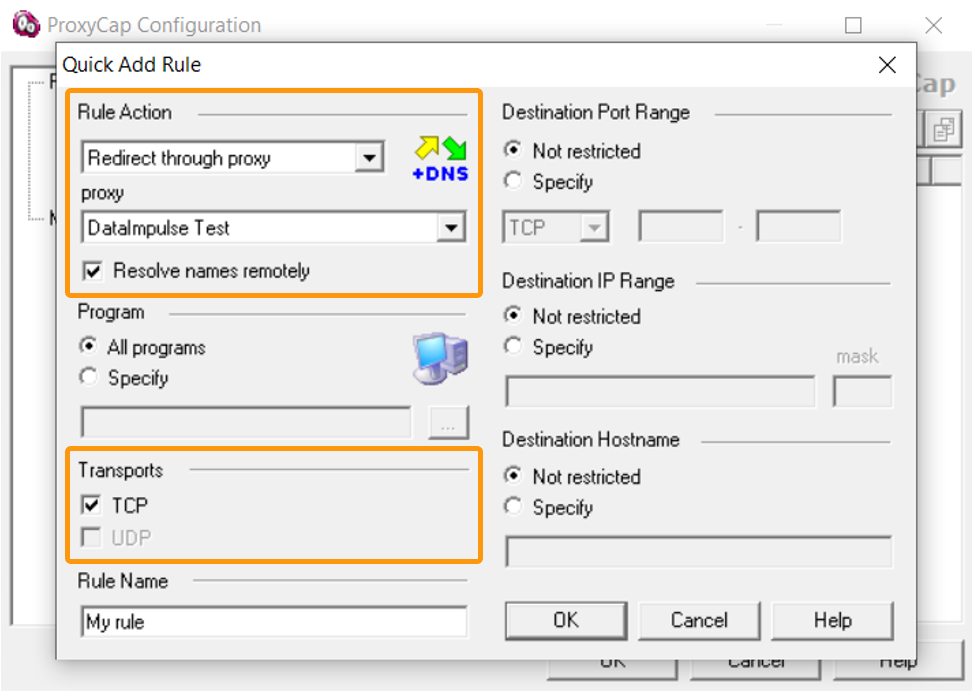
- In the pop-up window, under “Rule Action” select “Redirect through proxy.”
- In the “Proxy” field, choose the proxy server you added earlier from the dropdown menu.
- Enable the “Resolve names remotely” option by checking the box. This setting redirects DNS requests to the server, enhancing security against potential DNS leaks.
- Check the boxes next to TCP protocol.
- Click “OK” to finalize all the settings.
Congratulations! You have successfully completed the setup, and now you can fully utilize DataImpulse proxies with ProxyCap.

