Using DataImpulse proxies with Helium Scraper
In the realm of web scraping, dedicated tools open up a world of possibilities. Helium Scraper stands out as a tool that streamlines the web scraping process, making it accessible and user-friendly. However, when it comes to proxies and their integration, this becomes the key aspect to consider in order to ensure a smooth and uninterrupted extraction of valuable data.

Proxy configuration
NOTE: To get started, make sure you have Helium Scraper installed on your computer. You can download it and enjoy a free 10-day trial.
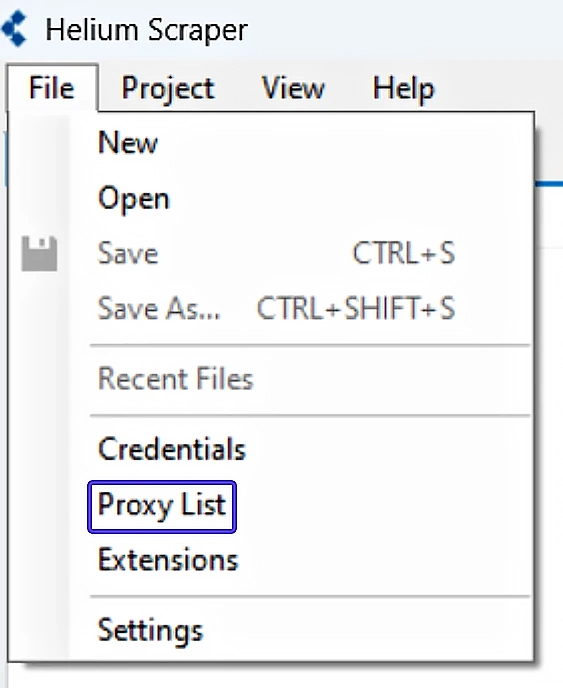
- Open Helium Scraper and click on “File” and then select “Proxy List” from the menu.
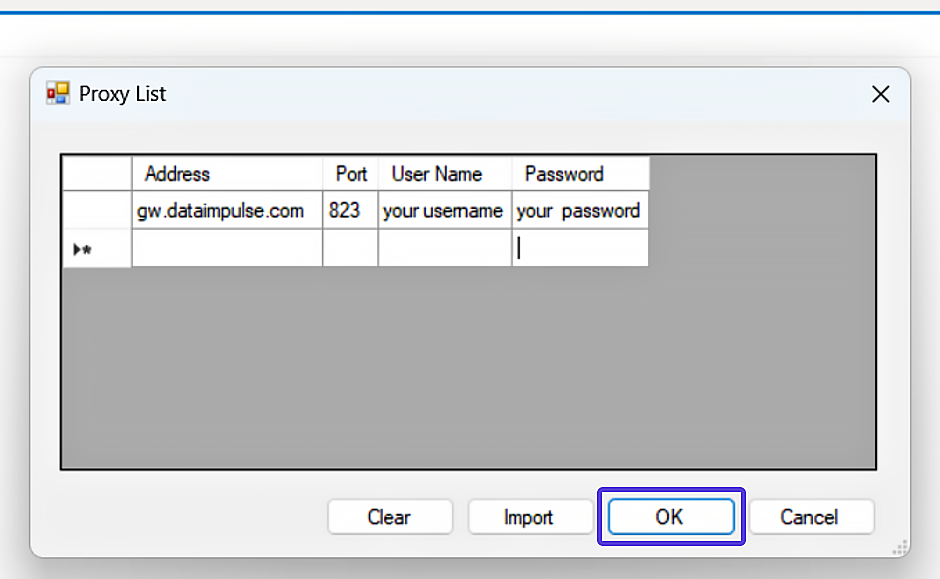
- To configure proxies in Helium Scraper, add this info:
Residential Proxies
Connection type: HTTP proxy
New address: gw.dataimpulse.com
Port: 823
- Enter your DataImpulse proxy user’s Username and Password.
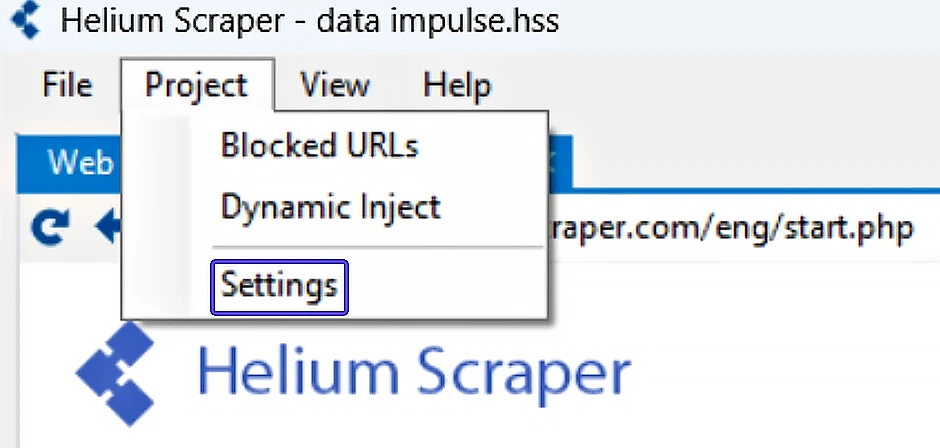
- Now, open the Helium Scraper project you are working on and go to Project>Settings. on the menu. Remember to repeat these steps every time you start a new project.
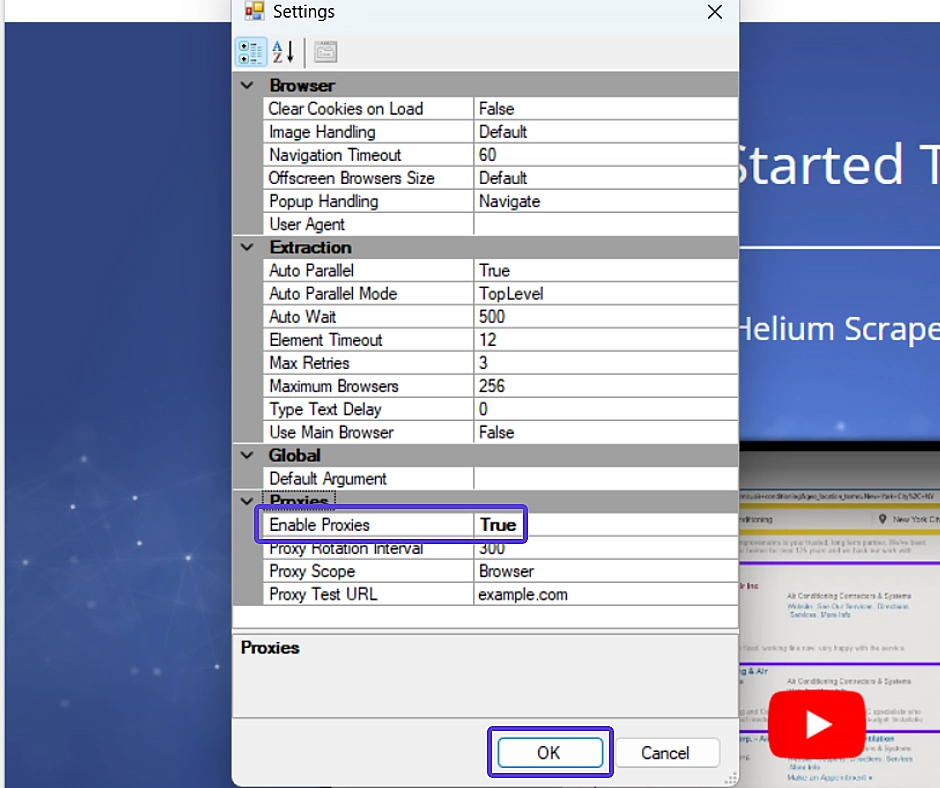
- Change the “Enable Proxies” setting to True and click OK to save the changes.
- To verify the proxy integration, open Helium Scraper’s main browser and visit a website that displays IP addresses. Confirm that the IP address has indeed changed.
Congratulations! You have successfully integrated your DataImpulse proxies with Helium Scraper.


