Setting up a proxy server on Windows 10 and 11
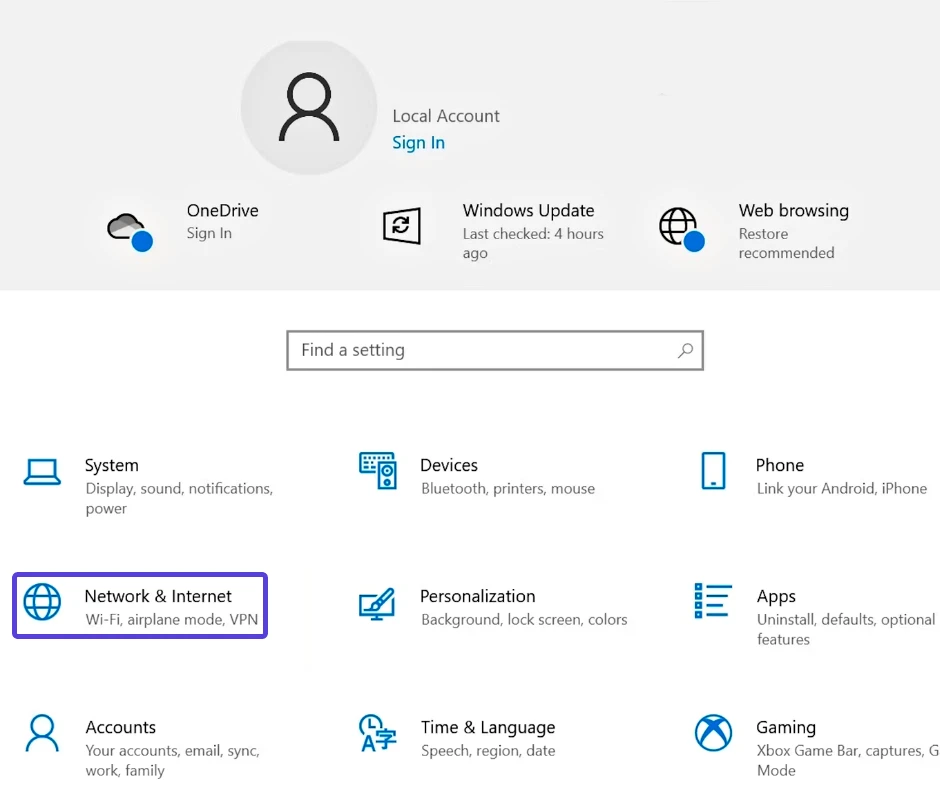
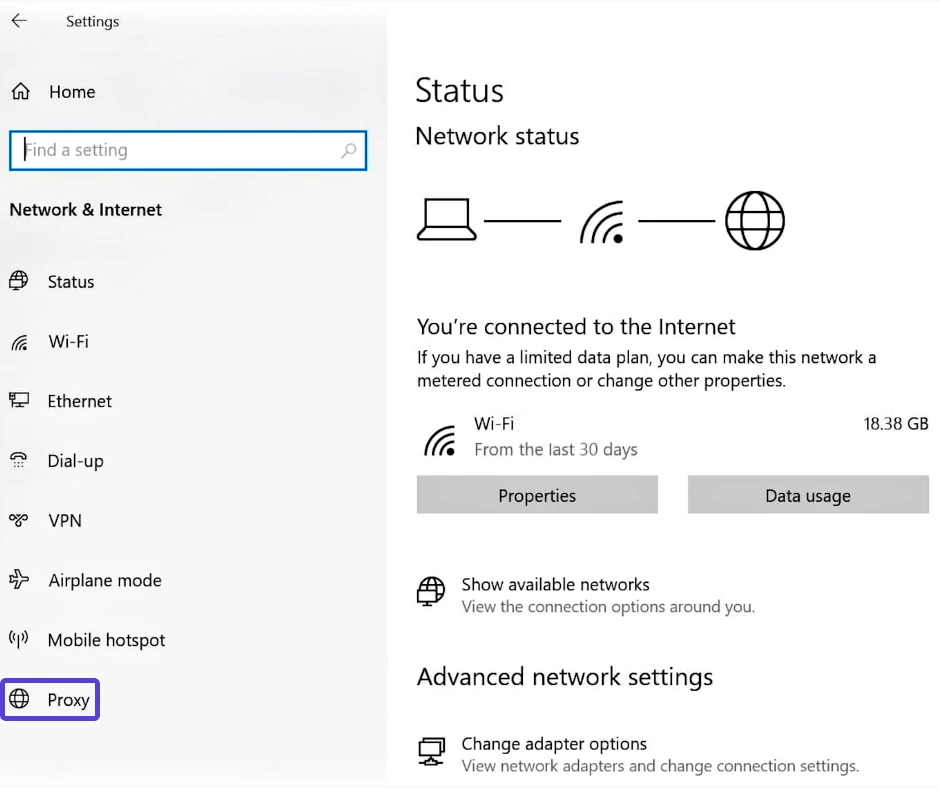
To configure proxy settings on Windows 10 and 11, follow these steps:
- Click on the Start > Settings > Network & Internet > Proxy.
- Windows provides three methods to configure proxy settings: automatic configuration, using a script, or manual configuration.
Automatic proxy setup
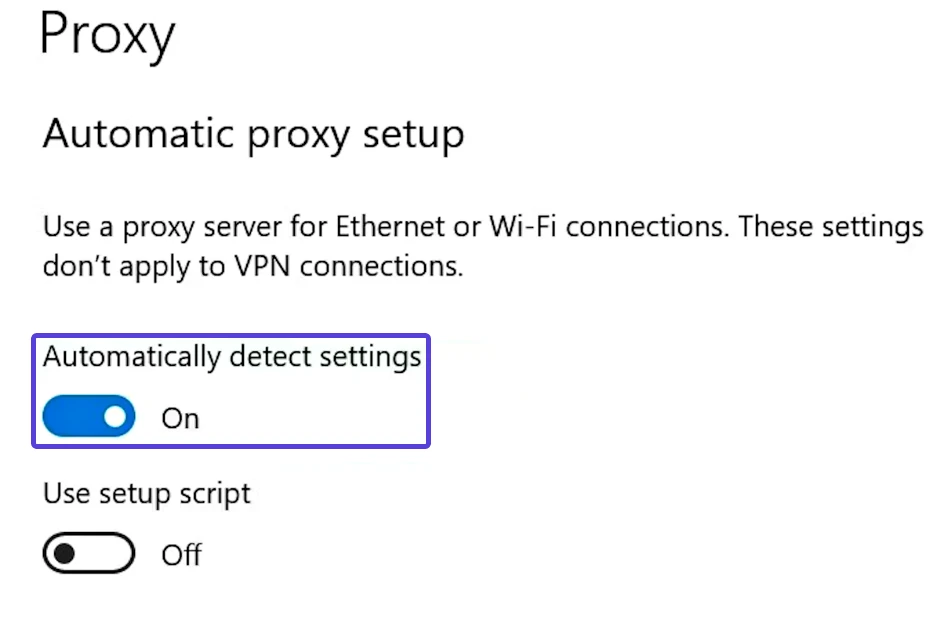
Within the Proxy settings, simply toggle the option to enable Automatic detection of settings.
By enabling this option, Windows will utilize the Web Proxy Auto-Discovery Protocol (WPAD) to automatically detect authorized proxy server settings. This is commonly used by organizations to impose restrictions and safeguard their internal networks, ensuring controlled access and protection of digital assets.
If you are using a personal computer or prefer to manually configure a proxy, you can disable this setting. By turning it off, you can take control of the proxy configuration and input the necessary settings according to your preferences
Setting up a script
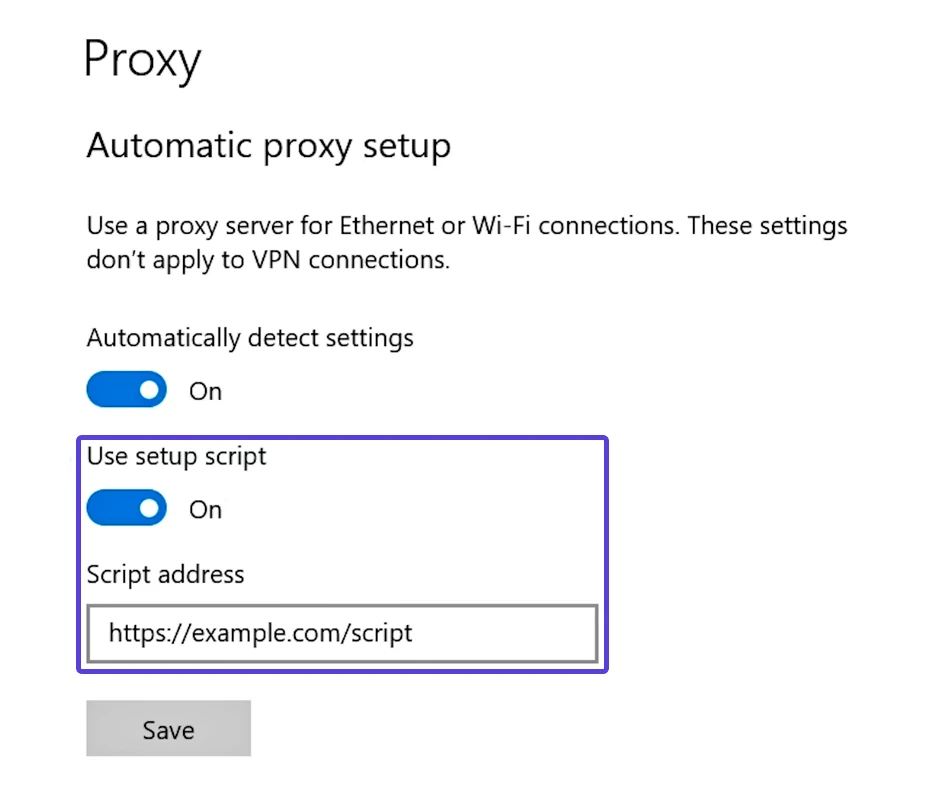
While you are in the Proxy settings, you can enable the “Use setup script” option. By turning this on, you can enter the address of a setup script that will be used to configure your proxy settings.
After you click the “Save” button, the proxy configuration you specified will be imported from a designated list.
Manual proxy setup
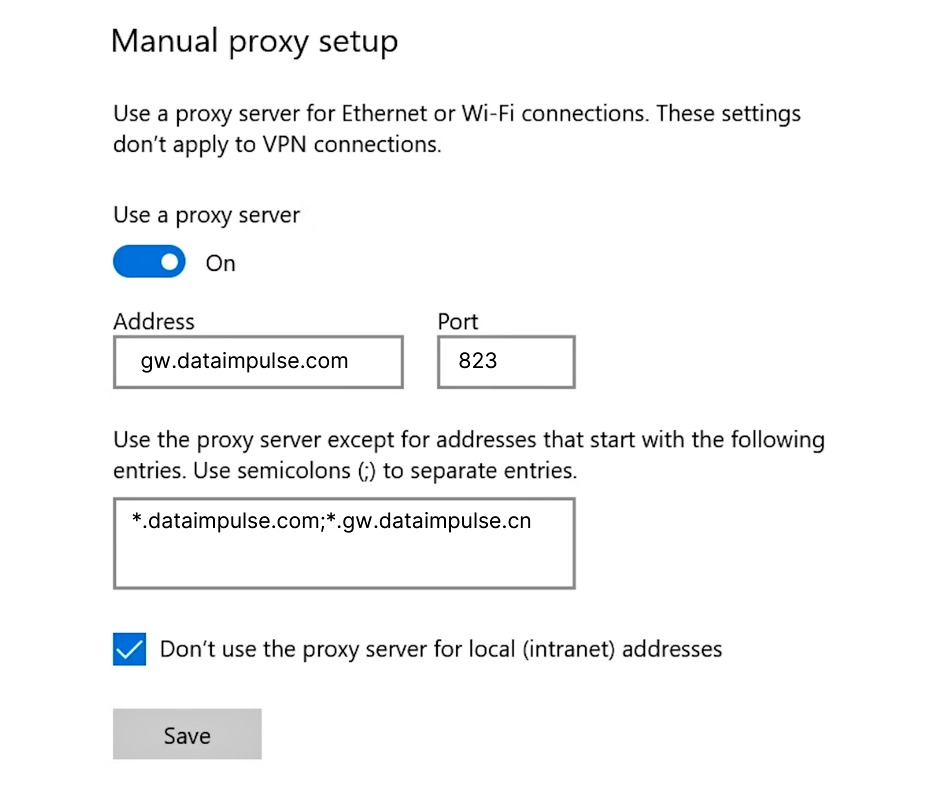
To manually configure a proxy, activate the “Use a proxy server” option and provide the following information:
Residential proxies
Proxy type: HTTP
IP address: gw.dataimpulse.com
Port: 823
Configuring proxies using legacy Windows settings
These steps are applicable to all Windows versions, including Windows 7, 8, and older. They provide more advanced features not available in the Settings app of Windows 10 and 11. To configure proxy settings, follow the steps below:
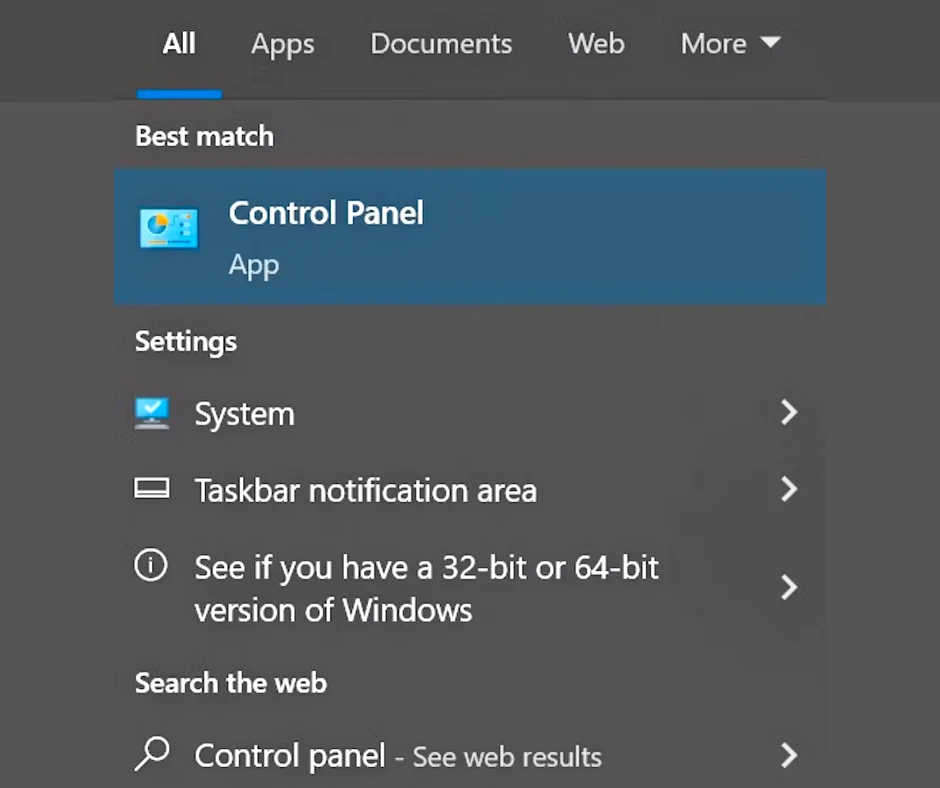
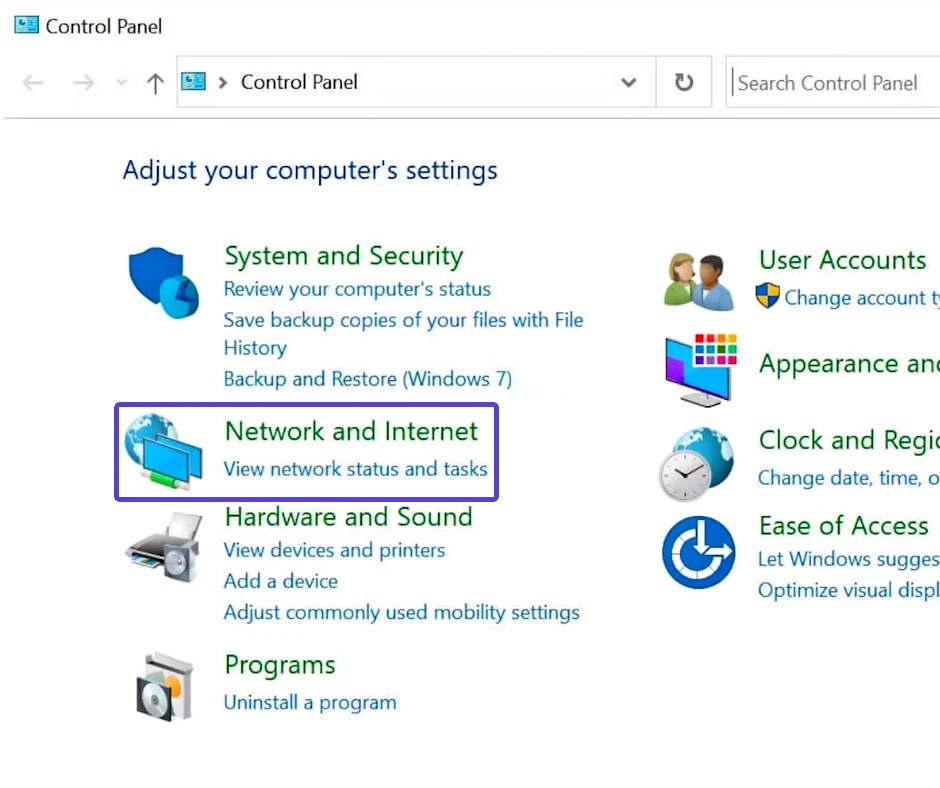
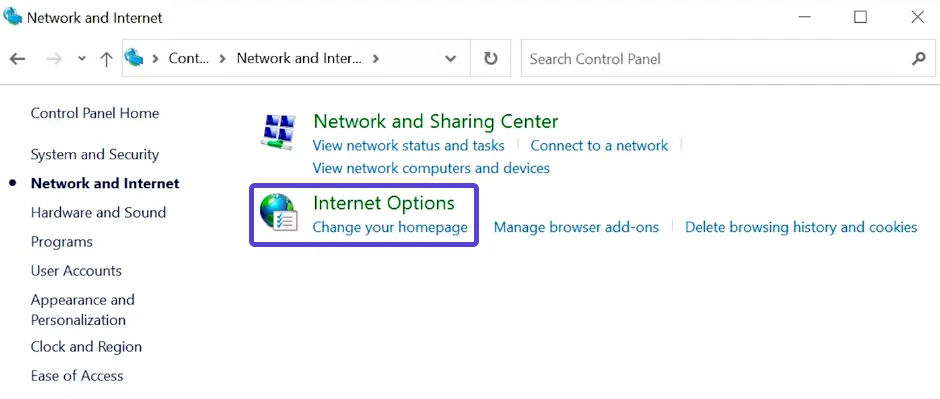
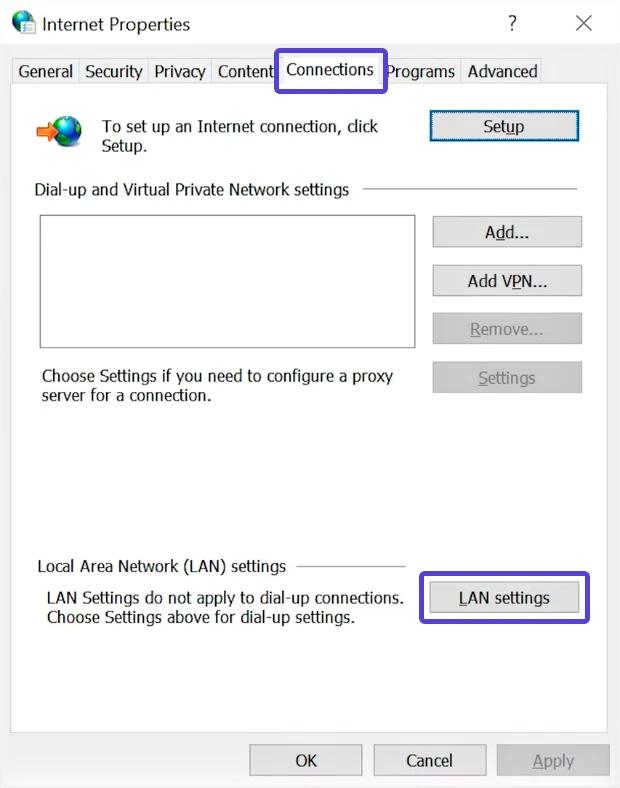
- Press Control Panel > Network and Internet > Internet Options.
- In the Internet Properties window, go to the Connections tab and click on LAN settings.
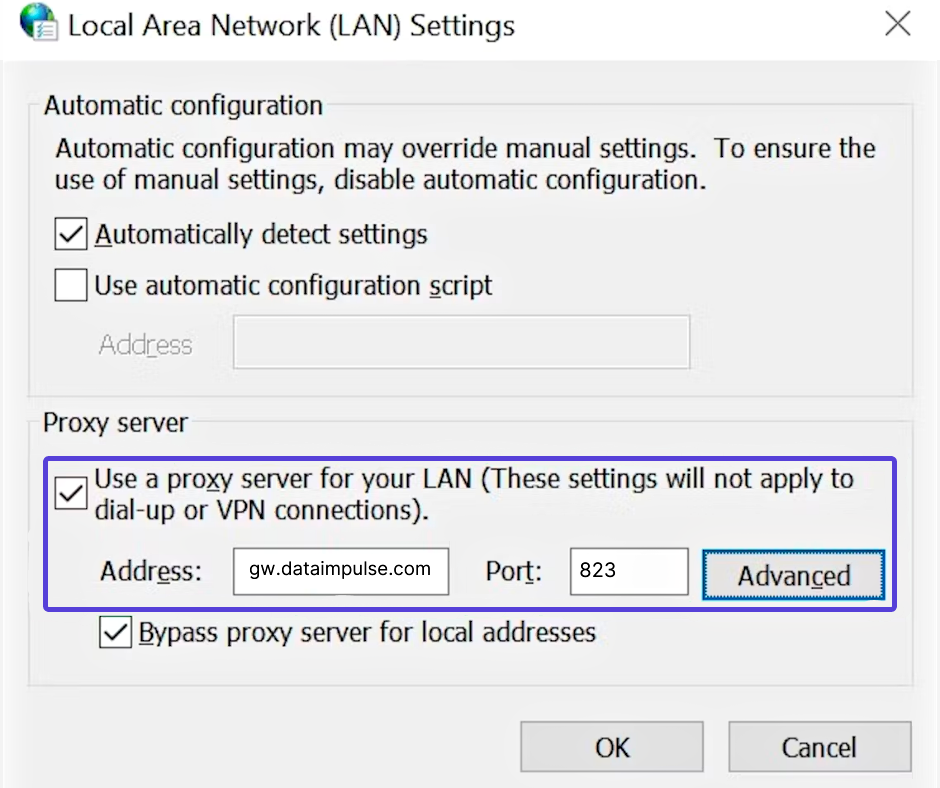
- Check the “Use a proxy server for your LAN” option and click on “Advanced”.
- Enter your proxy details. For more specific DataImpulse proxy configuration instructions, please refer to the previous section.
You also have the option to specify the proxy type (HTTP or SOCKS). These proxy settings align with the settings mentioned in the previous section and apply system-wide. If you fill in a field here, it will also be reflected in the Settings app for Windows 10 & 11 users.
- Open a web browser to authenticate your proxy settings. Enter your DataImpulse sub-user’s credentials and sign in. Use the same credentials you provided when creating a new sub-user in the DataImpulse dashboard.
Everything is ready! You can now start browsing the internet using the proxy connection.

