Effortless FoxyProxy Setup Guide
In the ever-evolving world of browsers, where speed and security have seen remarkable advancements, it’s easy to overlook the stagnant nature of certain tools like tabs and bookmarks. However, rejoice, for a new champion has emerged in the realm of browser extensions – FoxyProxy.
With FoxyProxy, proxies become a seamless extension of your browser, opening up a world of possibilities previously unattainable. Unleash the power of FoxyProxy, and discover a new level of innovation, utility, and fulfillment for the savvy software enthusiasts among us.

Discover the Power of FoxyProxy in Google Chrome:
While Firefox provides built-in proxy server configuration options, Google Chrome takes a different approach by directing users to system-level settings, omitting basic proxy configuration features. At first glance, this may seem like an oversight, but could it be a clever collaboration between Chrome and FoxyProxy? Now, it’s time to unlock the full potential of FoxyProxy and configure this remarkable extension in Chrome. Experience a new level of proxy management and take control of your browsing experience like never before.
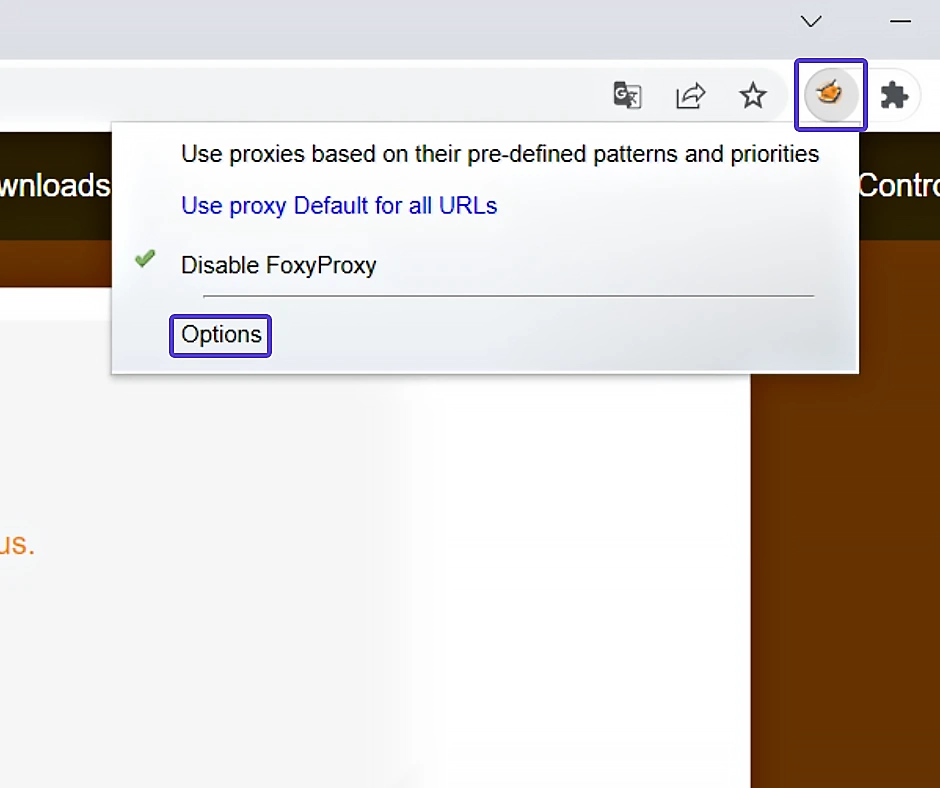
- Click on the extension icon and select “Options“.
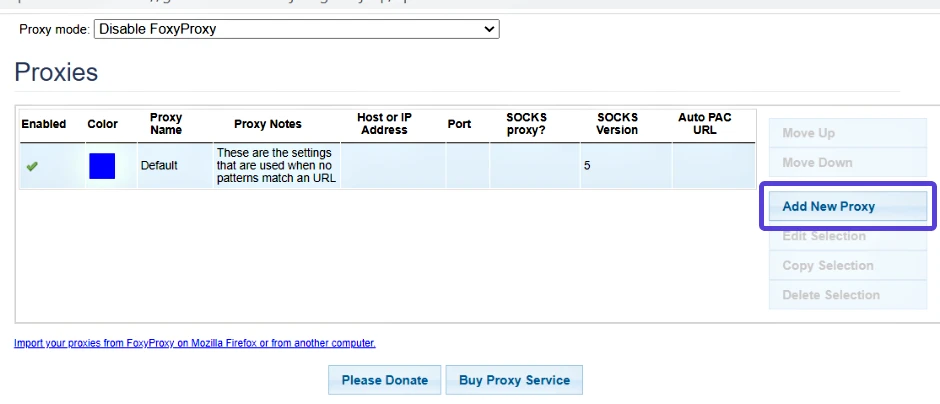
- Click “Add New Proxy” and choose “Manual Proxy Configuration“.
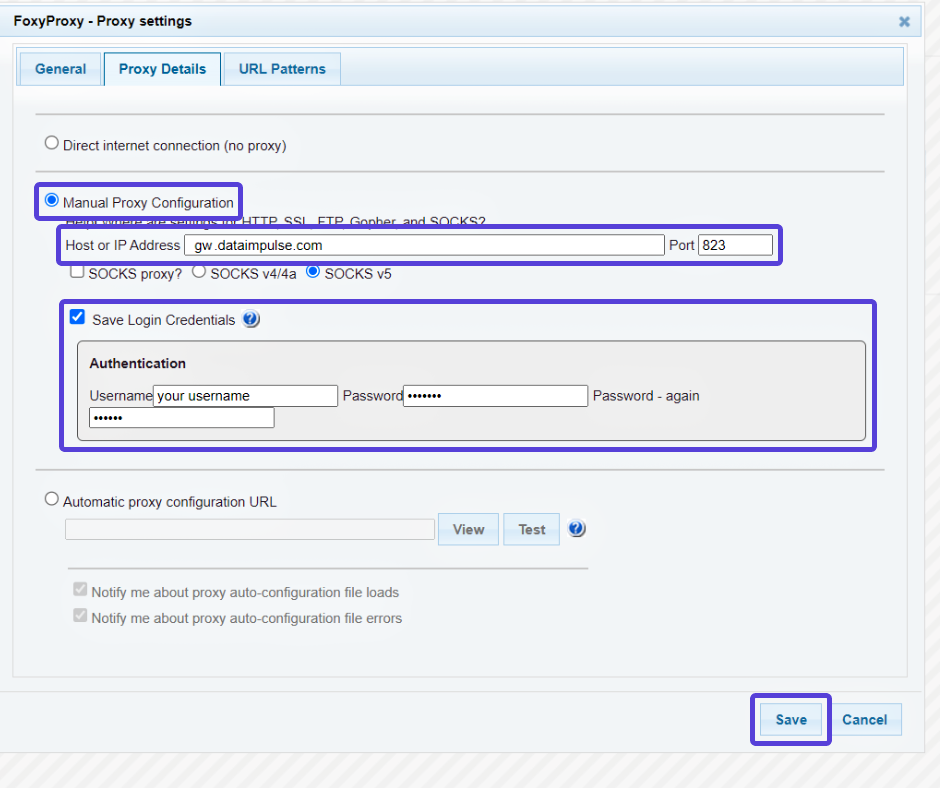
- Fill in the proxy settings and your account info, including your DataImpulse user’s Username and Password. If you have whitelisted IPs, no need to enter login credentials.
For Residential Proxies:
Proxy type: HTTP
Proxy host: gw.dataimpulse.com
Proxy port: 823
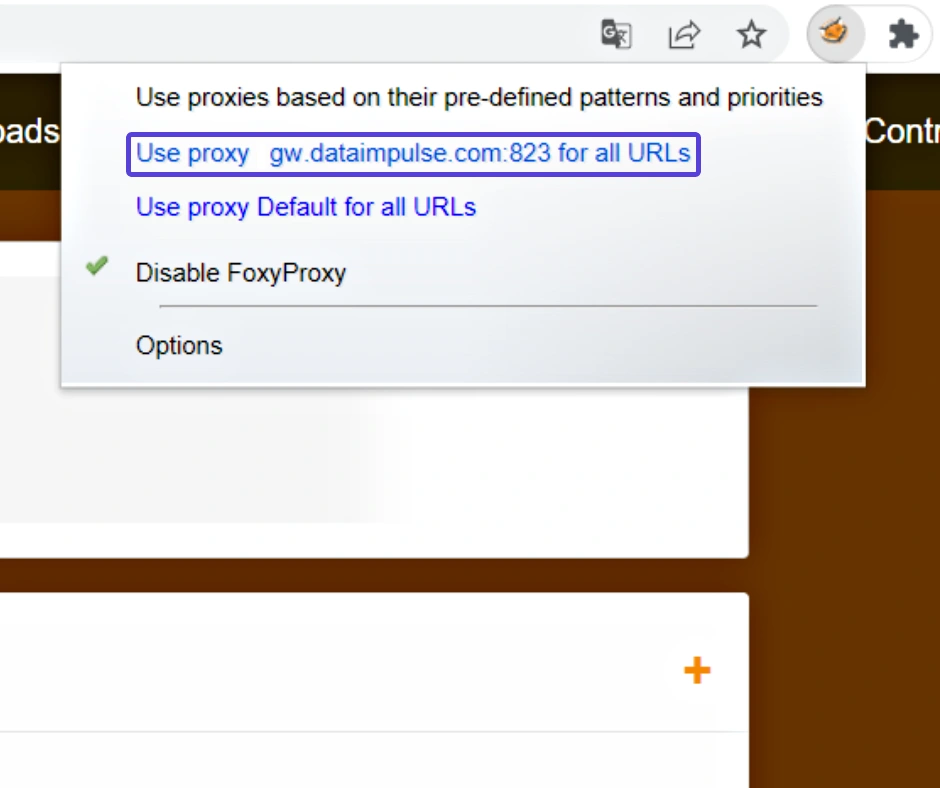
- Save your proxy server profile by clicking on the “Save” button. To enable a proxy server, open the FoxyProxy extension icon and select your desired proxy profile from the dropdown menu.
You’re now ready to enjoy the benefits of using proxies with FoxyProxy.
Unleash Its Power in Mozilla Firefox
Unlike Chrome, Mozilla Firefox empowers its users with built-in proxy configuration capabilities and advanced automation options. But fear not, for setting up FoxyProxy on Firefox is just as straightforward as on Chrome. Experience the full potential of FoxyProxy and follow these simple steps to get started. Embrace a world of seamless proxy management and customization like never before.
- Install the FoxyProxy extension and access its menu by clicking on the icon. Select “Options” to proceed.
- In the Options window, click on the “Add” button on the left to open the proxy settings.
- Fill in the necessary proxy details and your account information.
To use DataImpulse proxies, enter your DataImpulse user’s Username and Password. Make sure to use the same credentials you used when creating a new sub-user in the DataImpulse dashboard. If your IPs are whitelisted, login details are not required.
- After saving the settings, click on the FoxyProxy extension icon and choose your desired proxy profile from the drop-down menu.
With FoxyProxy, enjoy a seamless browsing experience and unleash the power of proxy management with ease in Mozilla Firefox.


