How to Configure Proxy Settings on Your Mac
MacOS devices are known for their sleek design, user-friendly interface, and strong focus on security. You can configure a proxy server on your macOS device if you want better privacy or smoother access to content.
A proxy acts as a bridge between your device and the internet, masking your IP address. Setting up a proxy server on macOS is simple and can help you browse safely or operate in line with geo-related access policies. Follow this step-by-step guide to configure a proxy on your macOS device.

Instructions to Activate a Proxy Server on macOS
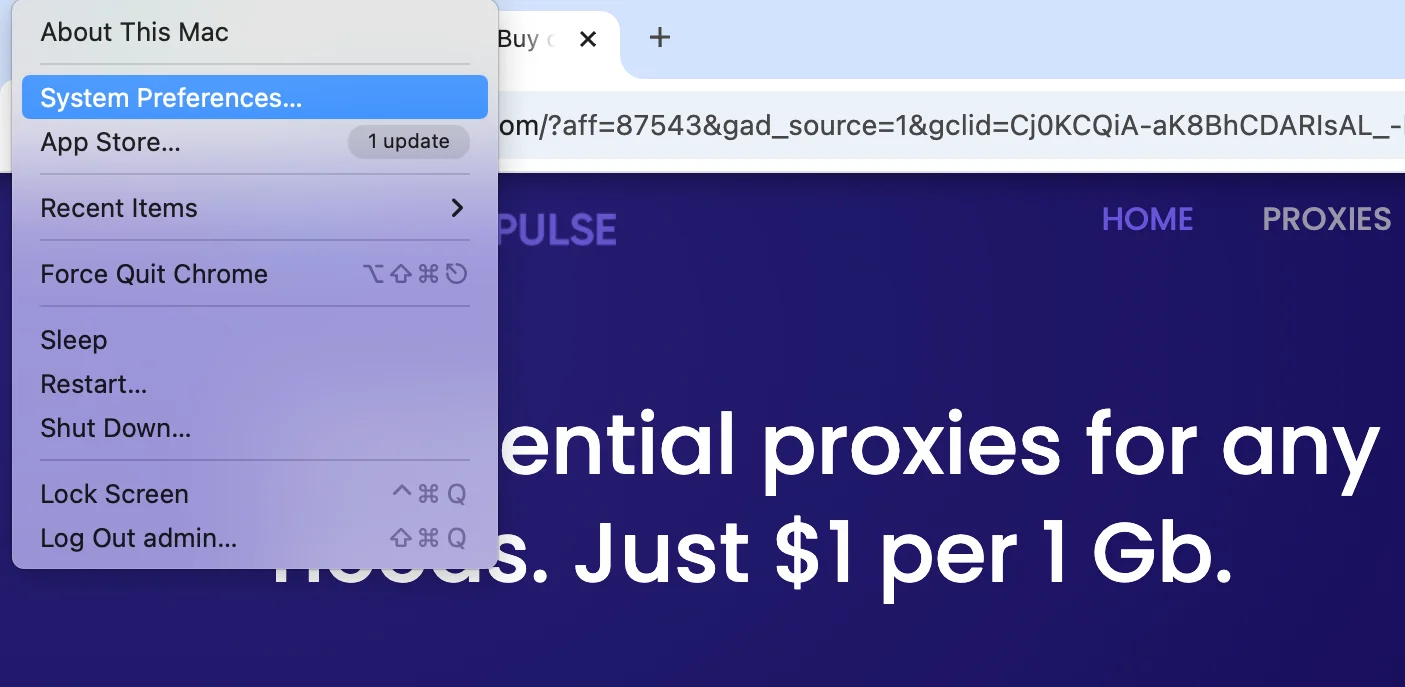
1. Click on the Apple menu in the top left corner of the screen and select System Preferences.
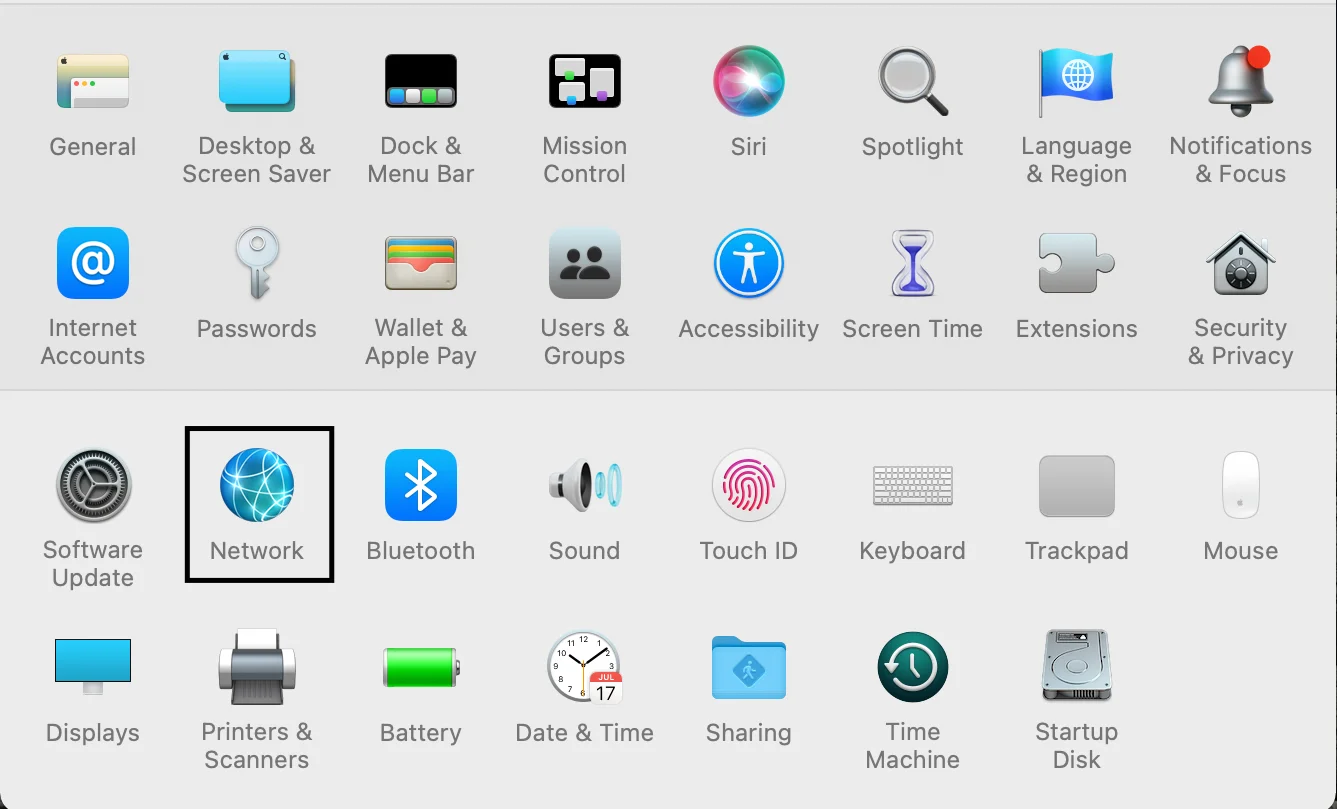
- Choose the Network panel icon.
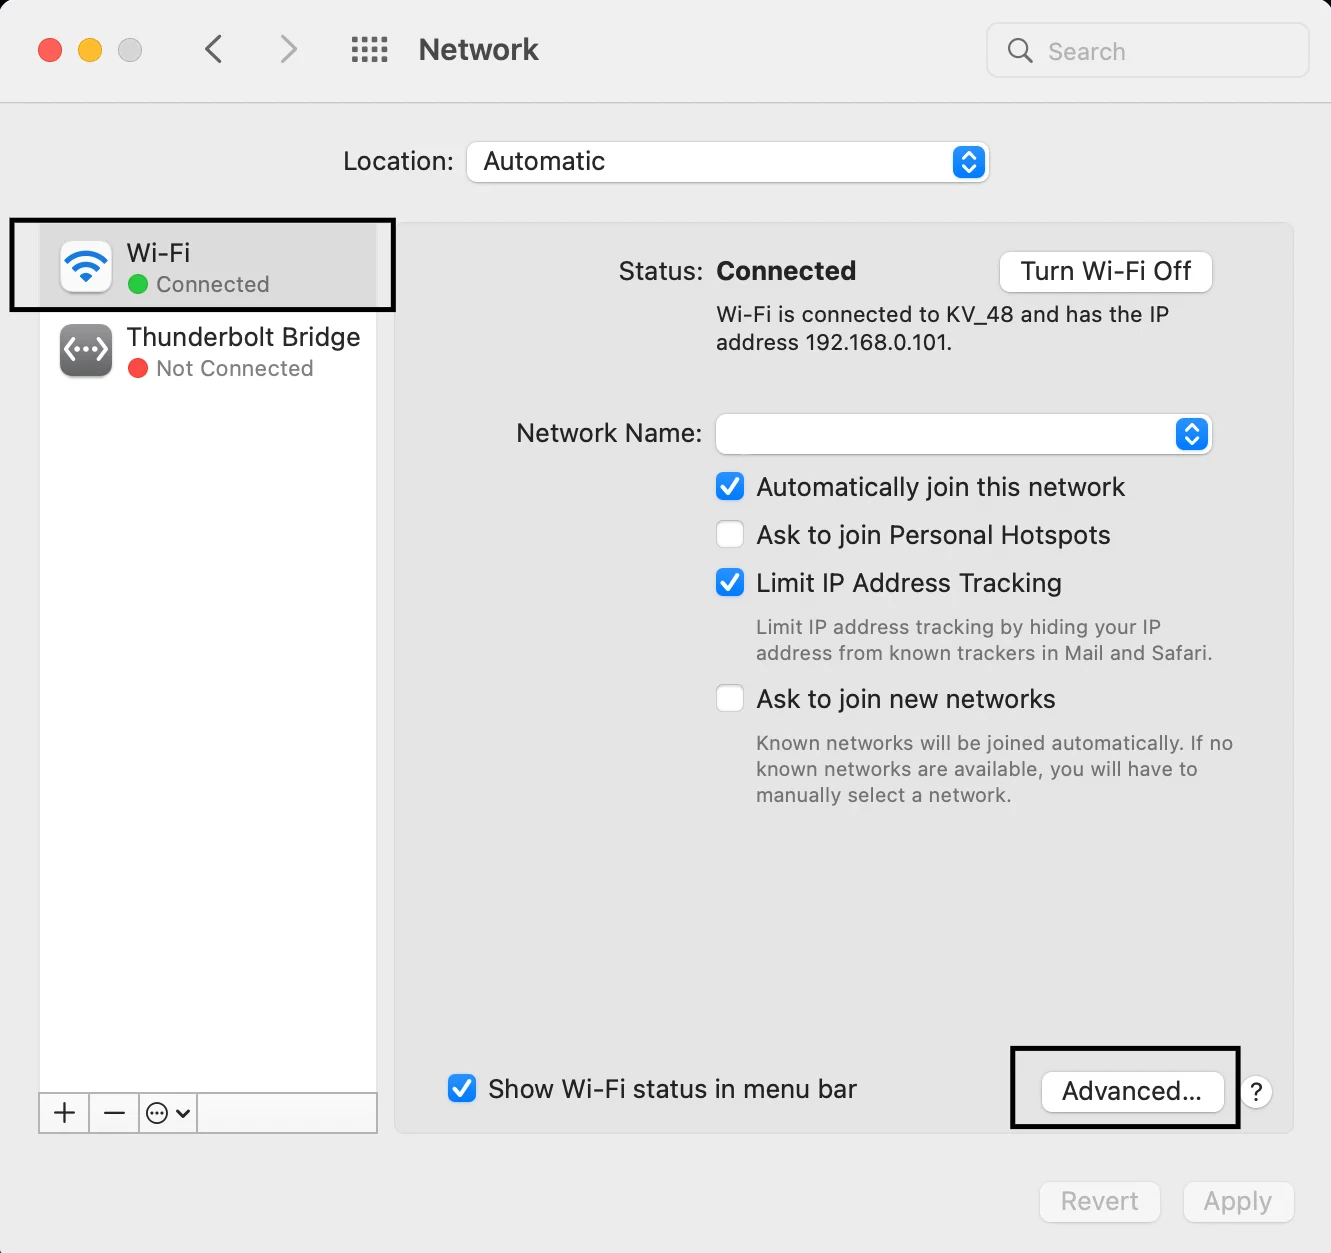
3. From the left-hand list, choose the network you are connected to (e.g., Wi-Fi or Ethernet). Click on the Advanced button in the bottom-right corner.
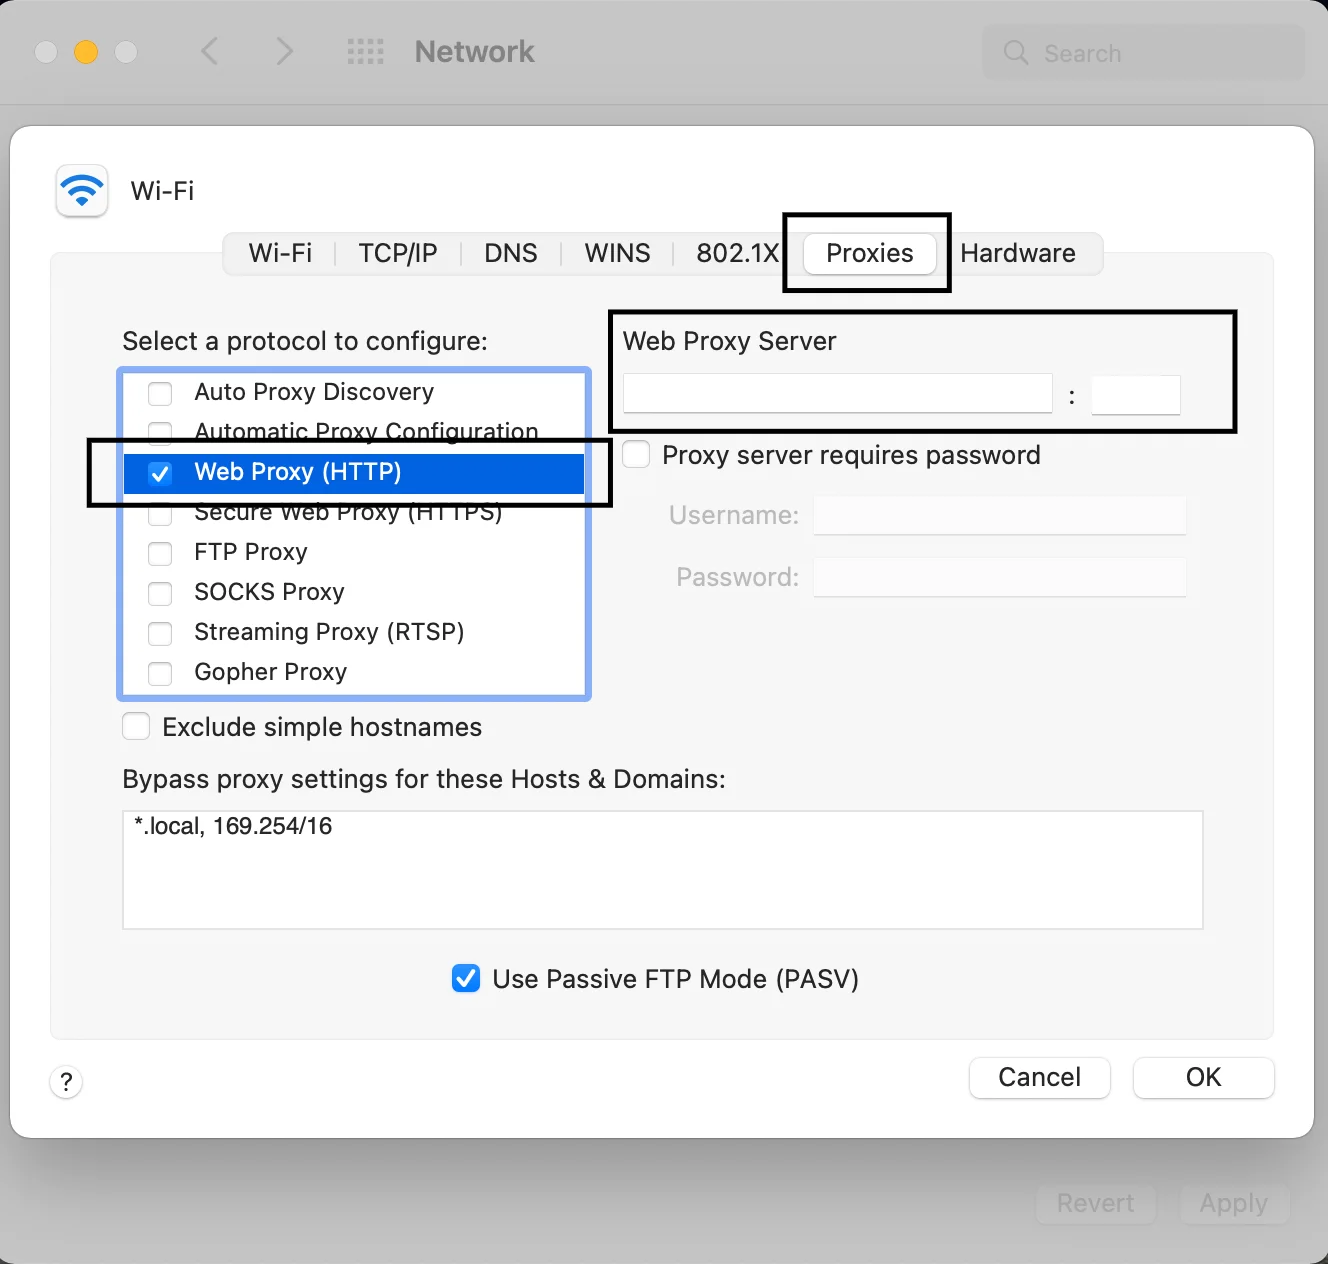
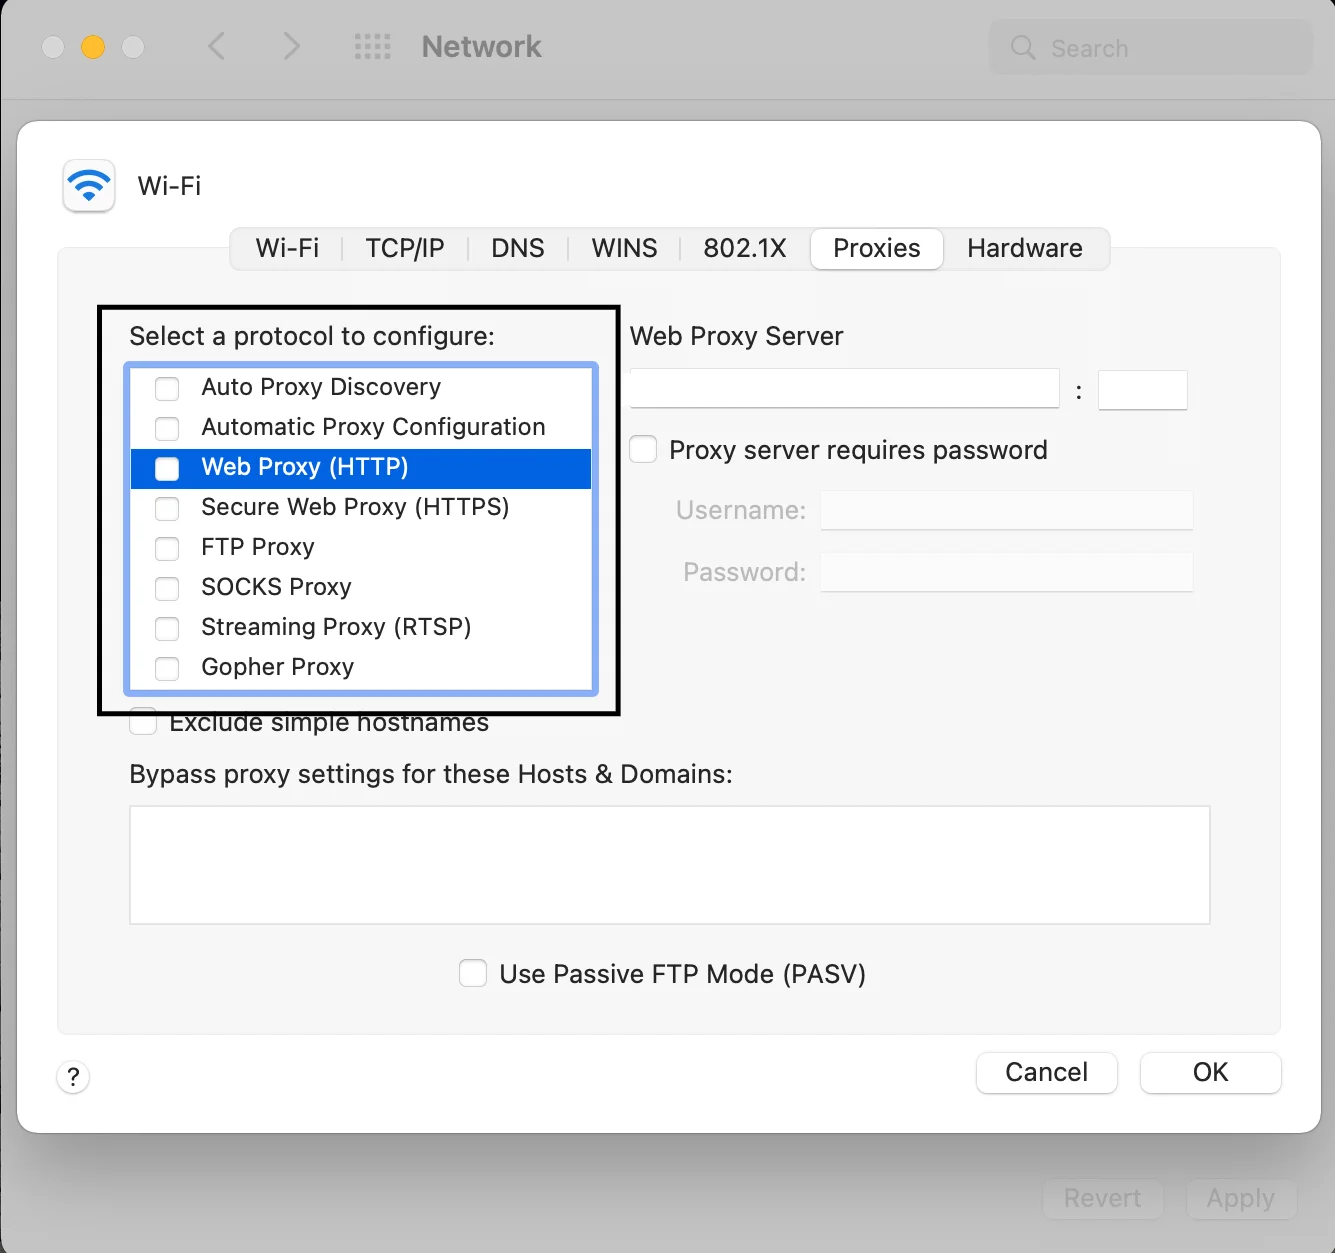
4. In the Advanced settings window, click the Proxies tab at the top. You will see a list of available proxy protocols on the left (e.g., HTTP, HTTPS, SOCKS5). Choose the proxy for your specific aim:
-
- HTTP (Web Proxy) for general browsing.
- HTTPS (Secure Web Proxy) for encrypted connections.
- SOCKS Proxy for advanced applications.
5. Under Web/Secure Web/SOCKS Proxy Server, input your proxy details such as server address and port number provided by DataImpulse. To access your DI dashboard or to get started, read our guide.
- For each setting, specify the address and port of the proxy server.
- Proxy: gw.dataimpulse.com
- Port for Rotating HTTP/HTTPS: 823
- Port for Rotating SOCKS5: 824
- Port for Sticky HTTP/HTTPS : 10000
- Port for Sticky SOCKS5 : 10000
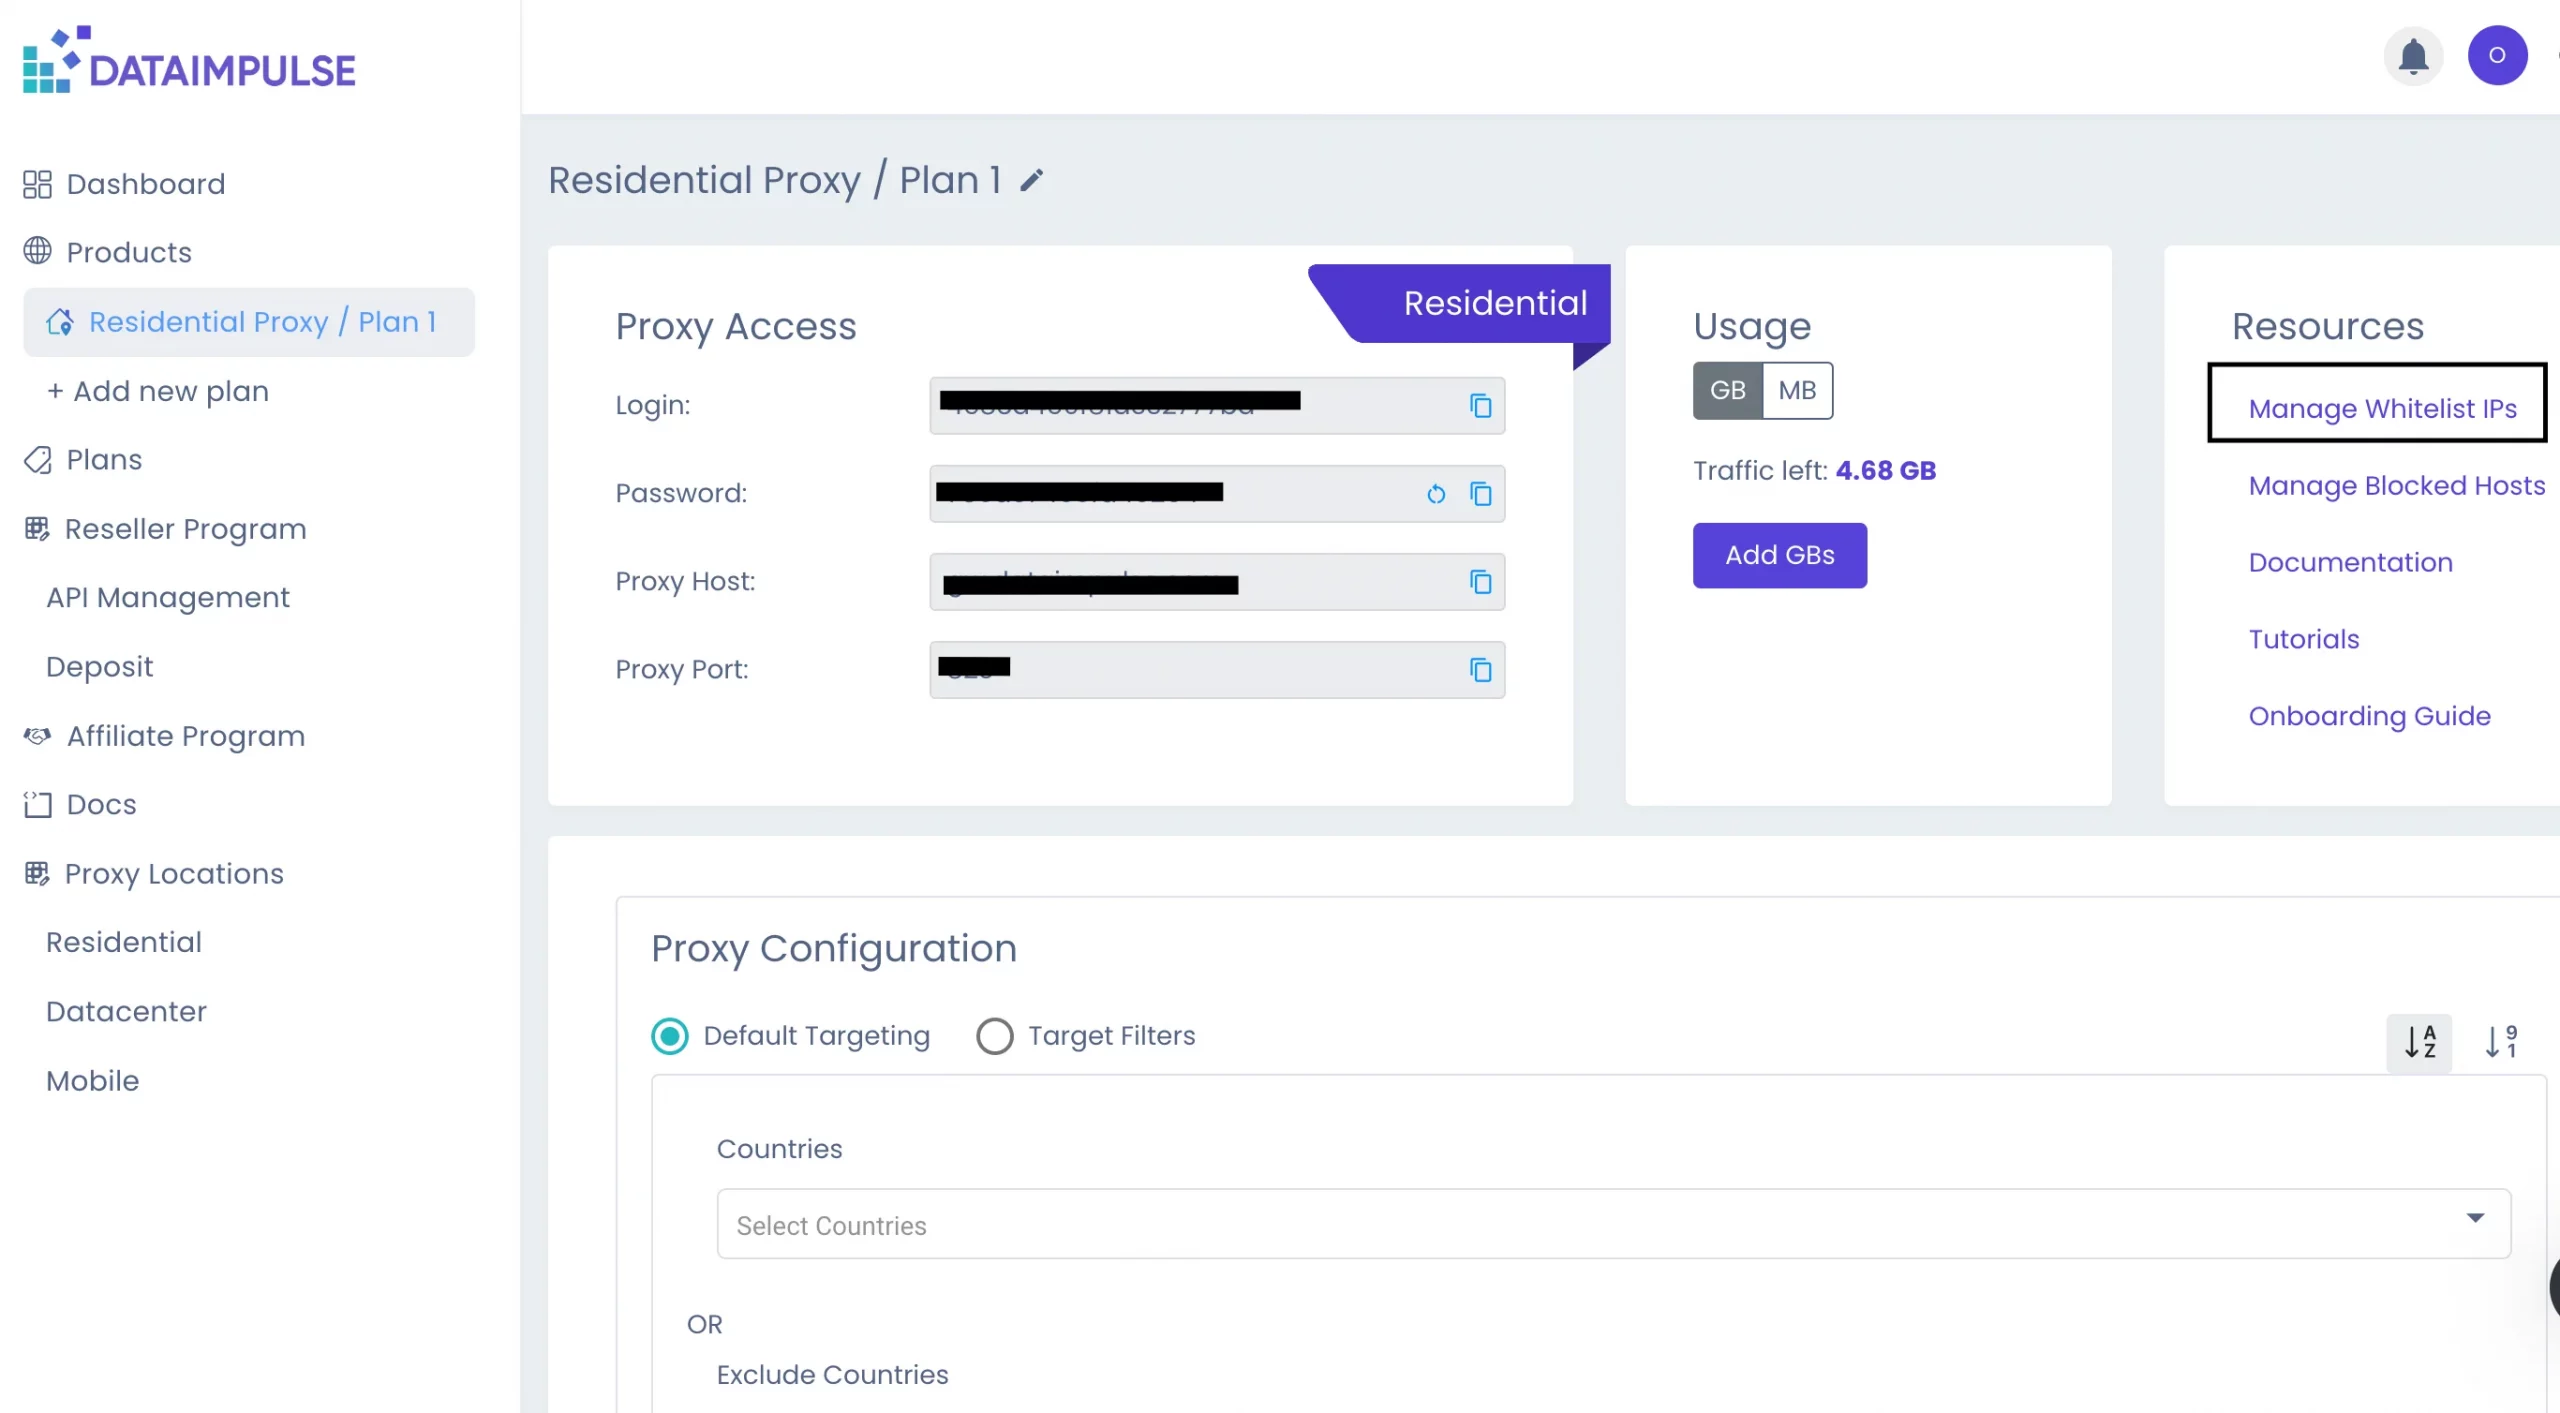
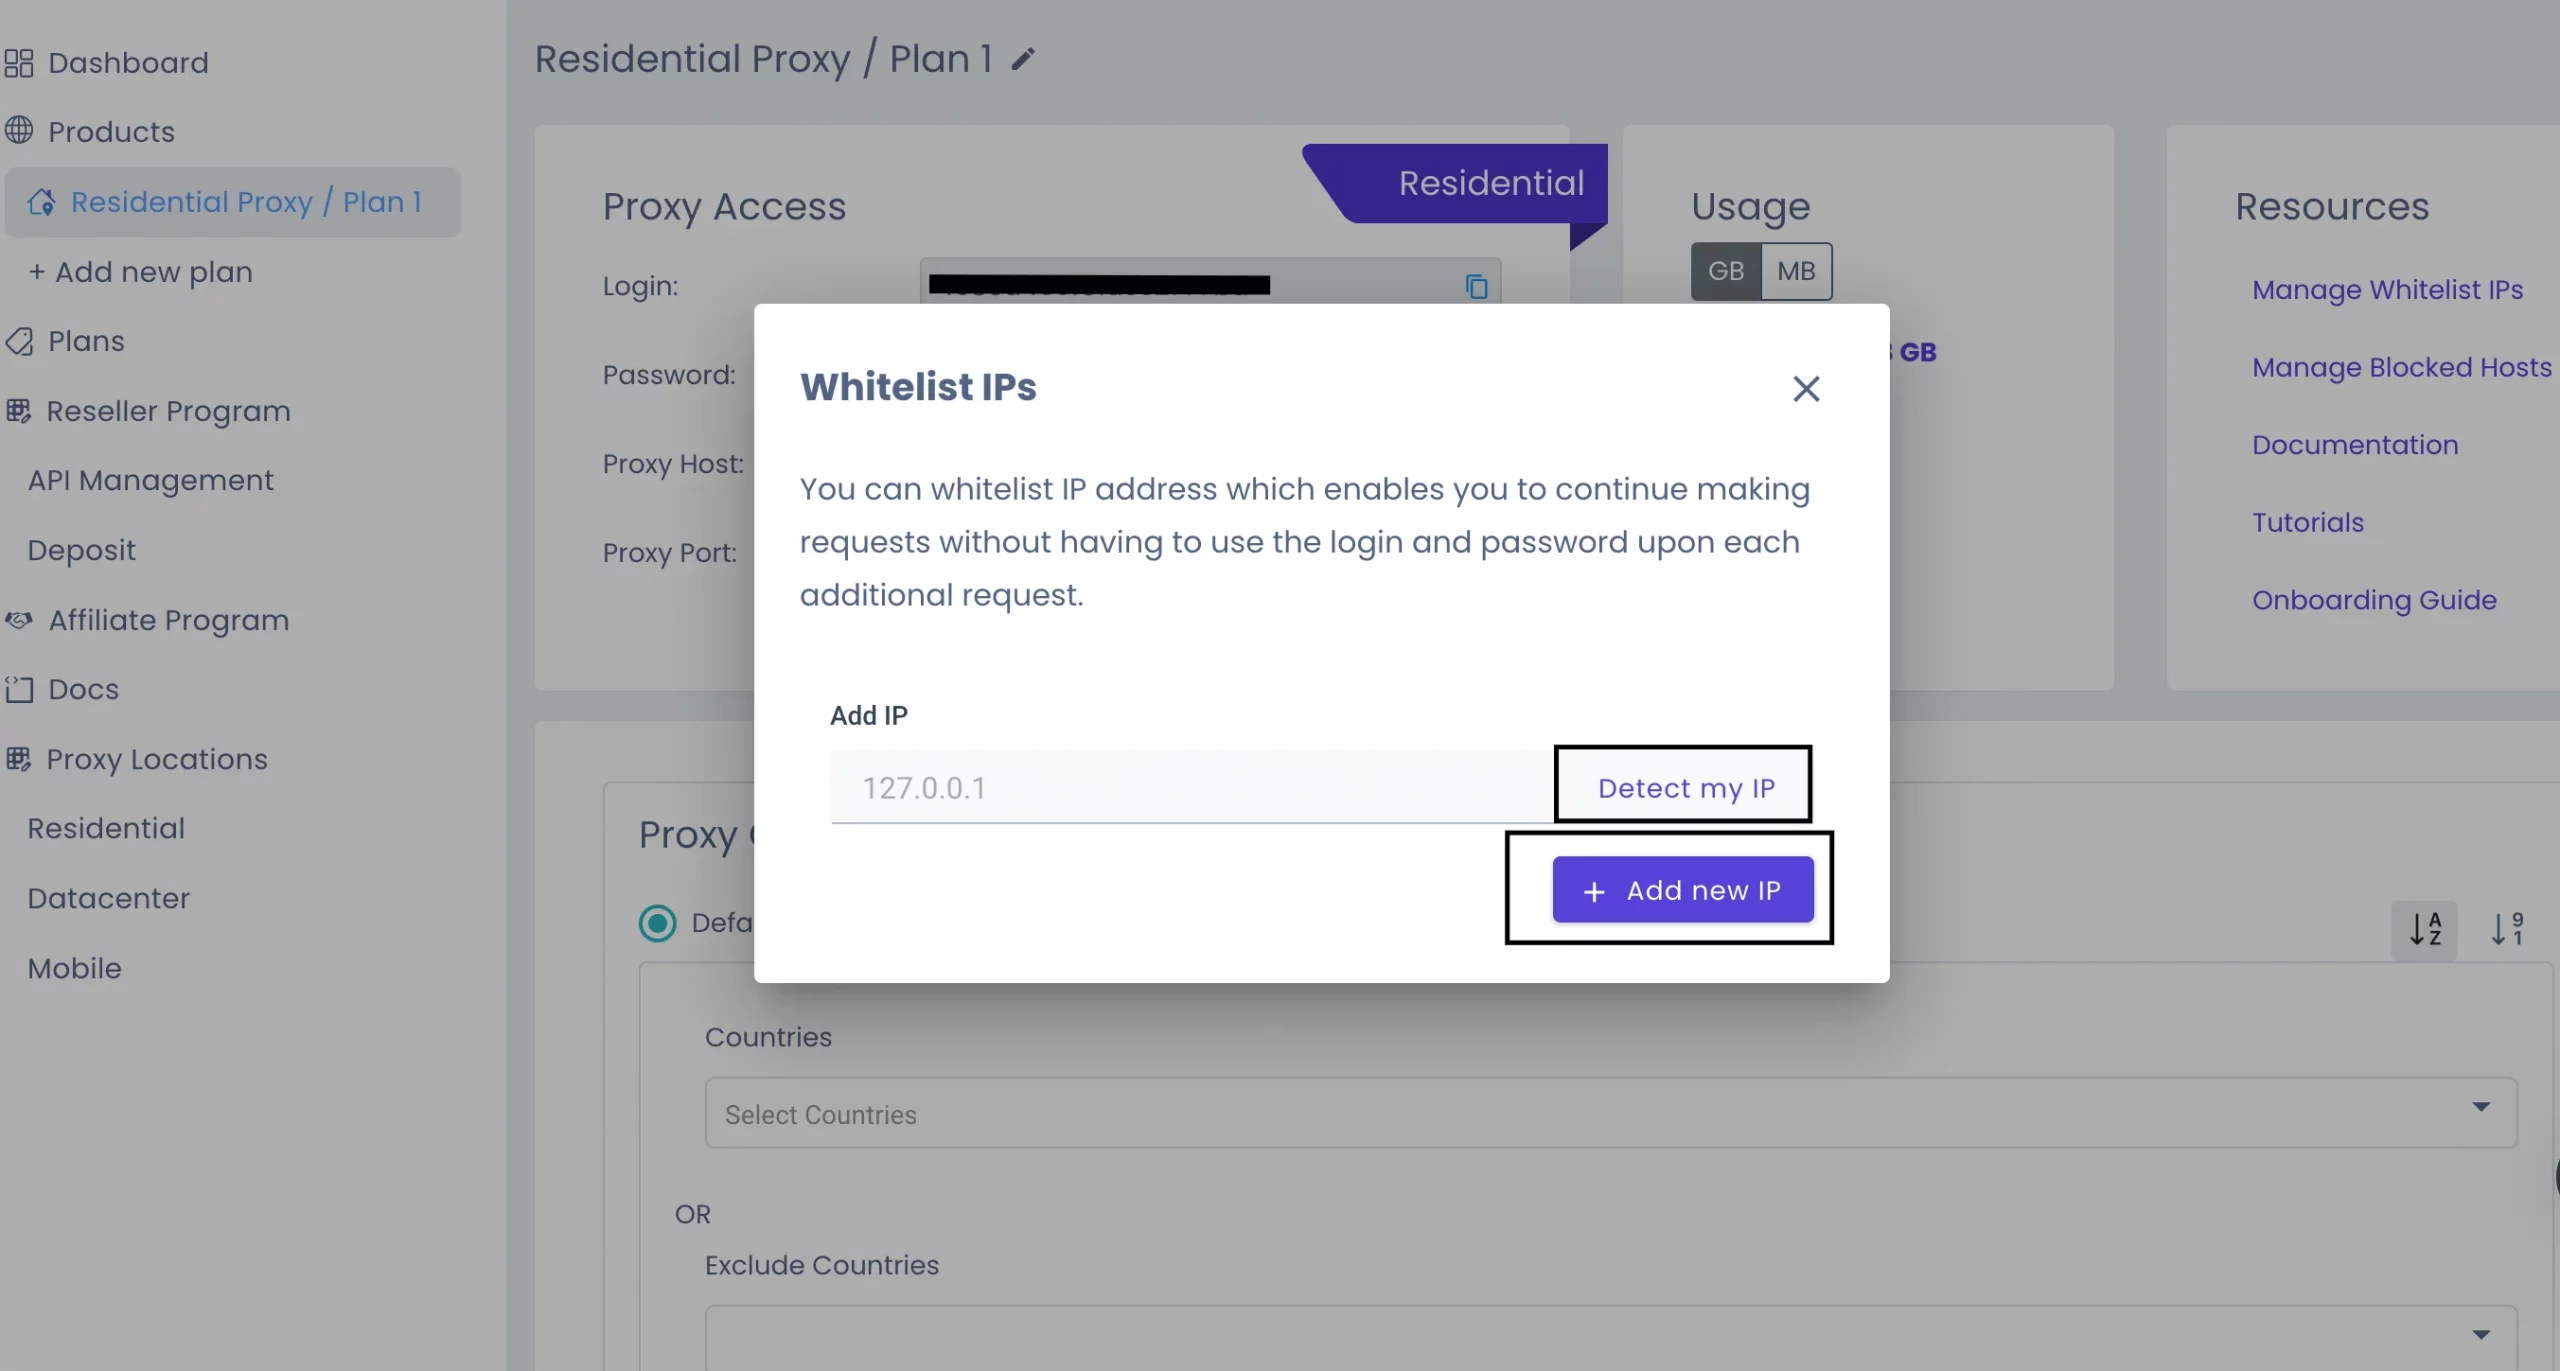
*Access your DataImpulse dashboard and go to the “Manage Whitelist IPs” section. Click “Detect my IP” and then select the “Add new IP” button. Once this is done, all your device’s traffic, including browser and app data, will route through the proxy server. You can also set this up at the start. Keep in mind that after whitelisting your IP, the system might need a moment to process the changes. If prompted for credentials when going online, you can dismiss the request—it should still work correctly.
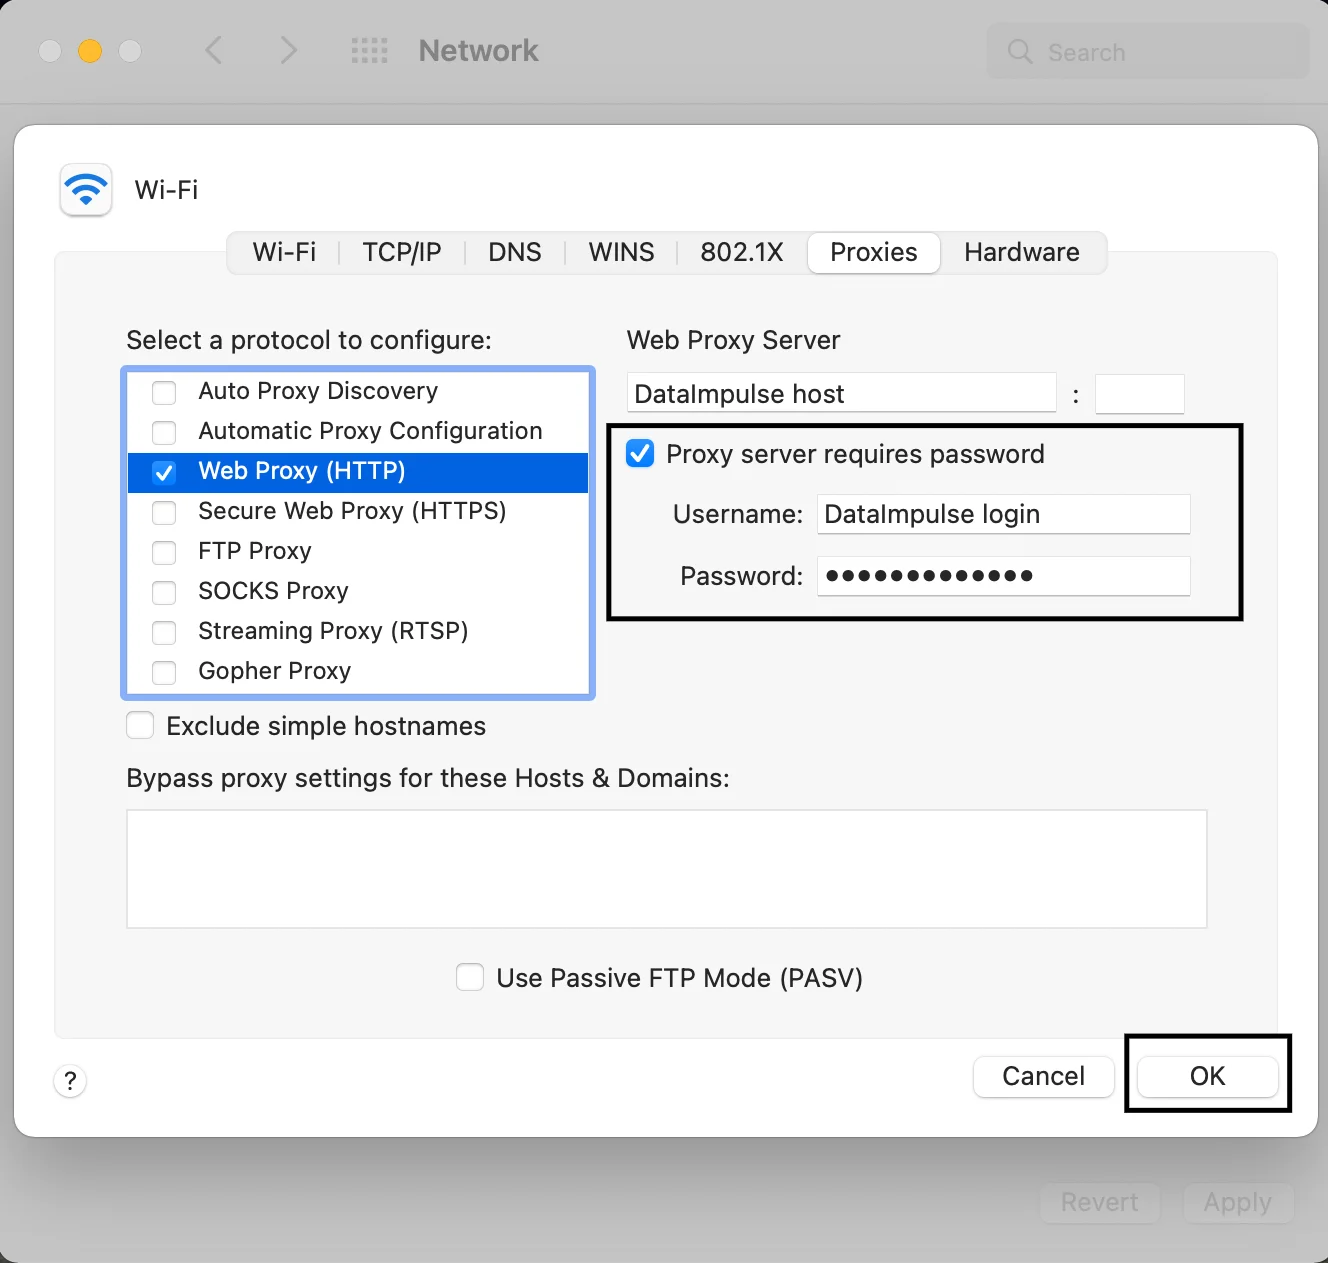
- If a proxy server username and password were provided, the “Proxy server requires password” option must be enabled.
8. After enabling the option, enter your Username and Password. Once you have completed all the setup steps, click OK to confirm and then Apply to activate the settings.
That’s it – you are now using a proxy on your macOS device. Well done!
How to Deactivate Proxy Settings on macOS
To return to the default proxy settings, you need to make sure that all◻️ checkboxes are cleared.
Setting up and turning off proxy settings on your Mac device is easy, as you can see. If you’re interested in exploring other integration options or want to learn about a particular tool, check out the integration tutorials available on this page.

