In this Article
If you want to try our proxies, this comprehensive guide will be incredibly helpful for you. Here you will find information about how to join our community, along with an overview of our user-friendly dashboard and sections it includes.
Hope you’ll find this guide both informative and easy to understand. Let’s start.
Main Steps to Sign Up:
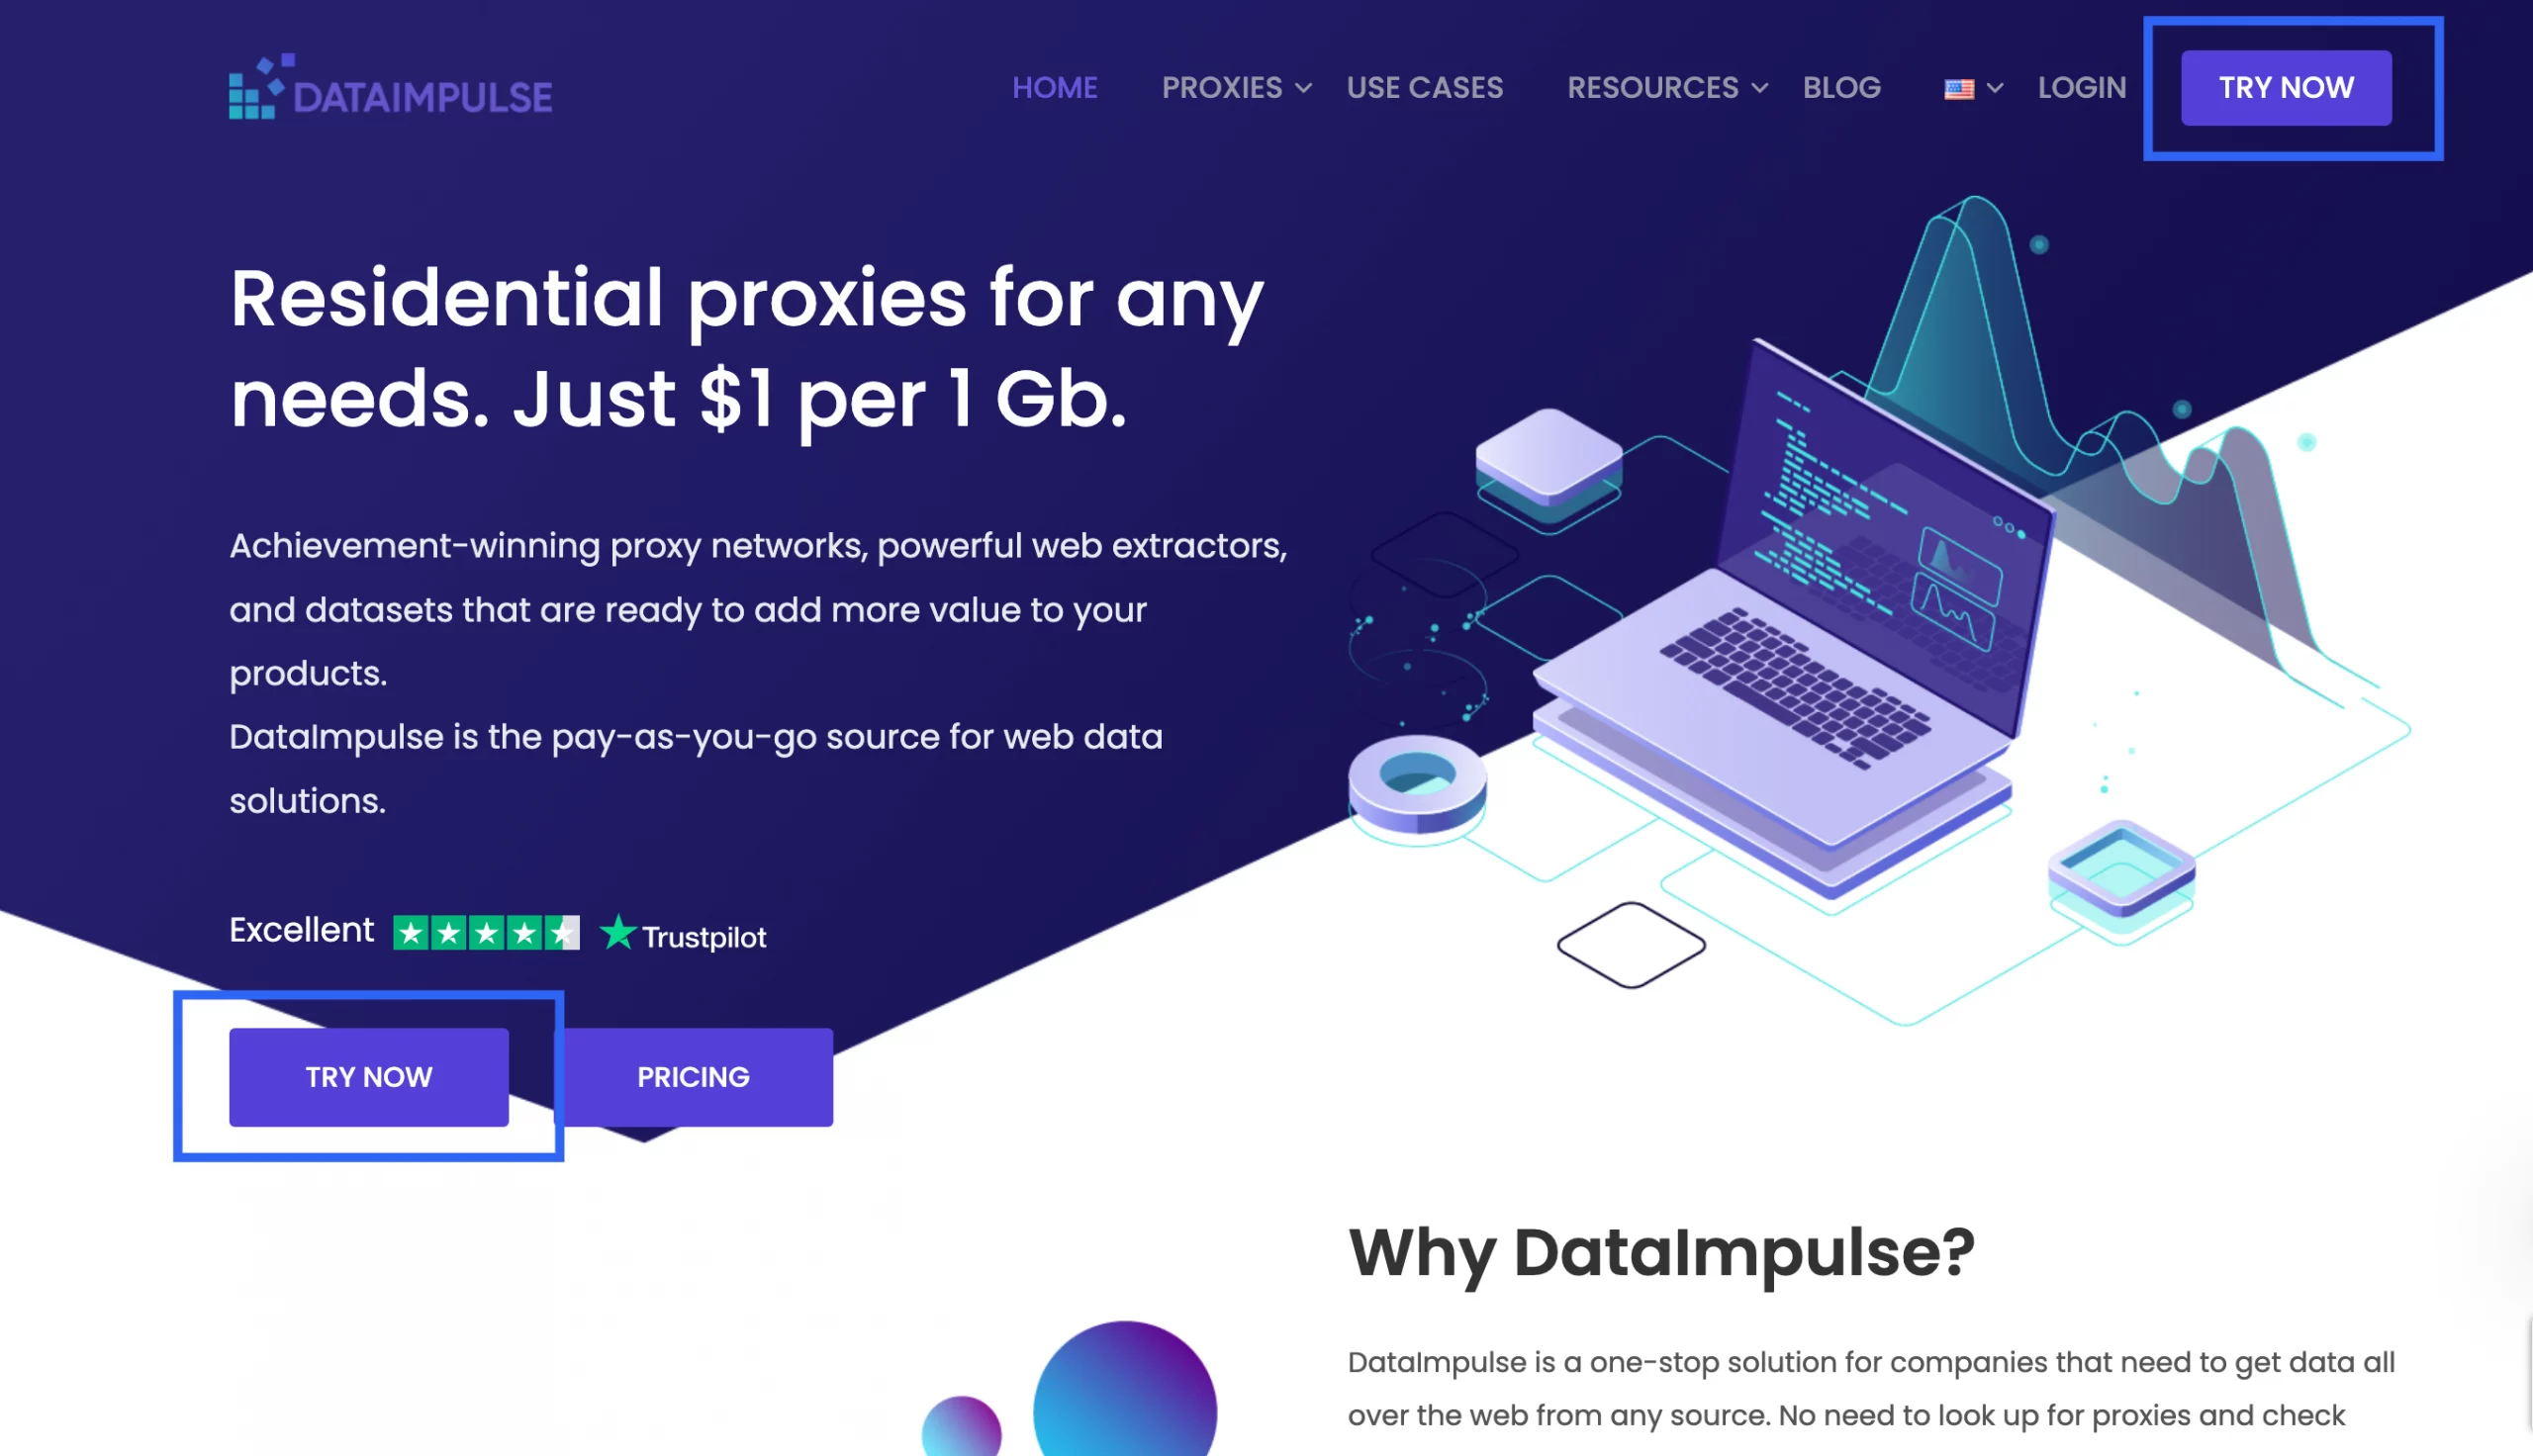
1. To start with DataImpulse, go to dataimpulse.com and press the “Try now” button in the top right corner of the screen or in the bottom left corner of the screen.
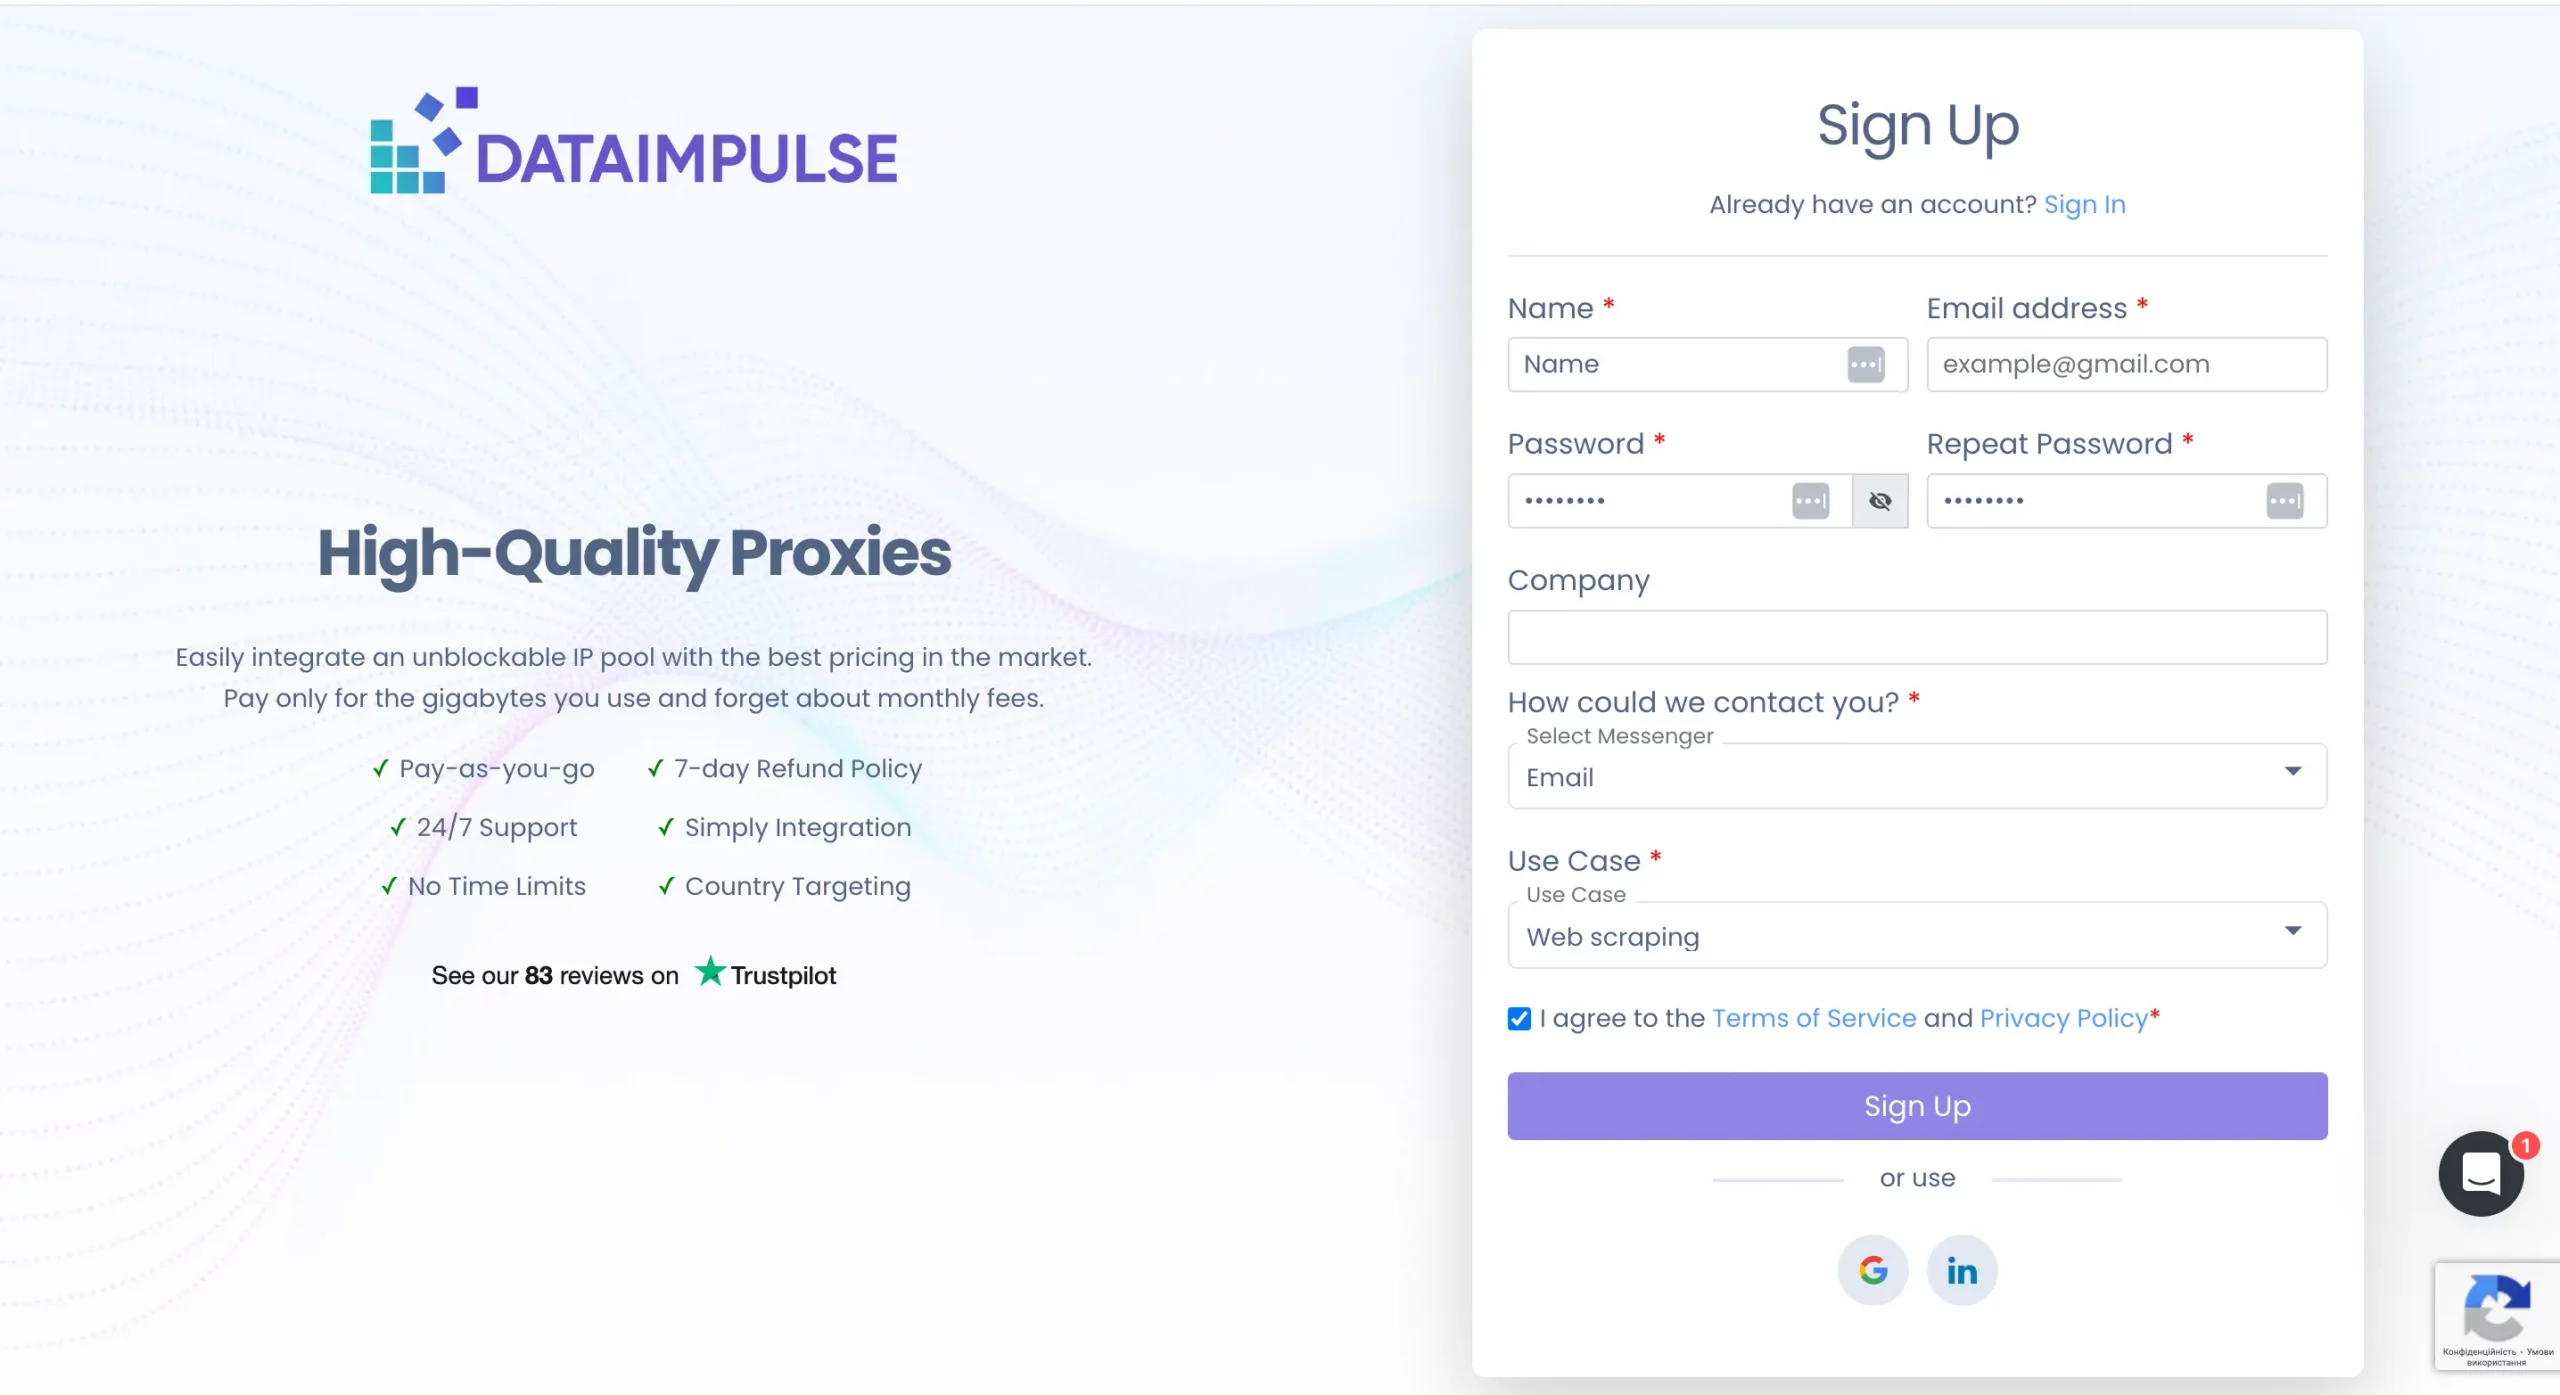
2. You’ll see a registration form. Make sure to fill in all the fields and re-enter exactly the same password. You can skip the “Company” field if you want to.
3. Choose your preferred platform for communication. If you prefer to stay connected via Viber or WhatsApp, please provide your active phone number. For Telegram, enter your nickname preceded by an “@” sign. If Skype is your preference, include your account information. If email suits you best, there’s no need to re-enter it.
4. Next, choose your specific use case from the provided list. If selecting “Other,” please specify.
5. Check our Terms of Service and Privacy Policy.
6. Click “Sign Up” to proceed to the next step. Alternatively, you can sign up using your Google or LinkedIn account.
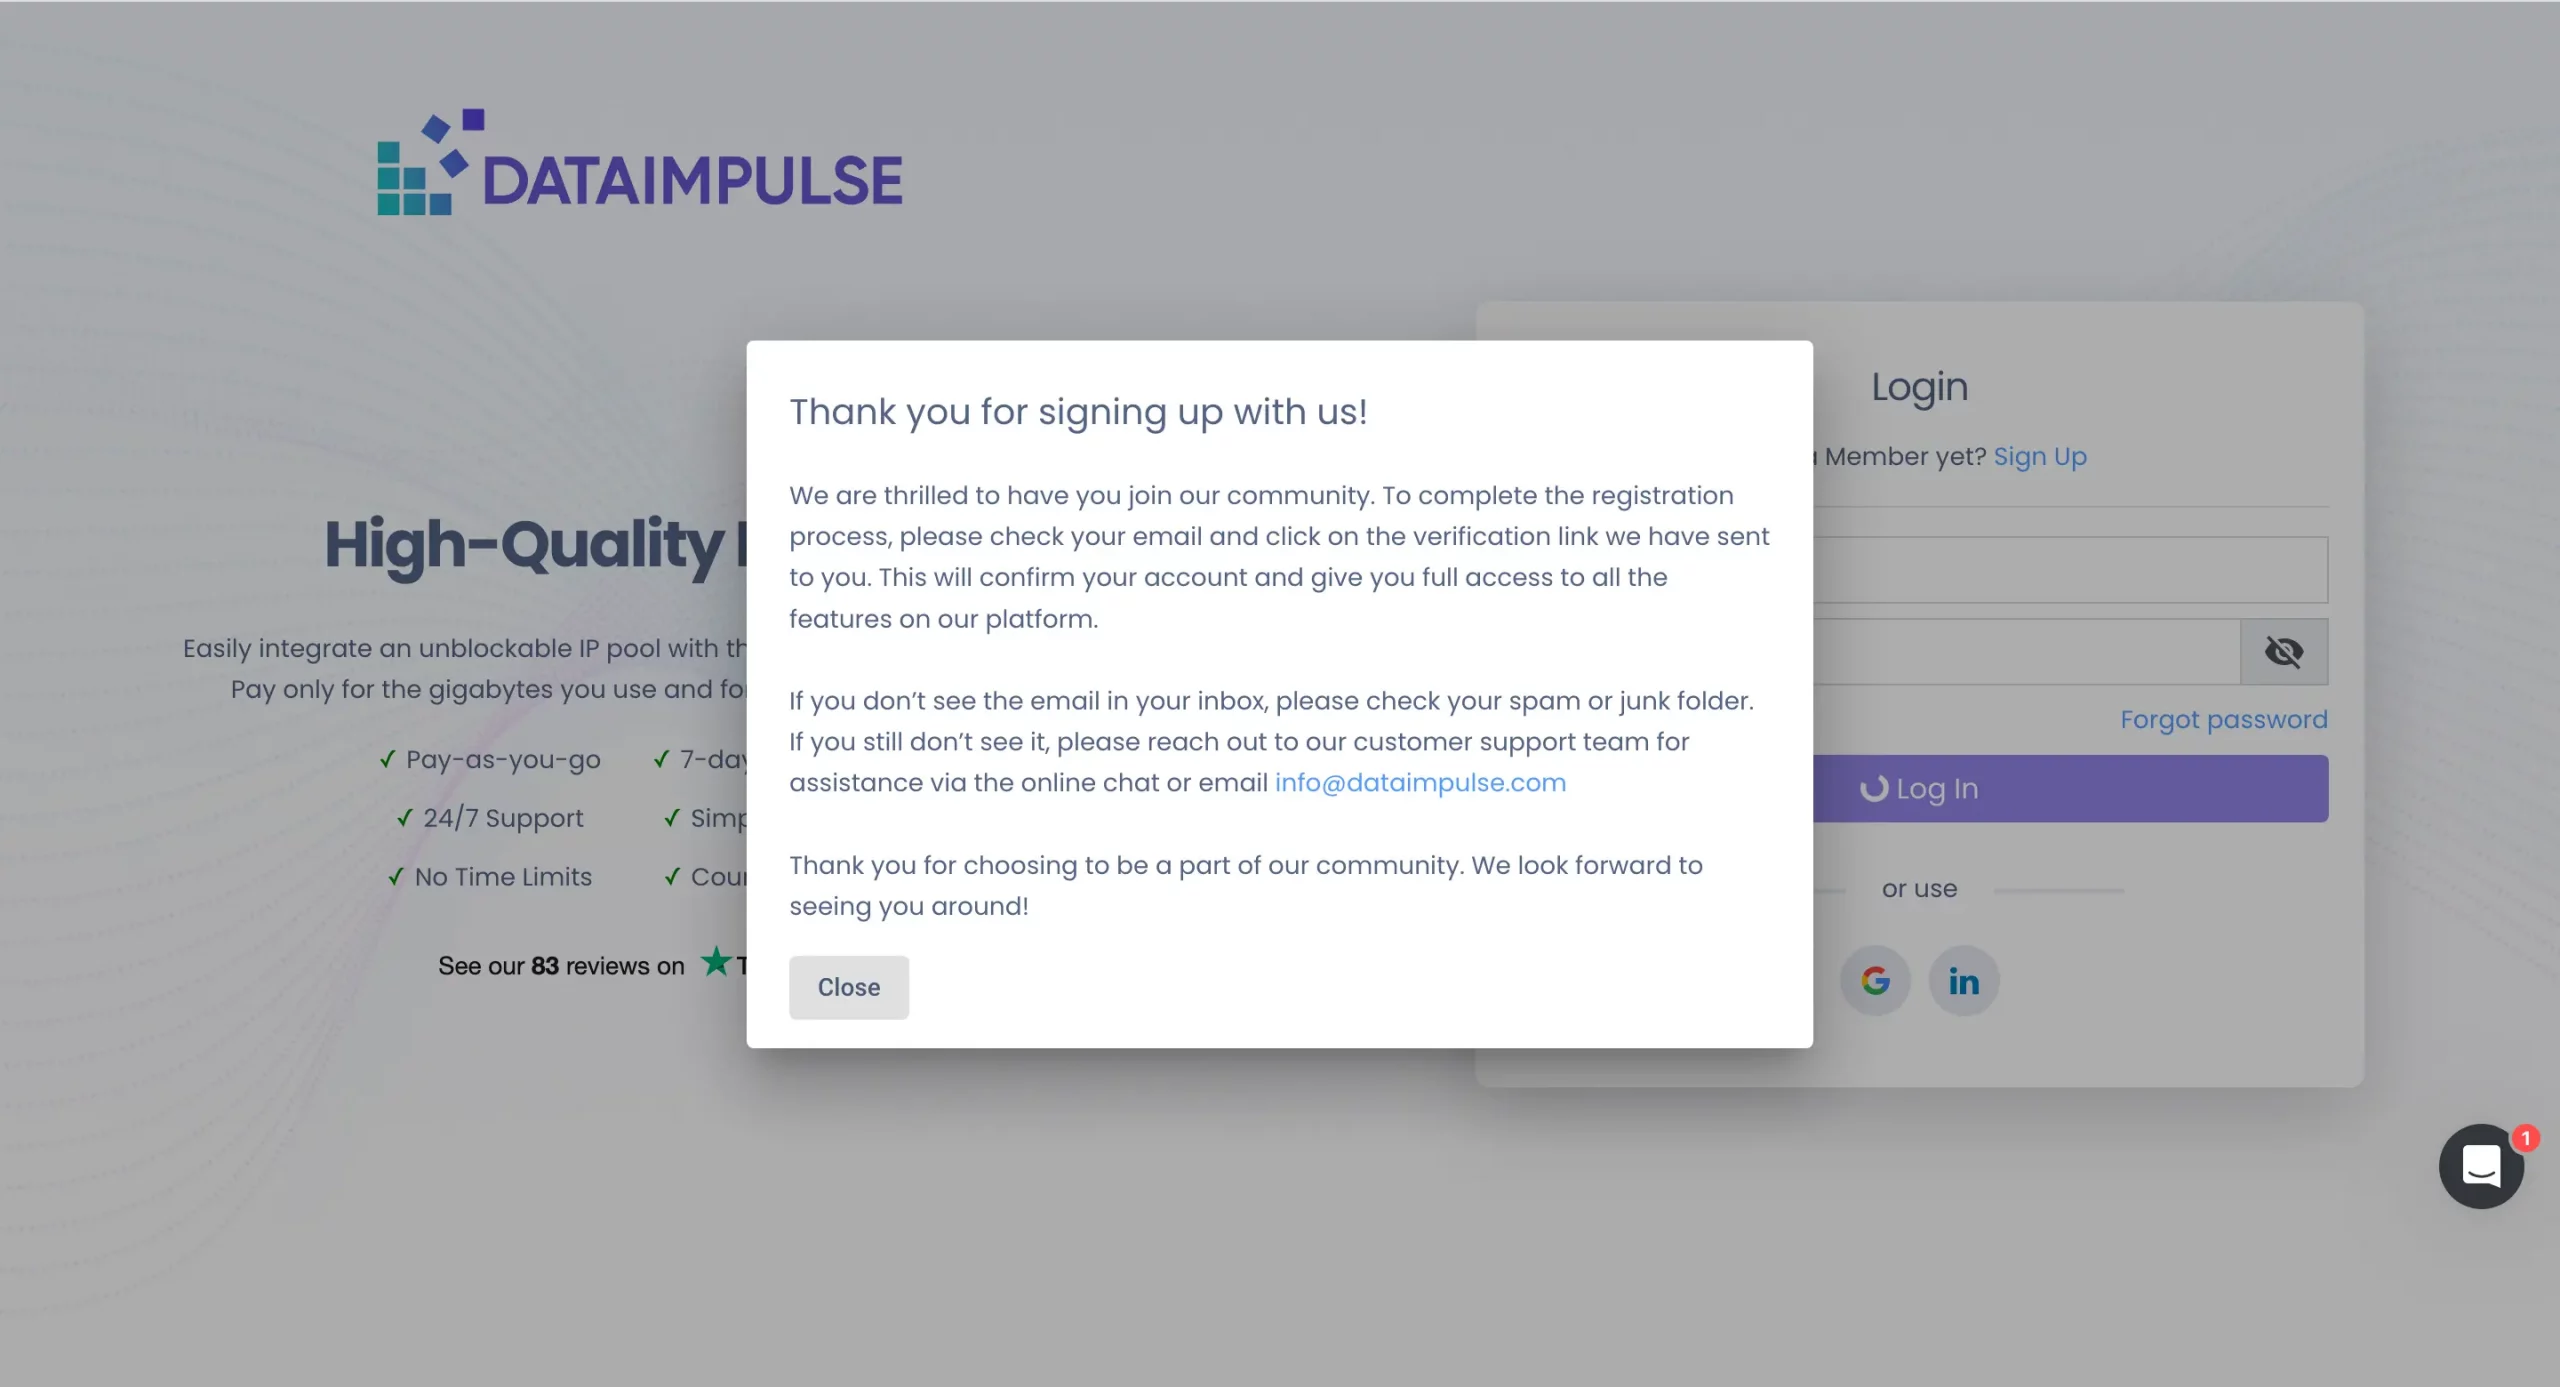
After that, you will get a “Thank you for signing up with us!” message with additional instructions.
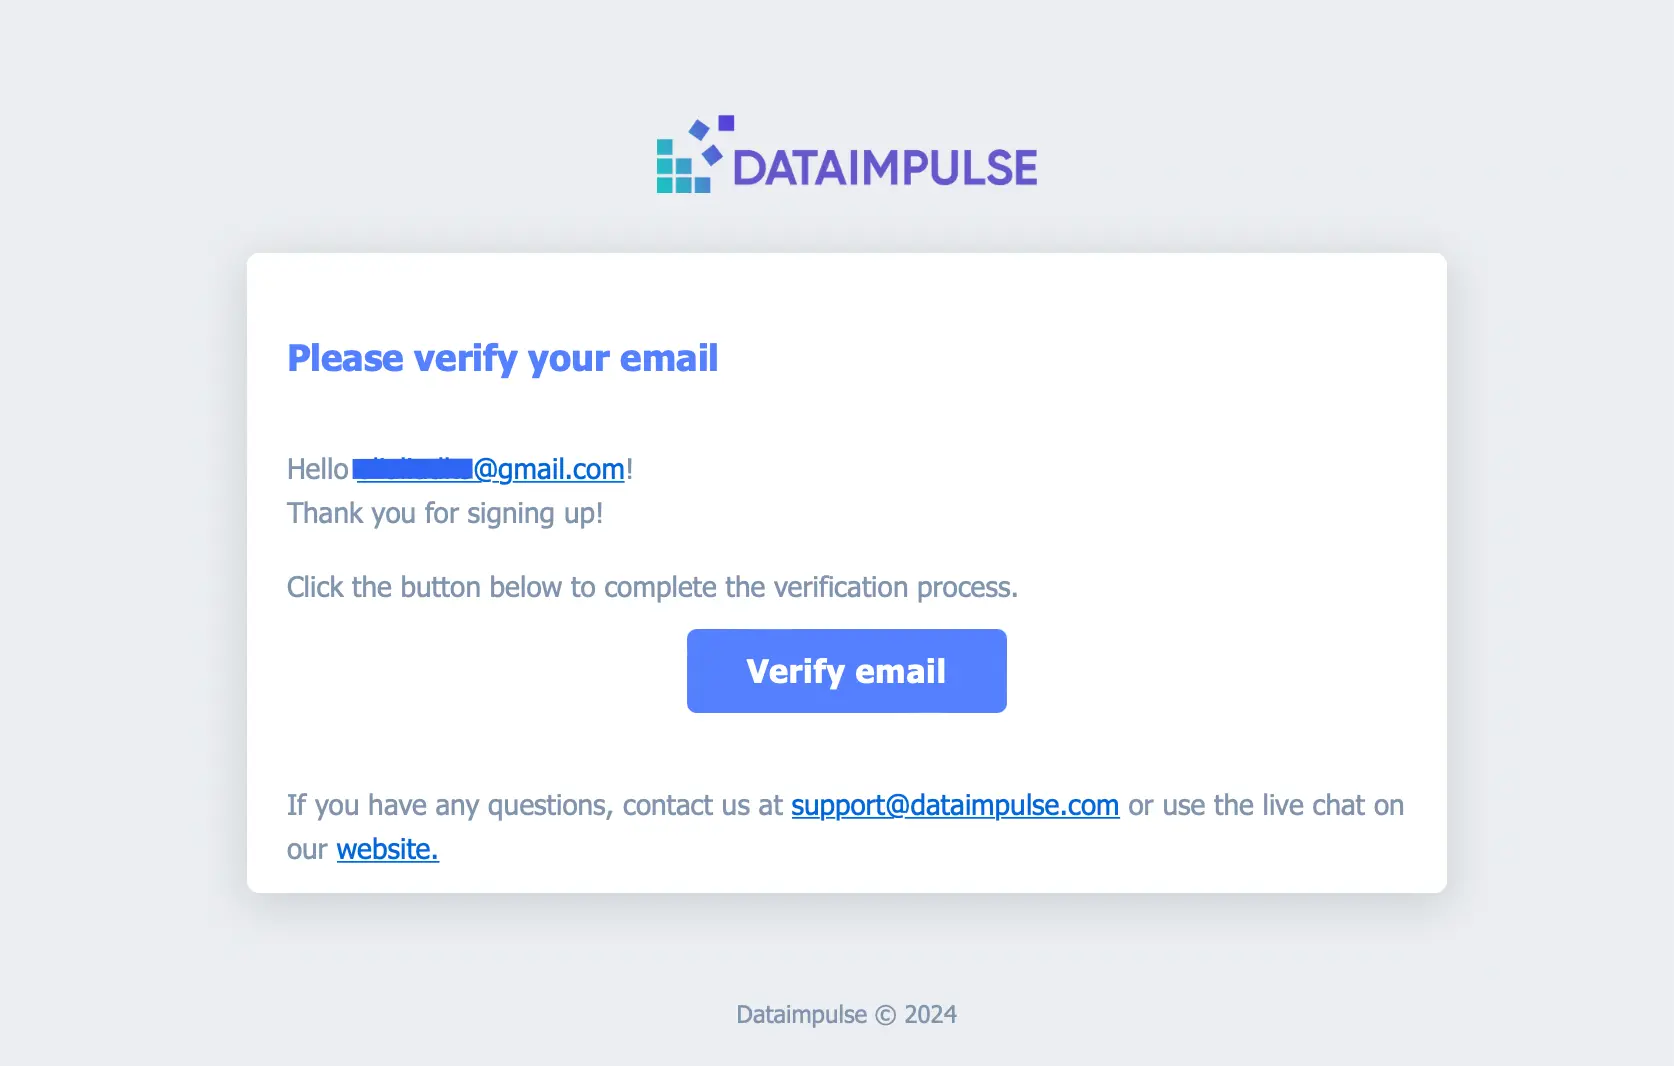
7. To complete the registration, please go to your inbox, open an email, and click the “Verify email” button.
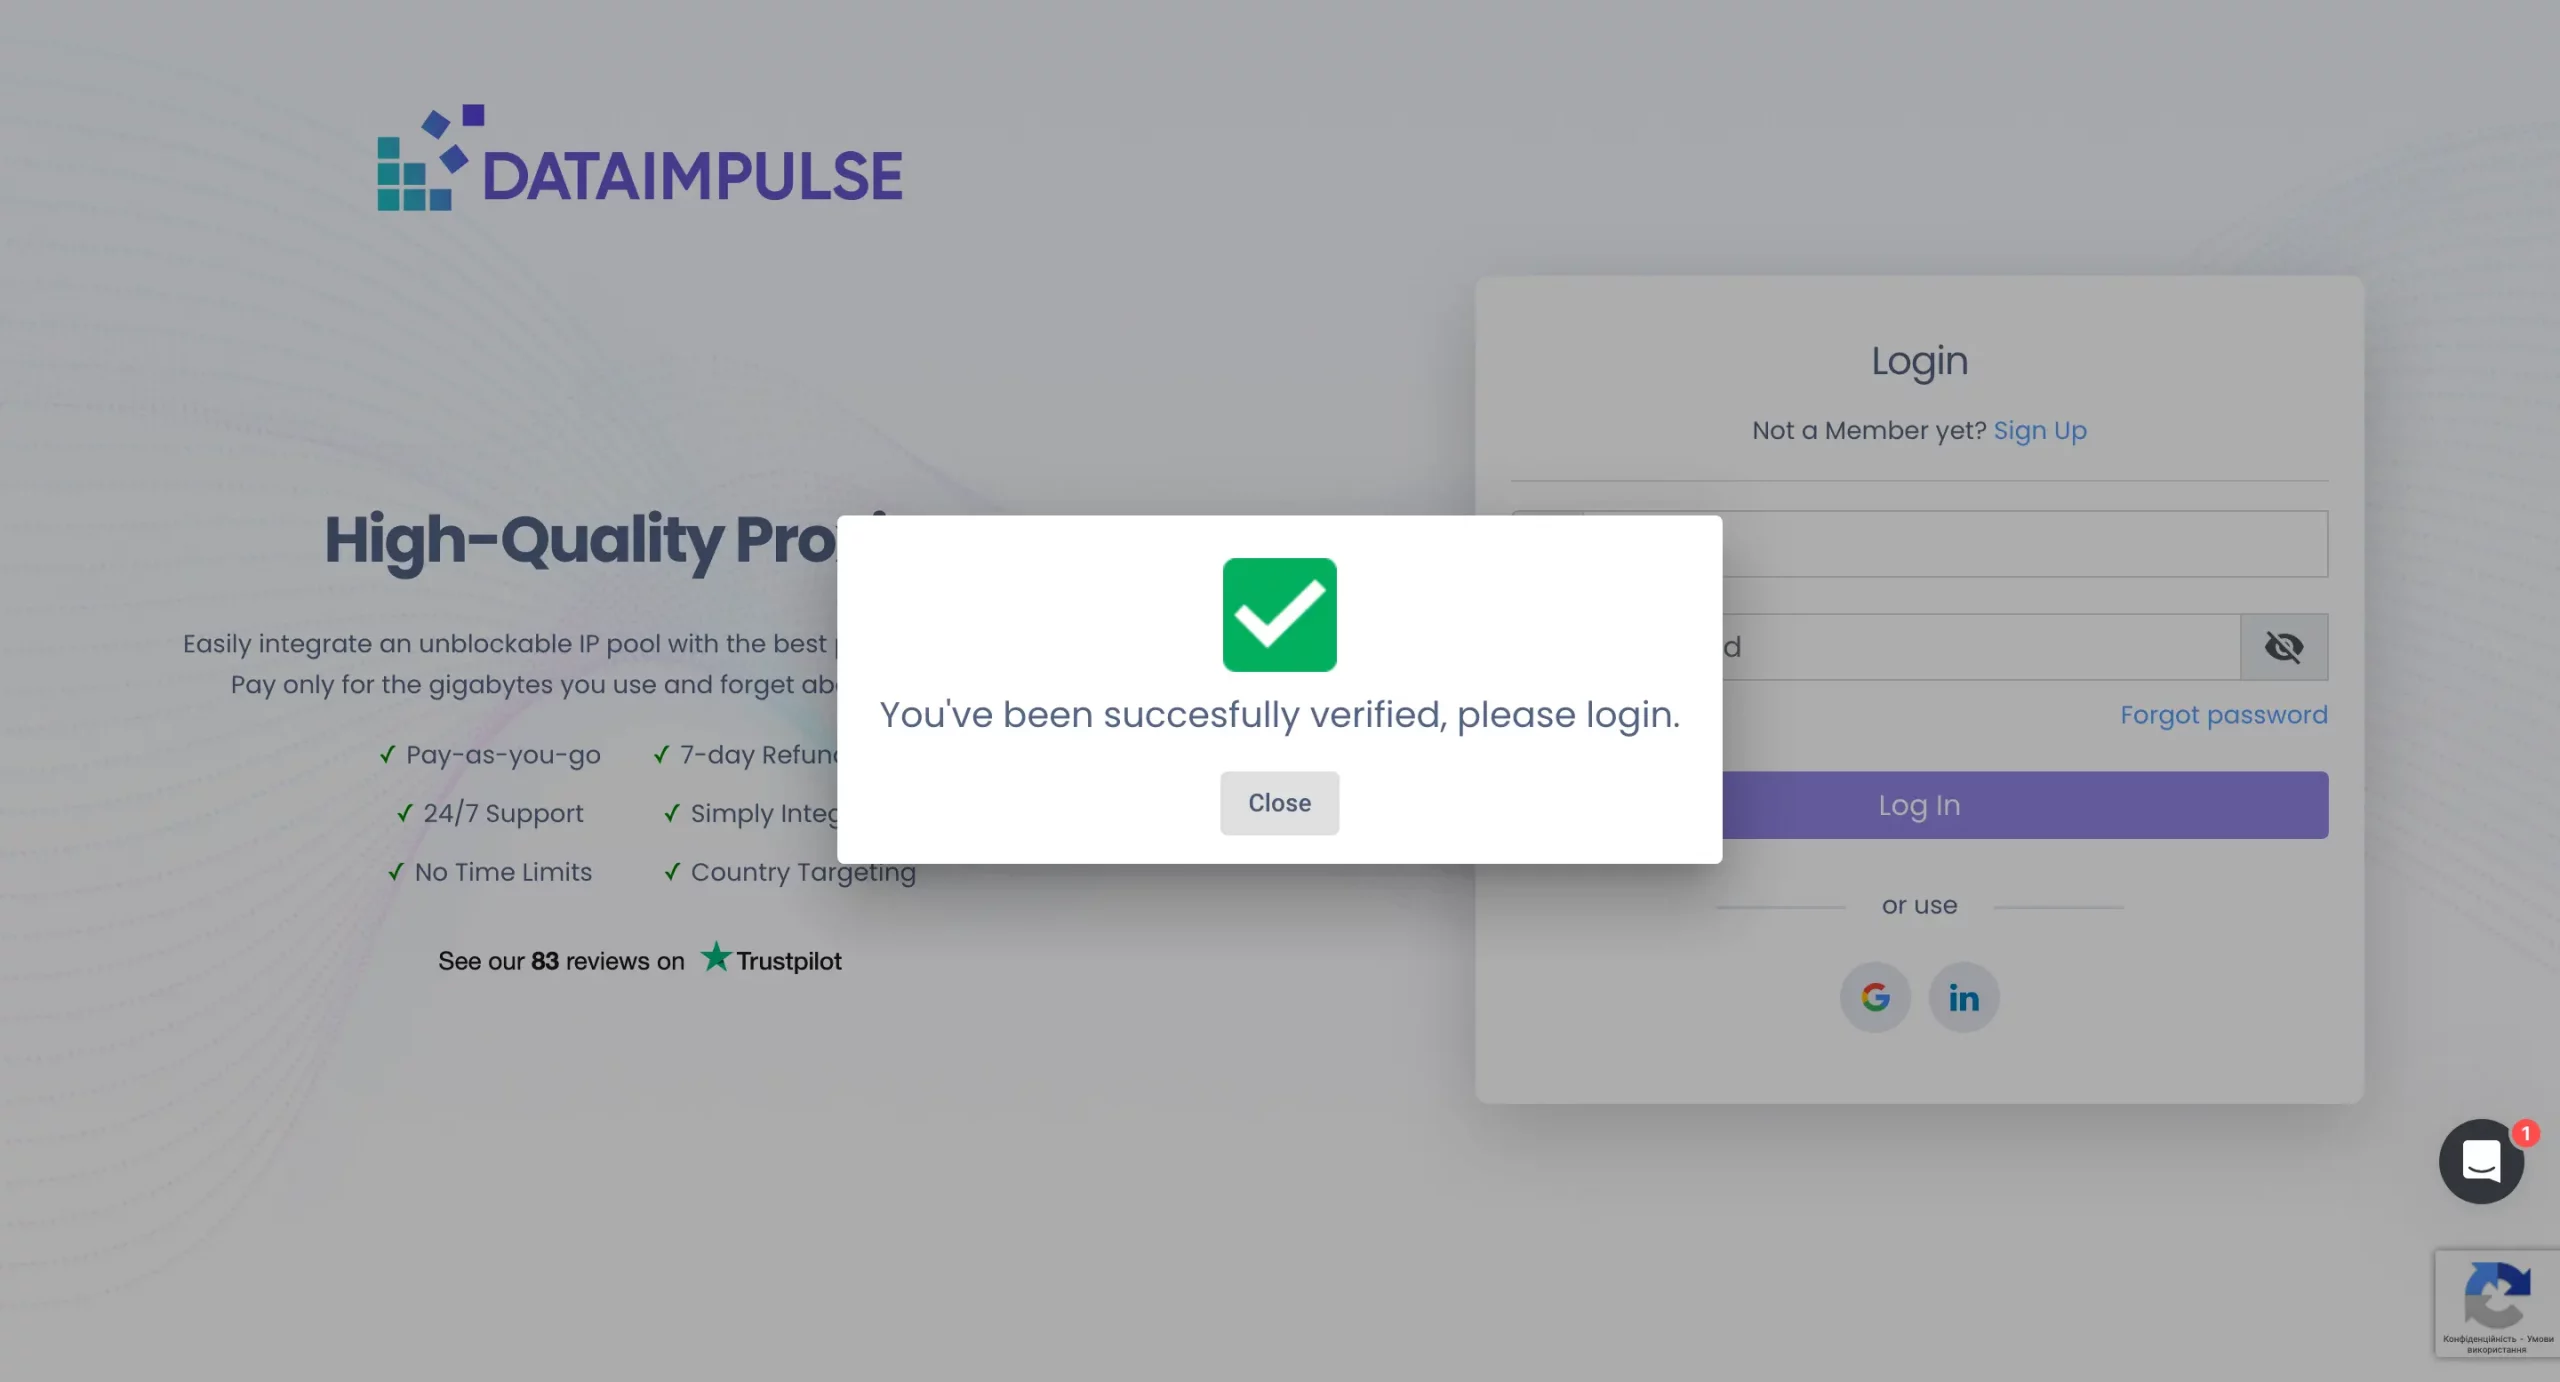
The system will redirect you to dataimpulse.com. You will see a notice of successful confirmation. Now you need to log in again. You can use your credentials or log in via your Google or LinkedIn accounts.
DataImpulse Dashboard: Overview
-
How to make an order
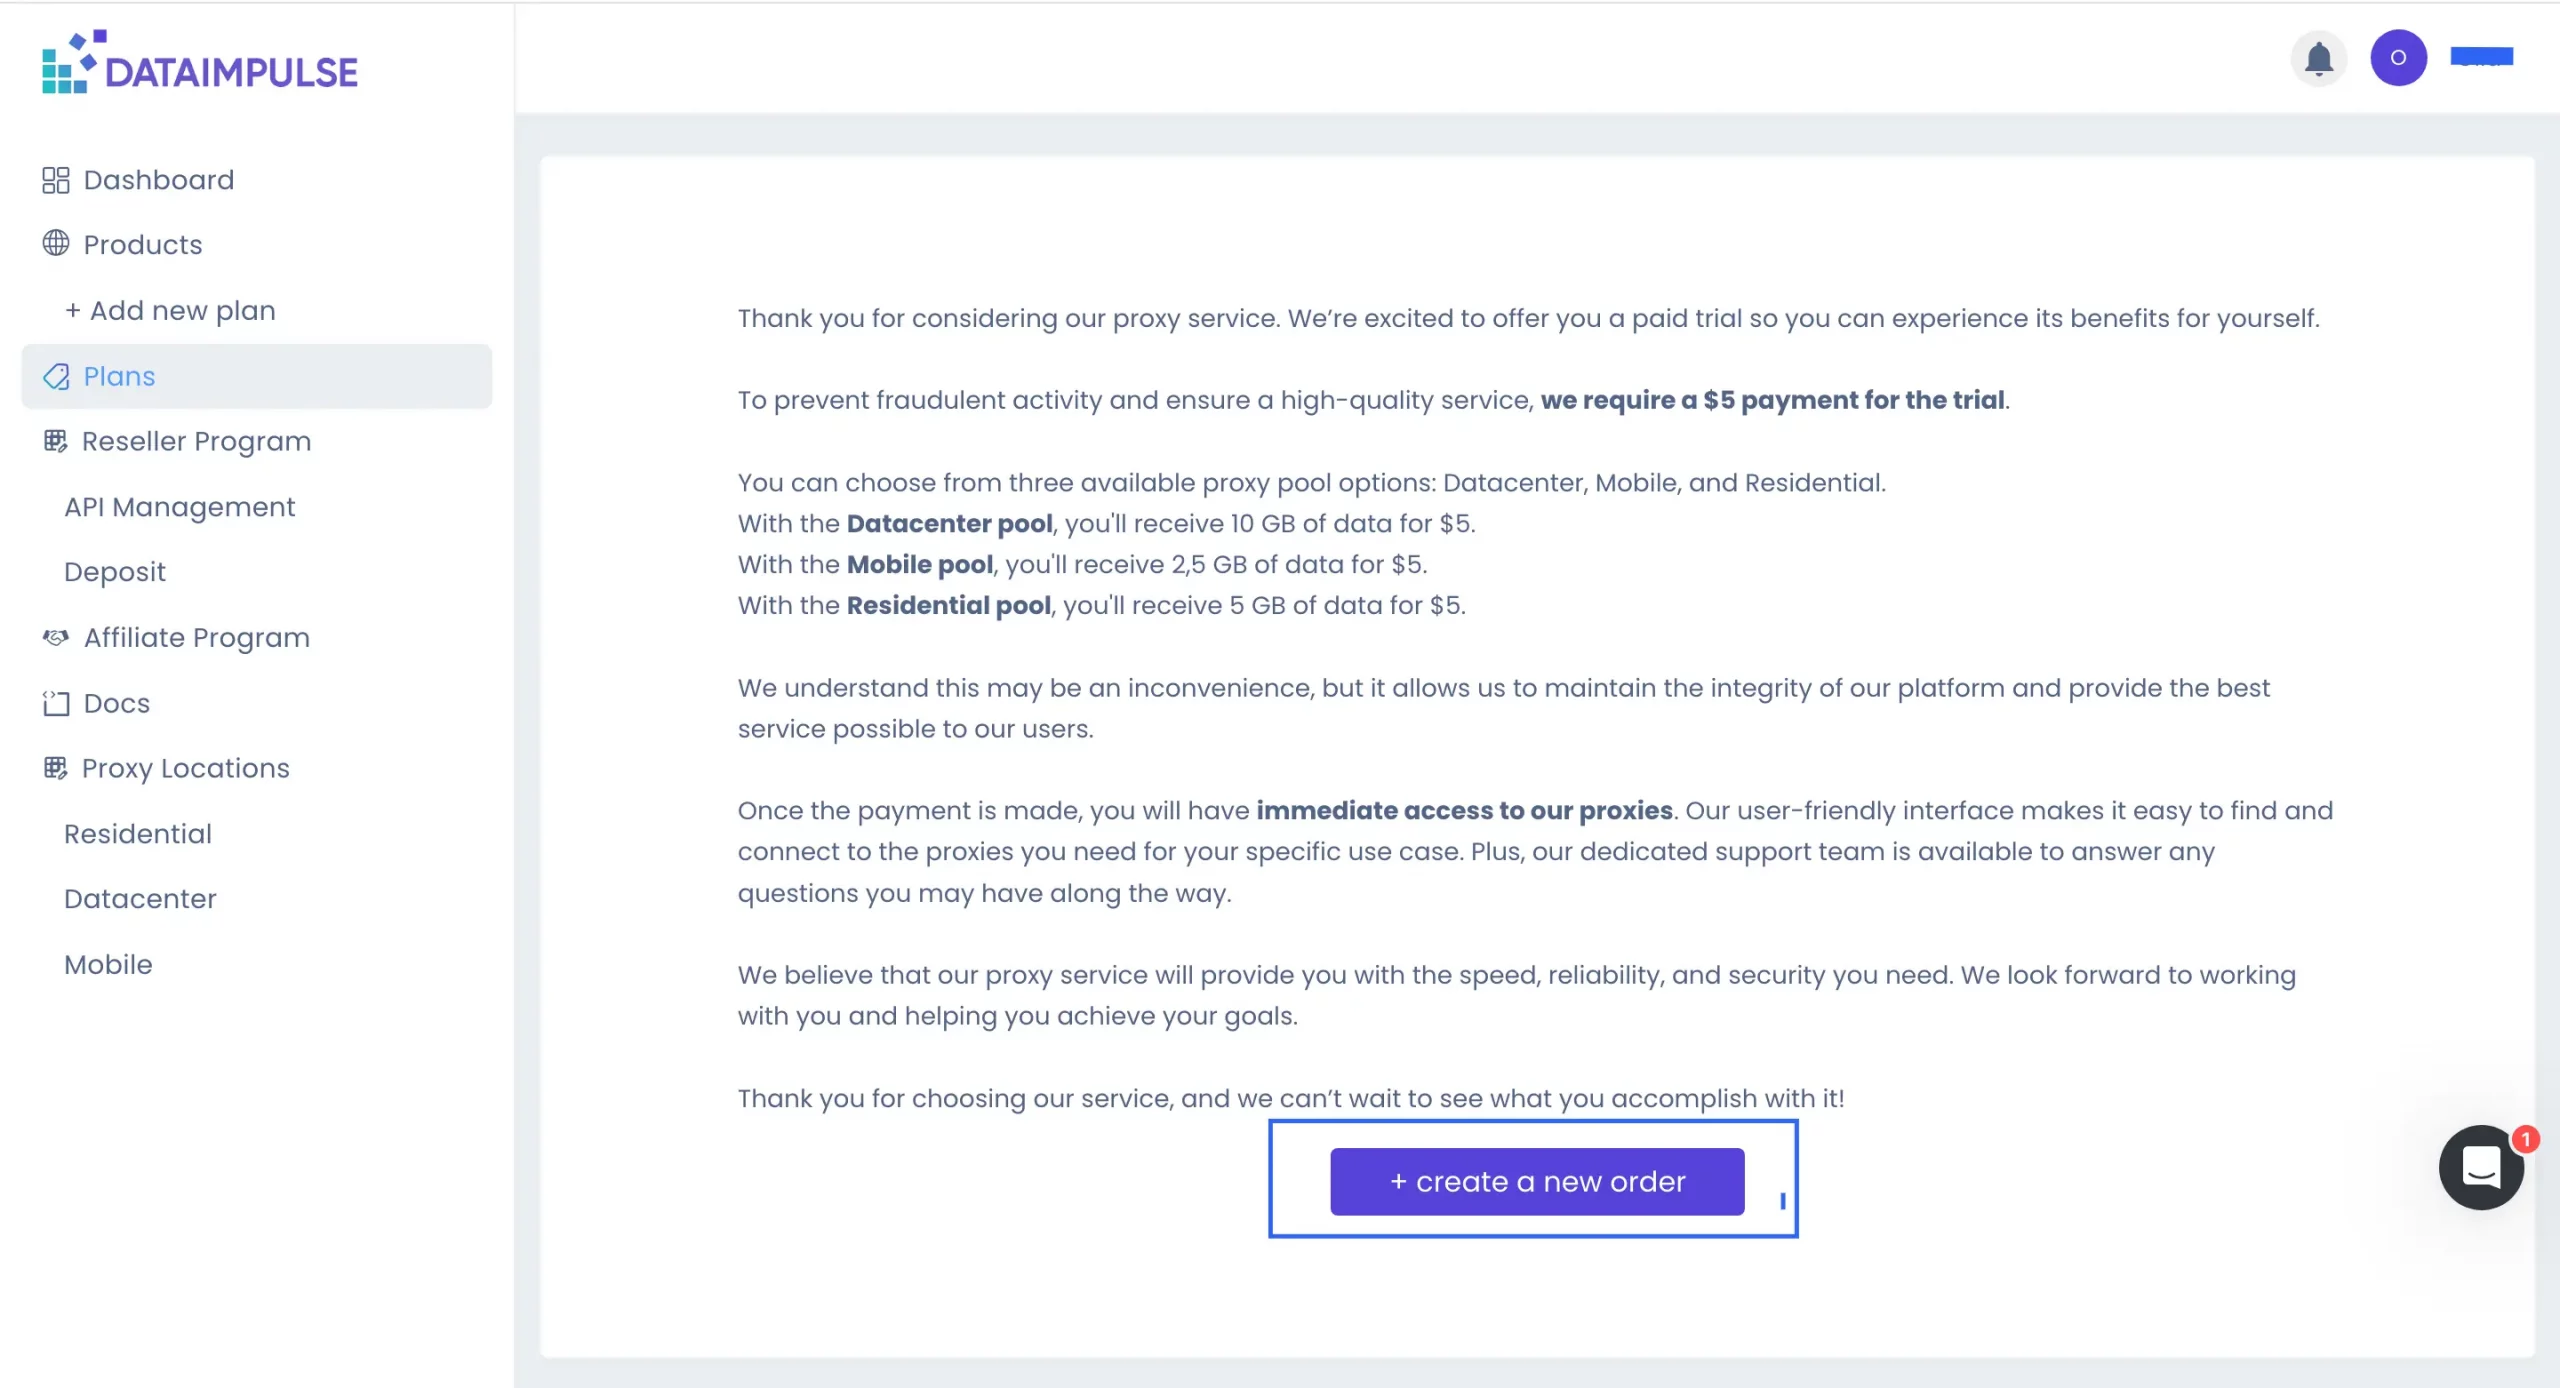
Once you log in to your account, the system automatically leads you to the “Plans” tab. As you don’t have any plans yet, here you see a message offering you to get a paid trial.
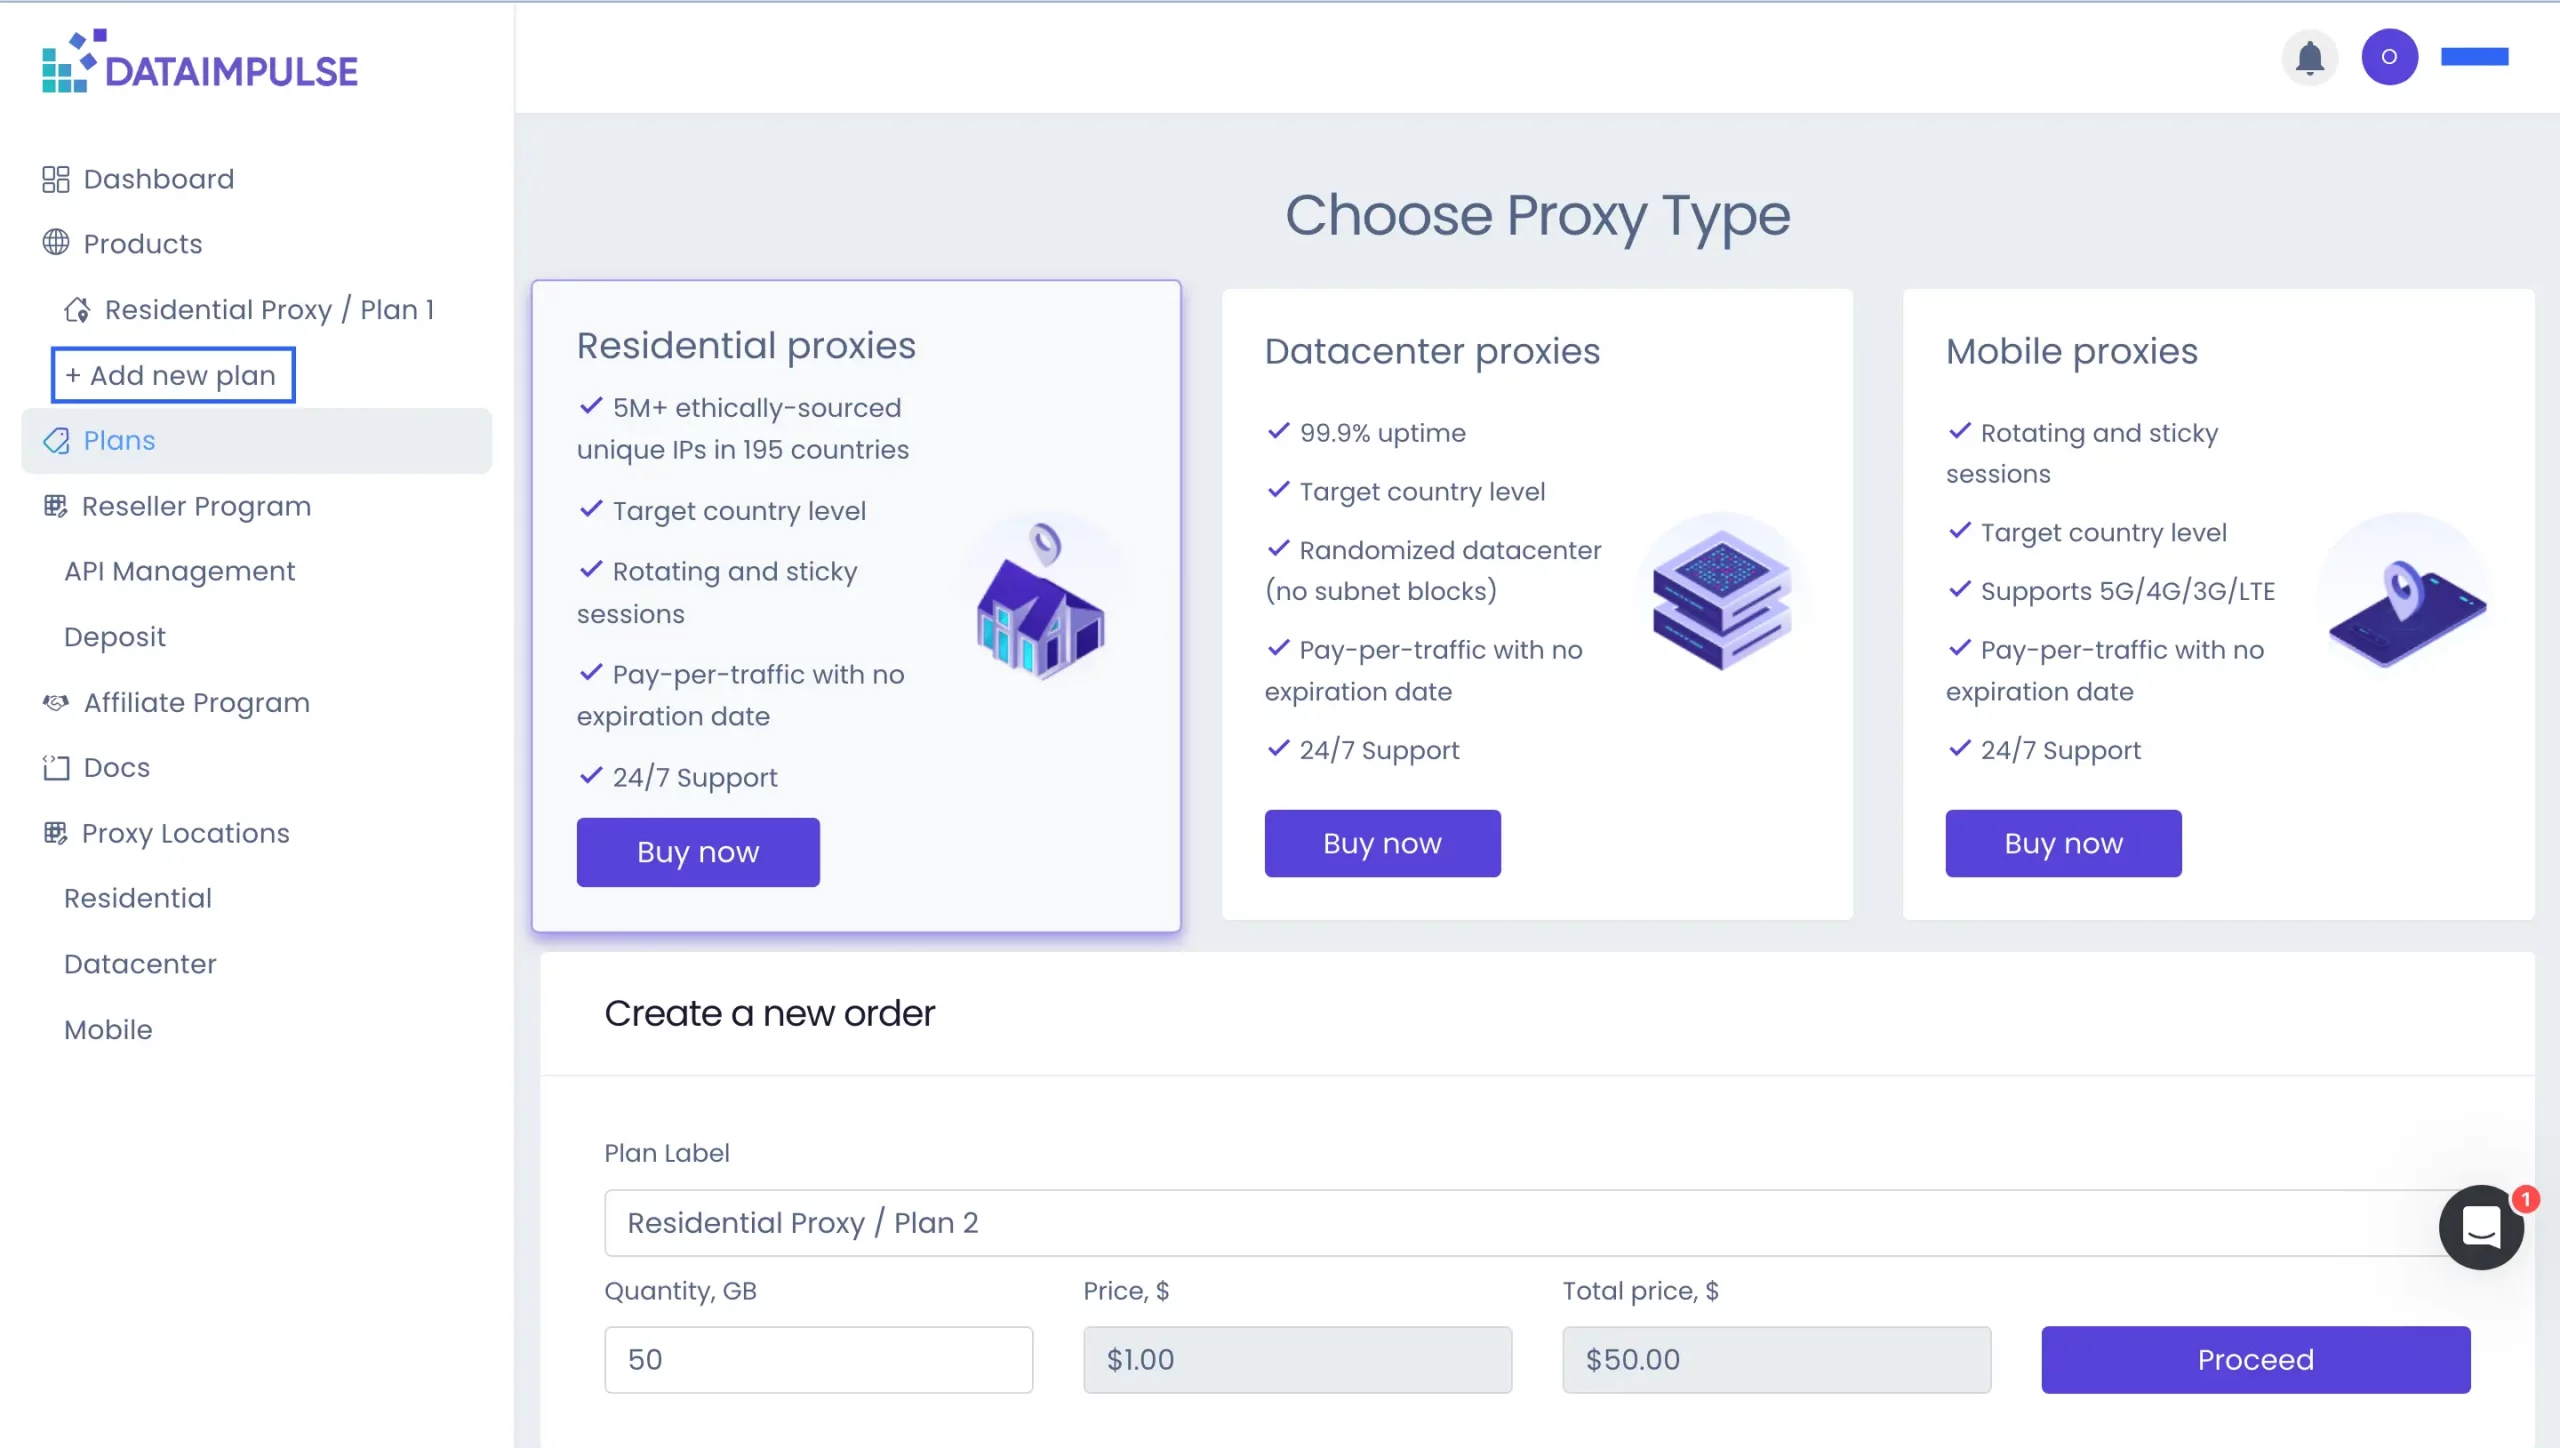
1. To start the process, select the “+ create a new order” button.
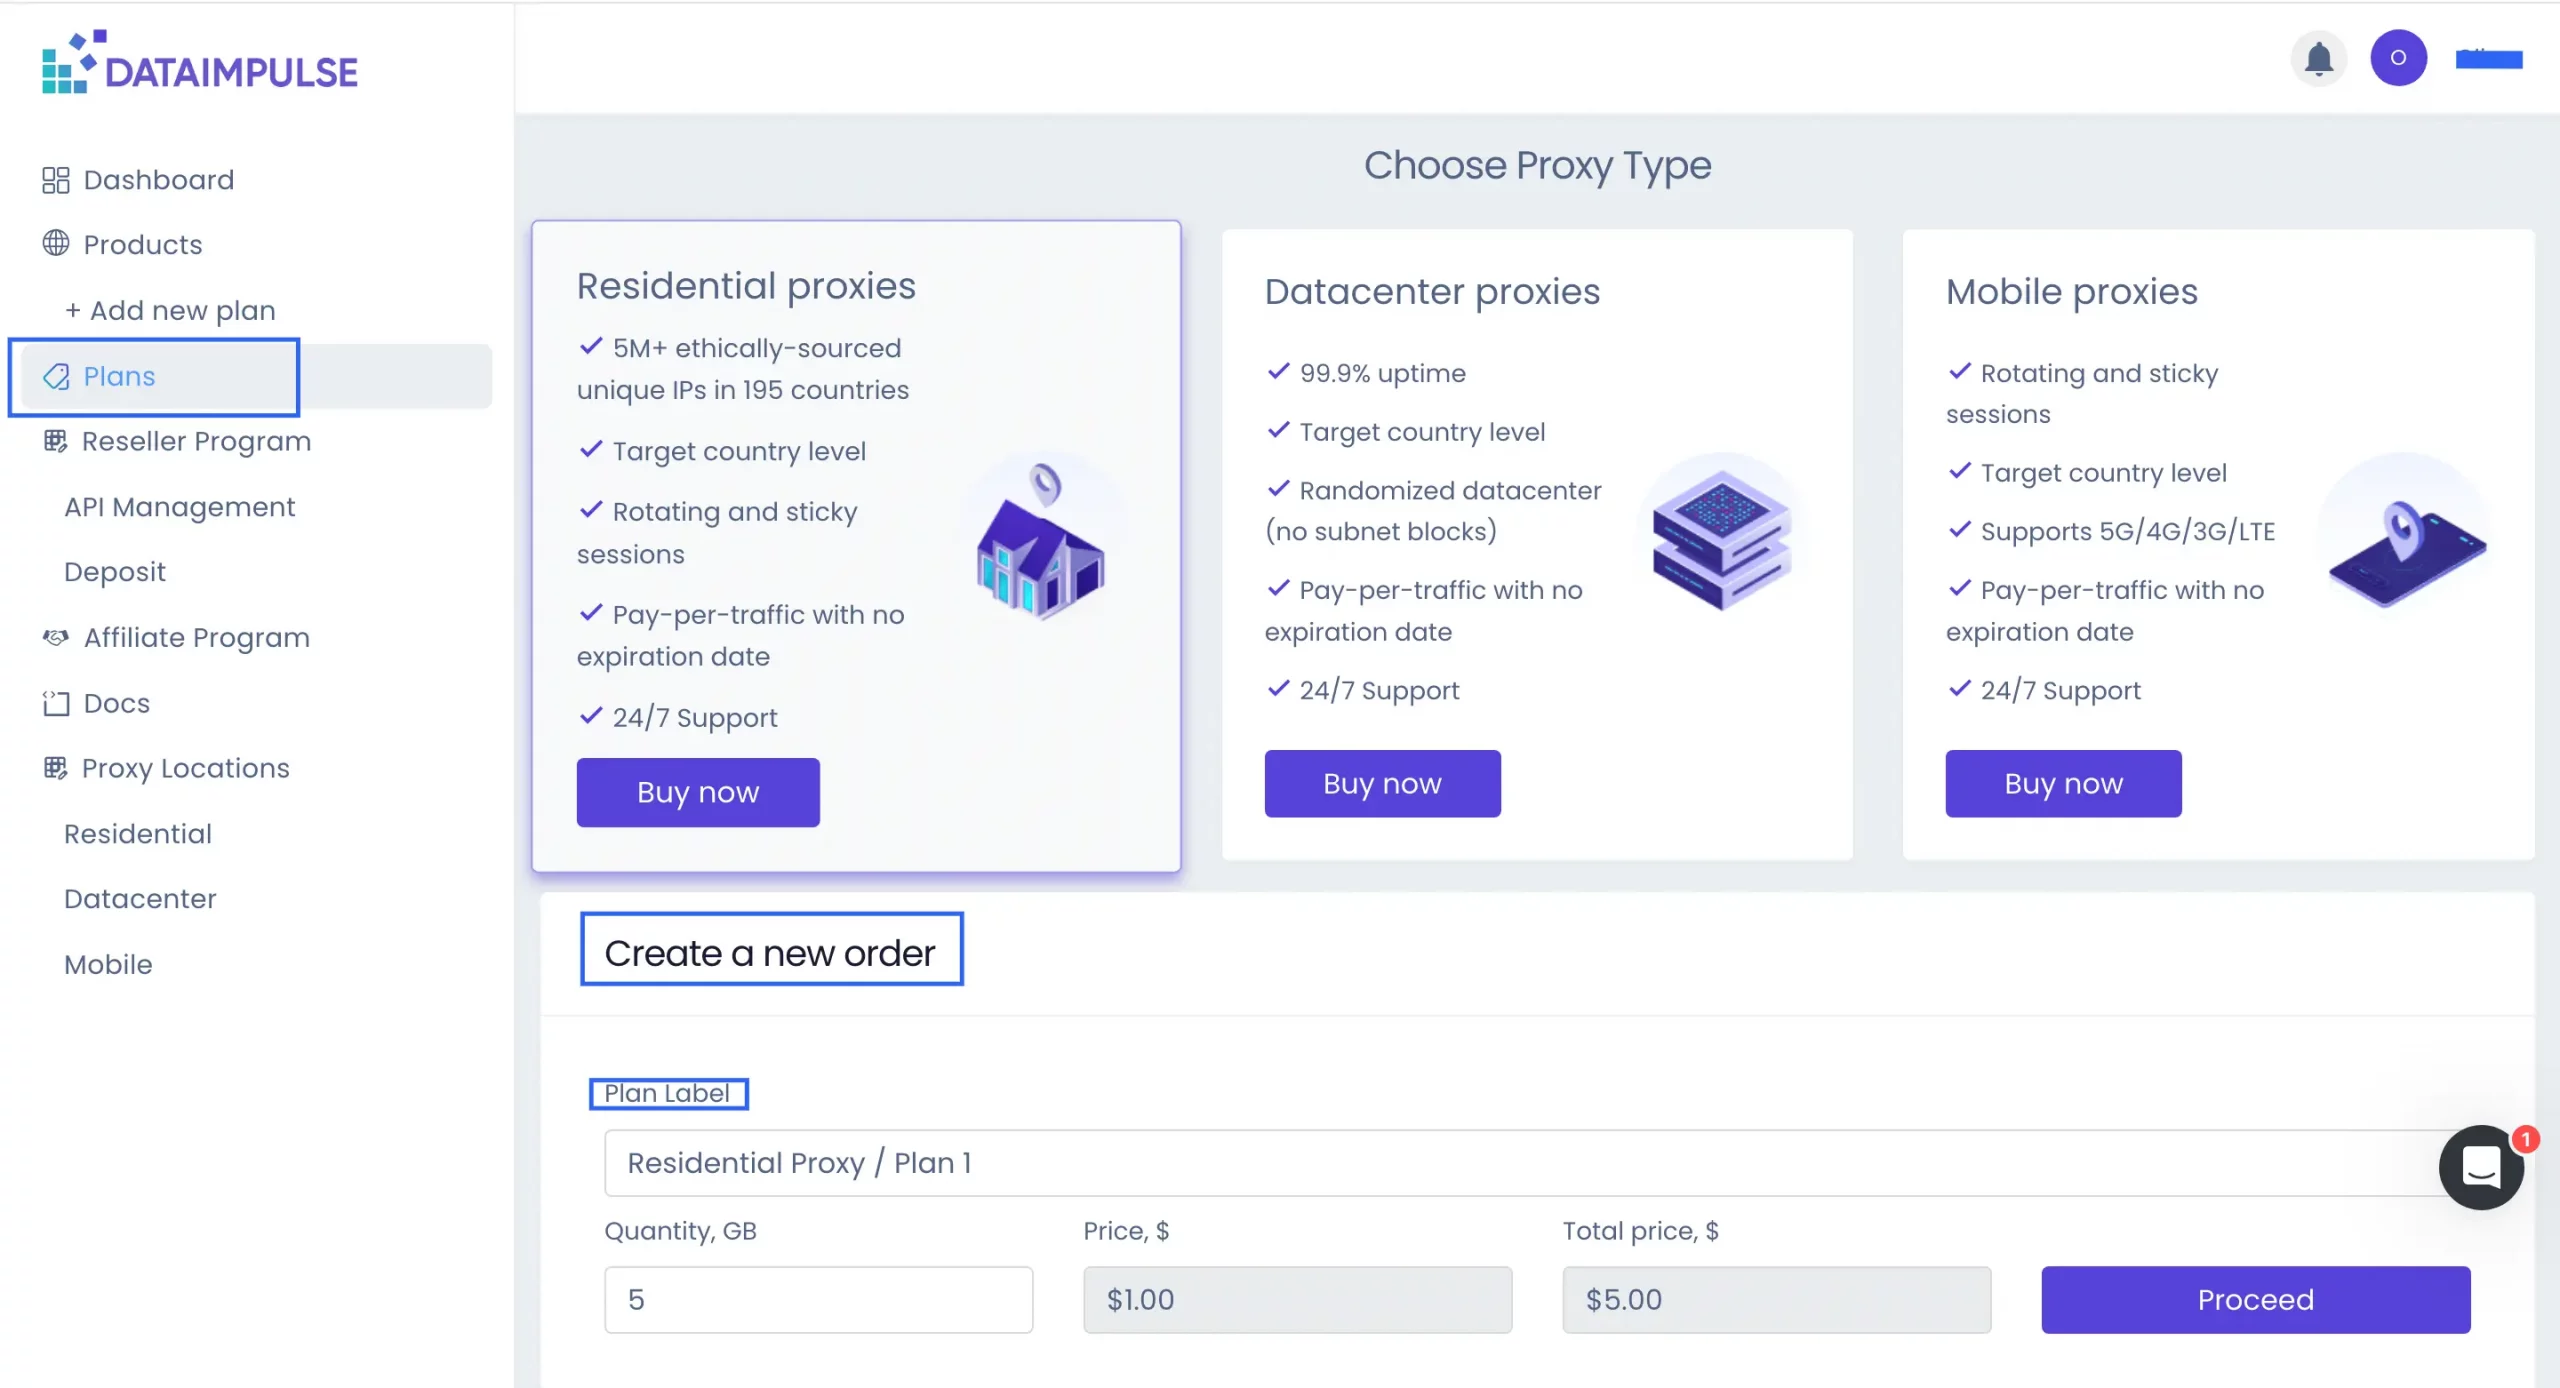
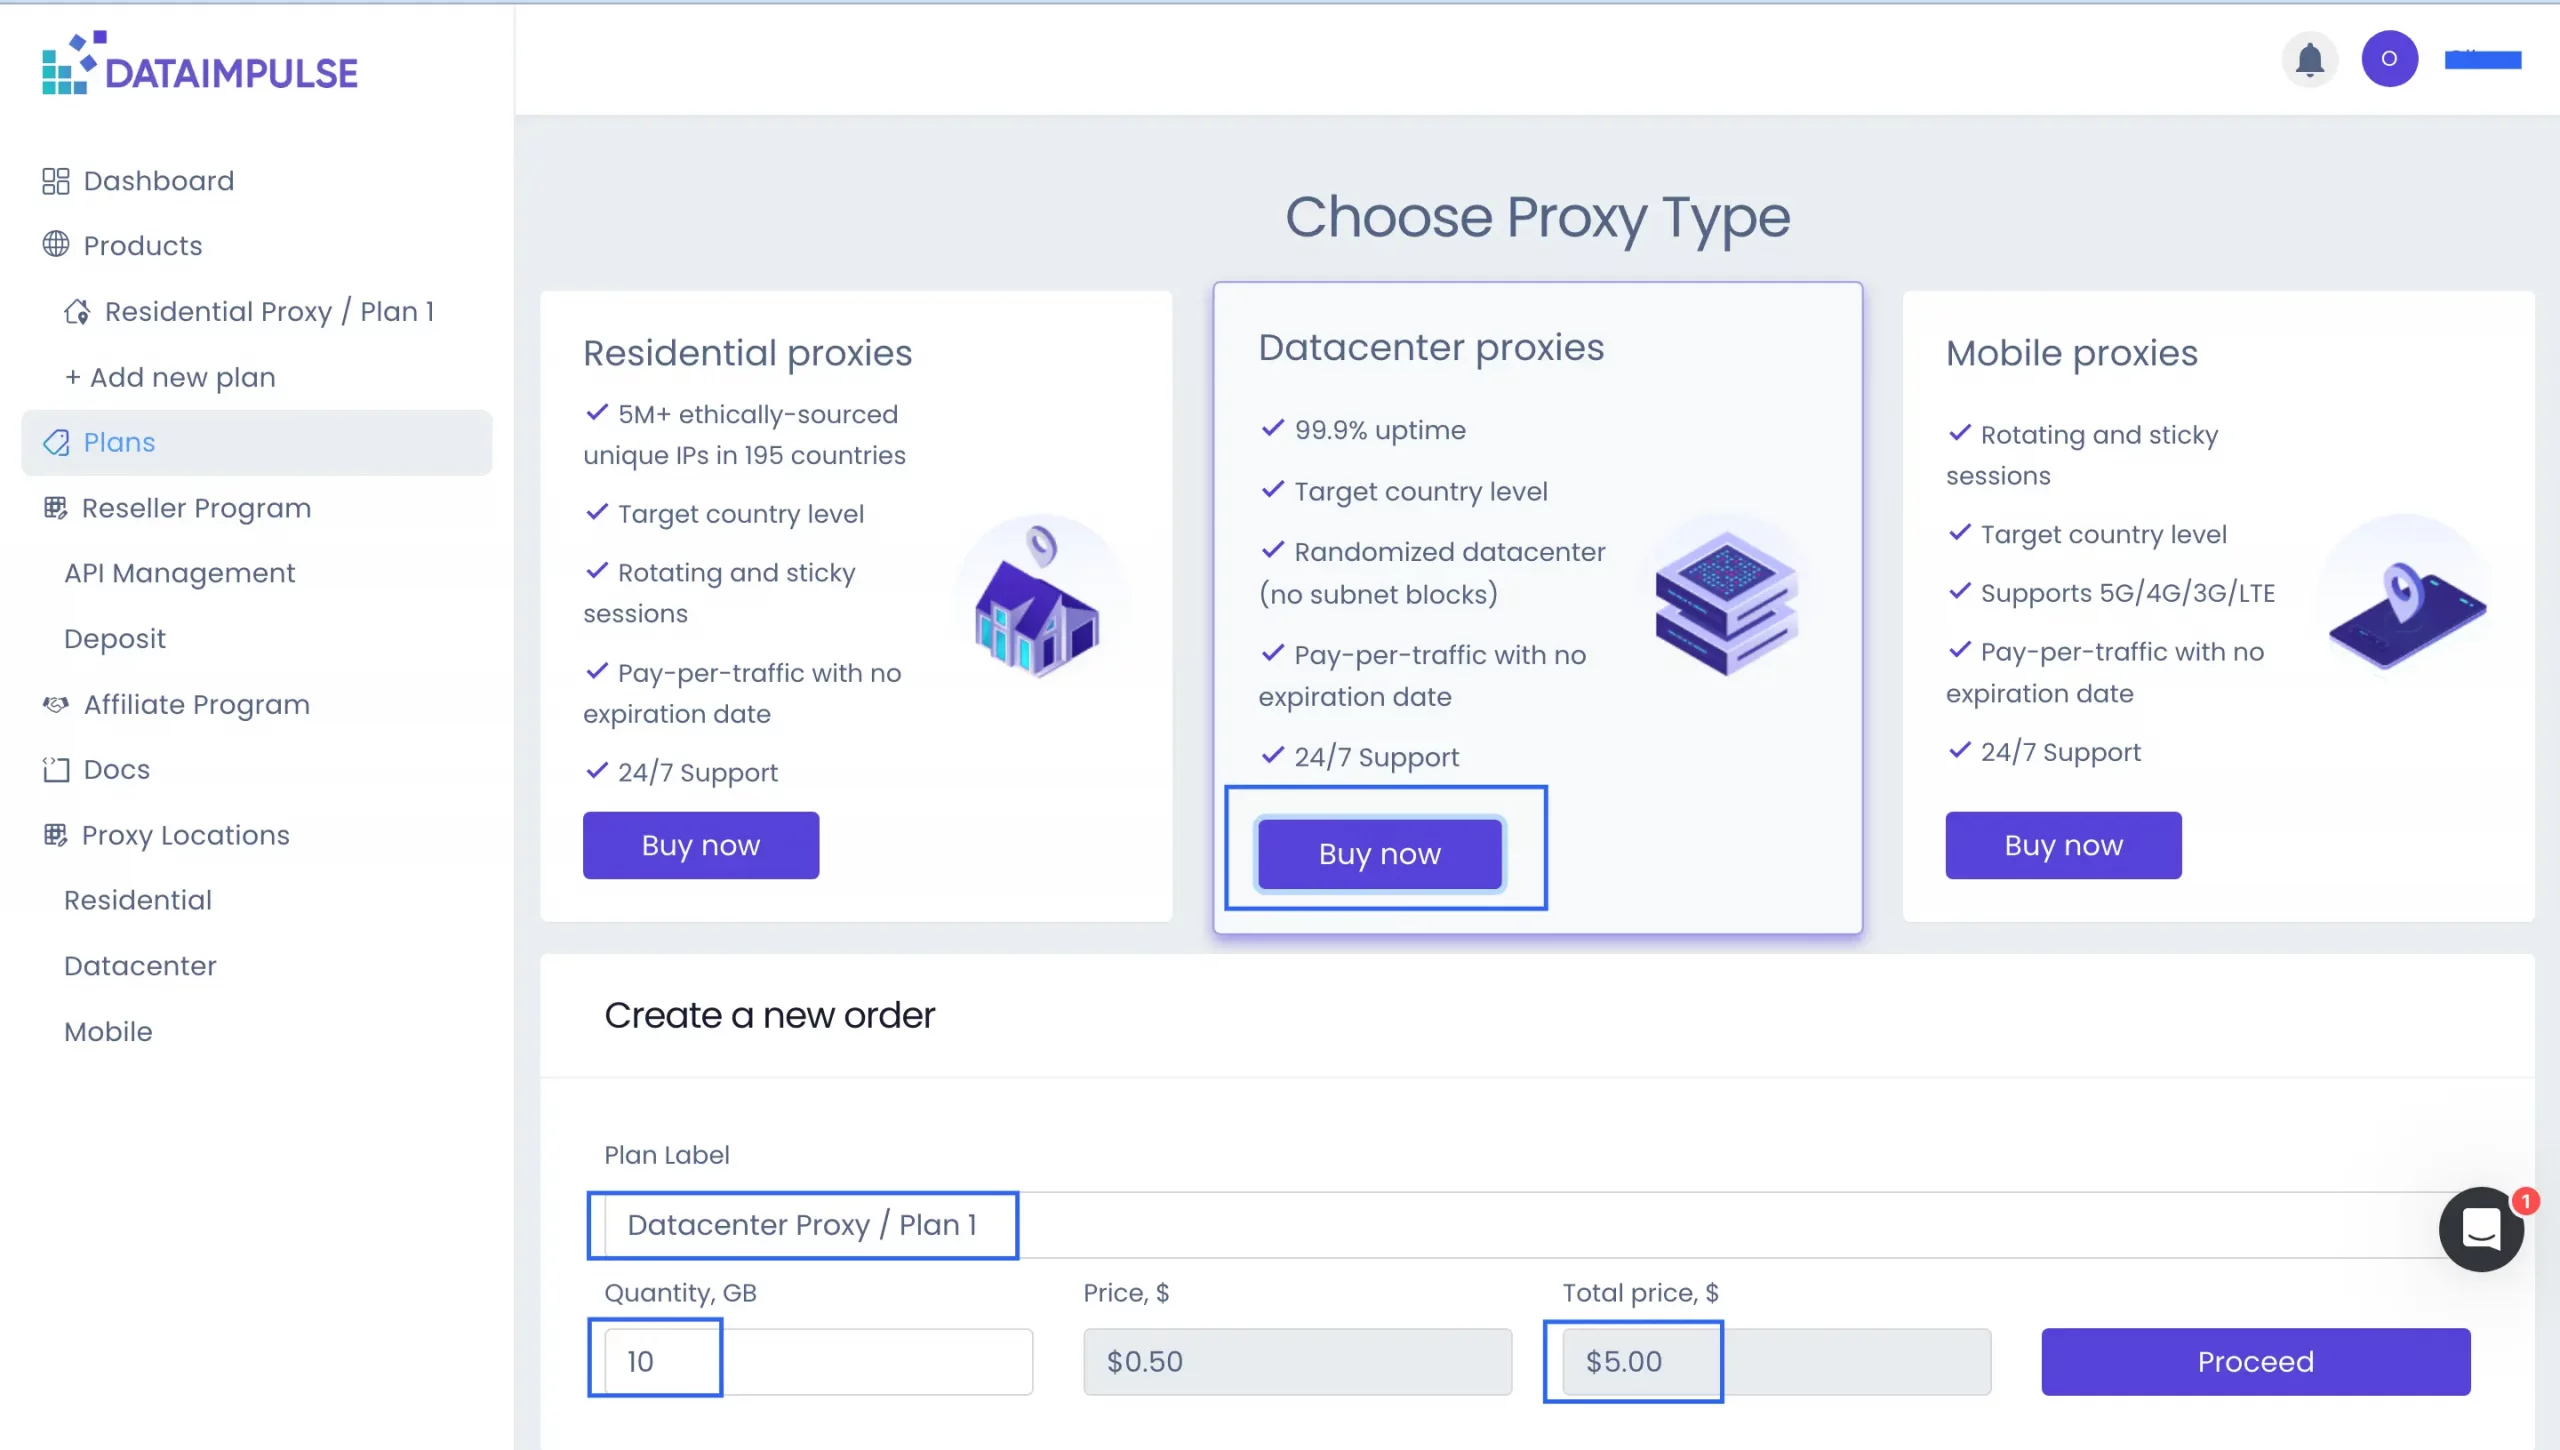
2. Within the “Choose Proxy Type” section, opt for the plan you wish to test.
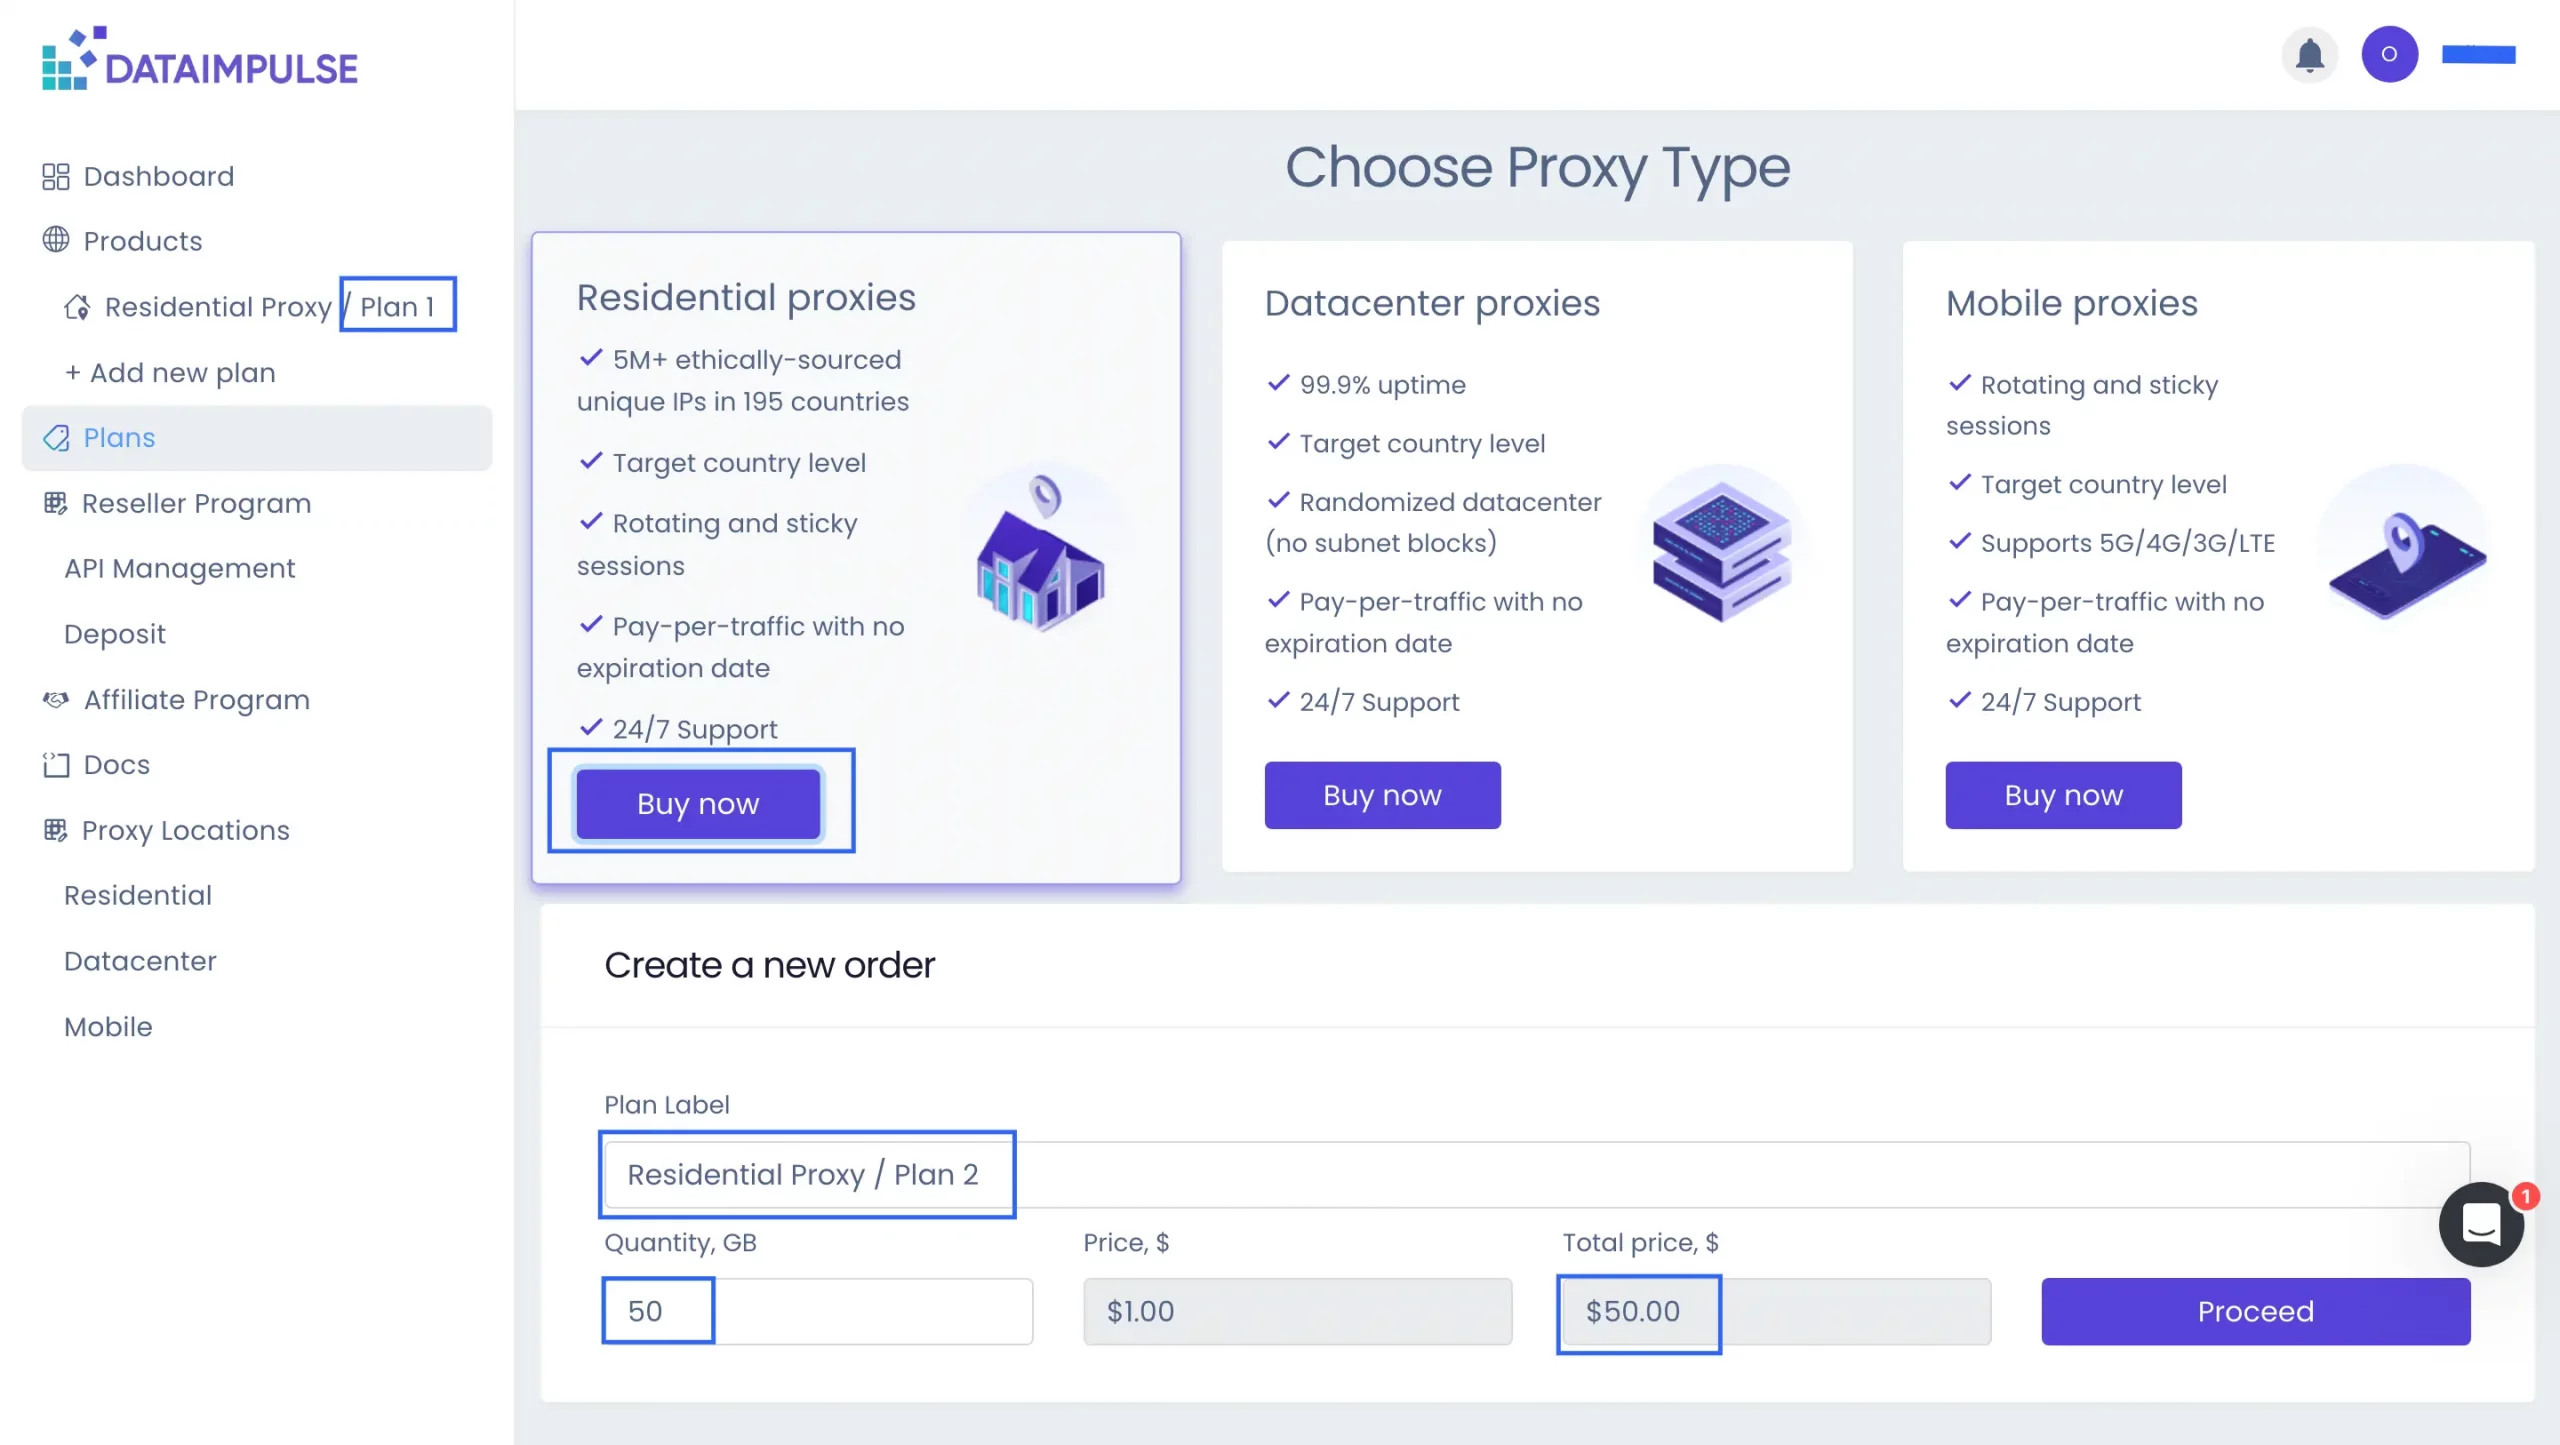
3. Click “Buy Now“.
Scroll down to the “Plan Label” field of the “Create a new order” section. Check if the name of your selected plan is displayed here, then click the “Proceed” button located in the bottom right corner.
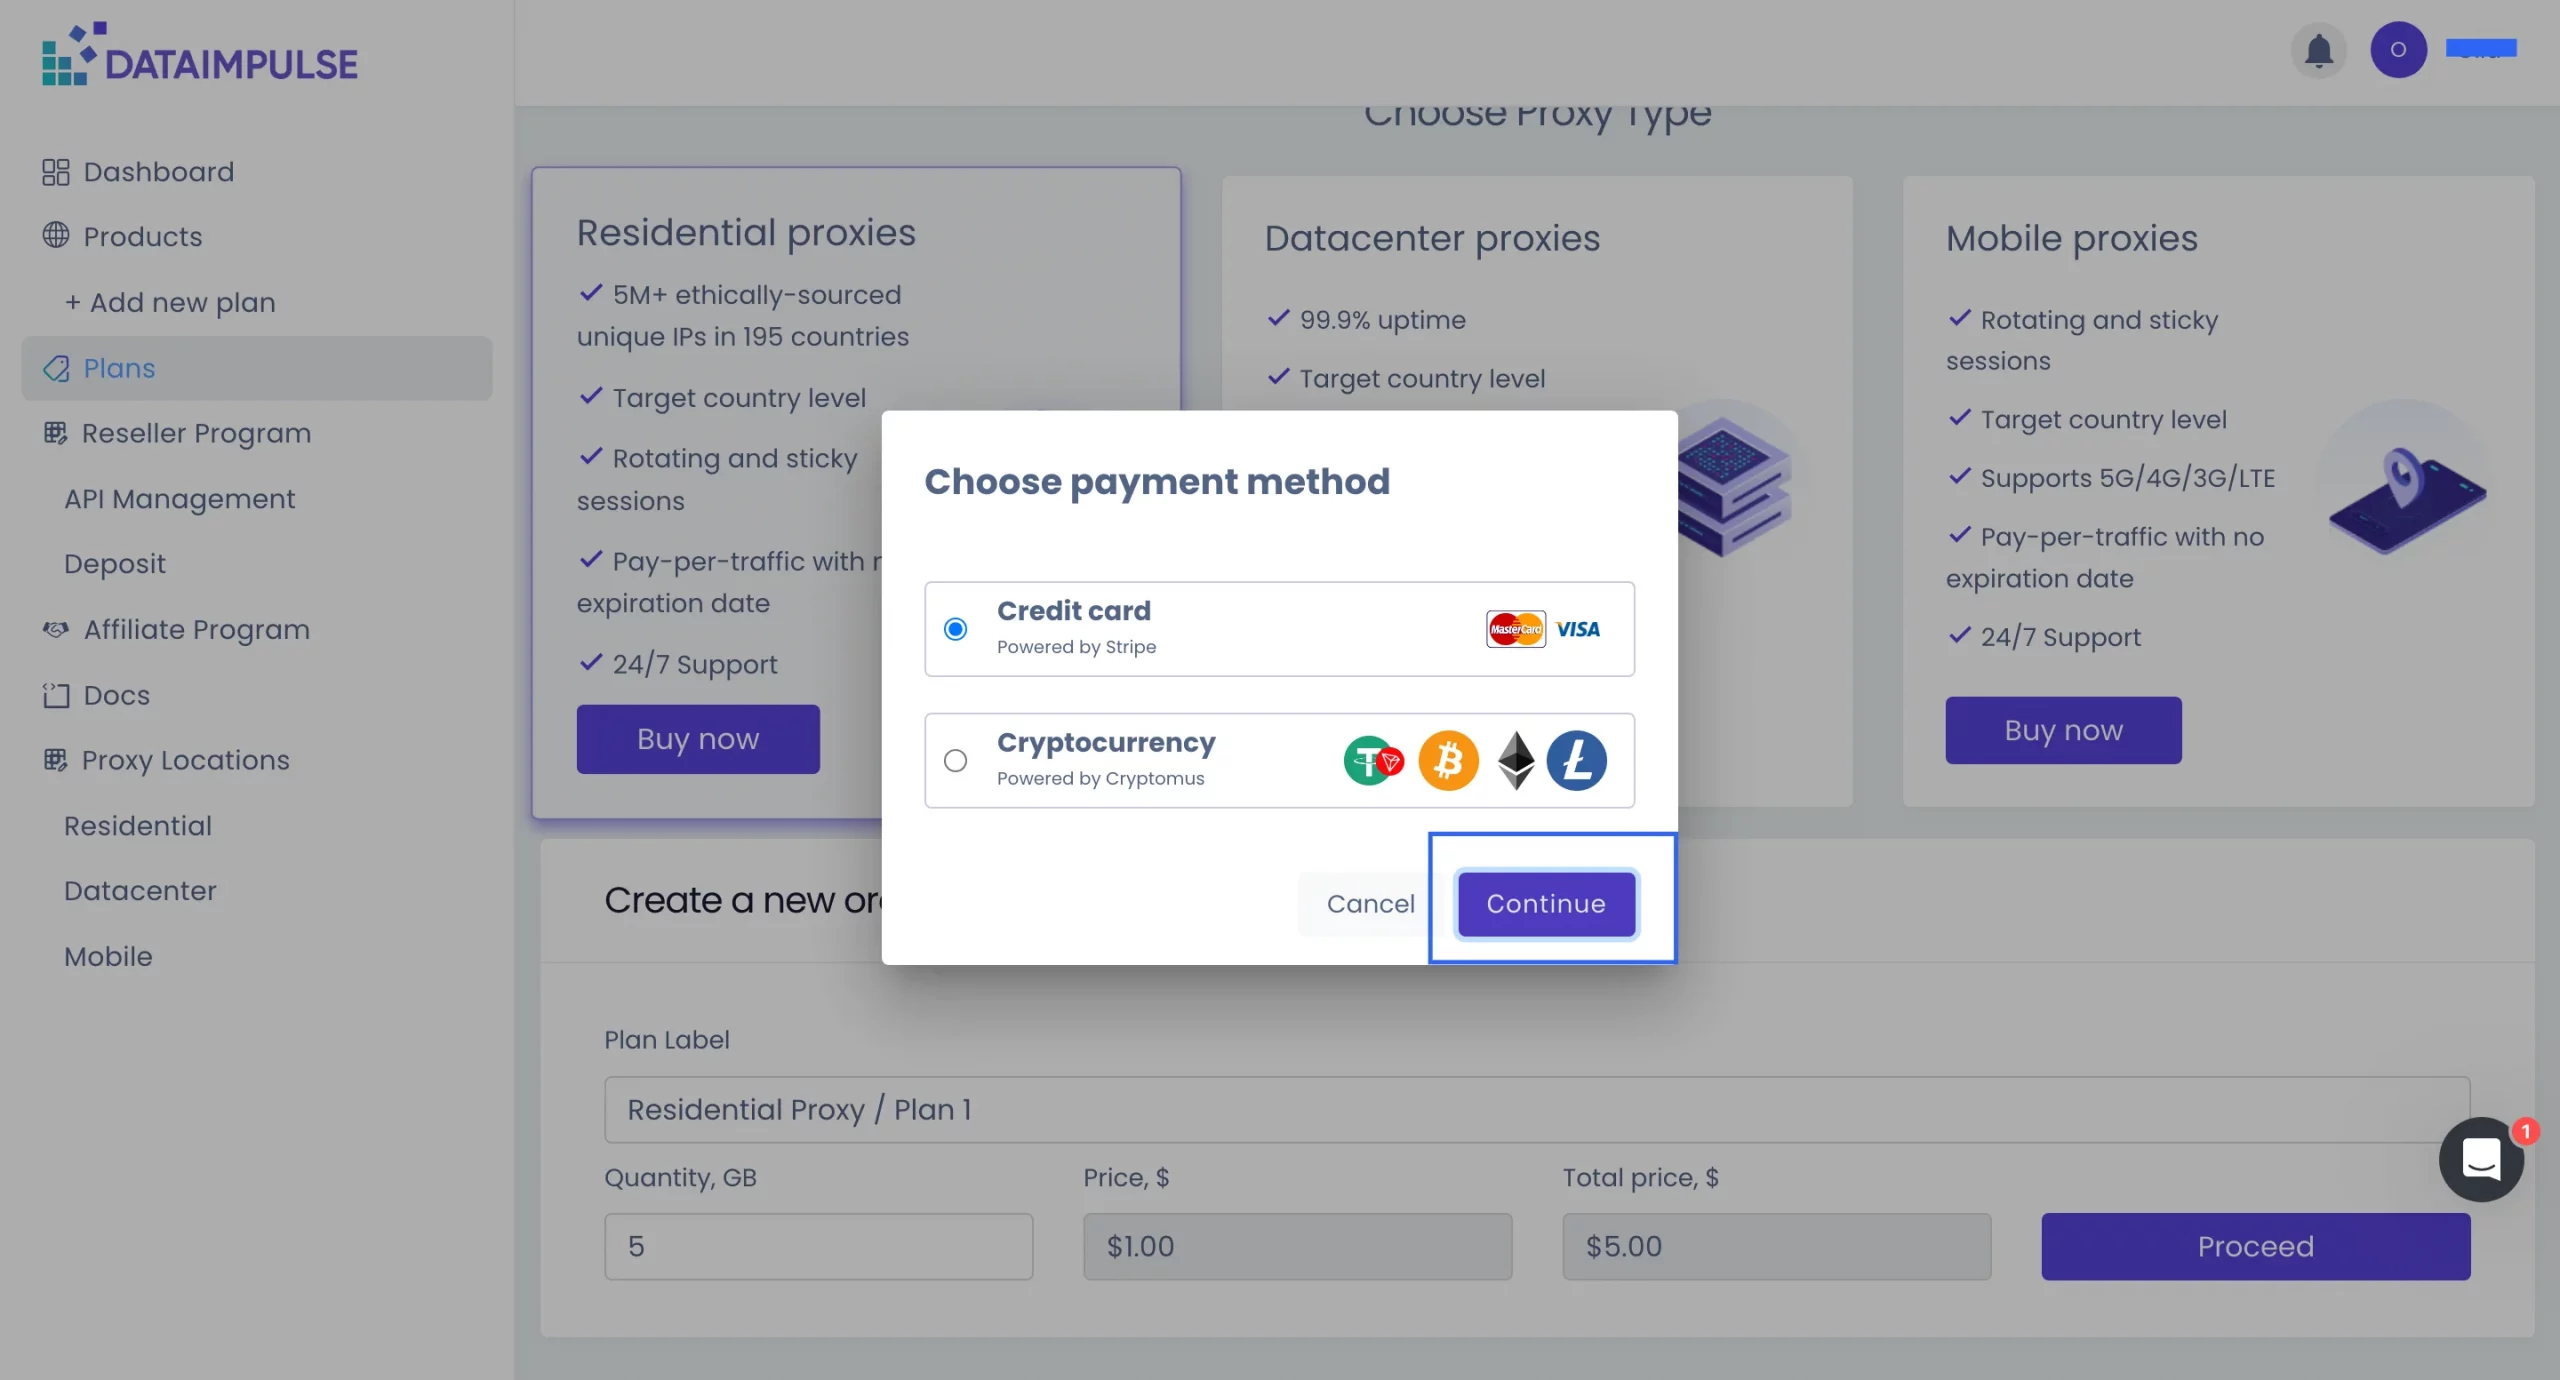
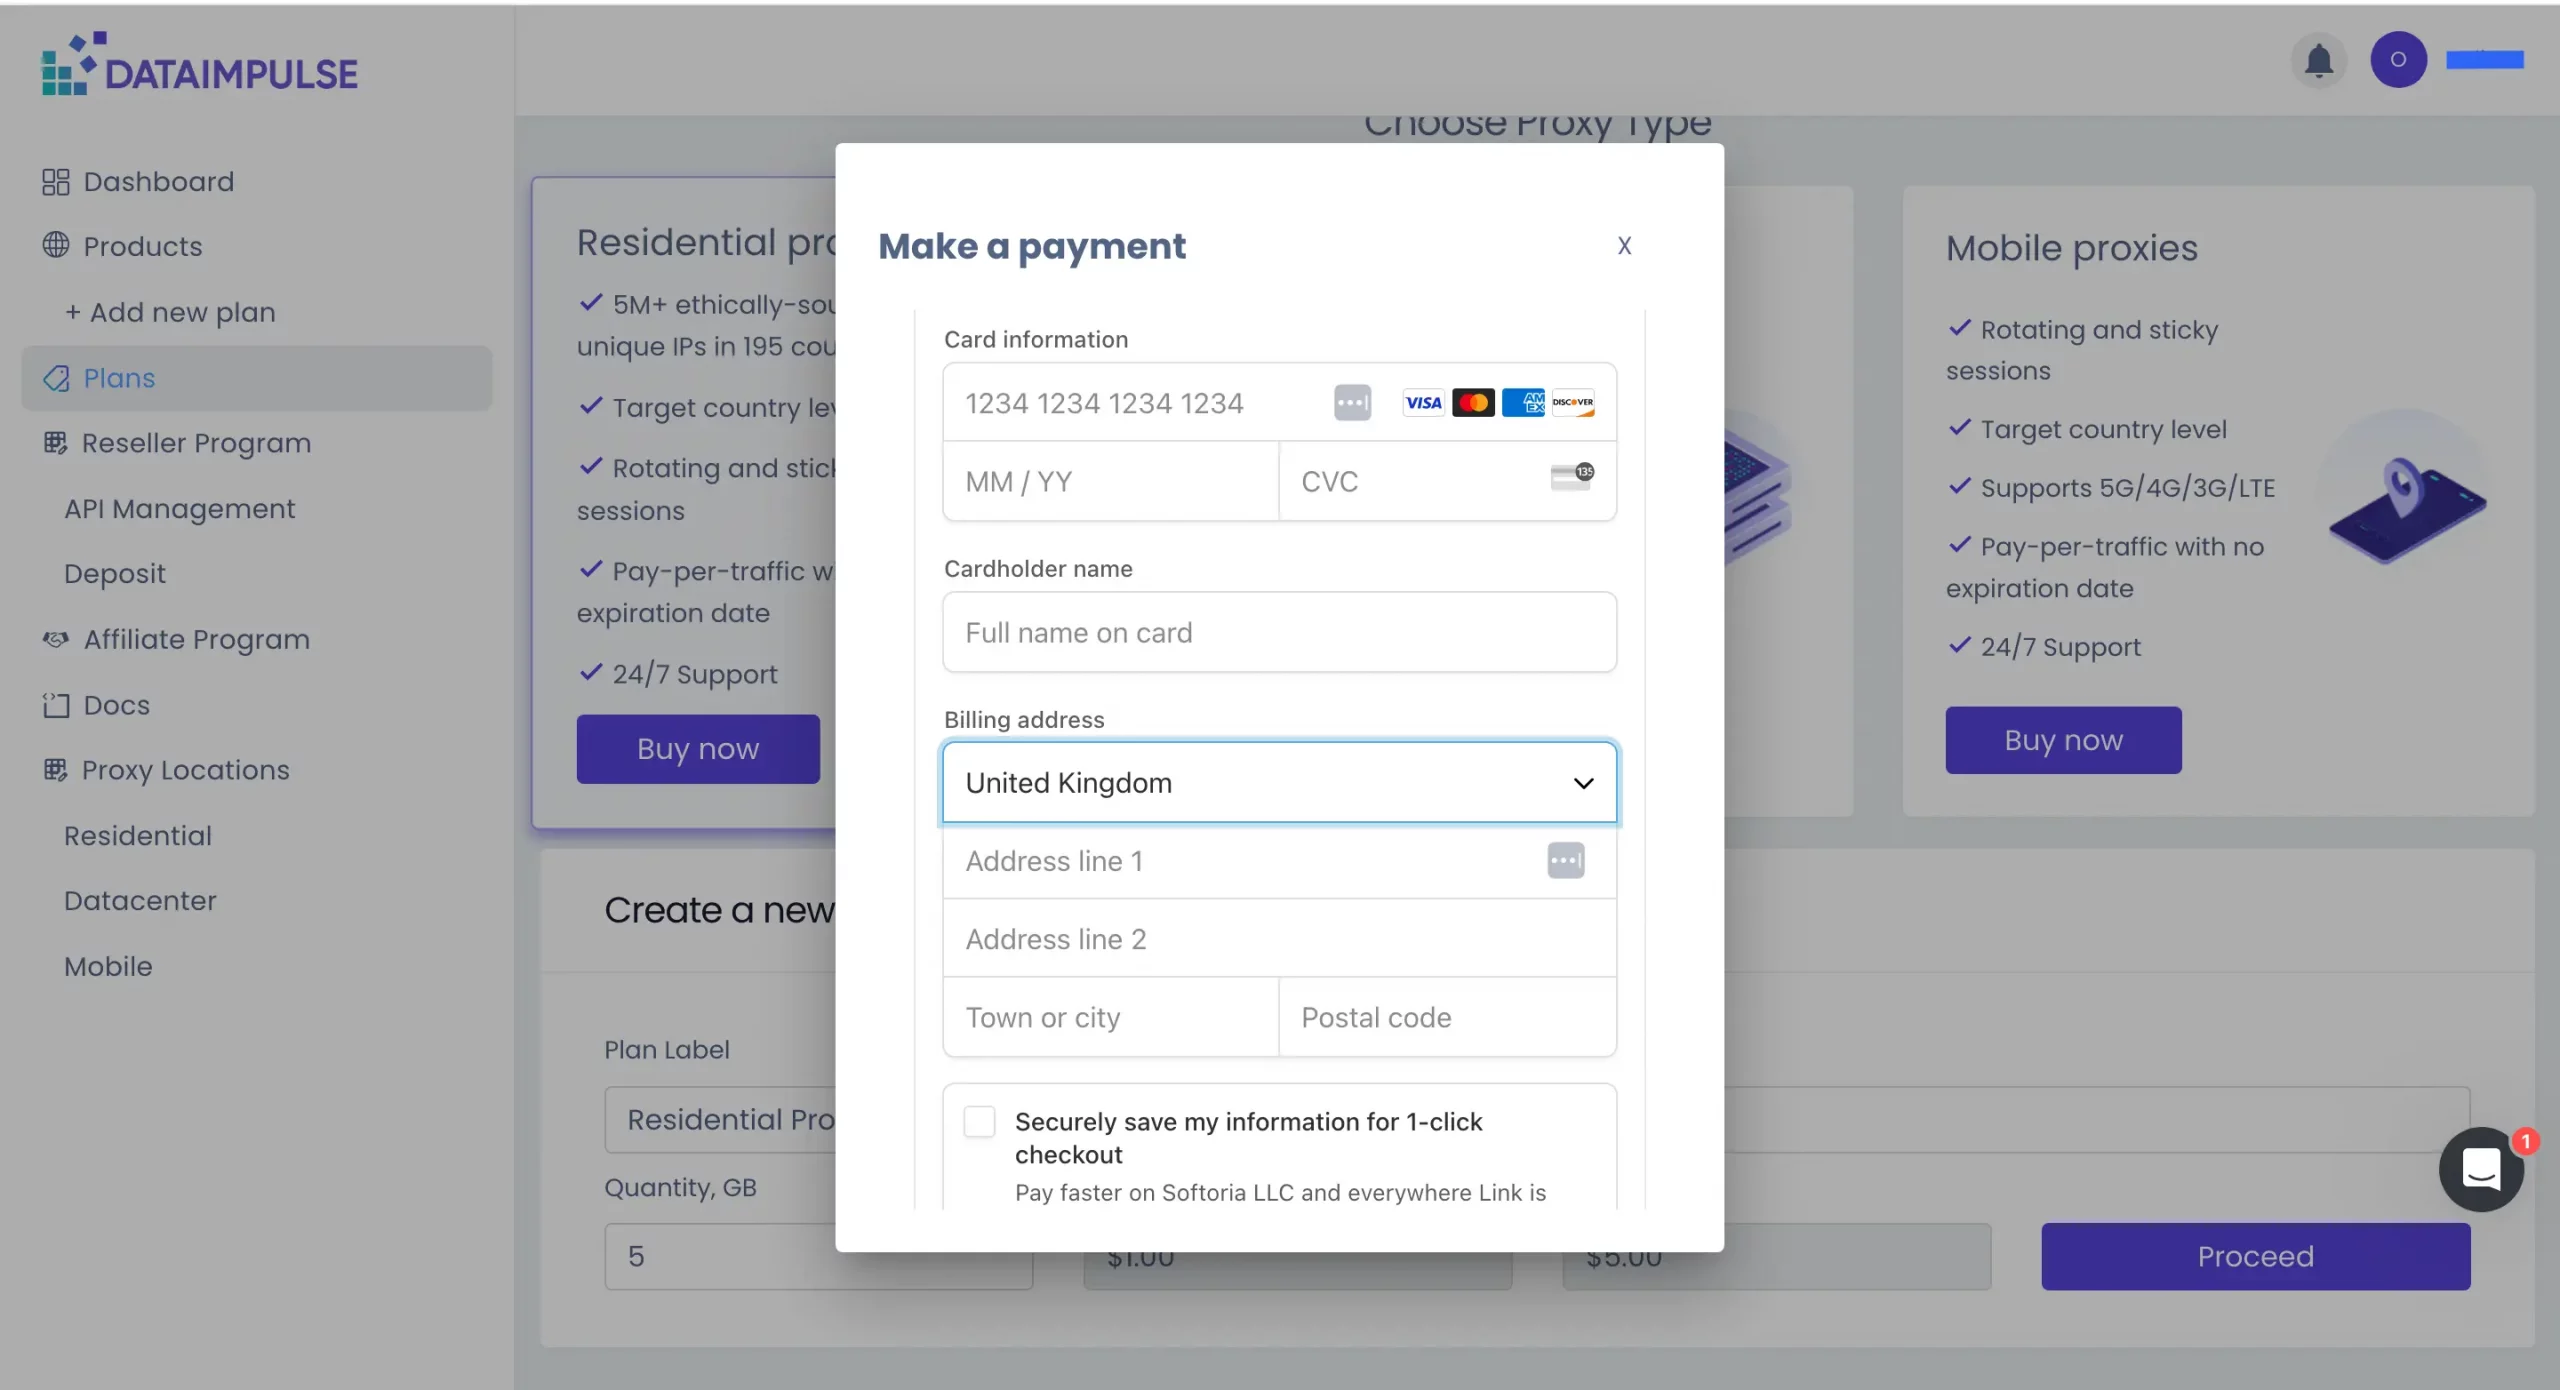
5. Choose a payment method and click on the “Continue” button. Provide the required payment information and complete the transaction.
*The system will redirect you to your account. If you see a payment window displaying a “Session has expired” message, simply close it. If you return to your account and see a prompt to buy a trial again, refresh the page. These issues may occur due to internet connection speed or payment server problems, but they do not affect proxy performance.
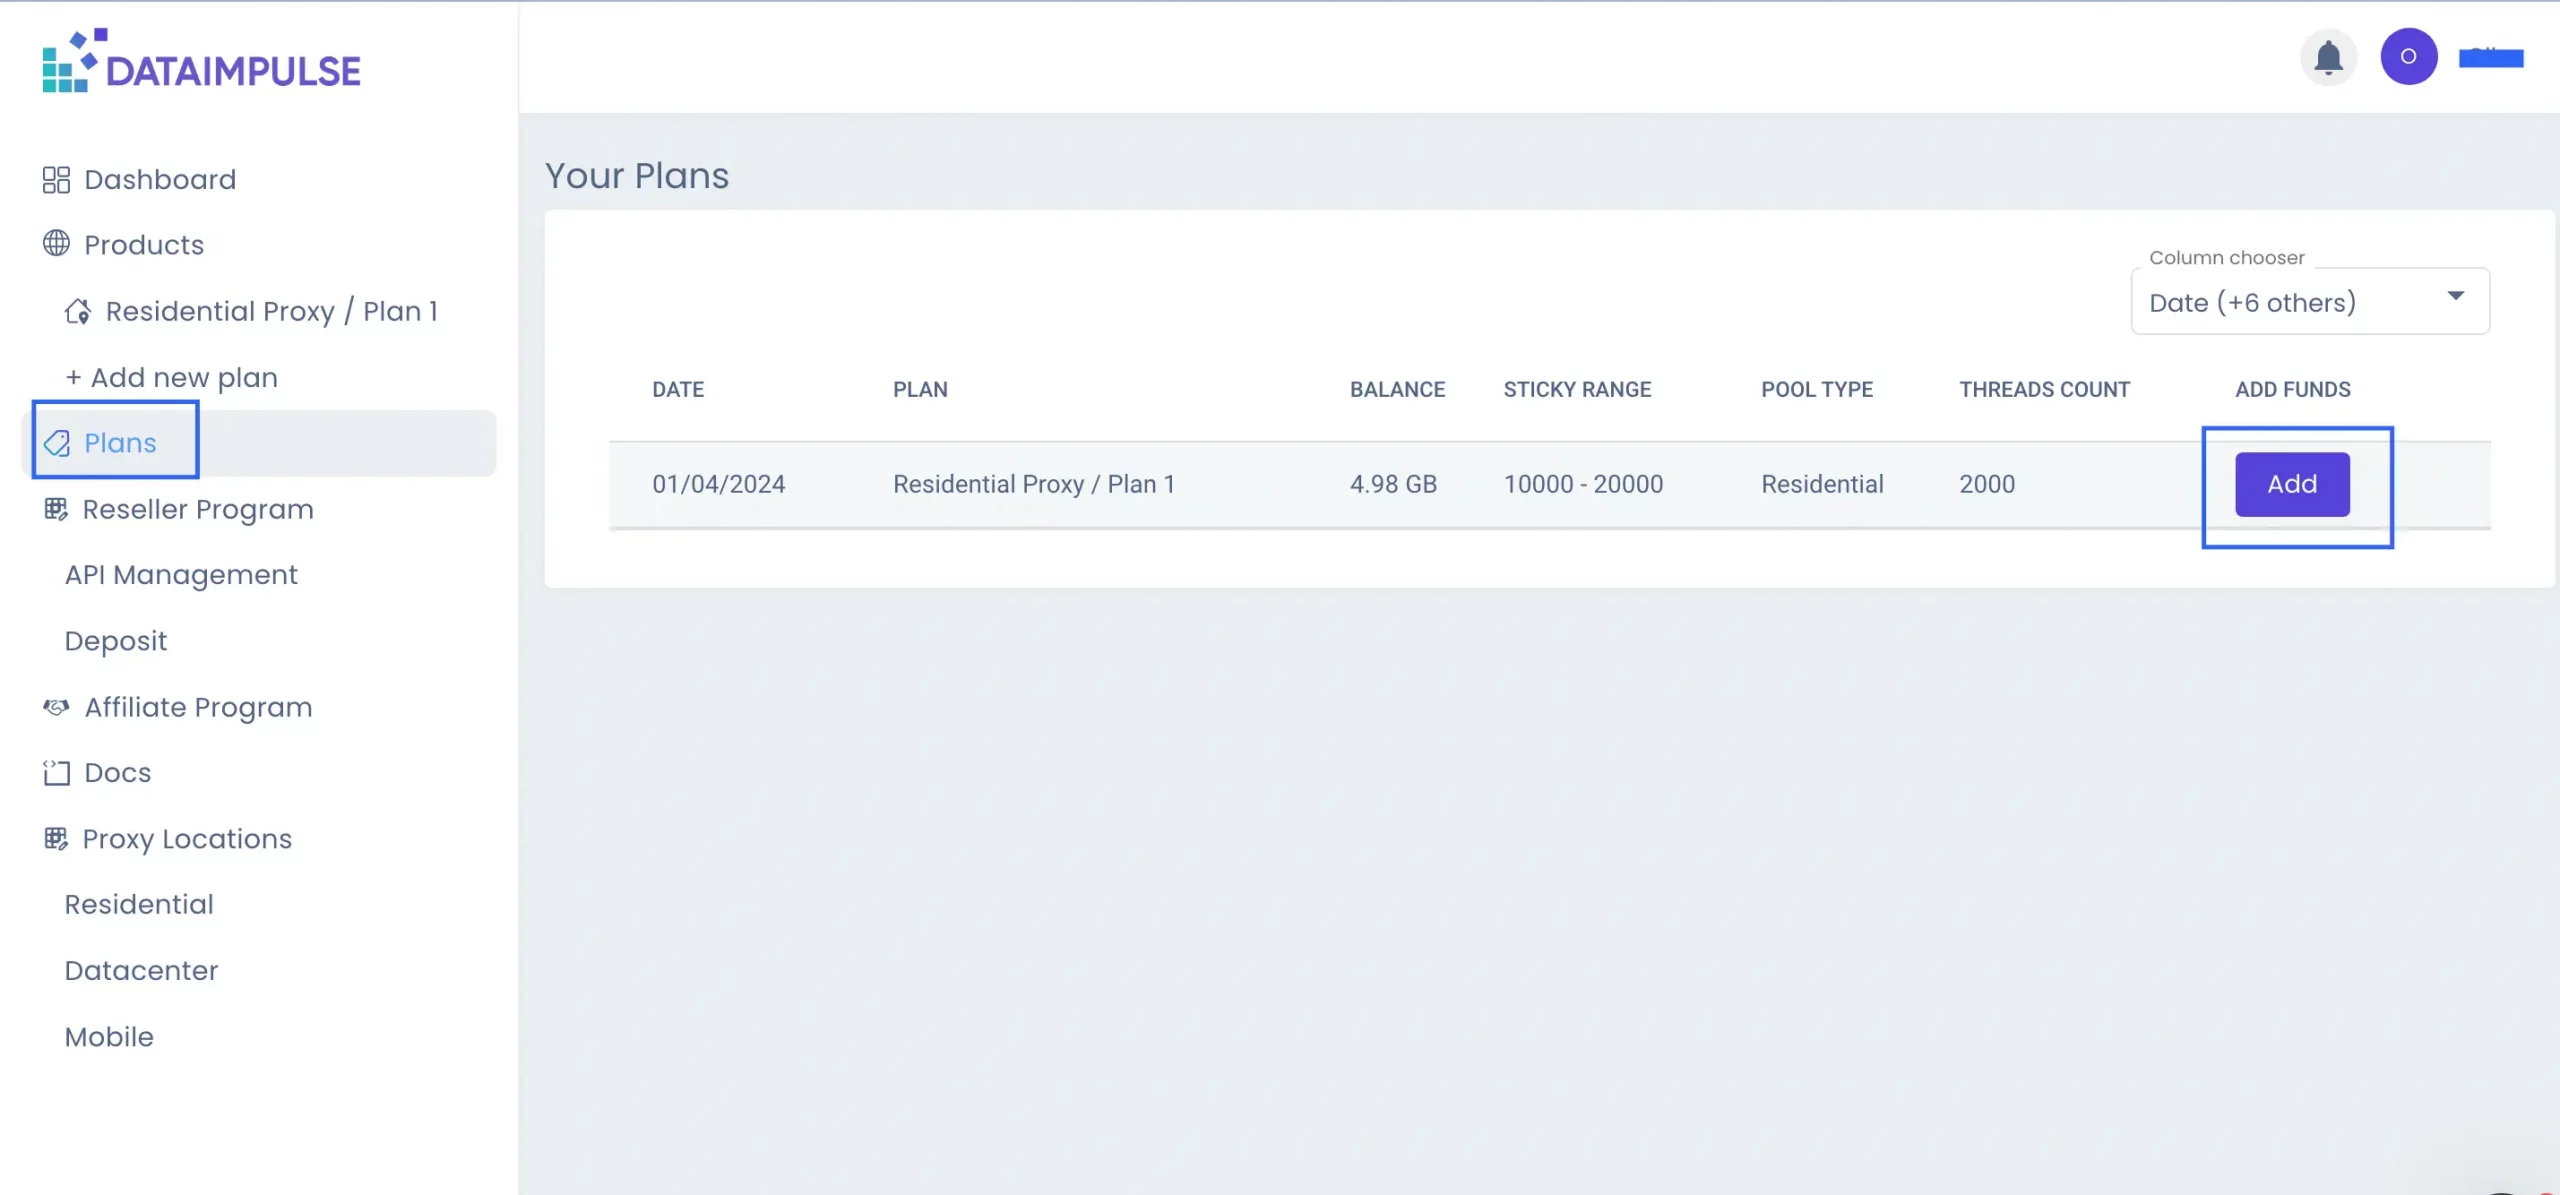
Once you’ve completed your first purchase, you can view all your plans in the “Plans” tab, including details such as the purchase date and remaining GBs. You can also top up a plan by clicking the “Add” button.
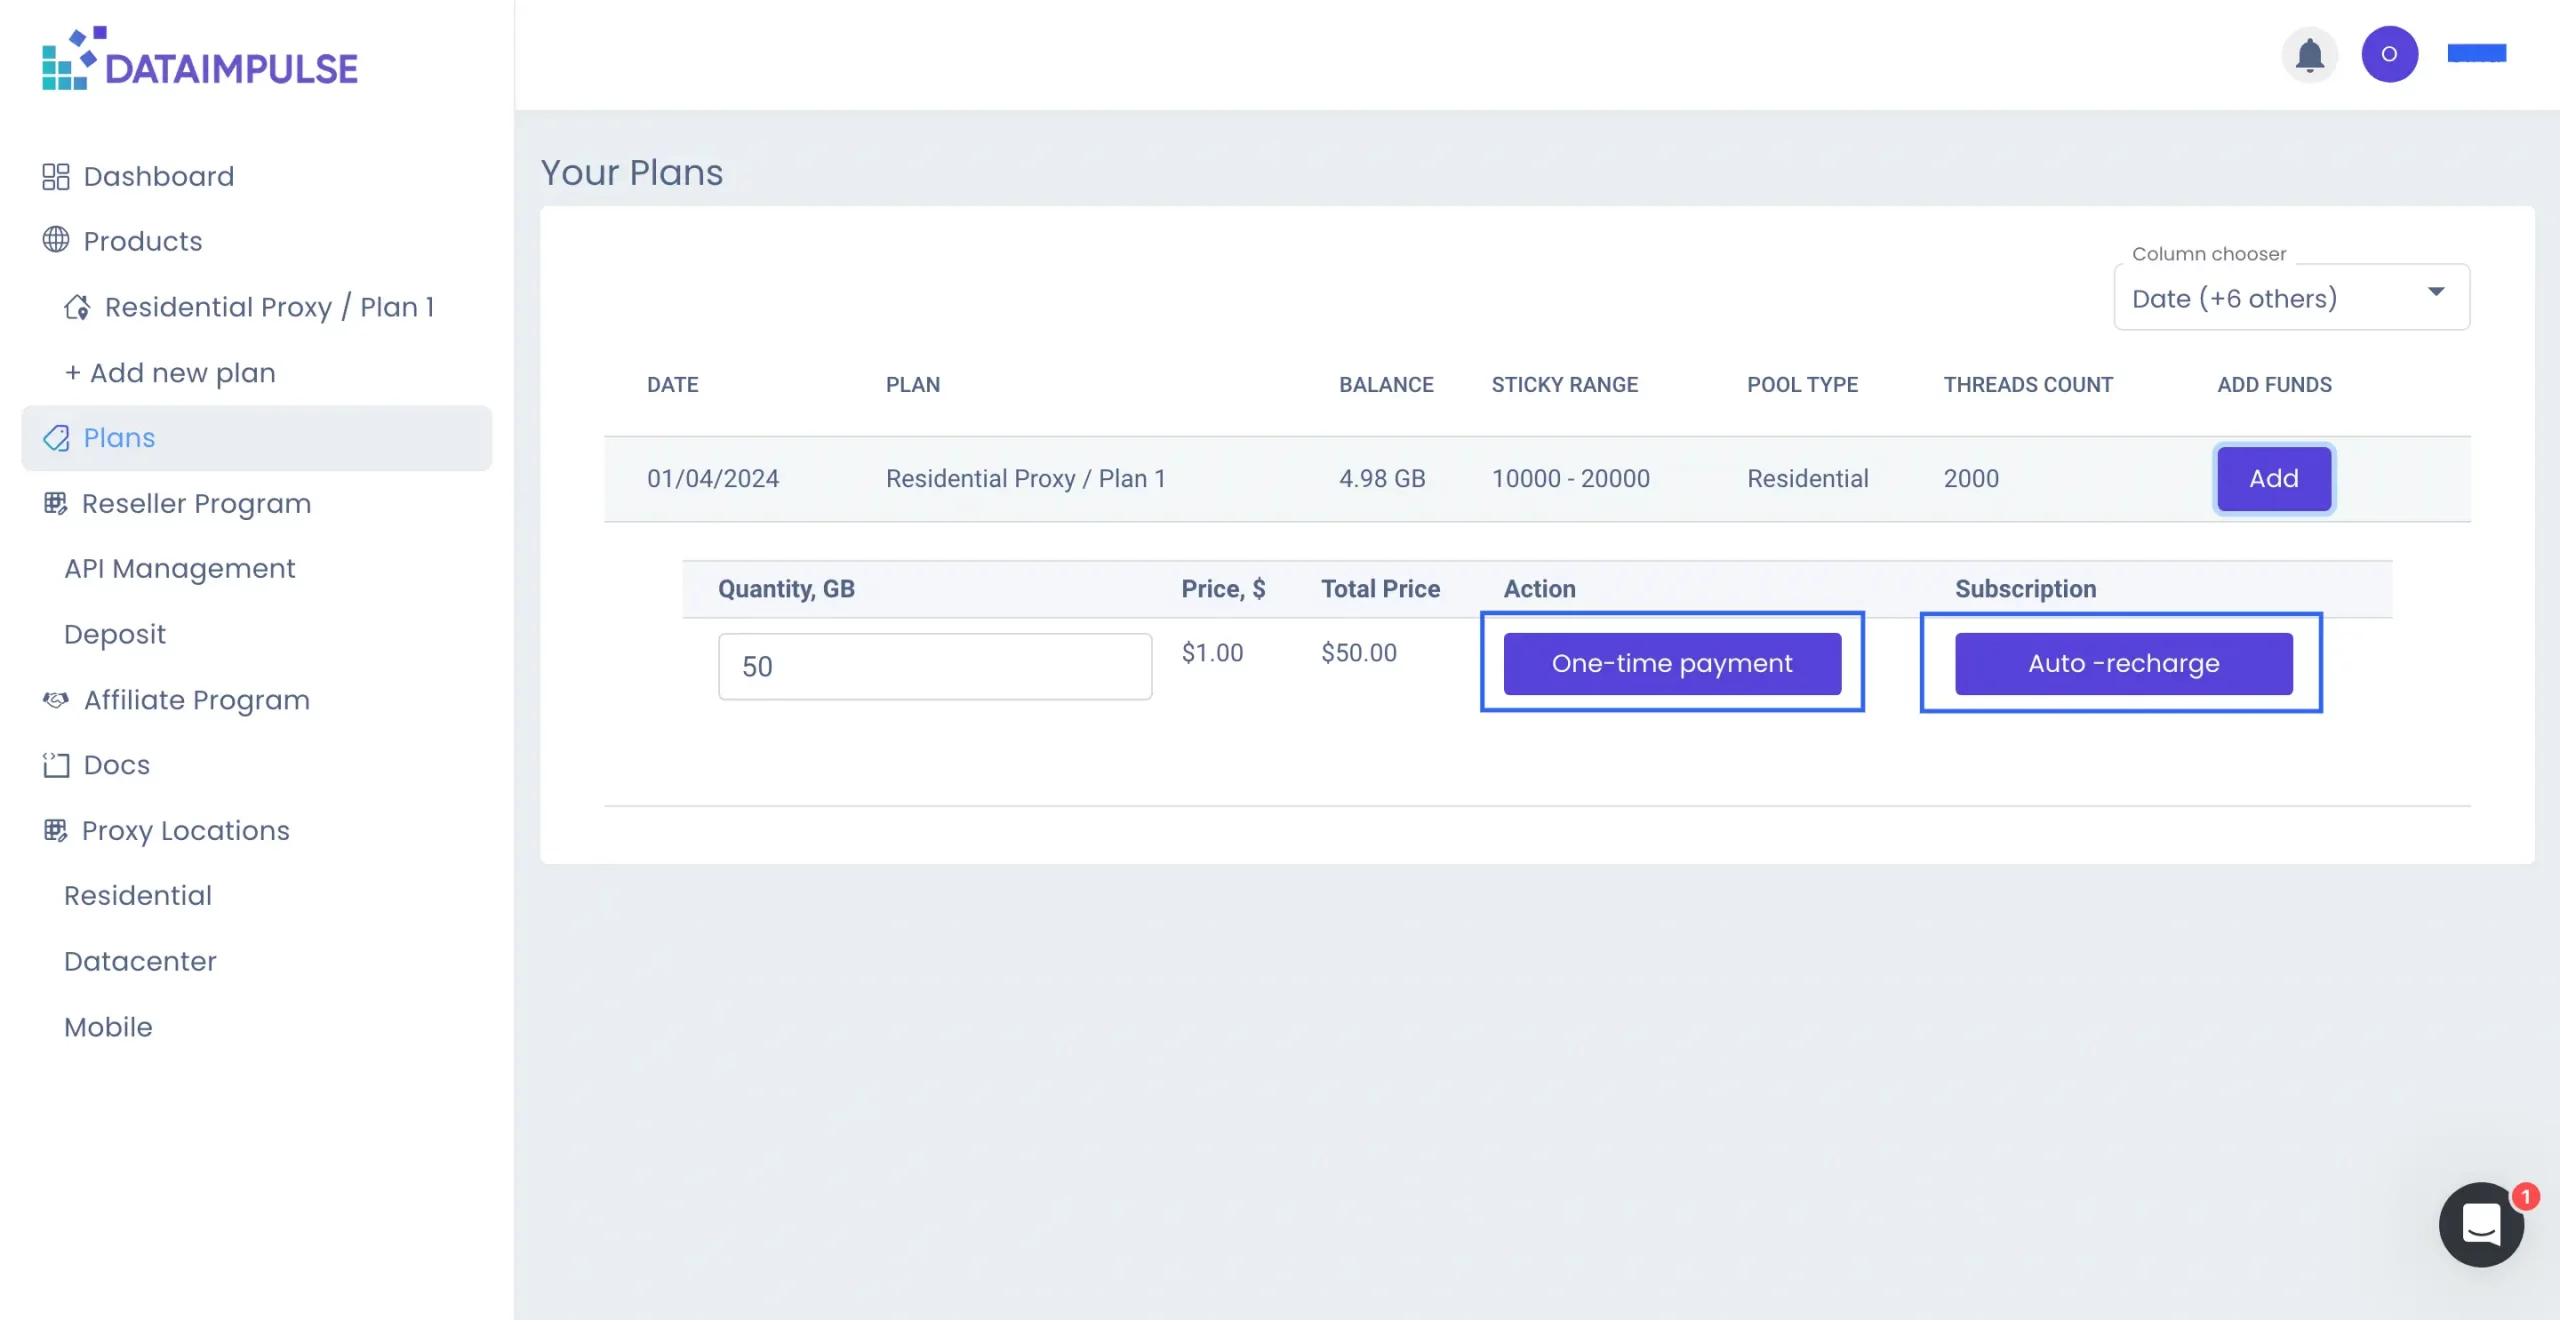
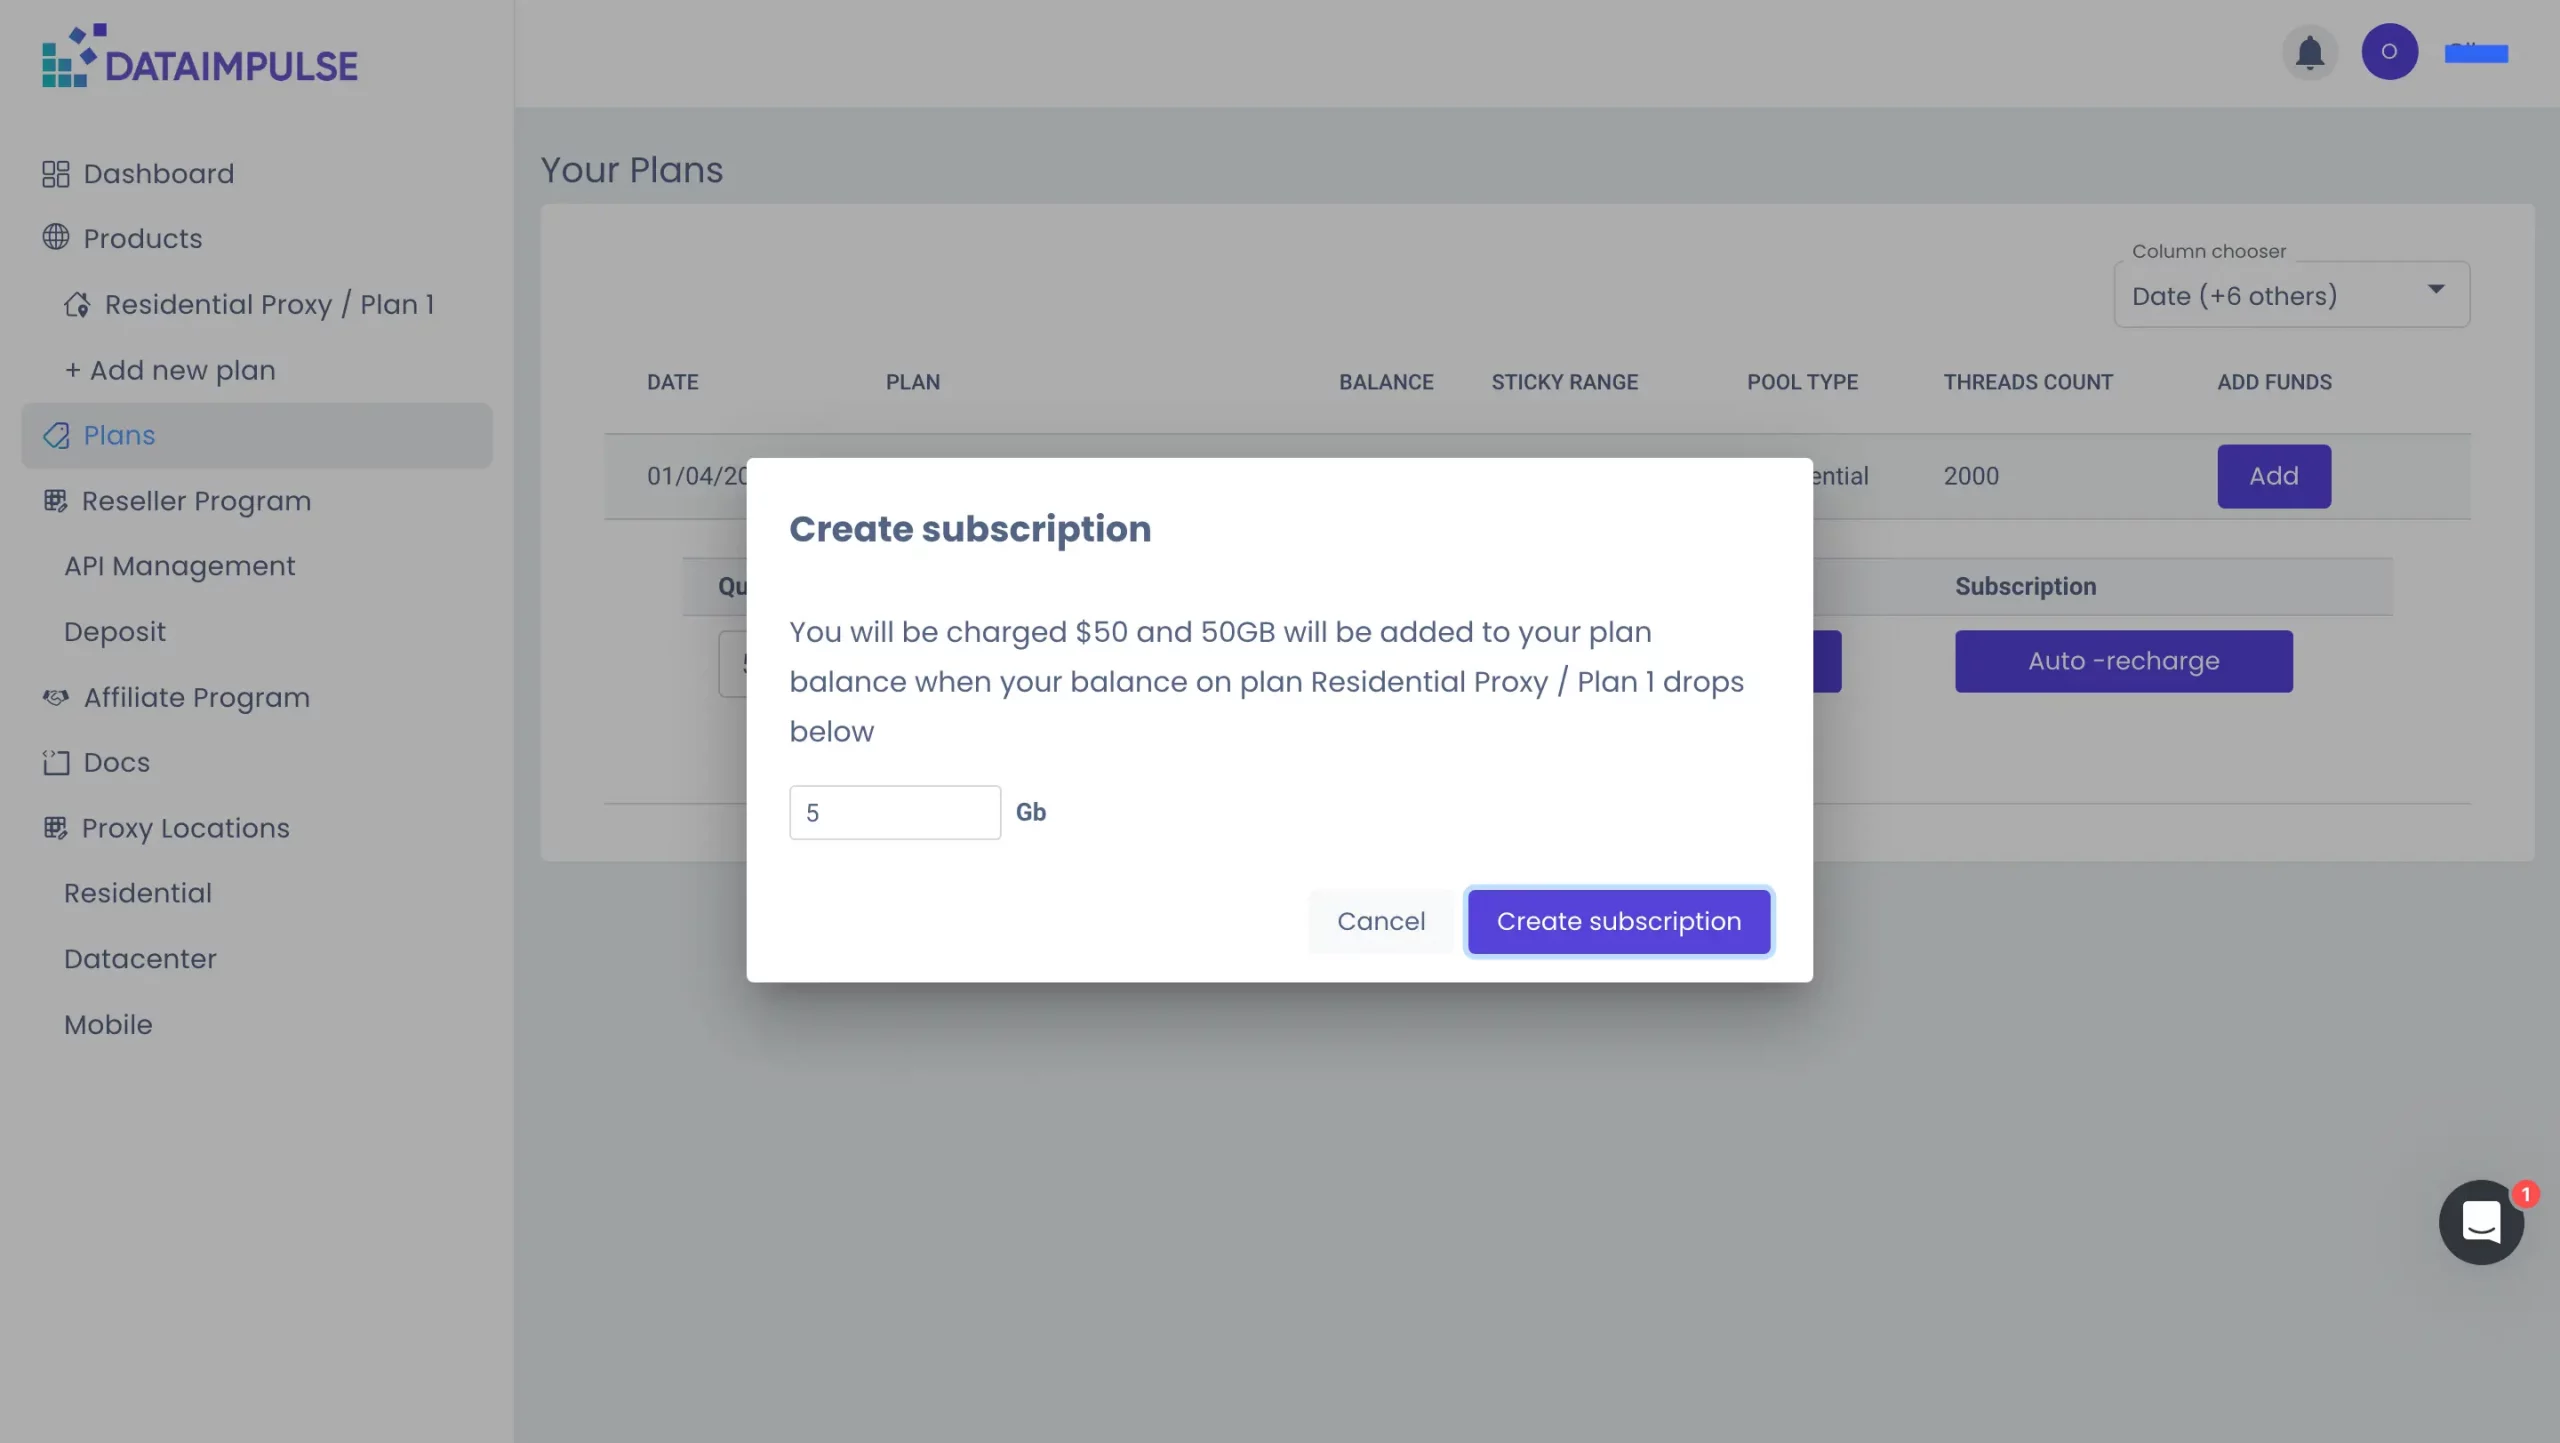
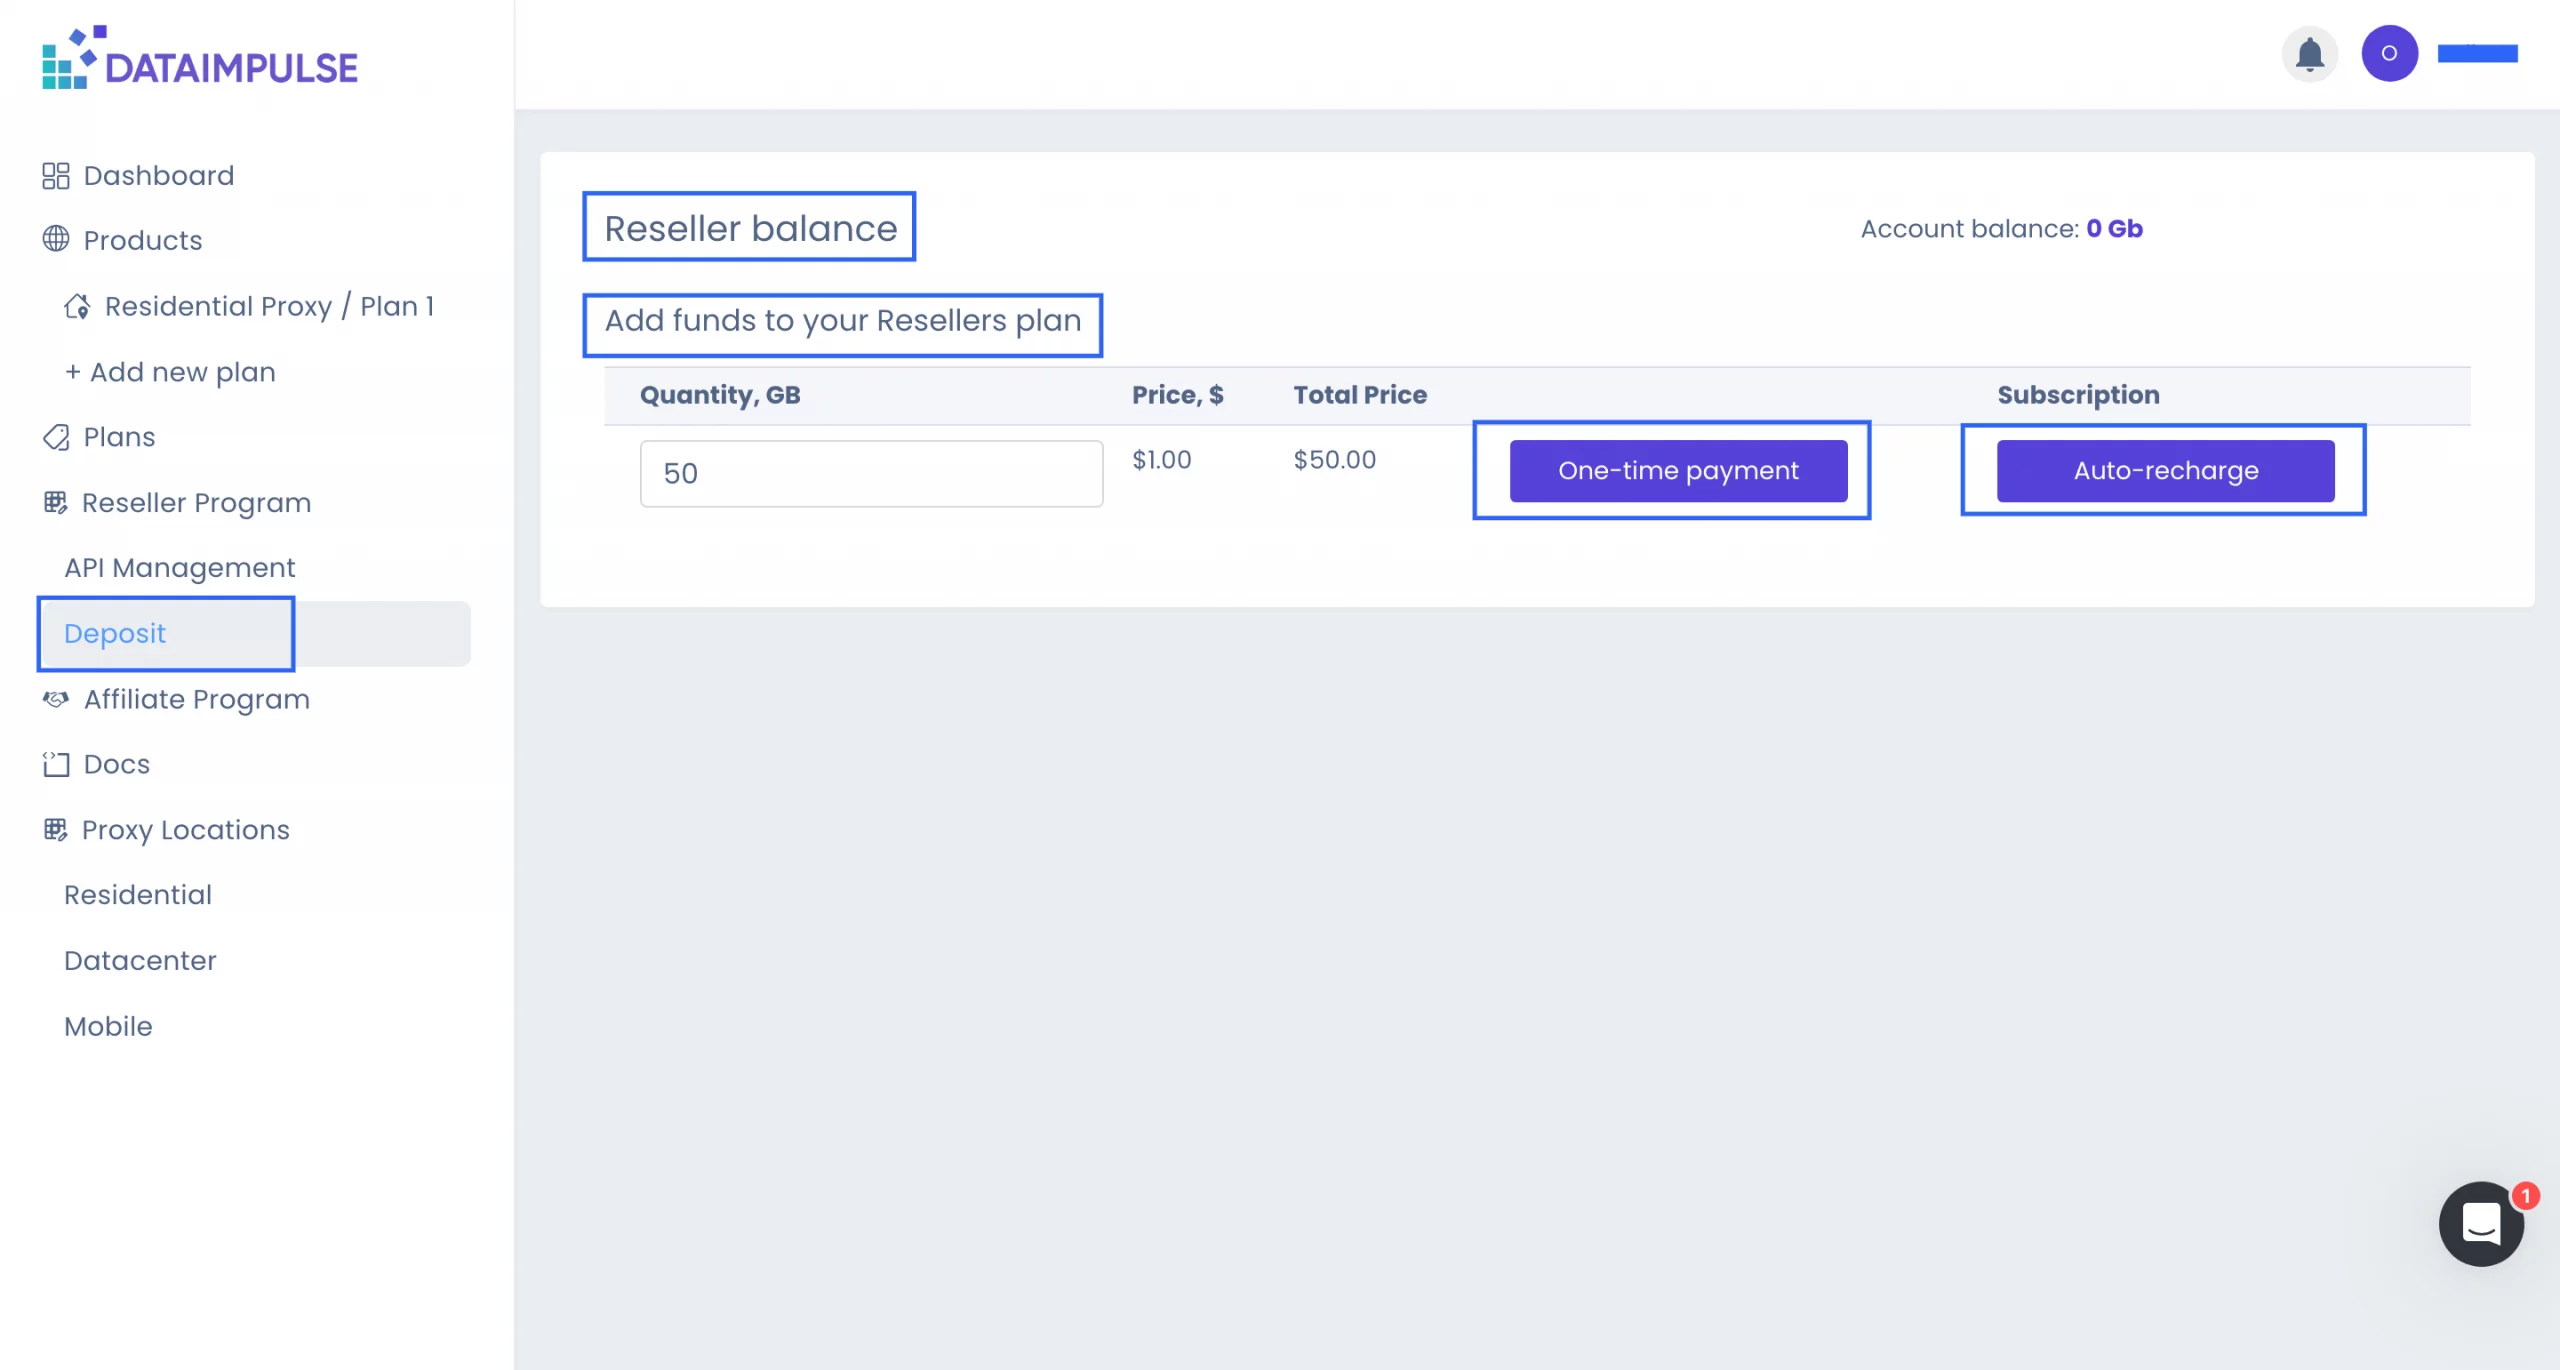
You can pay manually by clicking on the “One-time payment” button, following the same procedures as before. You can set up a subscription by selecting the “Auto-recharge” button. Then the system will automatically top up your balance when it drops below a certain level. You set this level yourself.
If you need one more plan of the same proxy type or you want to use another proxy type, click on the “+ Add new plan” tab, choose what you need, and repeat the payment process.
By buying another proxy type, you can once again enjoy a $5 trial. This benefit is only available for the first purchase.
If you purchase another plan of the same proxy type or top-up your current plan, the minimum payment required is $50.
DataImpulse Credentials: Where to Find?
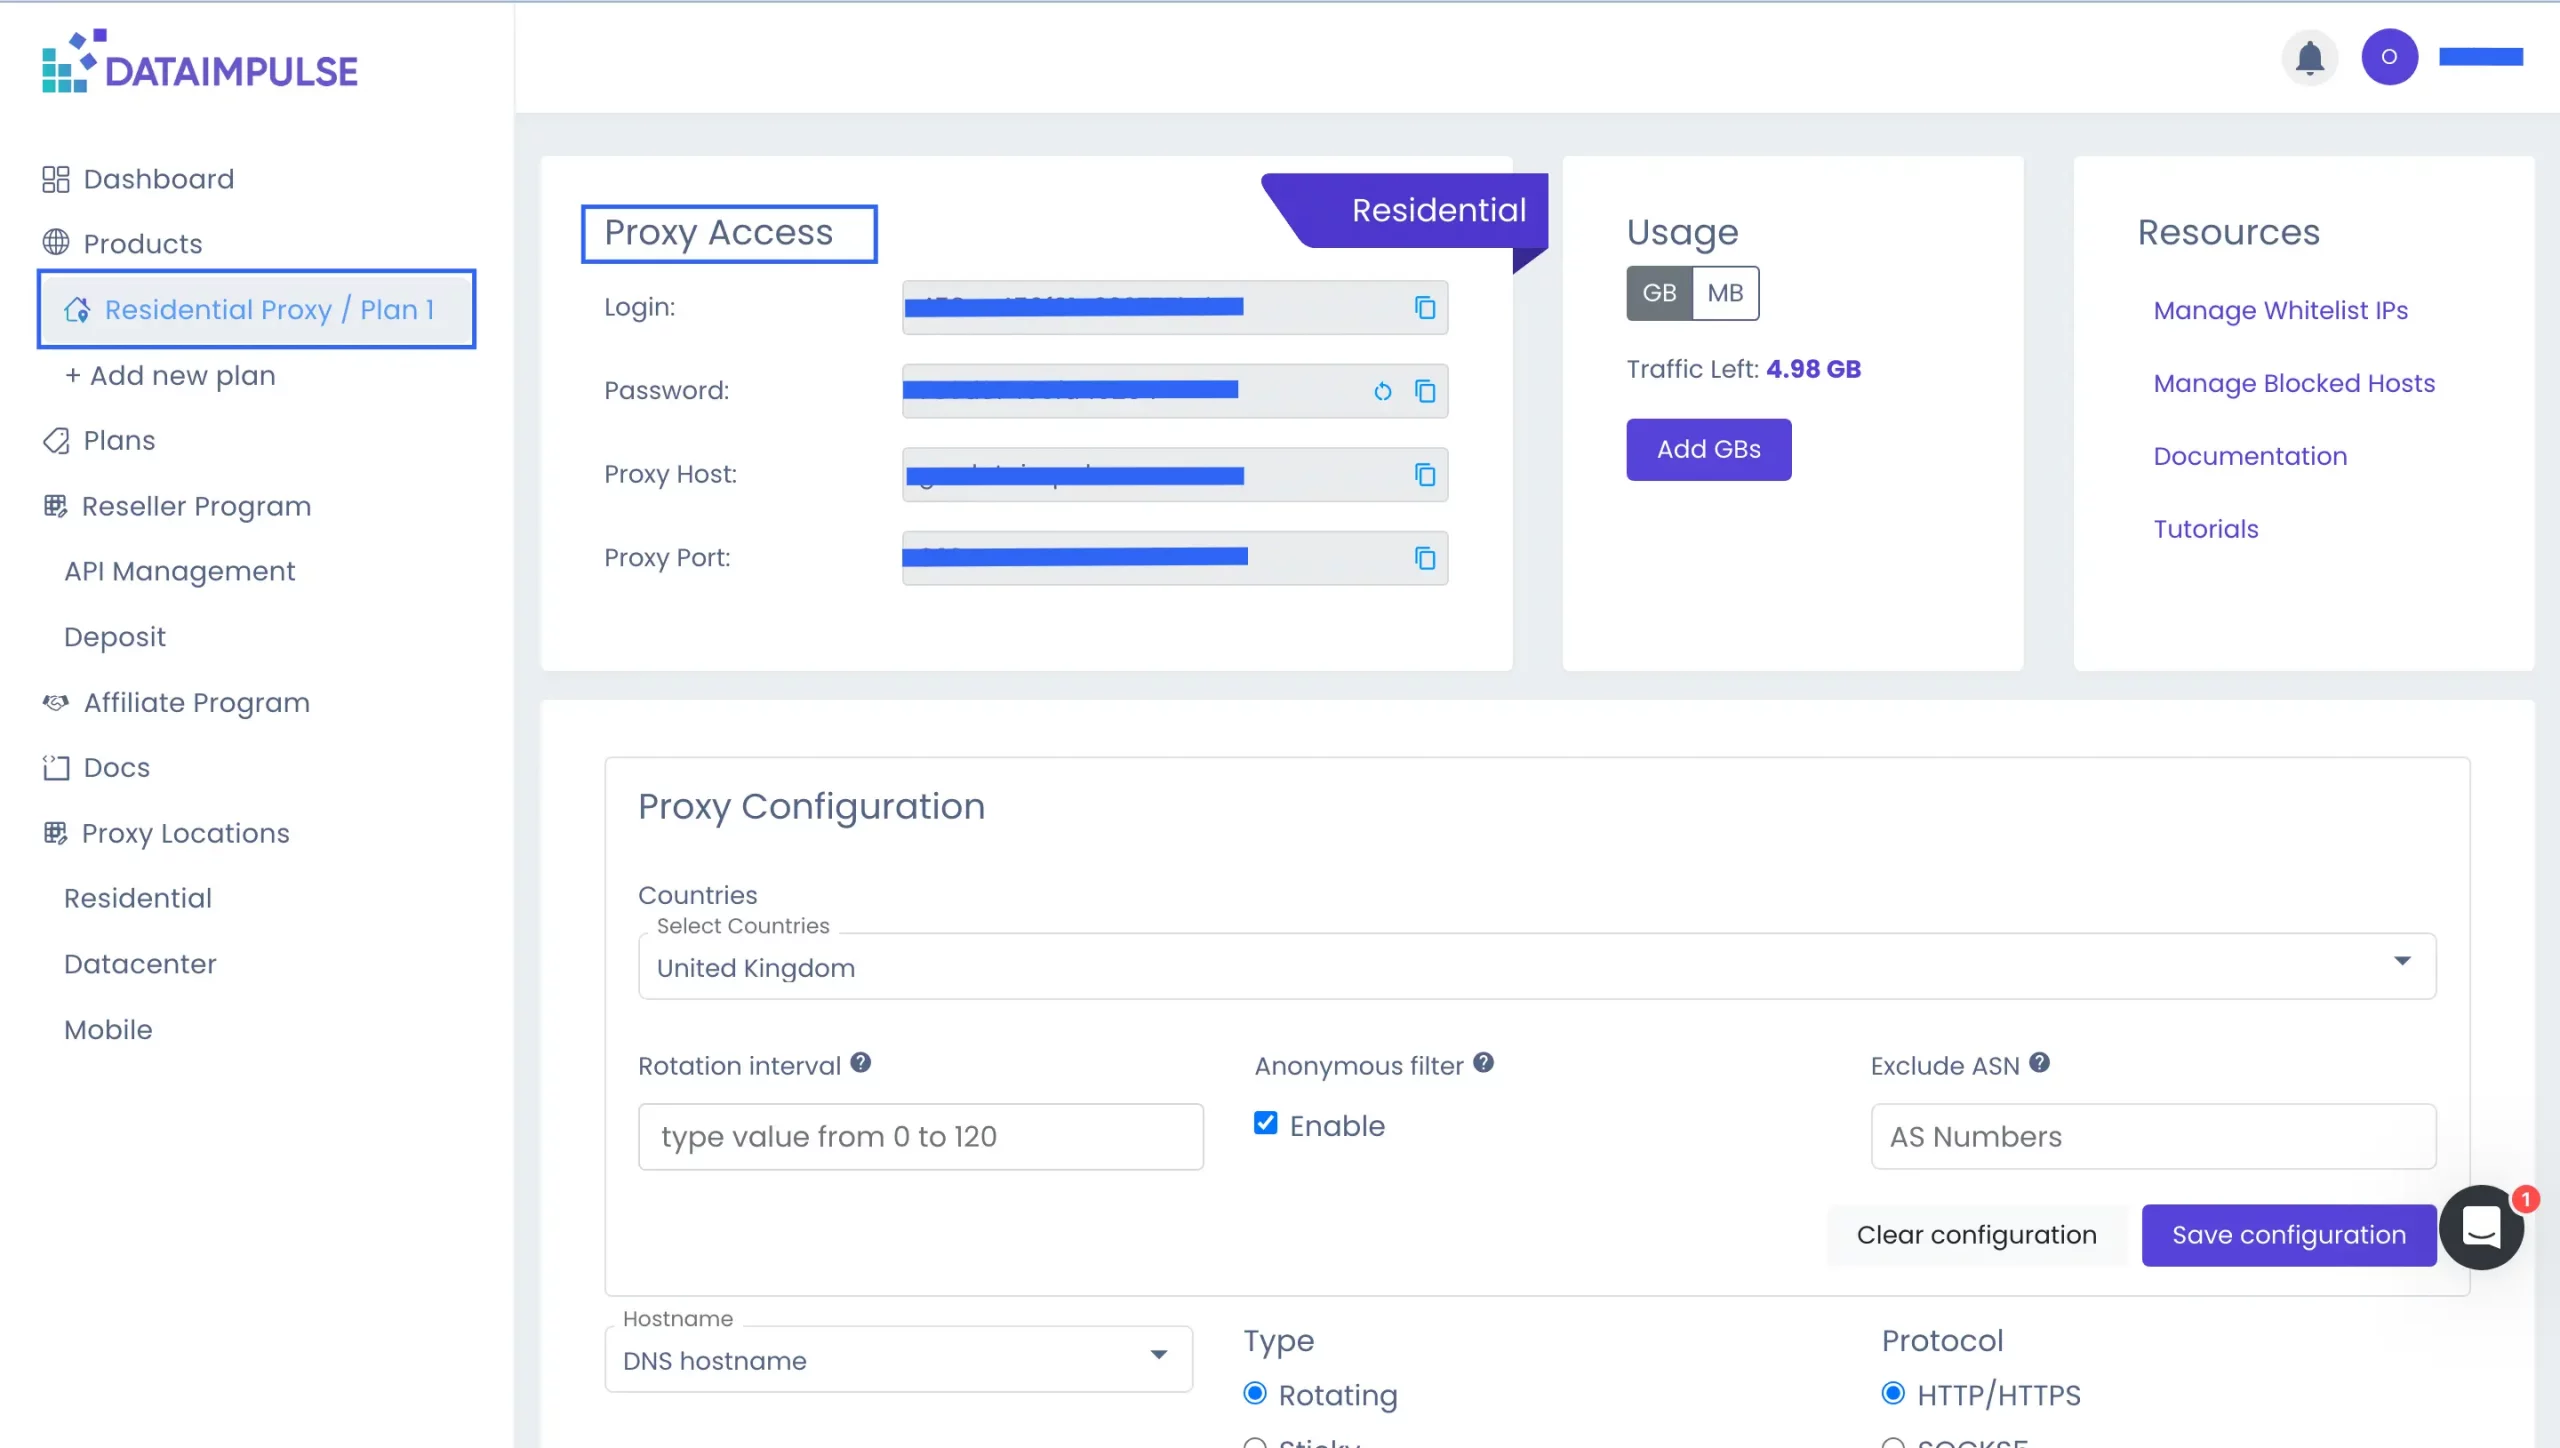
To adjust settings and get your credentials, go to a tab with the necessary plan’s name. In this case, it is the “Residential Proxy/Plan 1” tab.
In the “Proxy Access” section, you can find your login and password.
In the “Usage” section, you can see how much traffic is left and top up your balance.
The next one is the “Resources” section.
- If you want to whitelist an IP so you can make requests without credentials, click on the “Manage Whitelist IP” sign and enter the necessary address.
- If you want to block a host, use the “Manage Blocked Hosts” feature and enter the name or IP of the target host.
- The “Documentation” section provides basic instructions and examples for using proxies, which are also available in the “Docs” tab.
- The “Tutorials” link will lead you to the manuals about how to integrate proxies with different apps and browsers.
Proxy Configuration
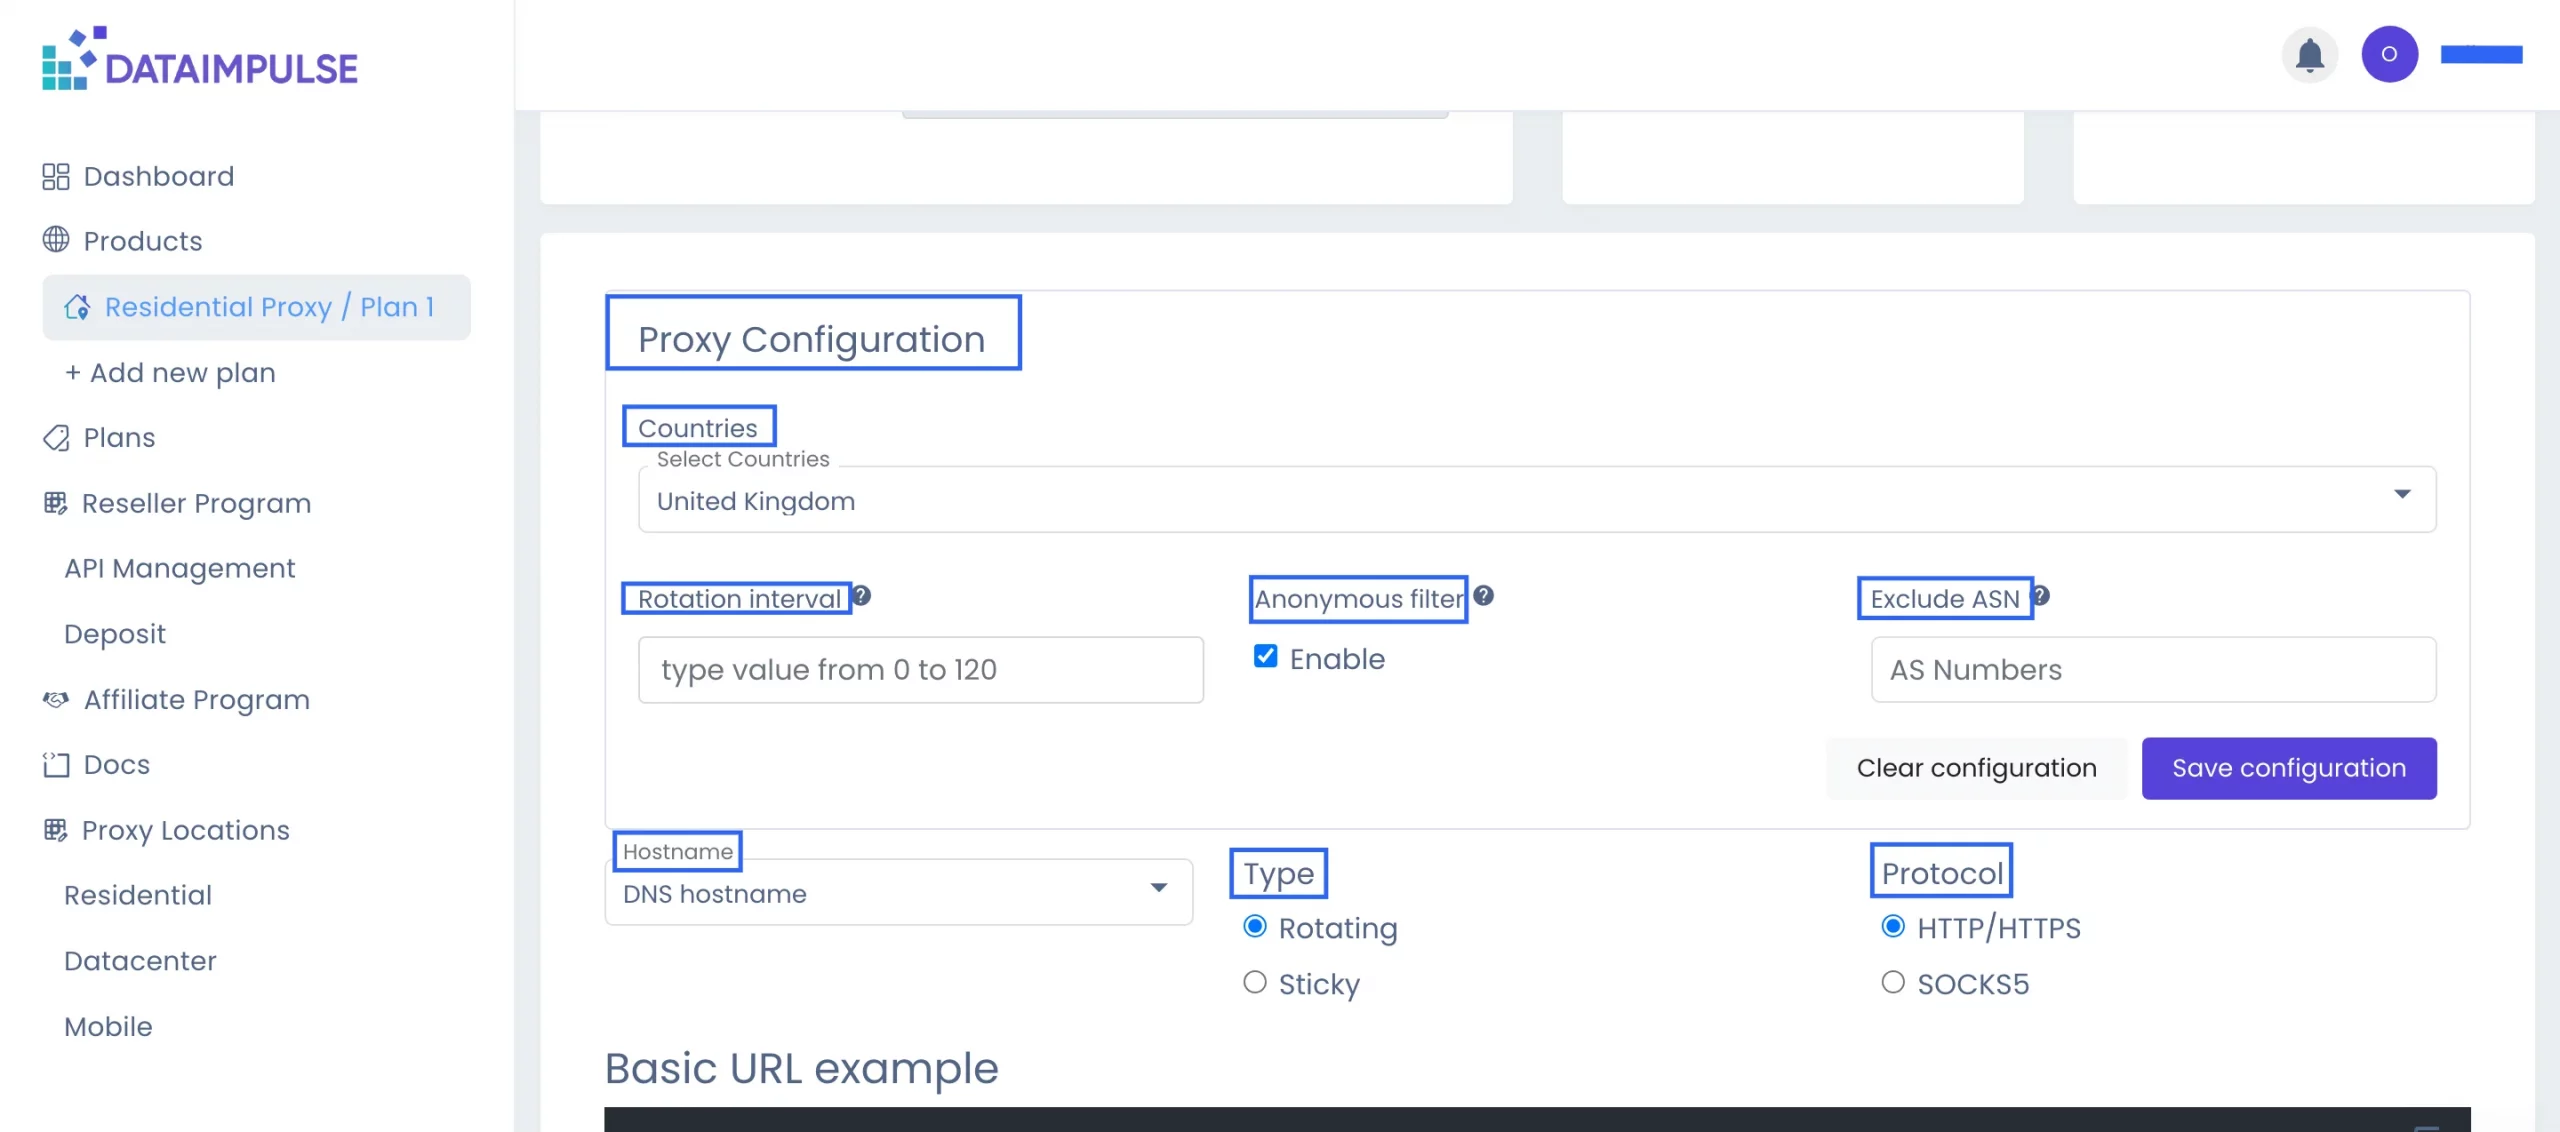
To manage your proxy settings, scroll down to the “Proxy Configuration” section. Here you can set a rotation interval, exclude ASNs, enable Anonymous filtering, and choose hostname format, proxy type, and proxy protocol.
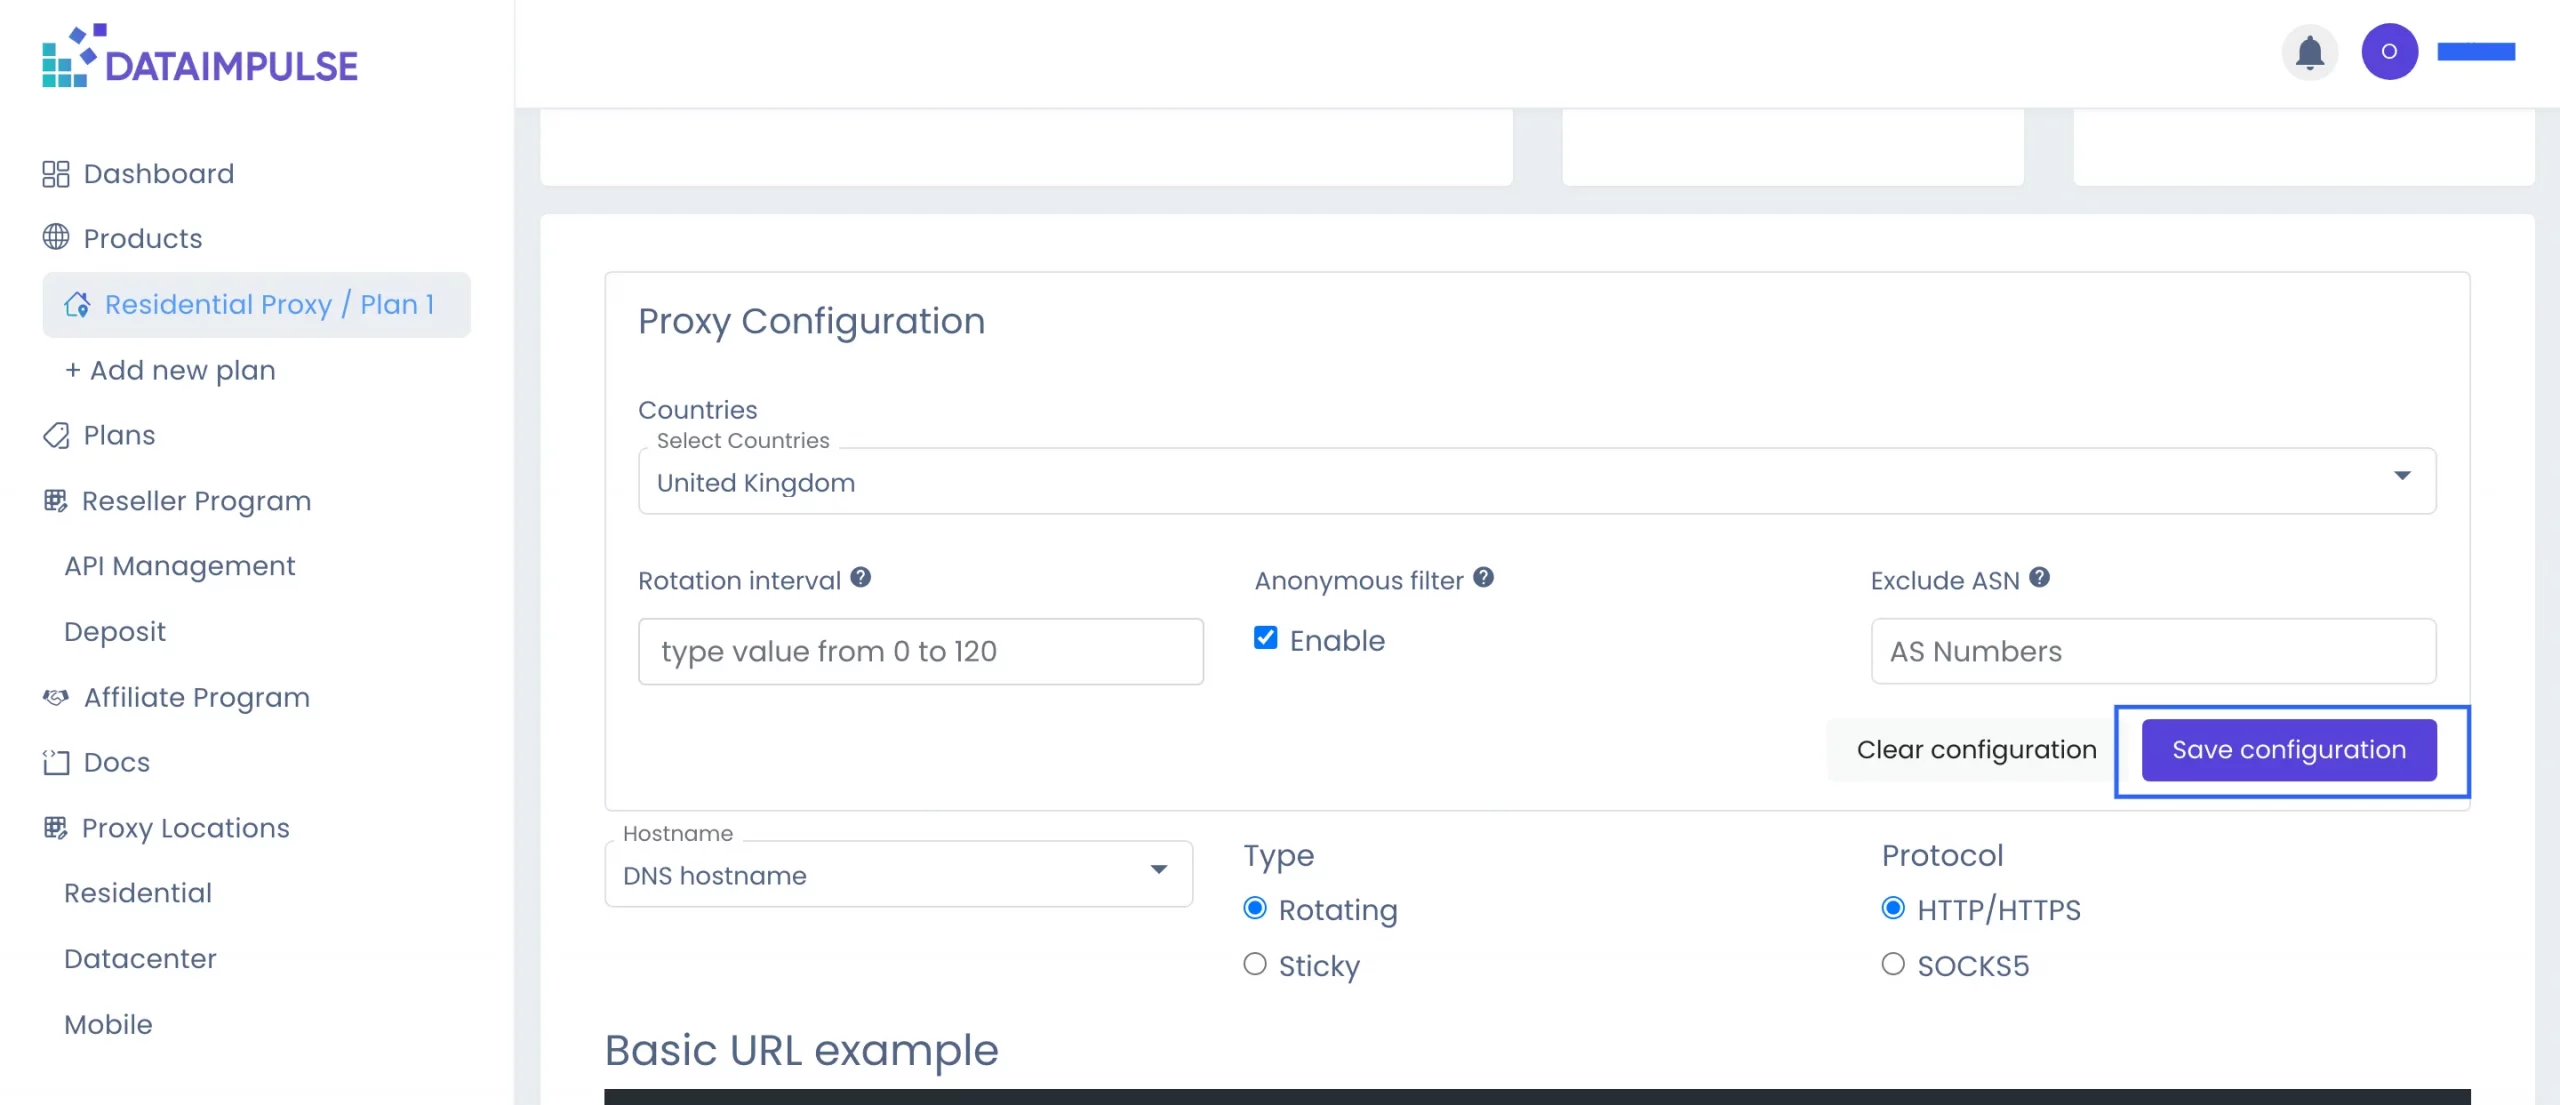
Please note that once you’ve finished adjusting your settings, remember to click the “Save configuration” button. If you no longer need your current settings, you can reset them by clicking on the “Clear configuration” button.
Geo-targeting is also available at no extra cost. Just select the country or countries you need IPs from.
Proxy Locations
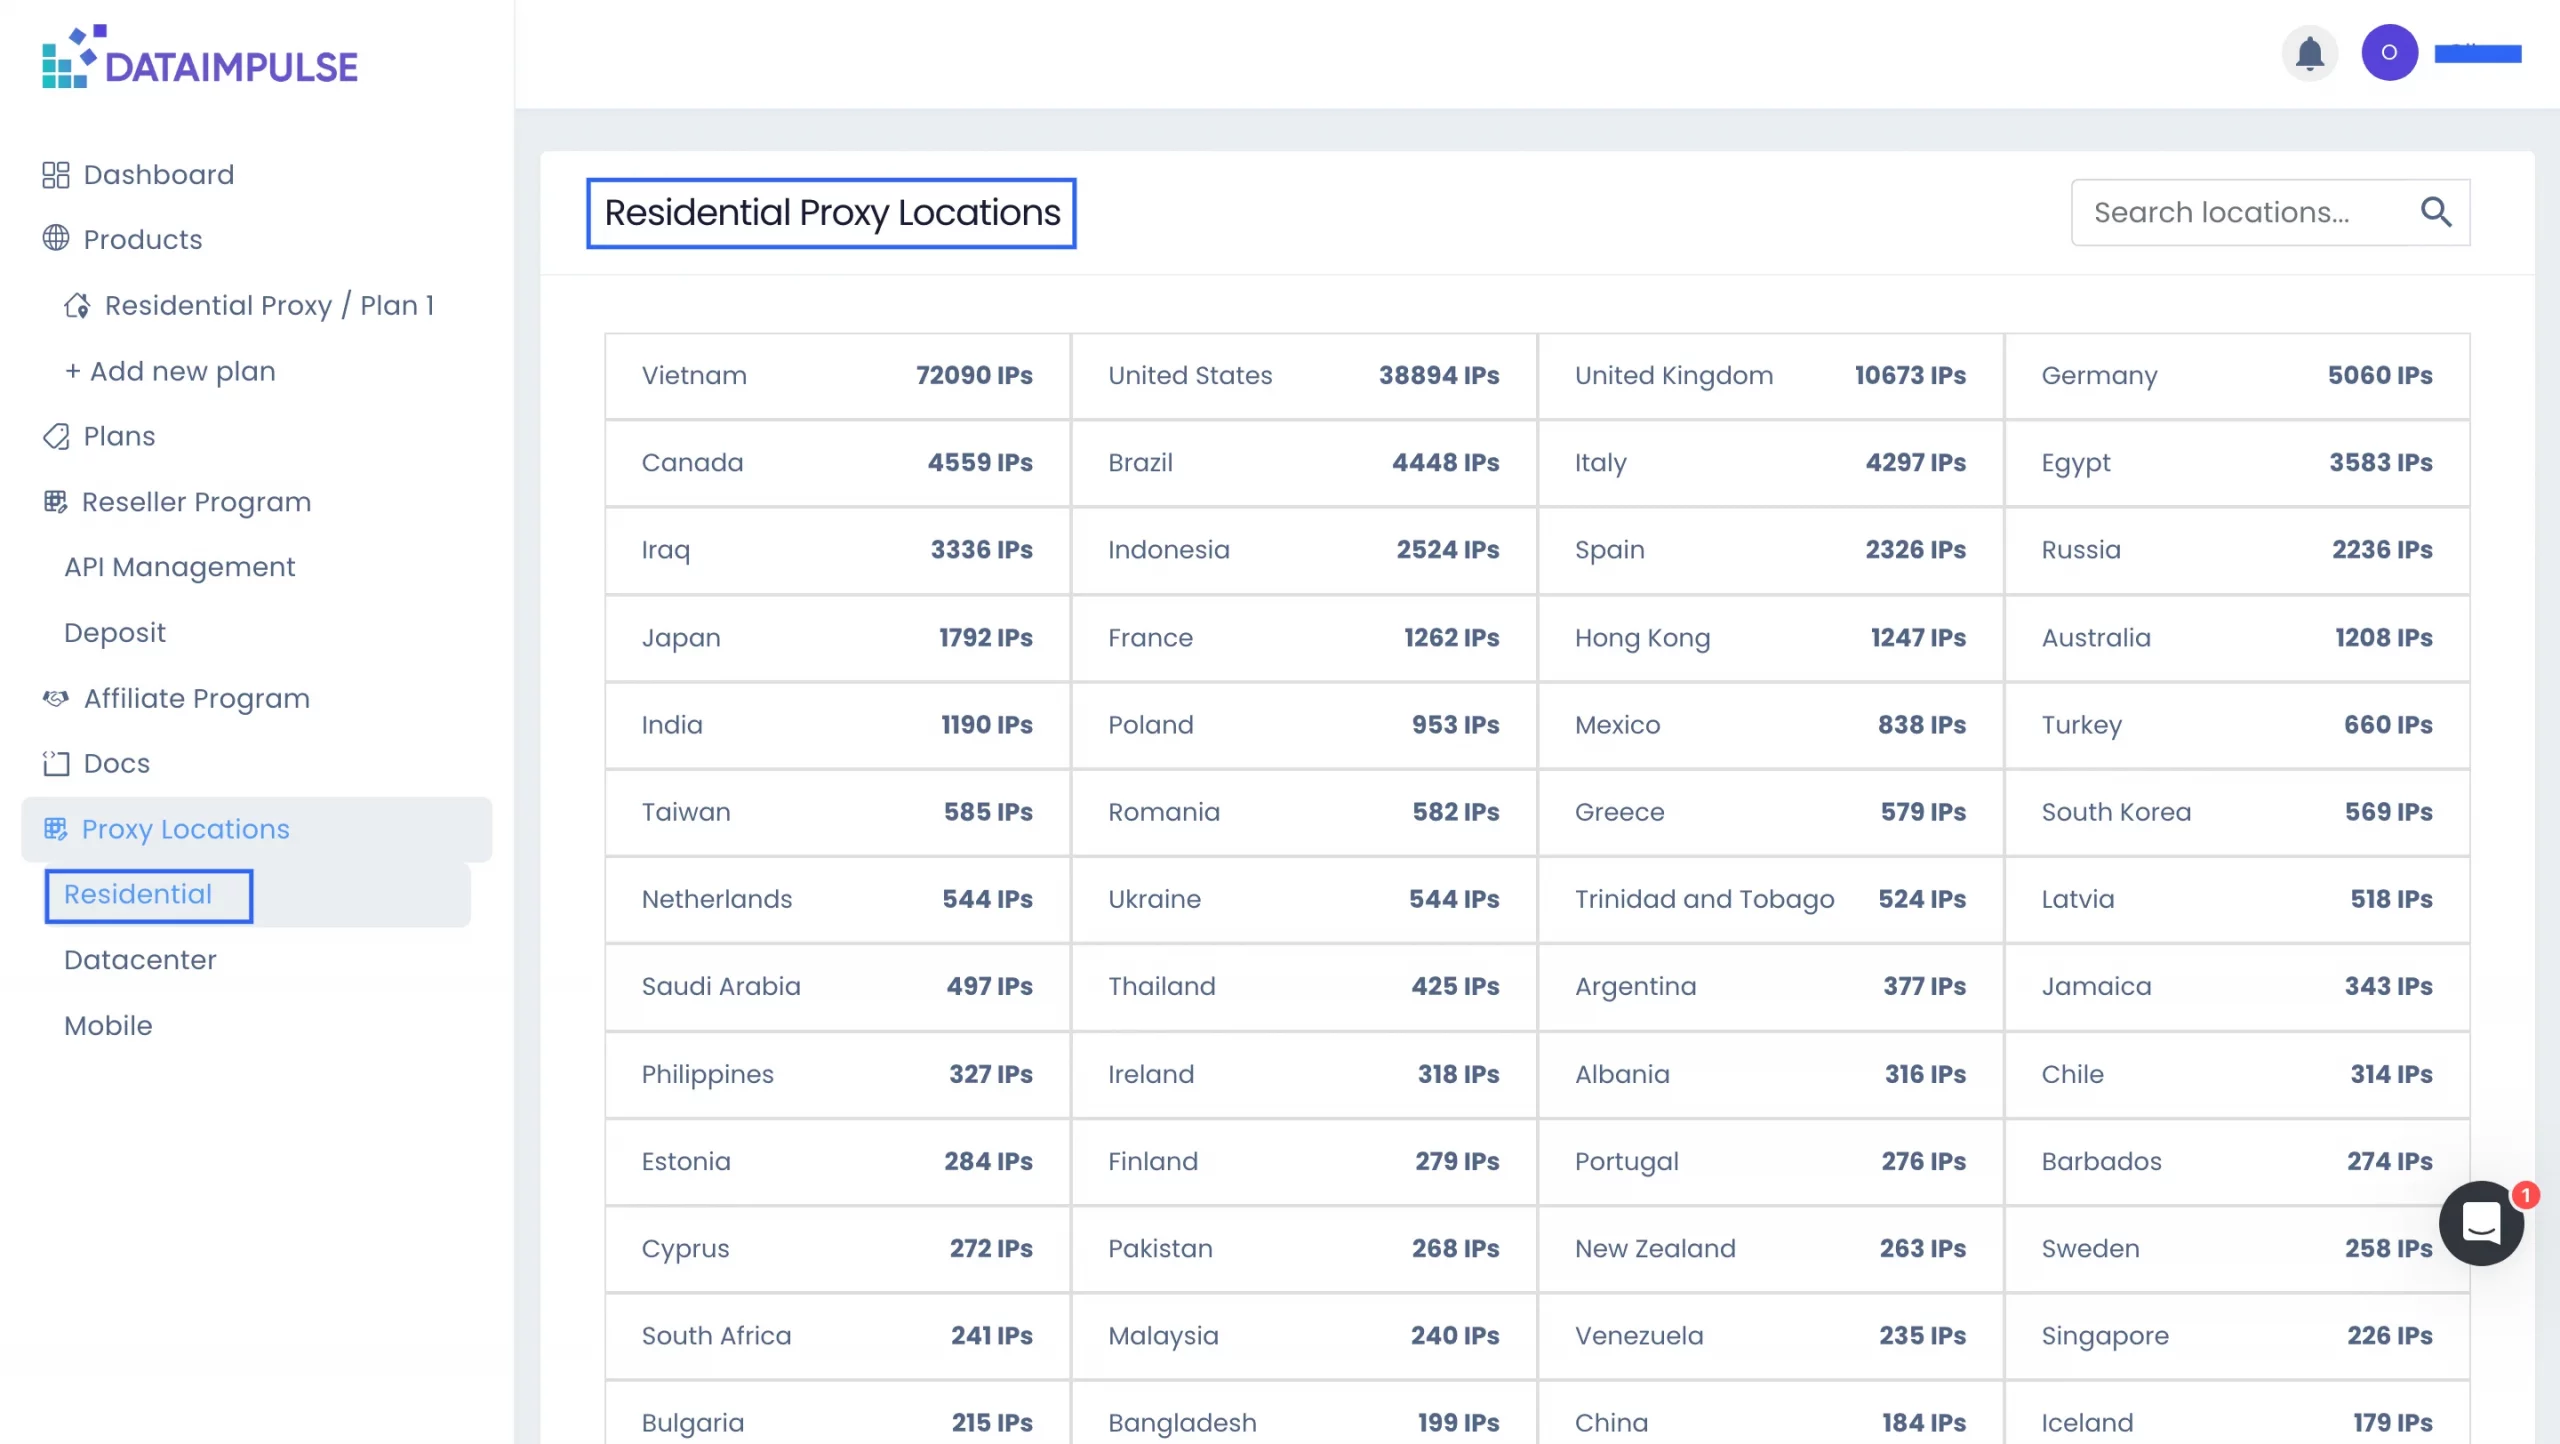
You can check the number of addresses that are online and available to connect to. To do this, go to the “Residential“, “Datacenter“, or “Mobile” tabs, depending on your desired pool type. Here, in real-time mode, you can see how many IPs from each country are active at the moment.
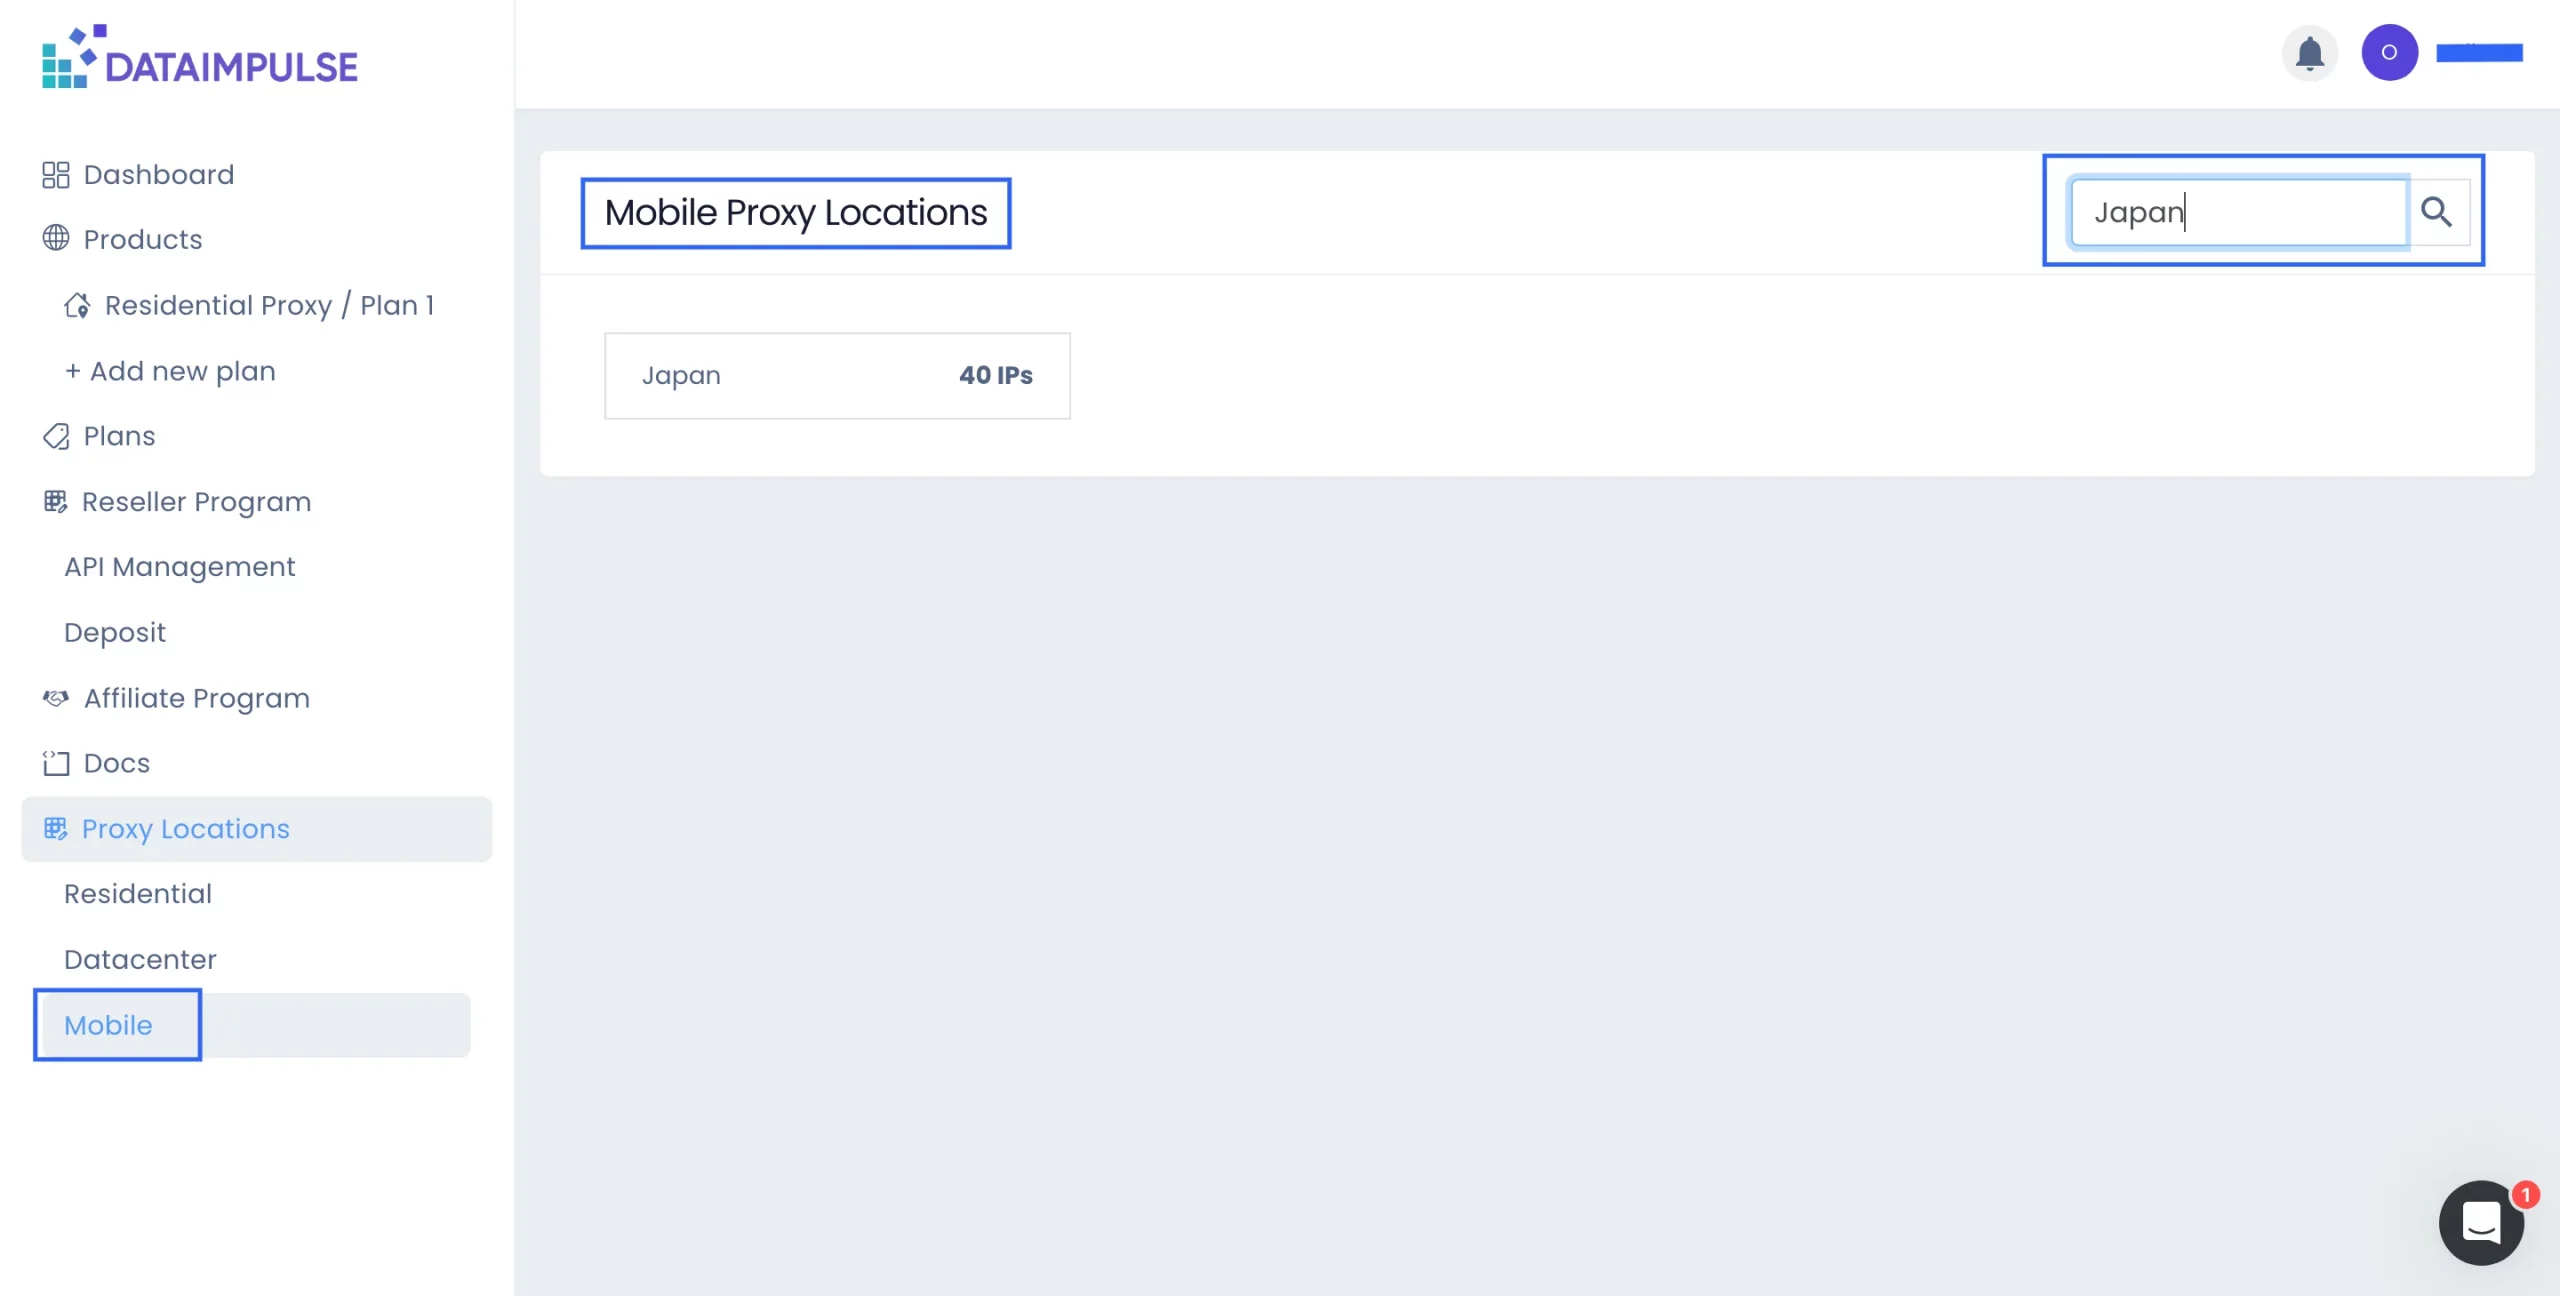
If you’re interested in a particular country, enter its name in the “Search locations” field, and you’ll instantly see an accurate number of accessible addresses.
To finish with your settings, go to the “Basic URL example” section, where you can modify the quantity and format of proxies. Also, you can copy or download your proxy list if needed.
Usage Chart Section
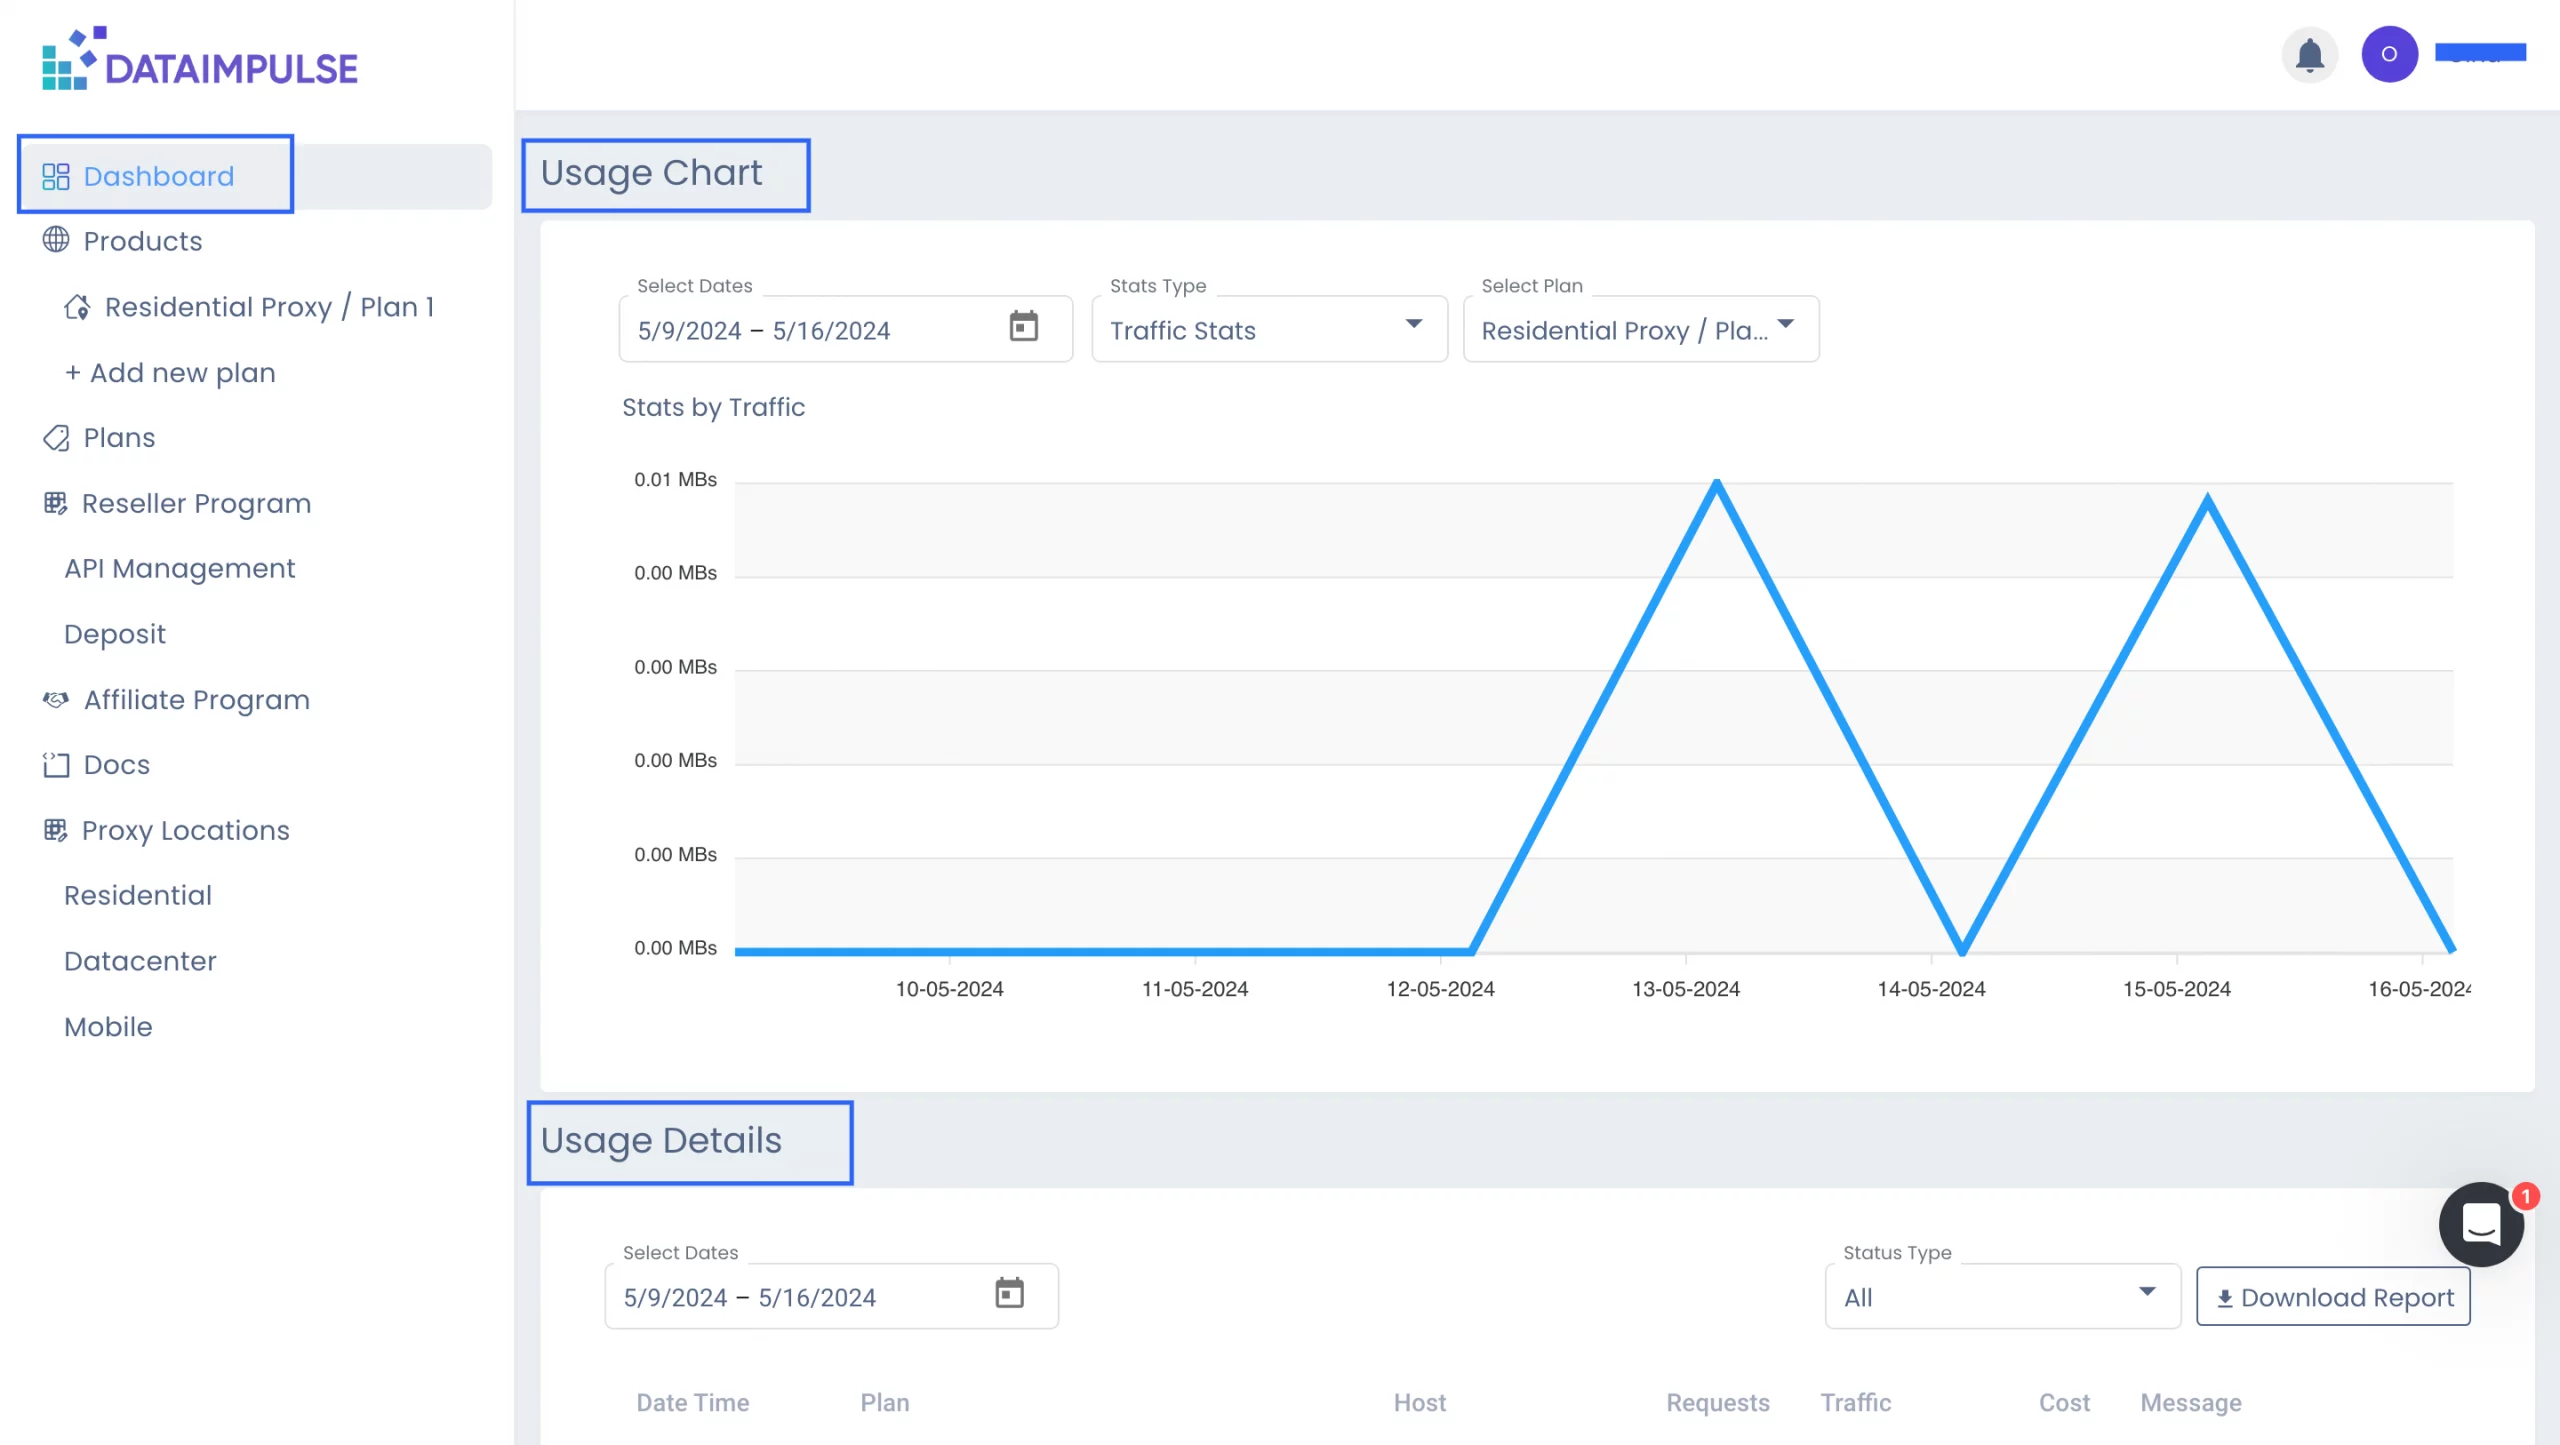
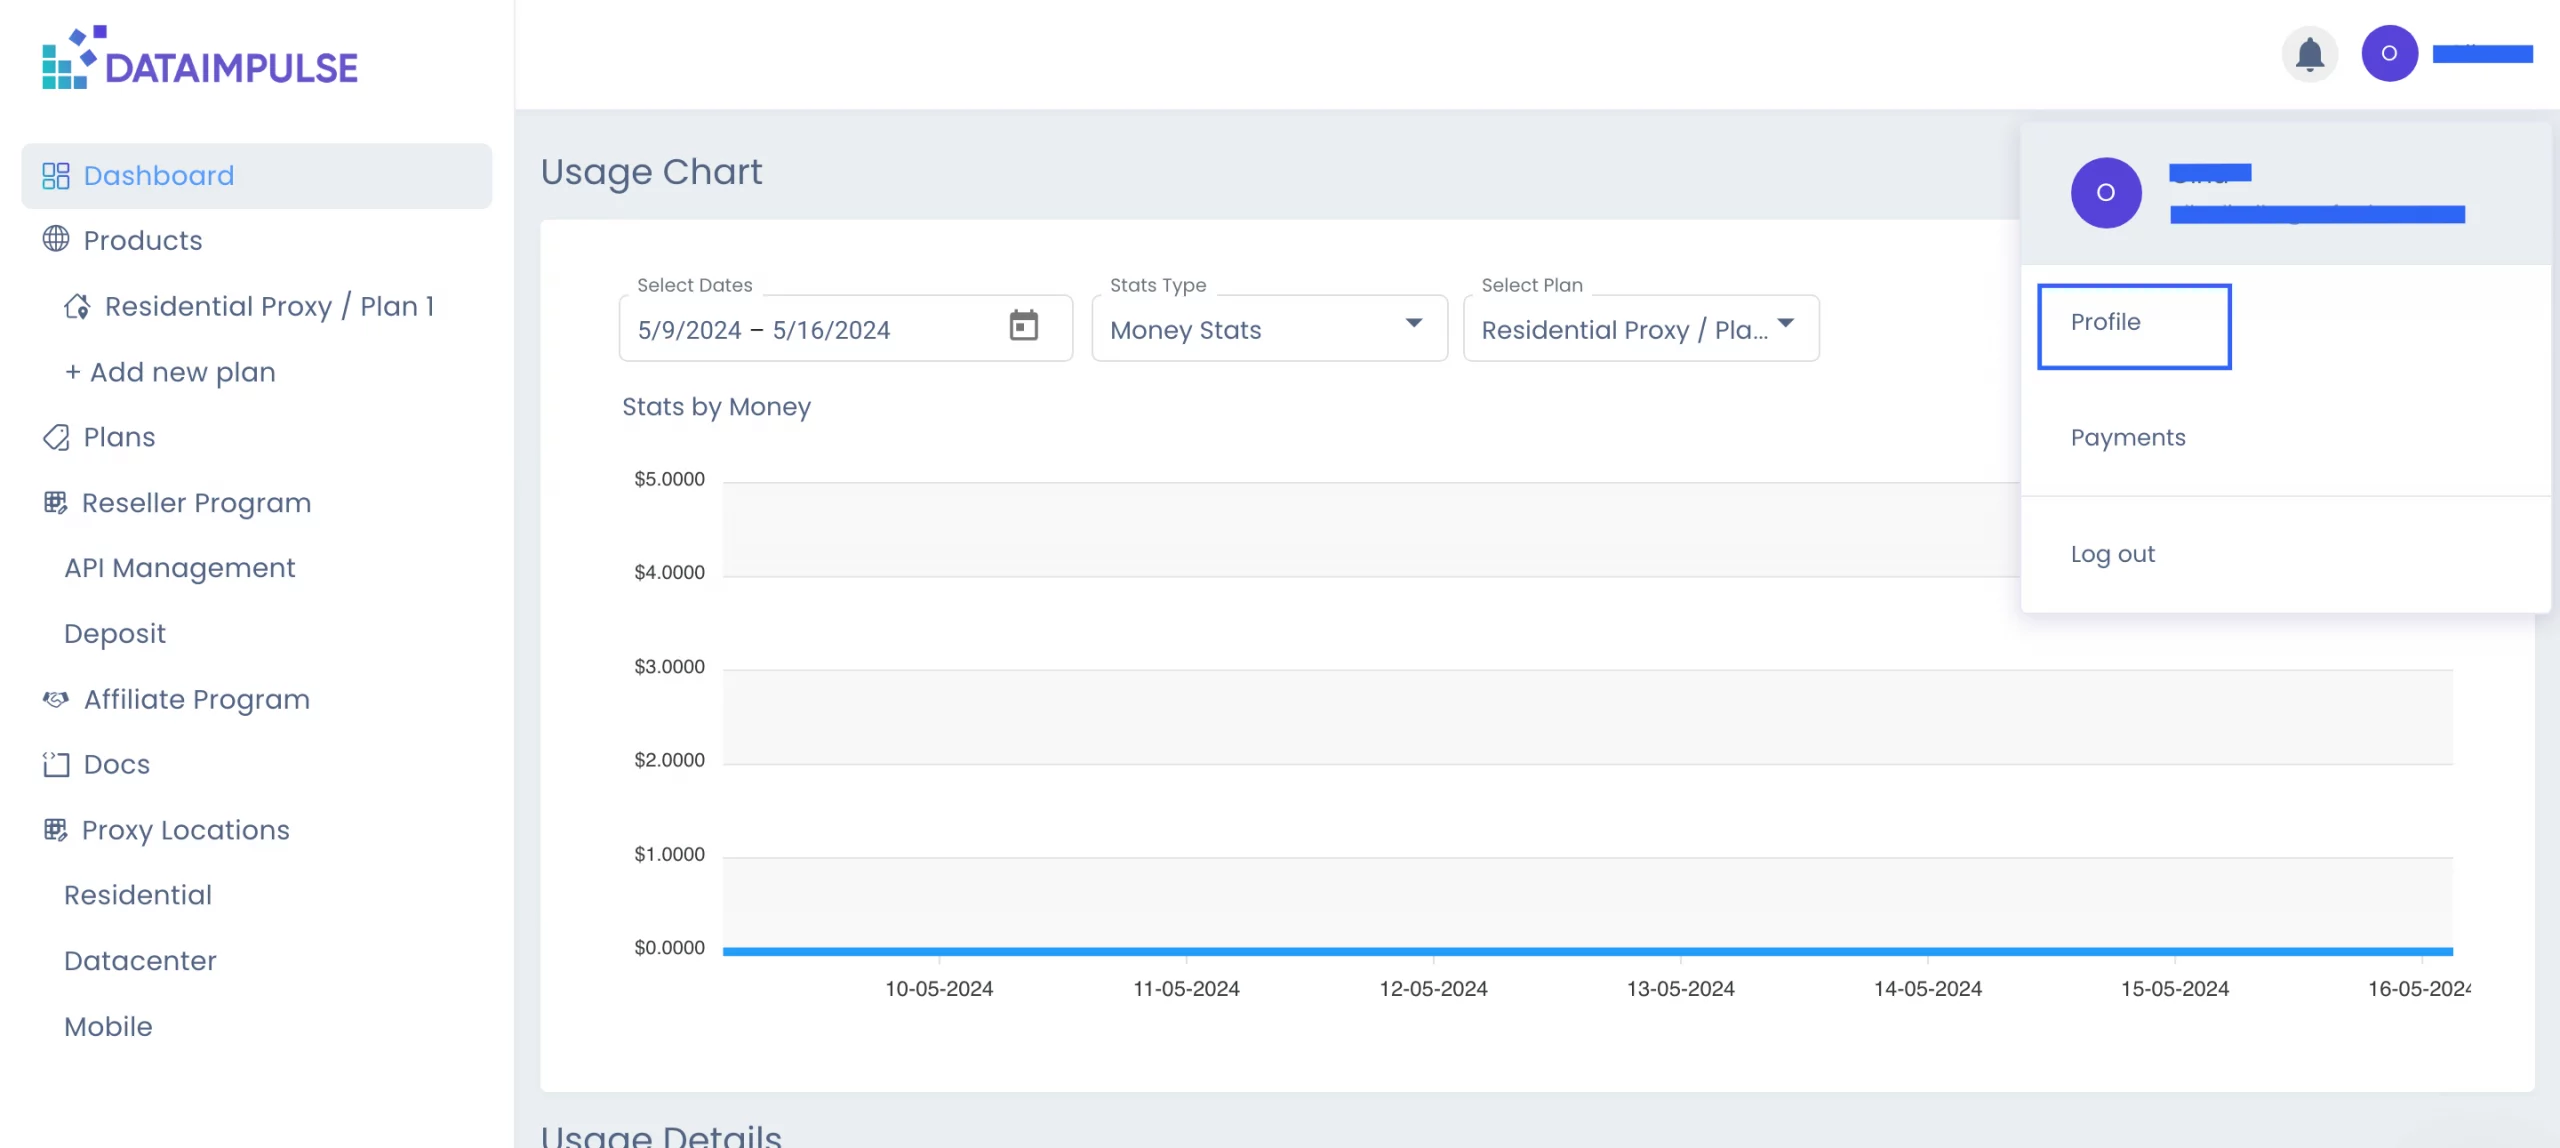
To monitor proxy usage, go to the “Dashboard” tab. In the “Usage Chart” section, you’ll find general statistics for each proxy plan you use. Here, you can select specific dates or date ranges and choose the type of records you’d like to view:
- Money stats;
- Traffic stats;
- Request stats.
This way, you can see how much money you spent, how much traffic you used, and how many requests you made.
The “Usage Details” section contains more information about technical aspects. Besides the proxy type and date, it displays the exact time and number of requests you made to a particular source. The section also shows how much traffic you used and how much money you spent on each query. To see the full picture, you can filter data by status type, so you’ll know the result of each request. If any errors occur, you can see the exact reason why.
For your convenience, you can download the full report in CSV format.
And, that’s not all you can get at DataImpulse.
Reseller Program:
-
API Management
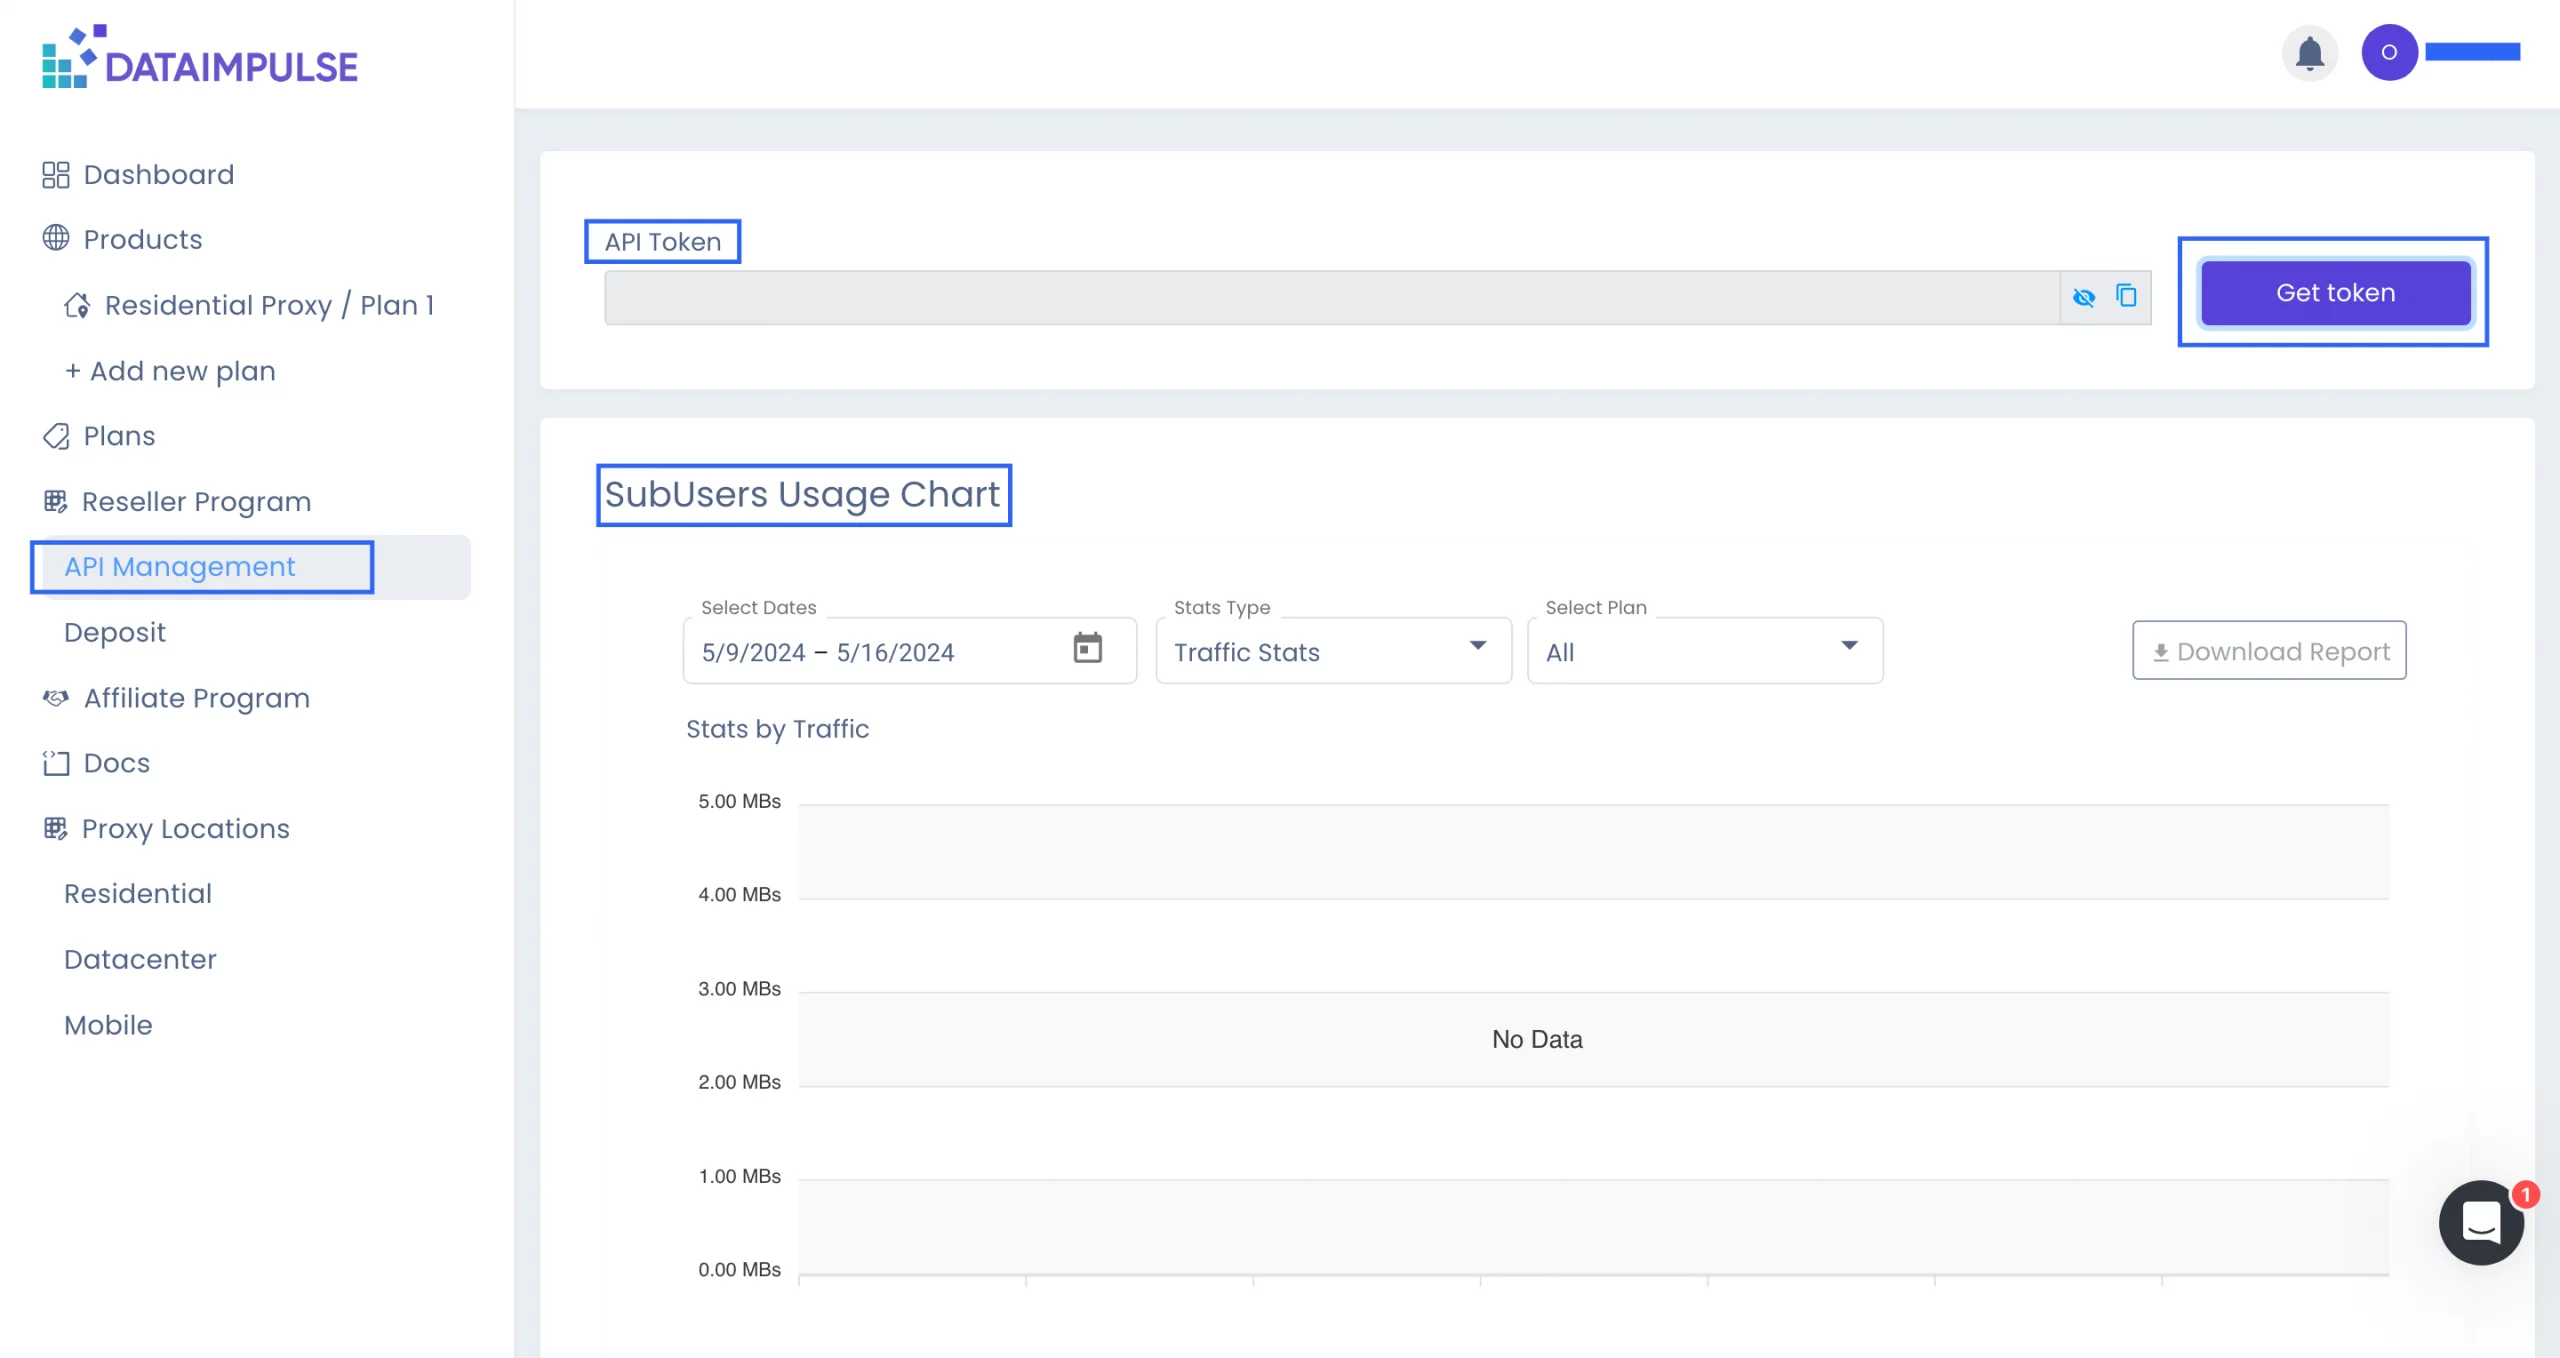
With DataImpulse, you can also become a part of our reseller program. To generate your unique API token, go to the “API management” tab and click on the “Get token” button.
If you’re interested, here is the link to our API documentation: https://documenter.getpostman.com/view/6095389/2s9YC7UC2x
Within the same tab, you’ll find the subusers usage chart and subusers list. The “Subusers usage chart” section functions similarly to the “Usage chart” section on the “Dashboard” tab, where you can download the full report.
In the “Subusers List” section, you’ll find detailed information about your subusers, including their label and login details. You can customize the table’s settings and choose which information you’d like to view using the “Column Chooser” function.
You can also view your account balance in the top right corner of the section. To replenish a subuser’s balance, simply click the “Add” button.
-
Deposit
To replenish your reseller plan, go to the “Deposit” tab. The features and payment process are the same as before. Here, you can also check your balance.
*Please note: when making a payment on this tab, you’re adding funds to your reseller balance, not your personal one. If you wish to replenish your personal plans, proceed to the “Plans” tab and complete the process there.
If you’d like to learn more about the Reseller Program, follow this link for a step-by-step guide: https://dataimpulse.com/blog/dataimpulse-reseller-program/
Affiliate Program: How to Participate
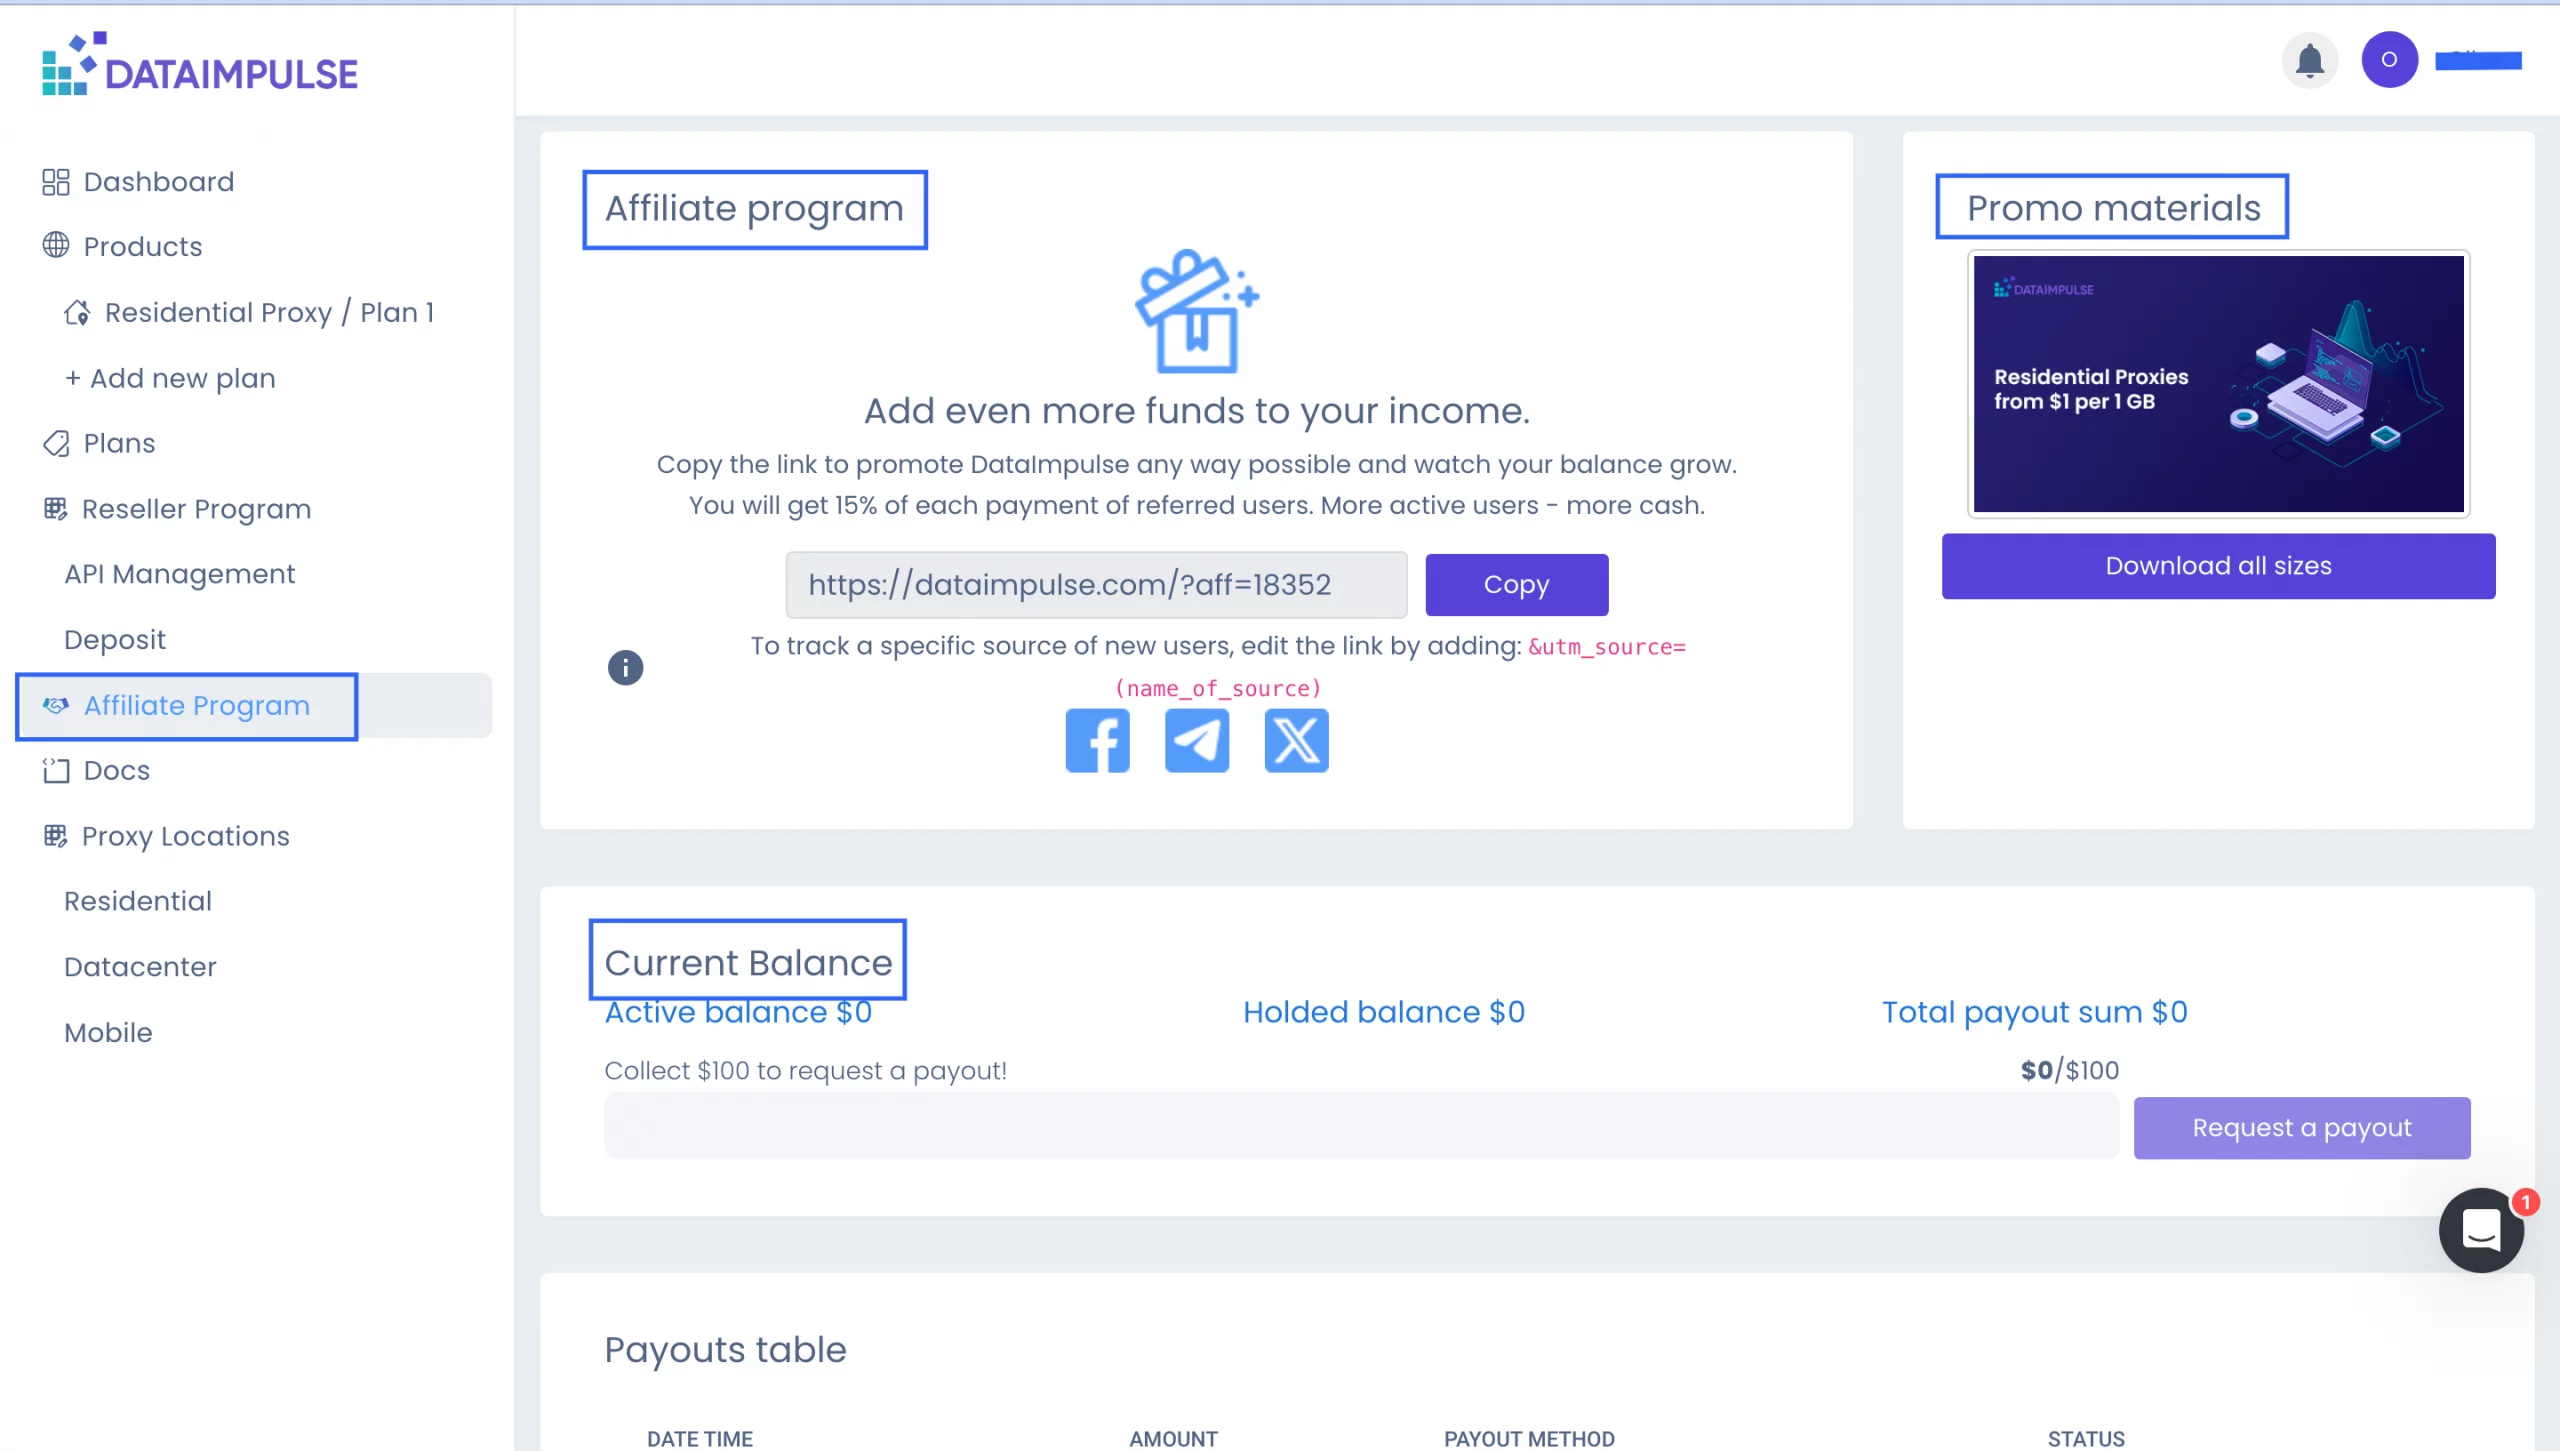
On top of that, you can participate in our affiliate program and earn extra income with DataImpulse. Everything you need for the affiliate program can be found in the “Affiliate Program” tab. There you’ll find your personal referral link, which you should copy and share. When customers register and make payments using your link, you’ll receive 15% of each payment.
- You can download the necessary promos from the “Promo Materials” section.
- Navigate to the “Current Balance” section to check your balance and request a payout. * Note that the “Request a payout” button will be active after you have $100 or more on your balance.
- Scroll down to the “Payouts Table” and “Invited Users” sections to view information about your payout history and referrals you have invited.
Profile Section
To manage your account, find your name in the top-right corner of the screen and click on it. A short menu will pop up.
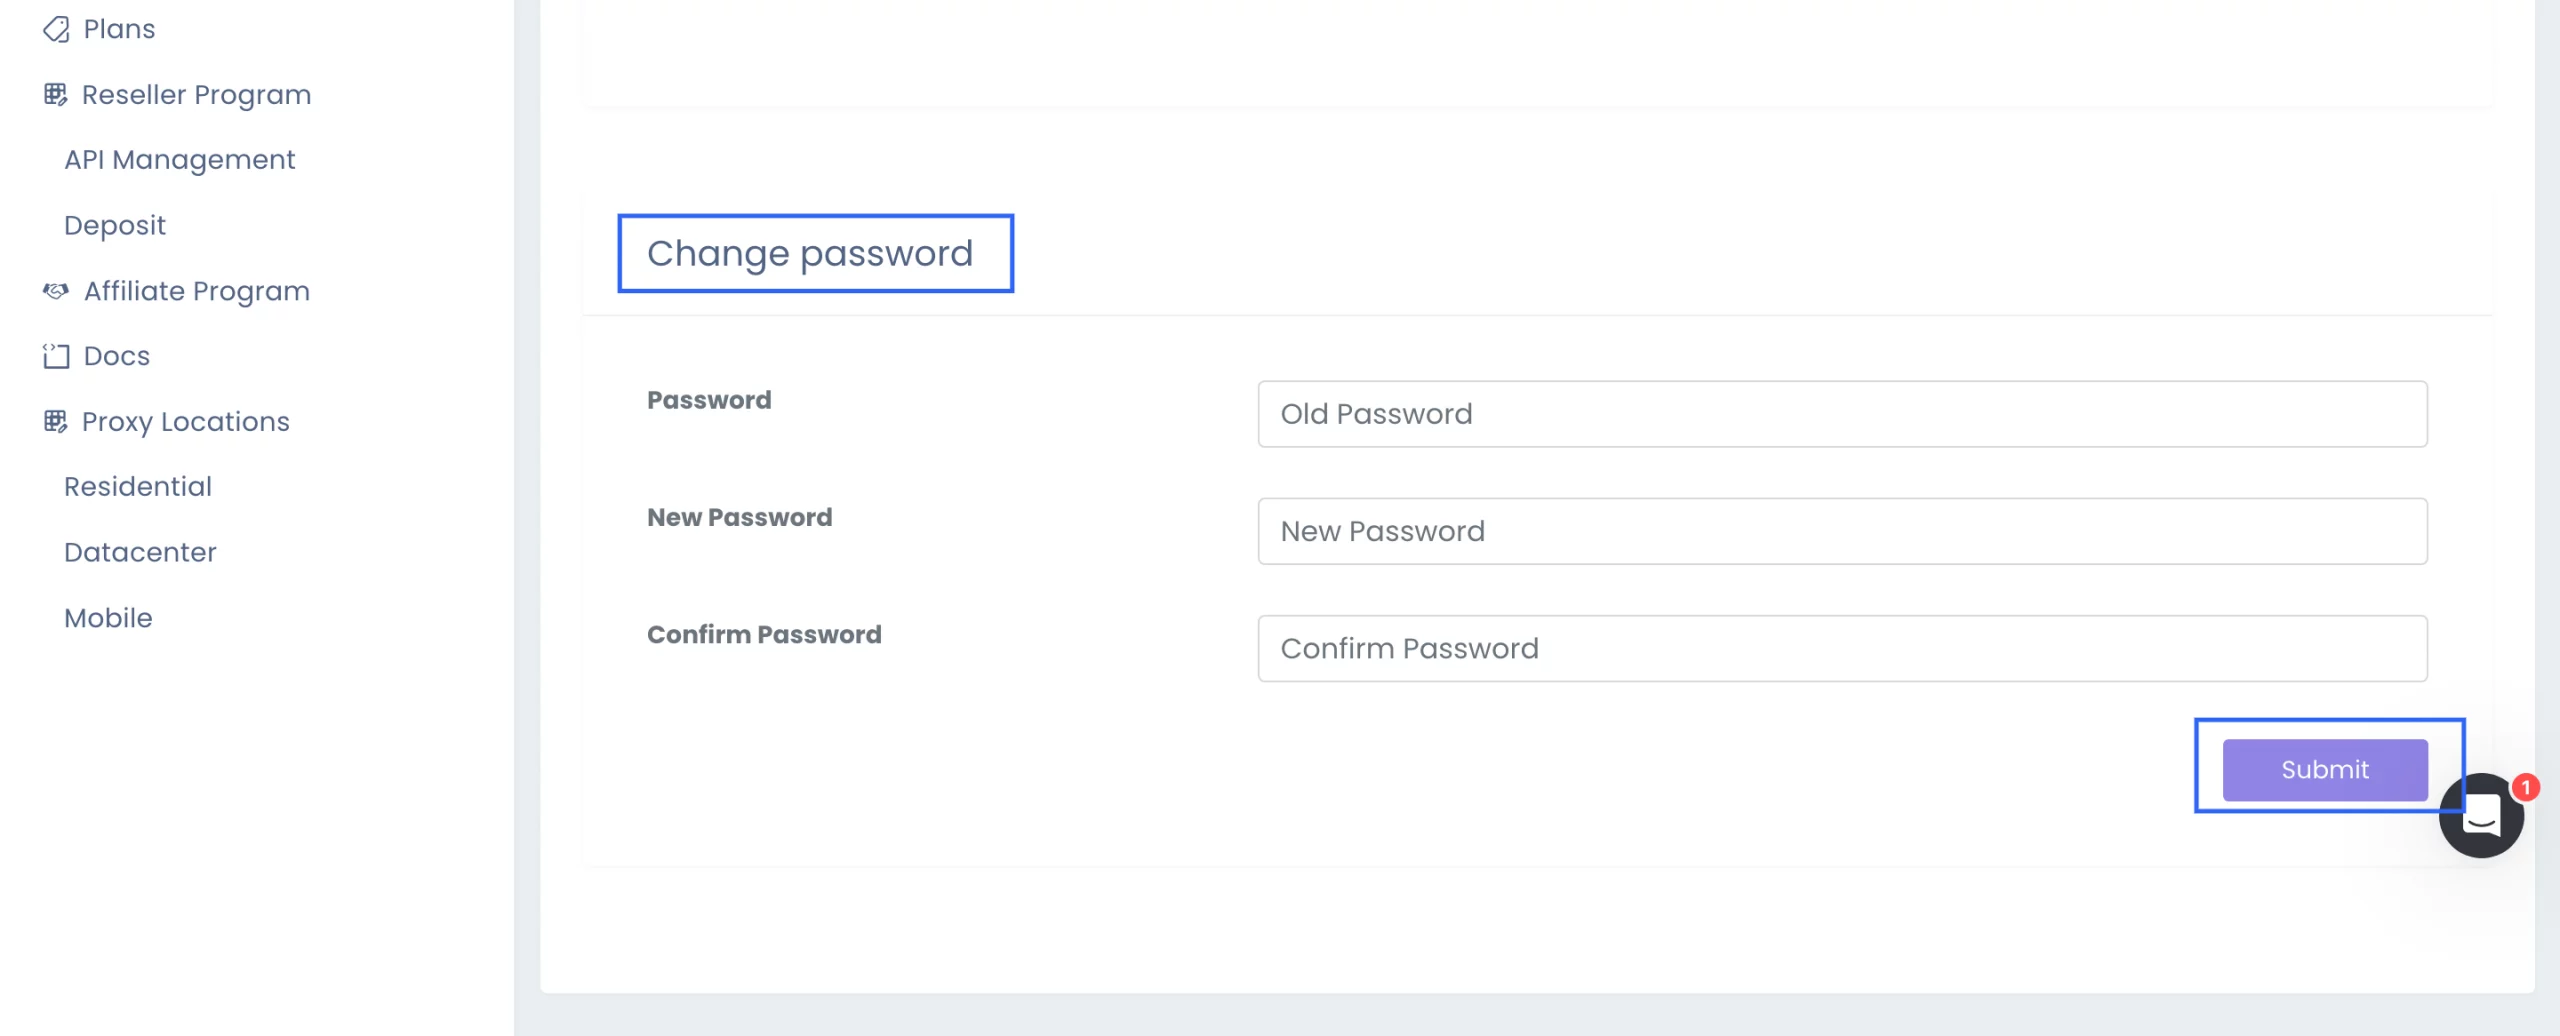
In the “Profile” section, you can view profile details and change your name by clicking on the “Edit profile” button. Don’t forget to save the changes. Here, you can change your password as well.
Payment and Settings Sections
In the “Payment” section, you can track your payments, including the date, email used, and amount of money you paid. If you need an invoice, you can download it in PDF format by clicking on the corresponding link.
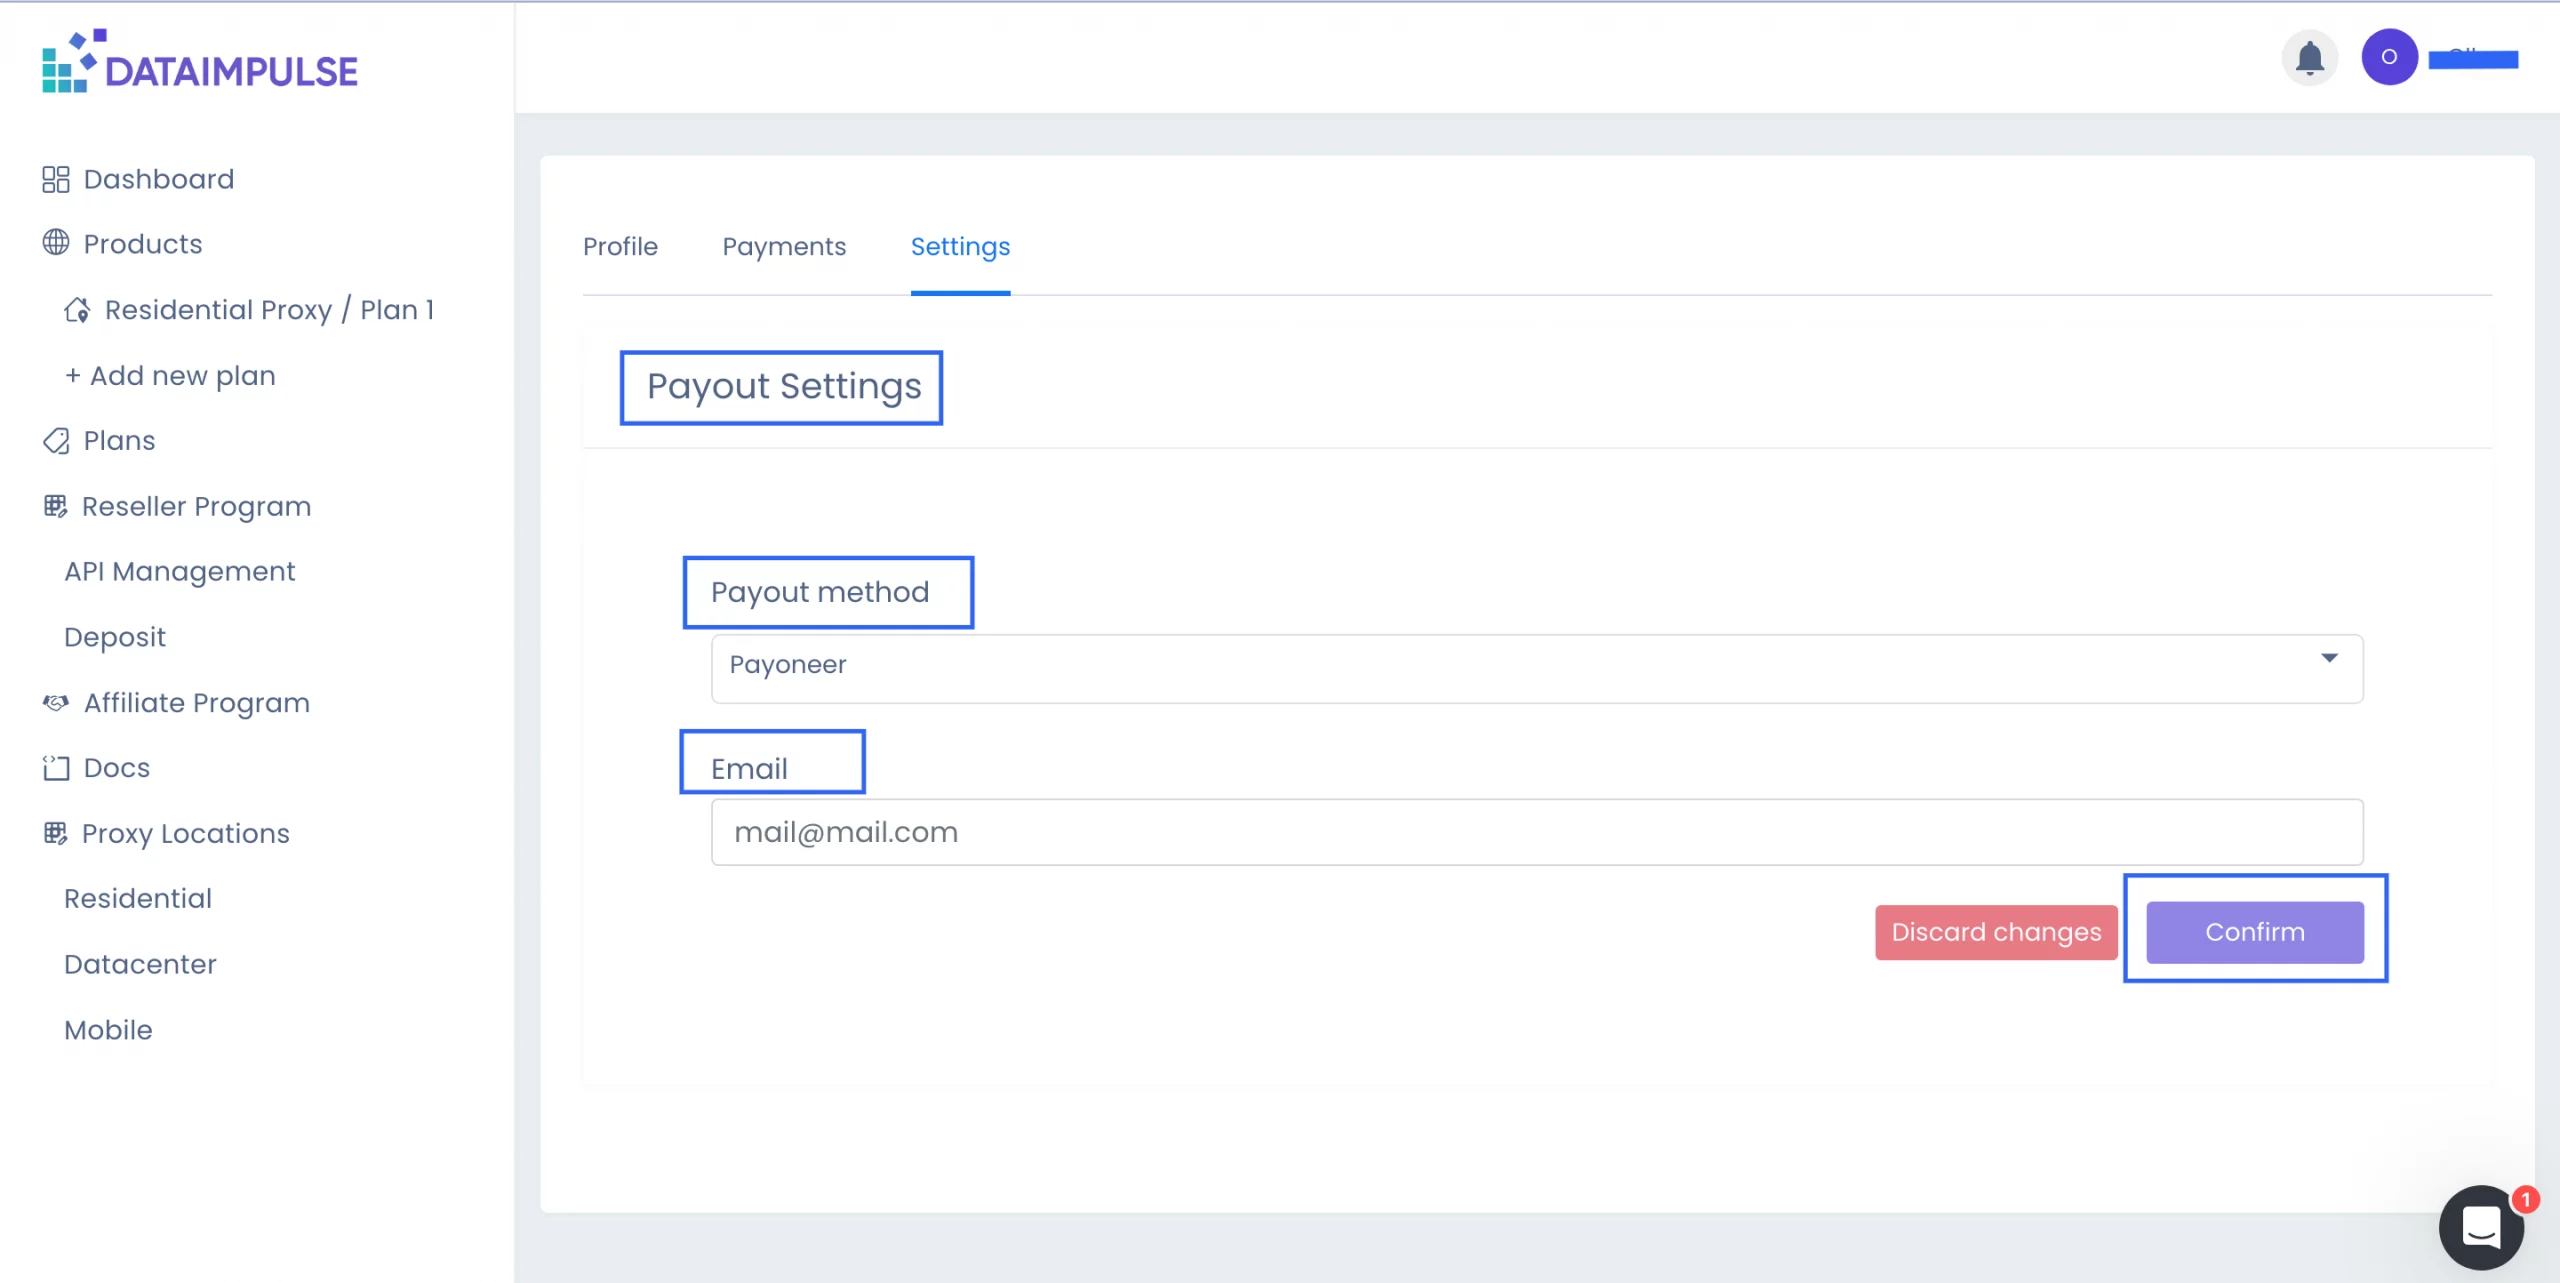
In the “Settings” section, you can choose the most convenient payout method for affiliates and enter the details required, such as your wallet number or email. Don’t forget to save the information by clicking on the “Confirm” button. You can erase data using the “Discard changes” button.
Get in touch with us
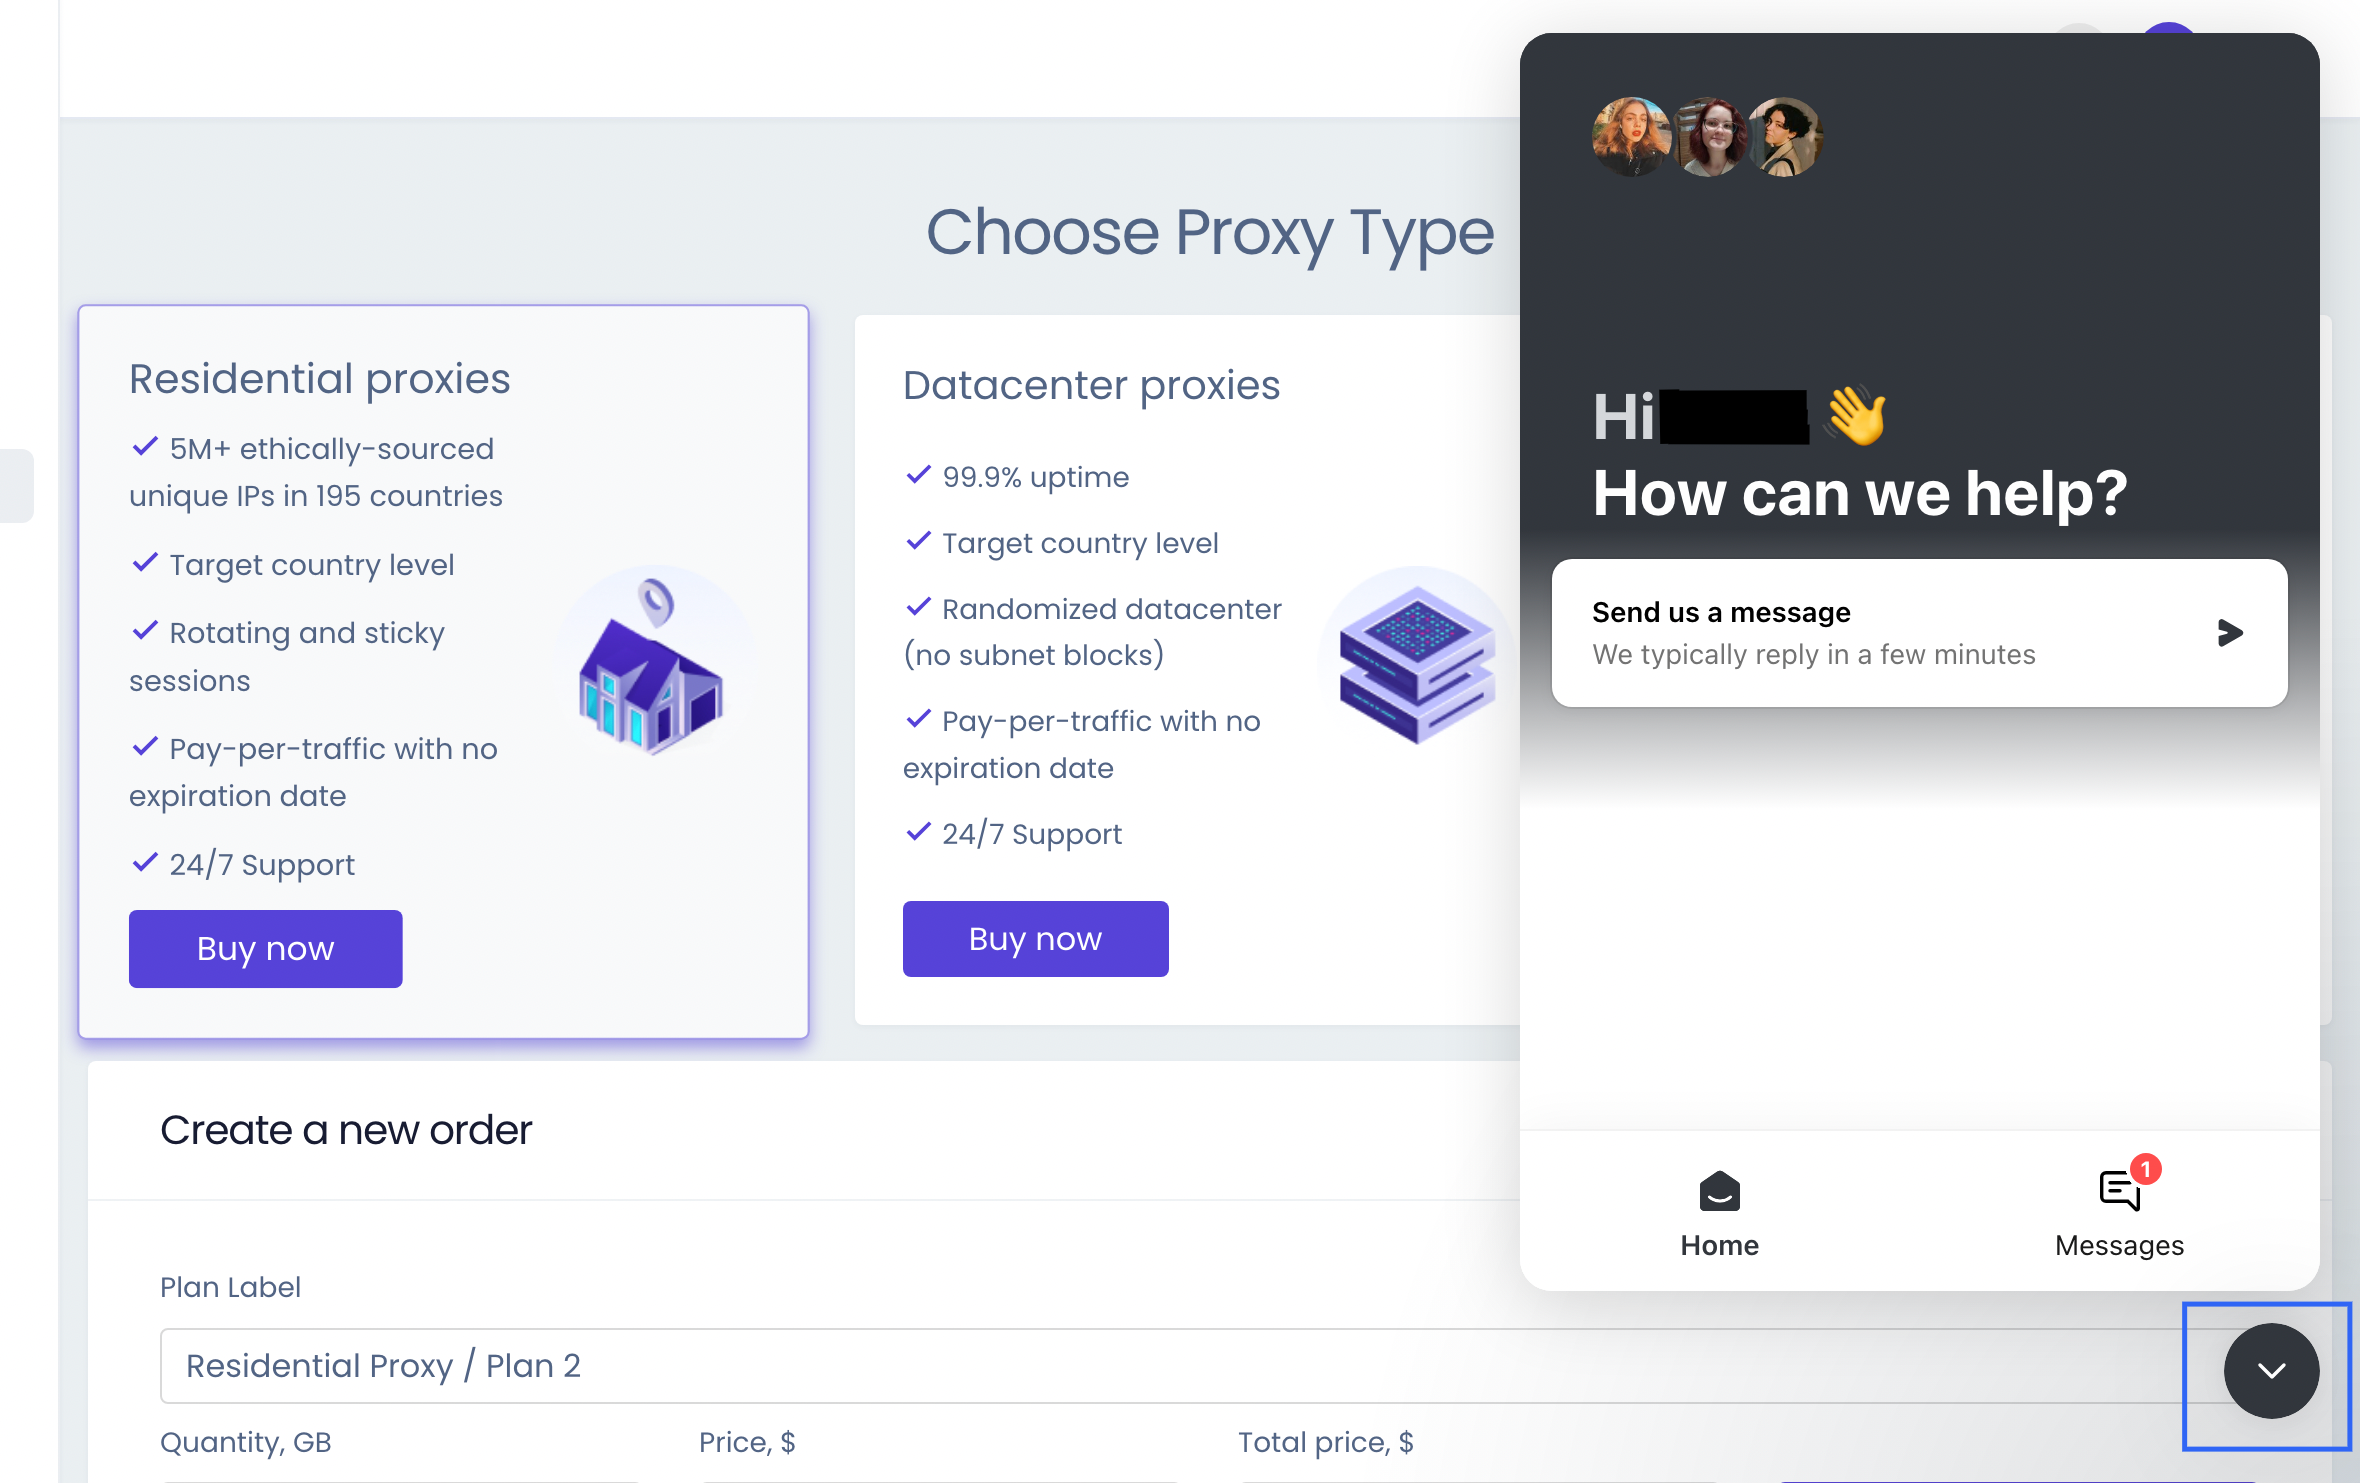
Regardless of the tab, there is a widget in the bottom right corner of the screen. Simply click on it, then select the “Send Us Message” option and write us a message. Our support agents are real humans, and they usually respond within just a few minutes.
DataImpulse as your Proxy Provider
At DataImpulse, you can find the best-quality proxies. Mobile, residential, datacenter proxies – you can choose the right ones for your purpose. By choosing DataImpulse, you get:
- High-speed connection
- 15+ million IPs from 194 locations
- 24/7 support
- user-friendly dashboard
- pay-as-you-go model
Finally, that’s it. Hope you easily join our community and enjoy staying with DataImpulse. Stay tuned!

