How to Set Up Proxies With Octo Browser
With Octo Browser, you have the ability to create multiple instances or profiles on your device, each with its own distinct browser fingerprint. This means that you can have numerous instances running simultaneously on a single device, limited only by the resources available on your machine.
Octo Browser is a web browser that allows you to create multiple instances or profiles on your device. Each instance has its own unique browser fingerprint, which means that it appears as a separate browser to websites and online services. This enables you to have multiple browsing sessions running simultaneously on a single device, each with its own settings and identity.
Proxy setup
To configure DataImpulse proxies in Octo Browser, just follow these simple steps:
- Start by downloading and installing Octo Browser. Create an account and log in to get started.
In Octo Browser, proxy settings are managed separately from browser profiles. This allows you to easily add and remove multiple proxies and assign them to different profiles.
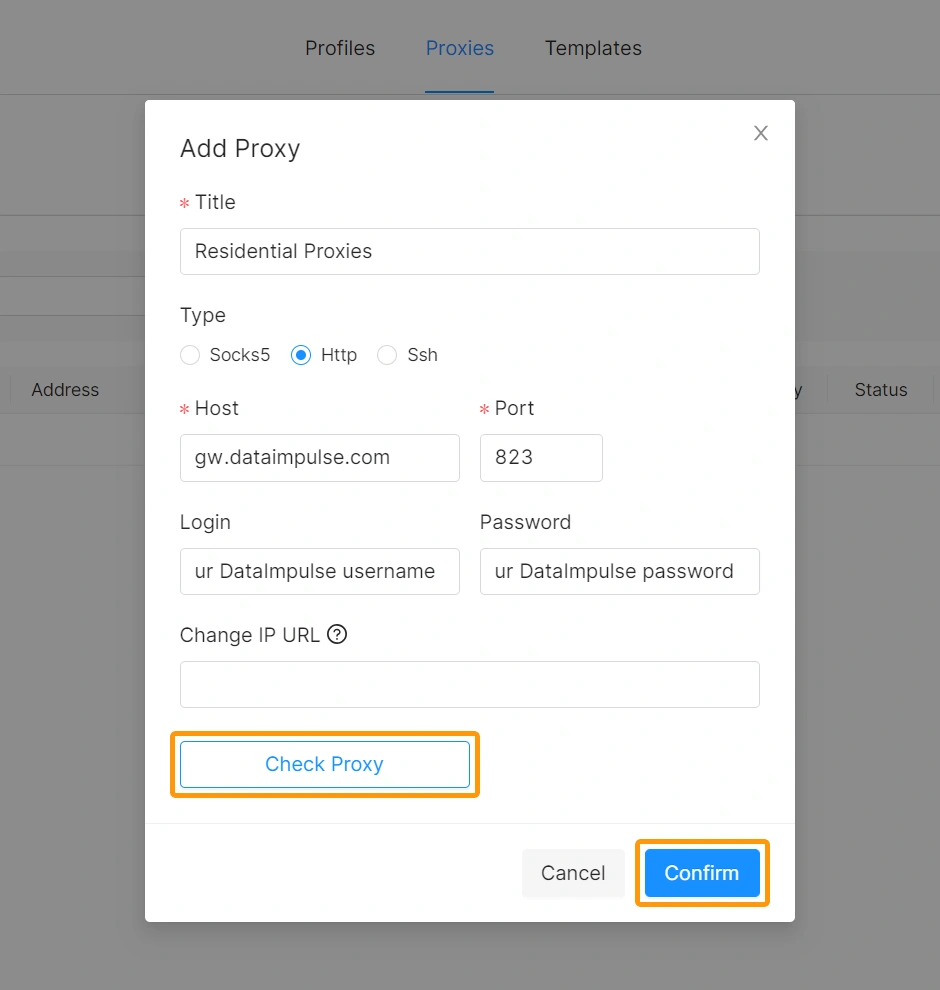
- Go to the Proxies section and click on “Add Proxy” to enter the details of your proxy configuration.
To set up DataImpulse proxies, simply provide the following details.
Residential Proxies
New address: gw.dataimpulse.com
Port: 823
Important: Remember to enable the “Check Proxy” option to ensure that the proxy functions properly. And then click on “Confirm”.
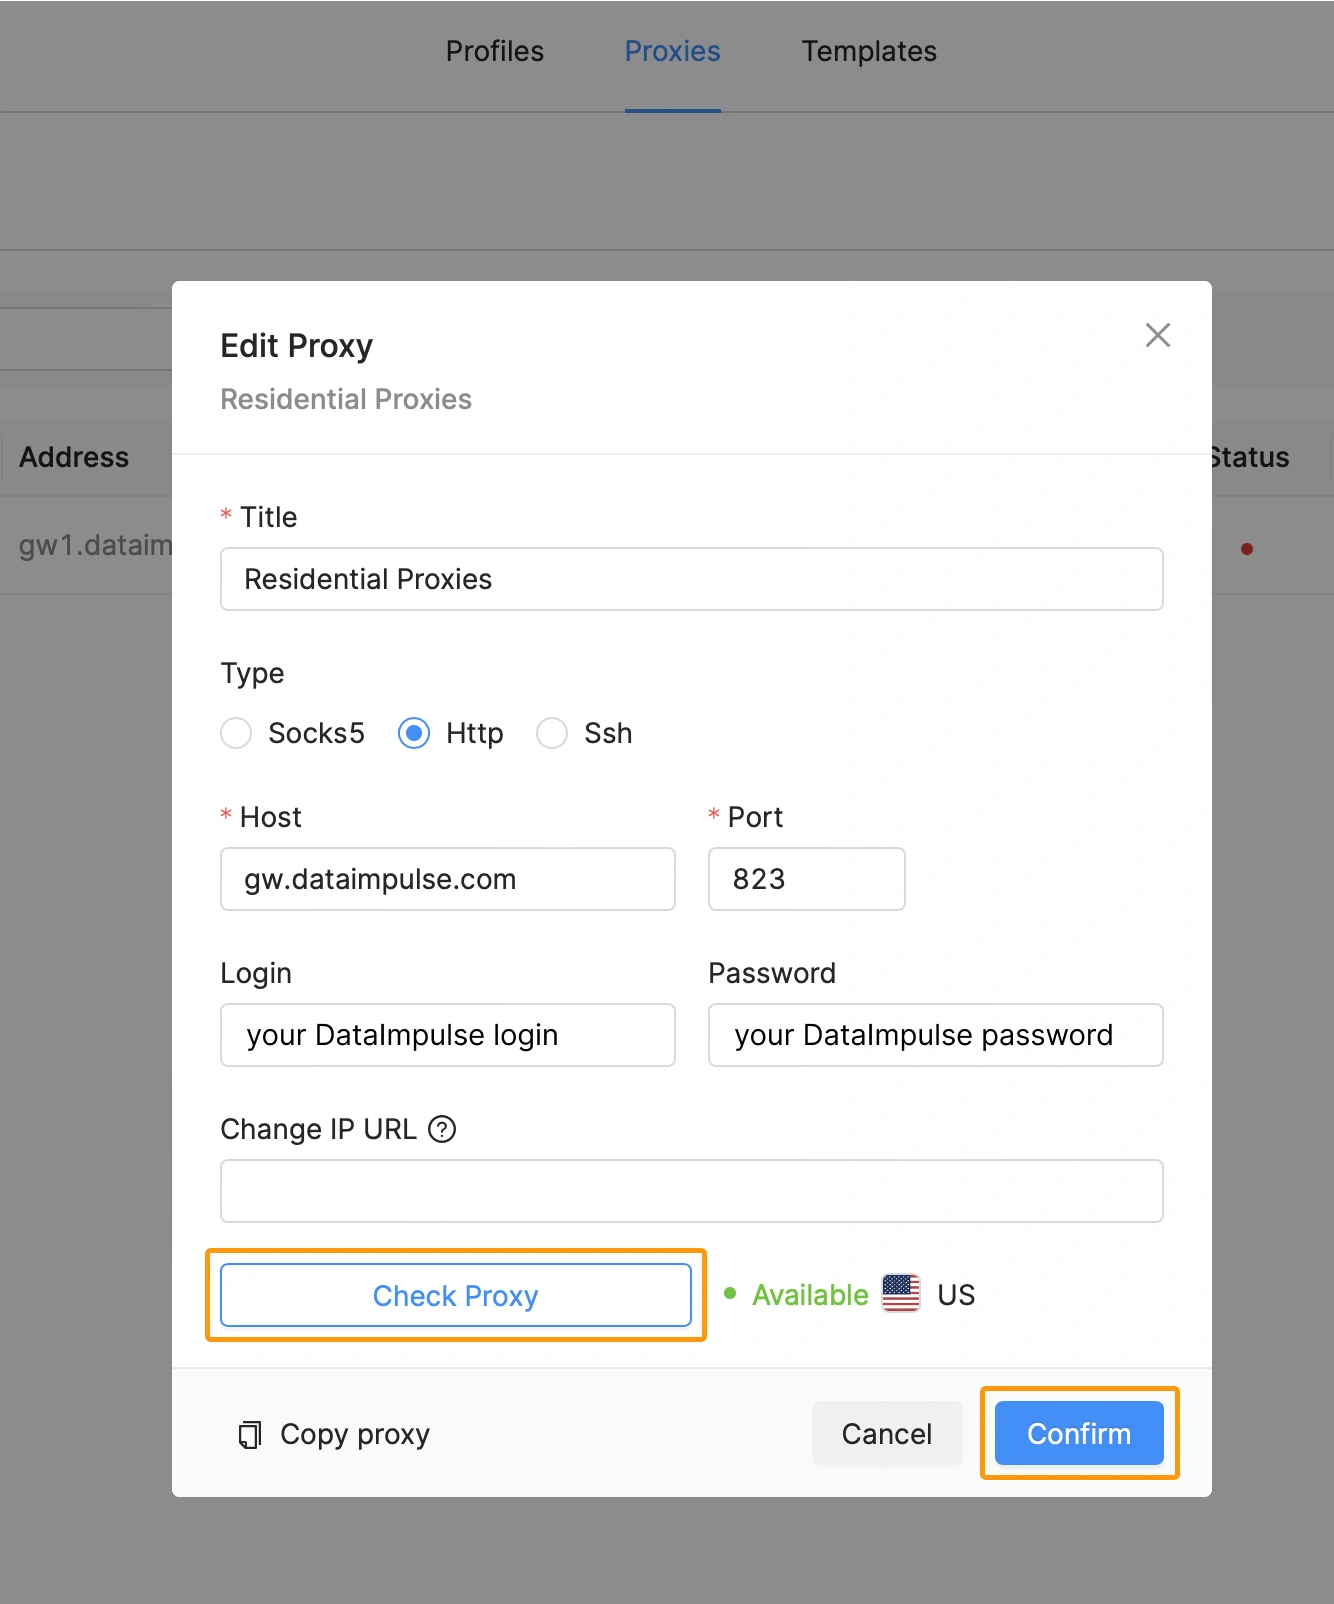
Here’s an example of what it looks like when everything is running smoothly.
- Input your DataImpulse proxy user’s credentials. Make sure to use the same credentials you used when creating a new proxy user in the DataImpulse dashboard.
Feel free to add multiple proxies and associate them with different profiles as needed.
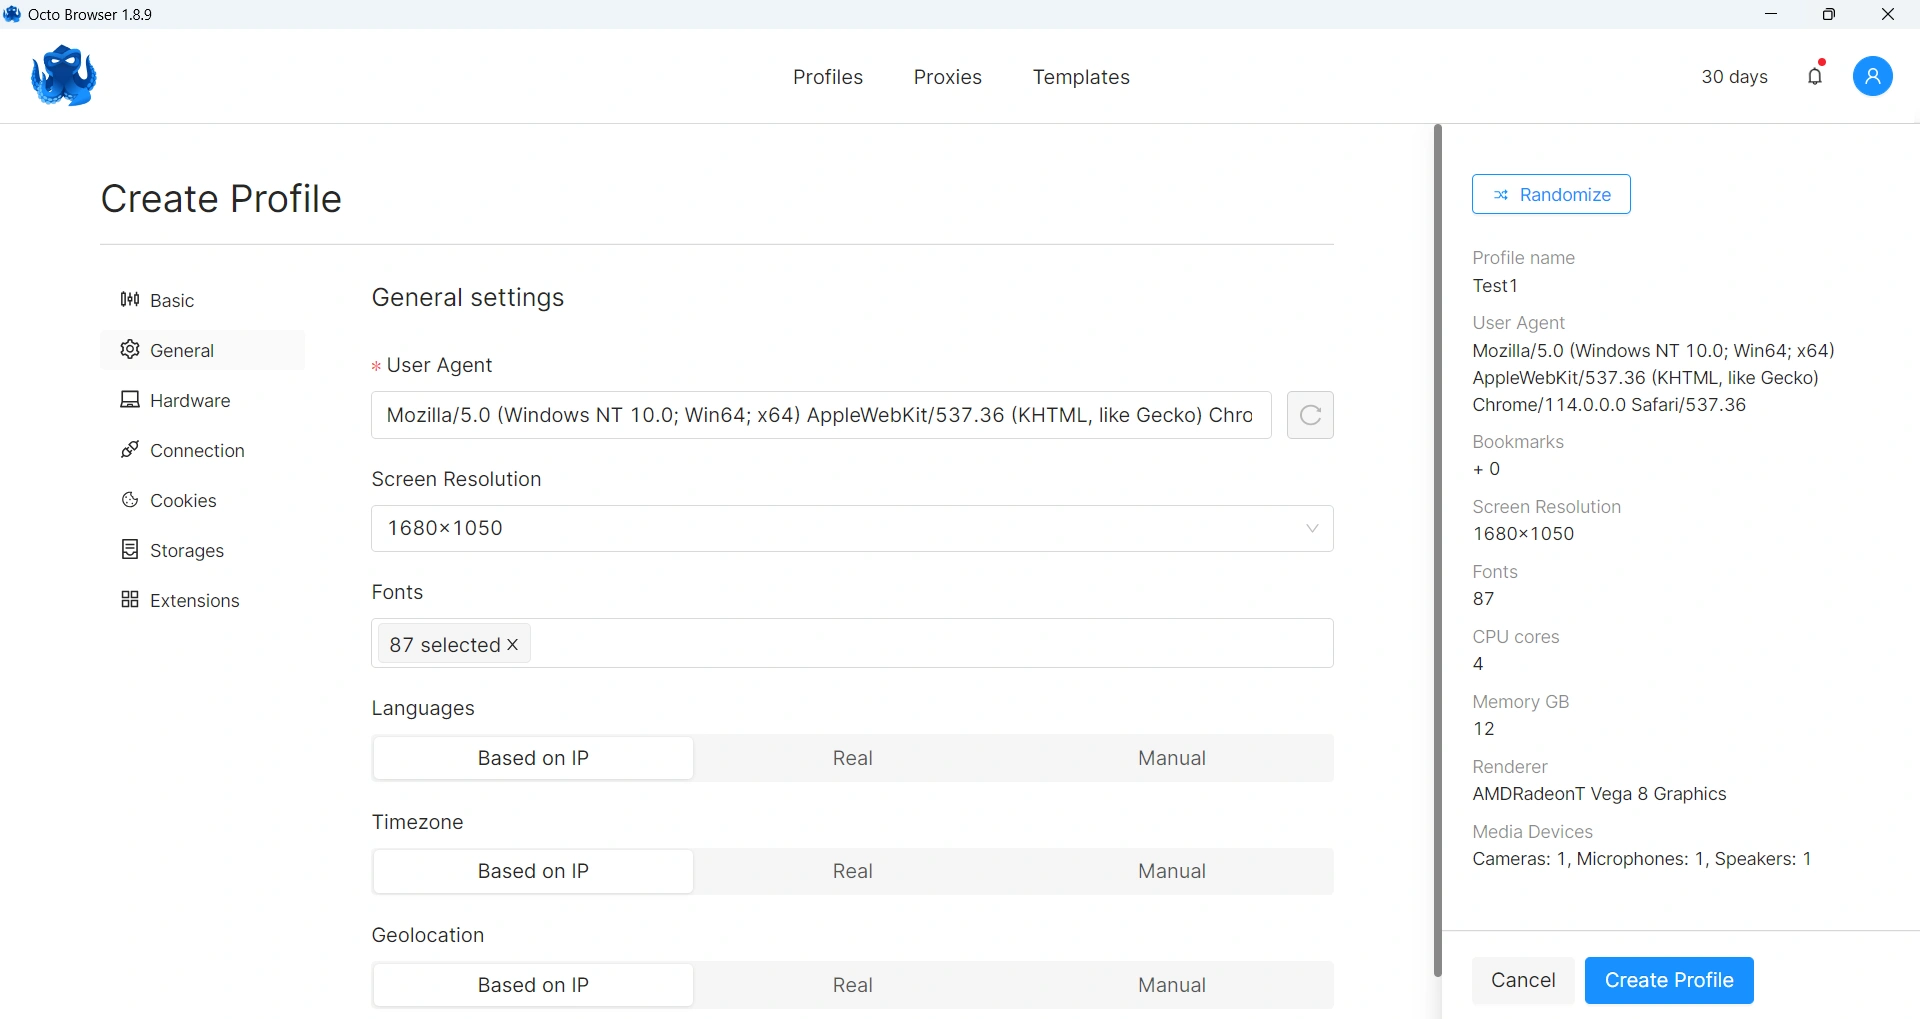
- Visit the Profiles section and click on “Create Profile” to set up a new profile.
Personalize your profile by adjusting various options such as user agents, cookies, and hardware/software parameters.
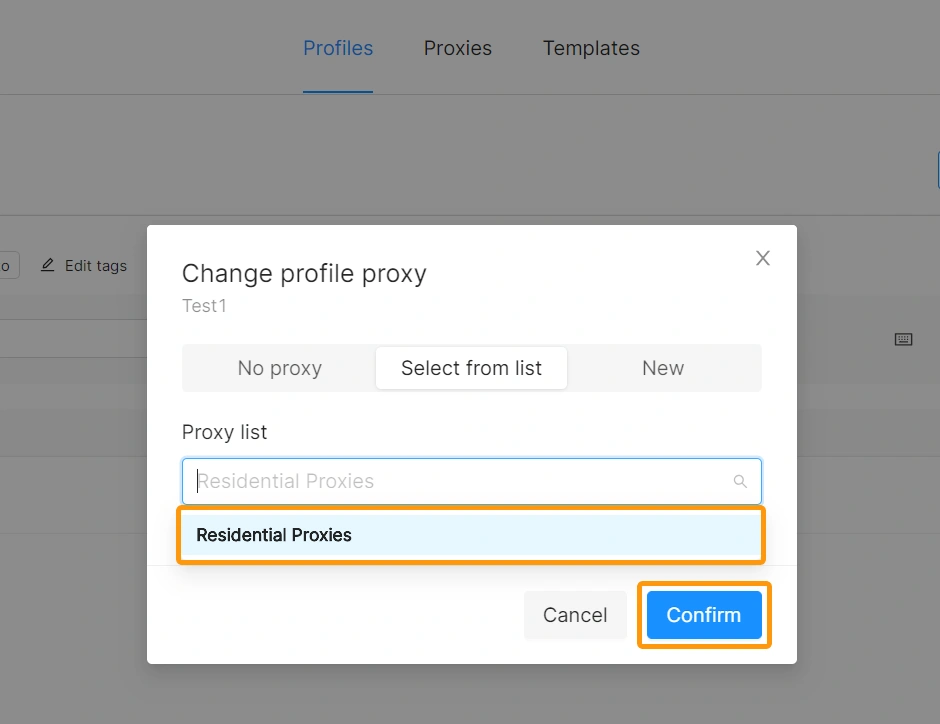
- Once you have set up your profile, you can assign a pre-configured proxy to it. You can either select the Proxy section within the profile or go to the Connections tab while editing the profile.
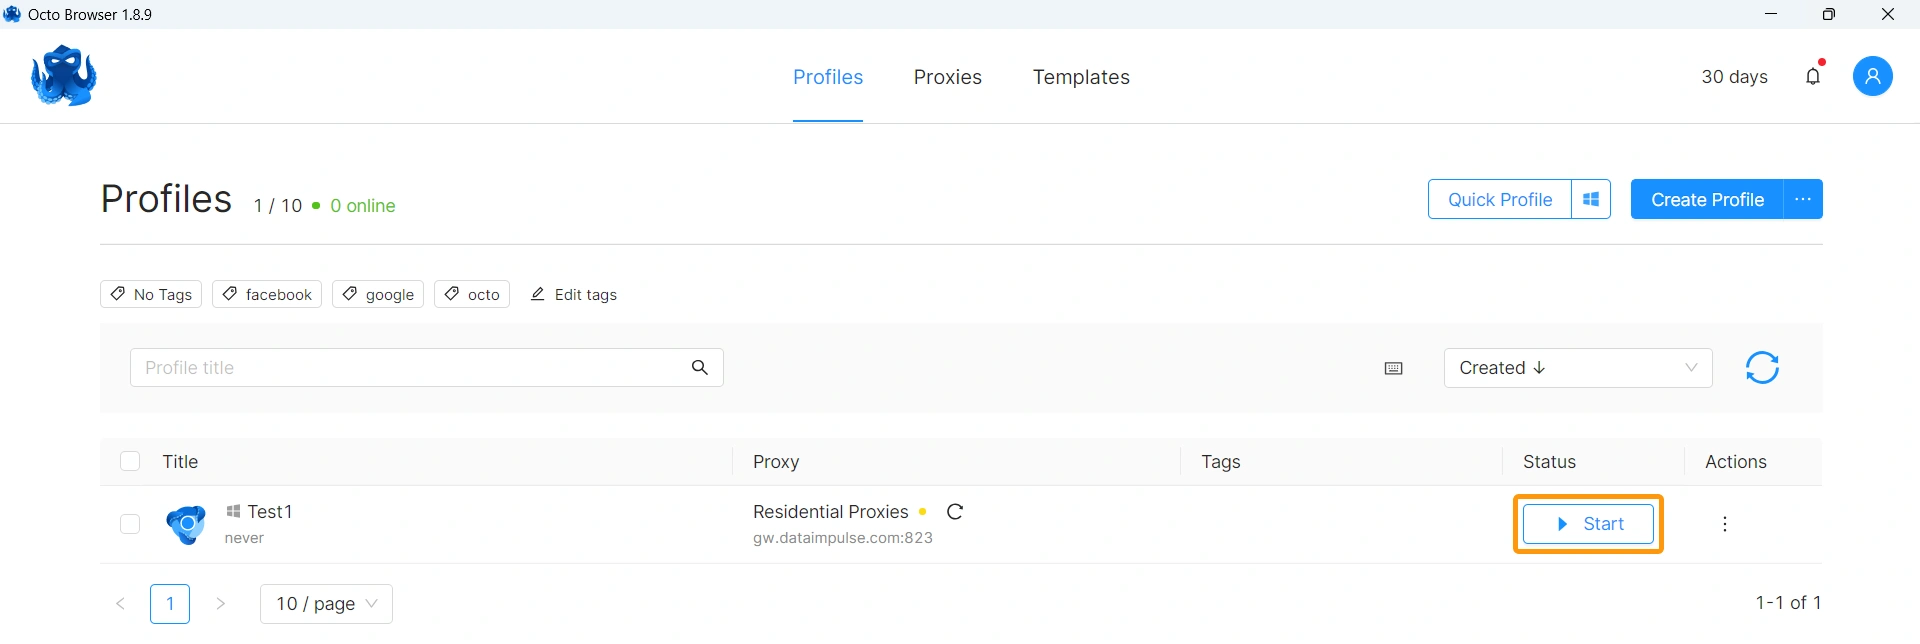
Your profile is now successfully configured with a proxy assigned.
- Lastly, click on the ▶Start button to open a new instance of the Chromium browser.
Now you can continue with your tasks in a secure and private environment!


