Configuring proxies in Psiphon Pro
Psiphon Pro is a cross-platform app that allows you to get over censorship and blocks and enjoy the free Internet. It is an official app that you can get from trusted sources like the Play Store. The app is quick to install and it doesn’t need much space. It also blocks access to suspicious websites. You can have all of this, even with a free version. Paired with DataImpulse proxies, it helps you ensure stable access to necessary content, popular social media, and more and stay in touch with the world, latest trends, and news.
How to set up DataImpulse proxies in Psiphon Pro
In this tutorial, we focus on configuring proxies with Psiphon for Android. However, the process is pretty similar for iOS and your personal computer.
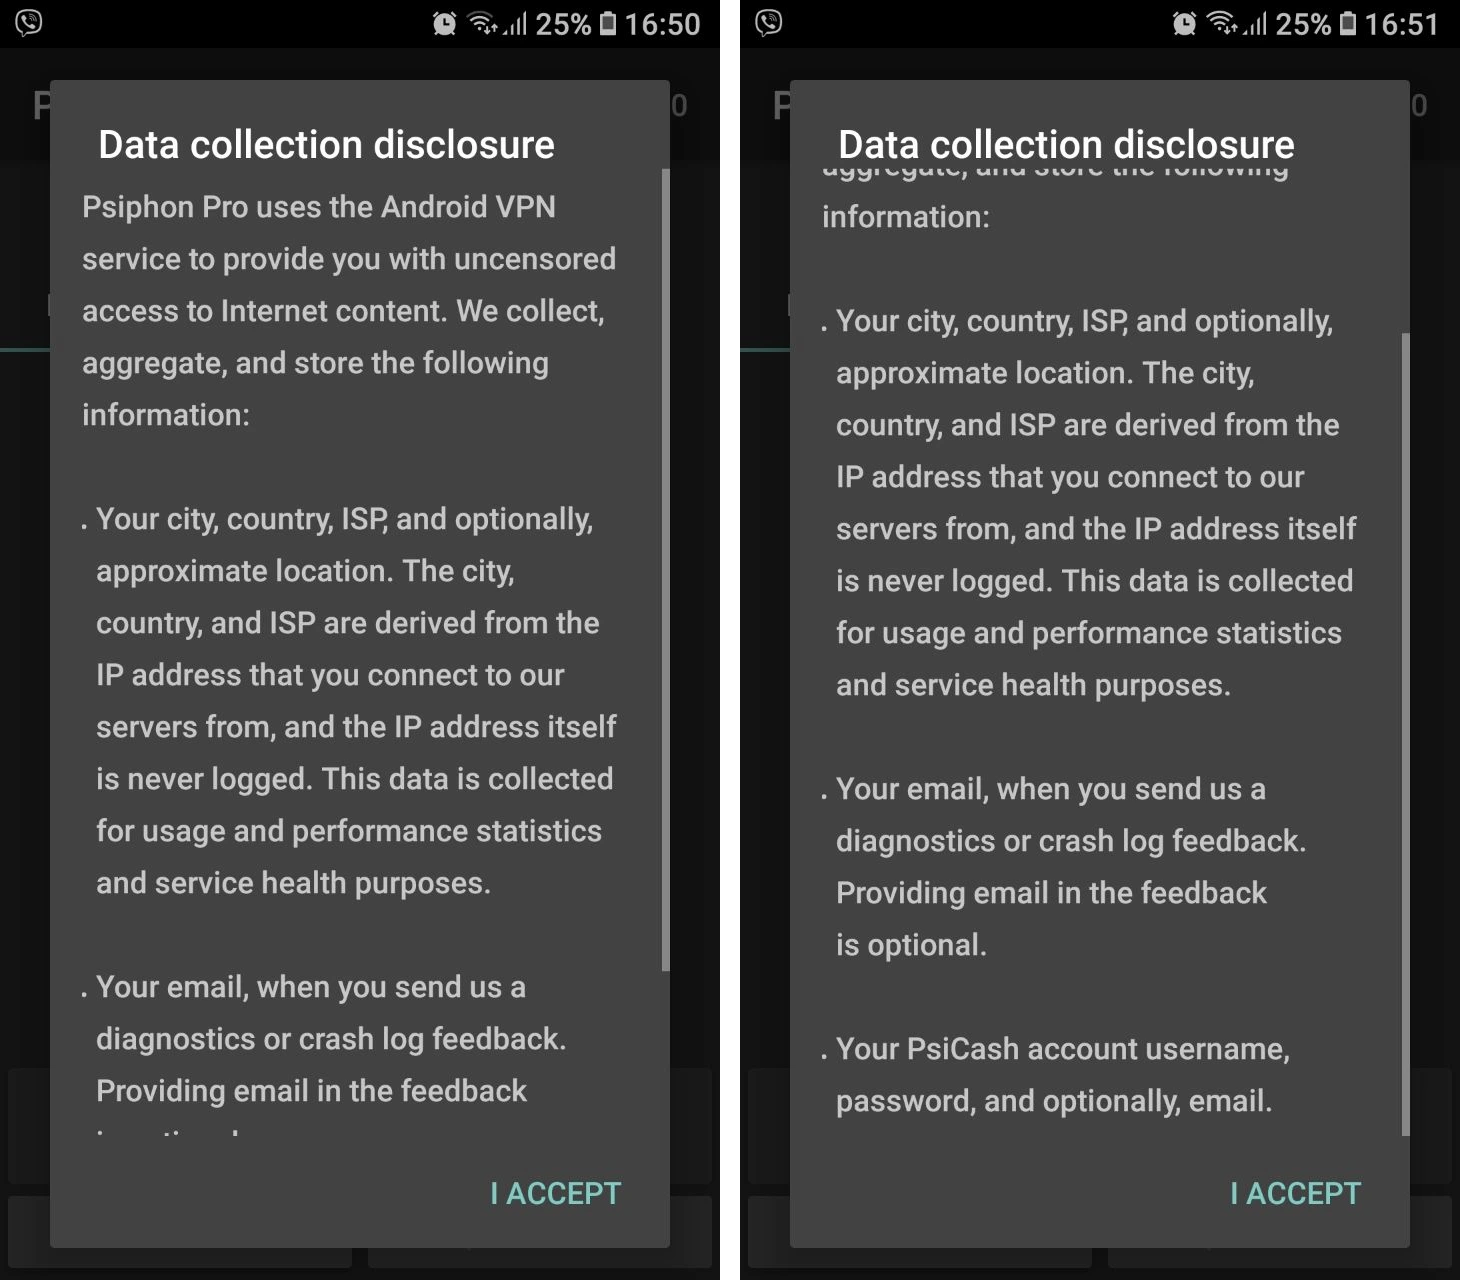
First, open your DataImpulse dashboard and navigate to the necessary plan tab. You will have to copy your credentials from here. Then, go to the Play Store and download the app. When you launch it for the first time, you will see a note on what types of data the app collects. To continue, press “I accept.”
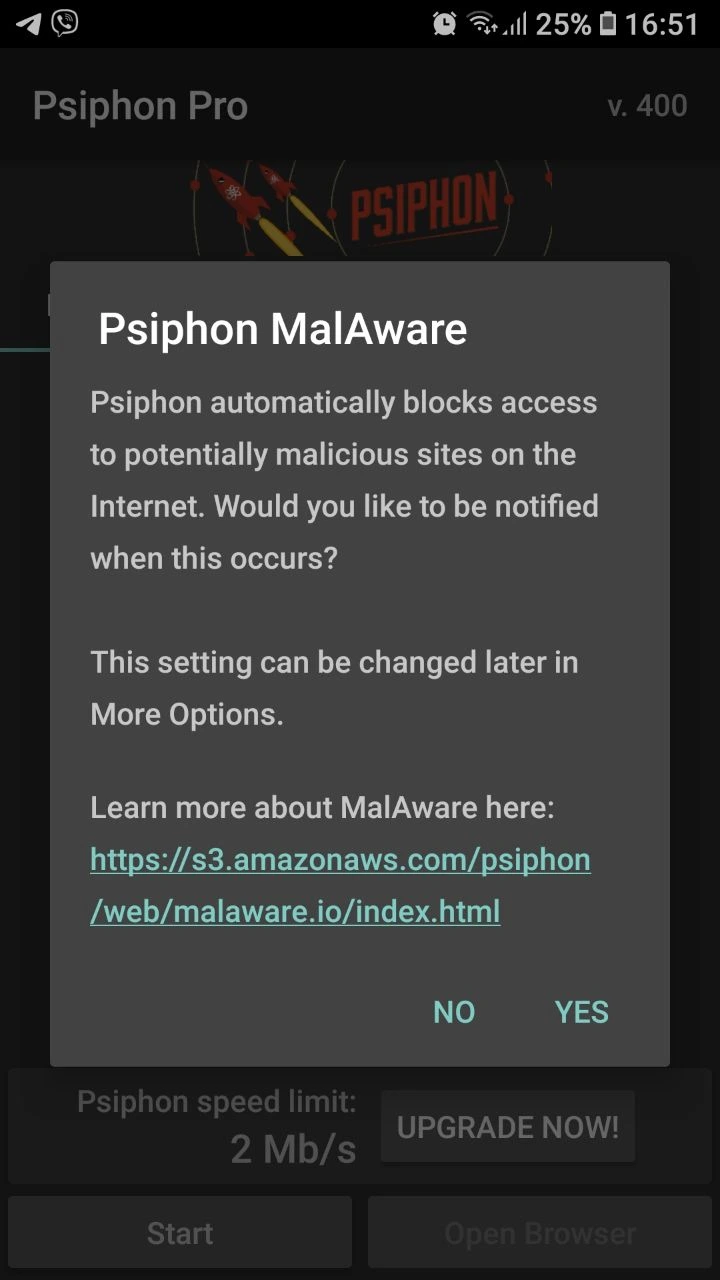
Then, the app will ask whether it should notify you when it blocks access to a suspicious website. Press “Yes” or “No”.
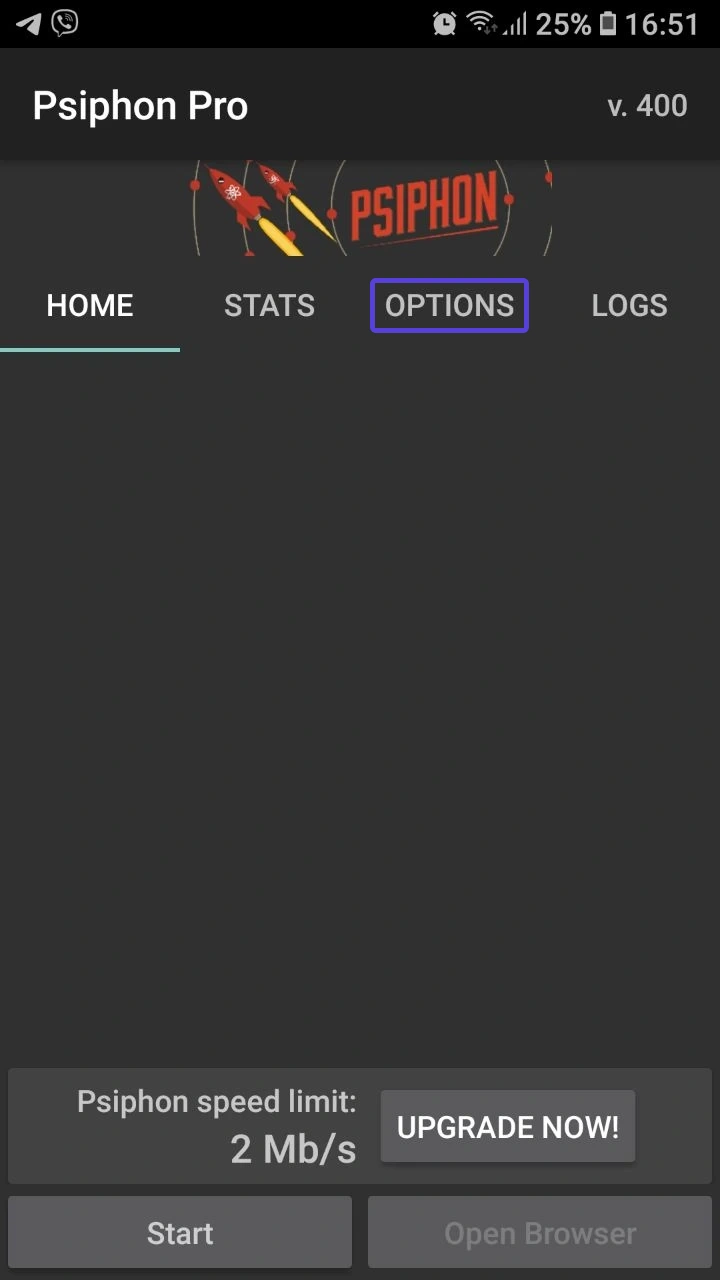
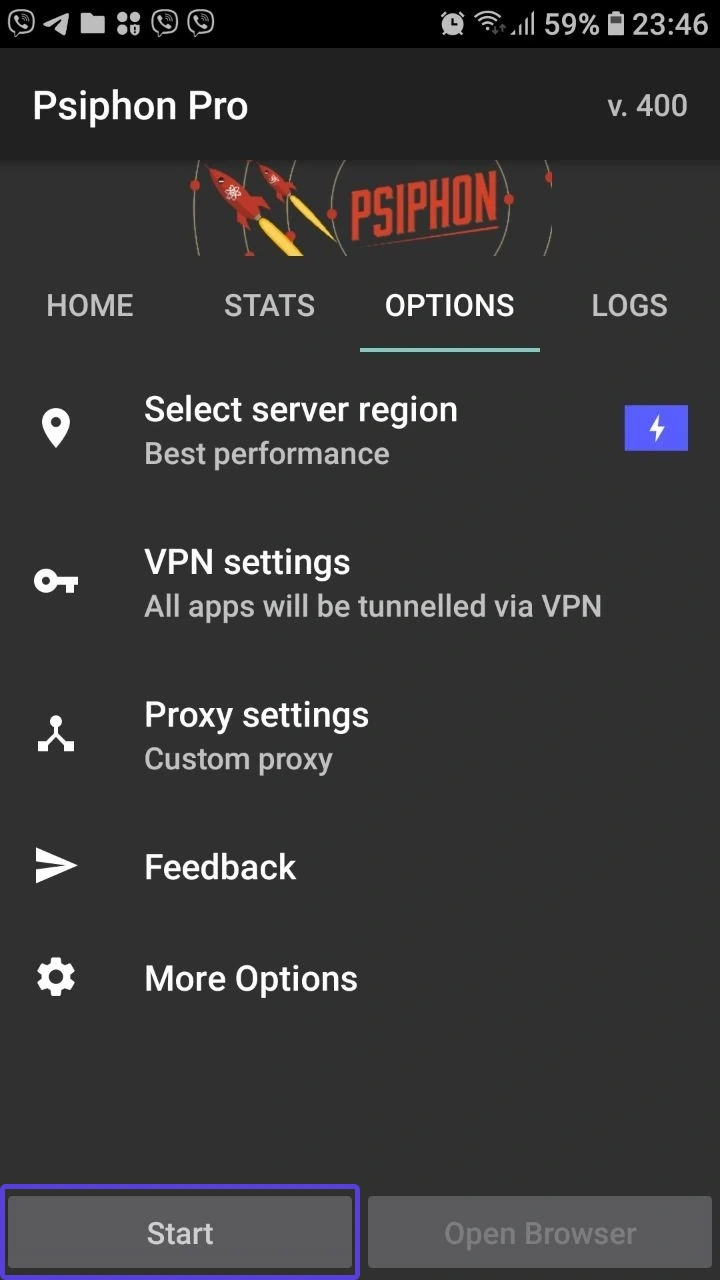
After that, you will end up on the “Home” tab, and here you need to switch to the “Options” tab.
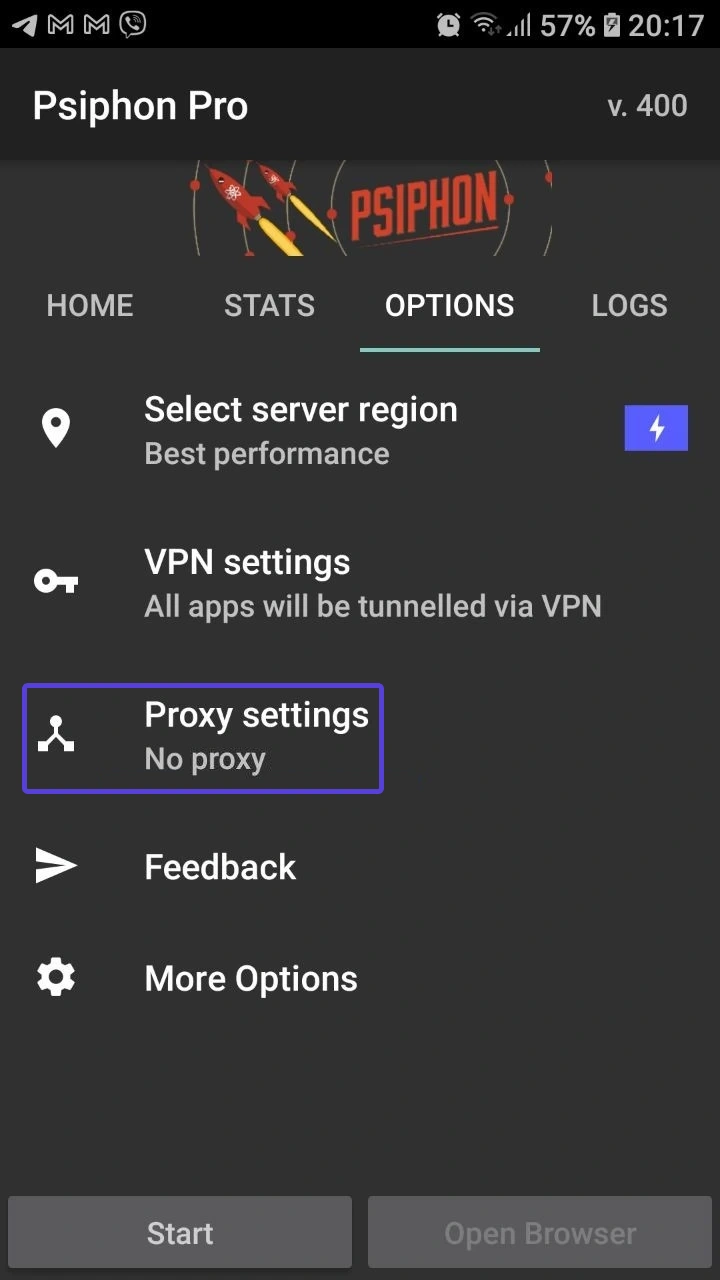
Now, choose the “Proxy settings” line.
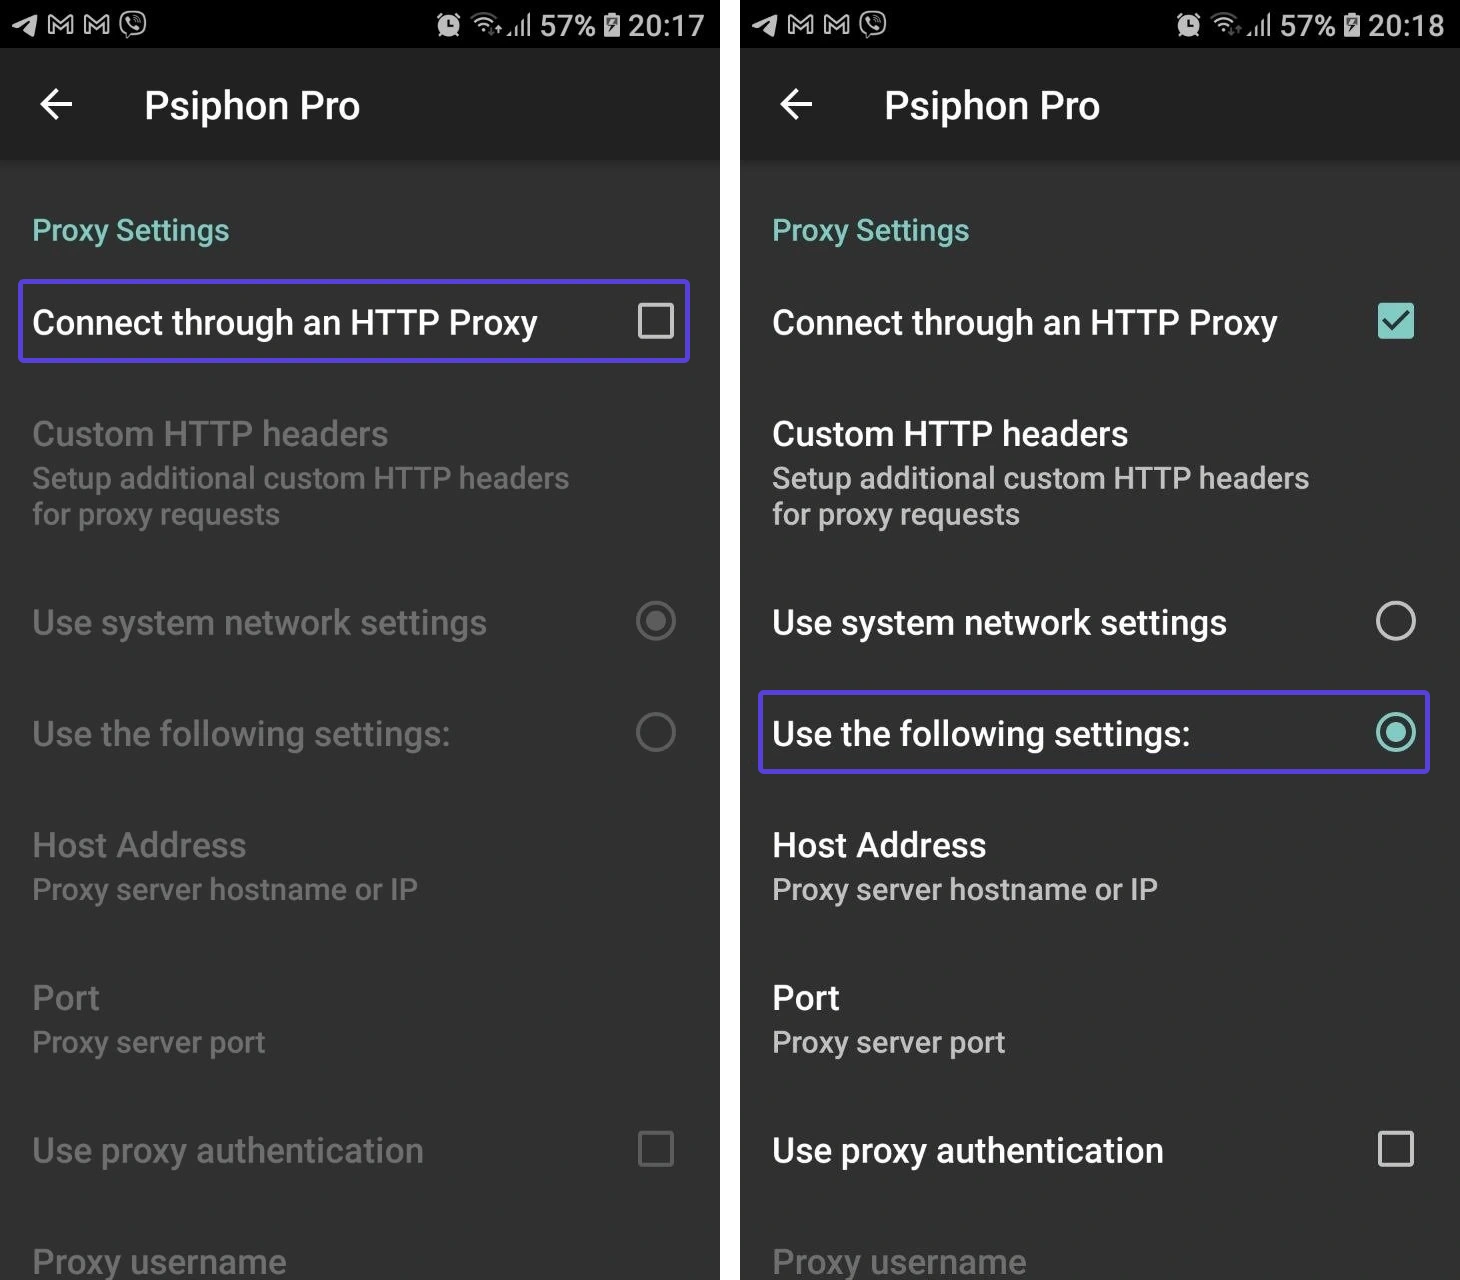
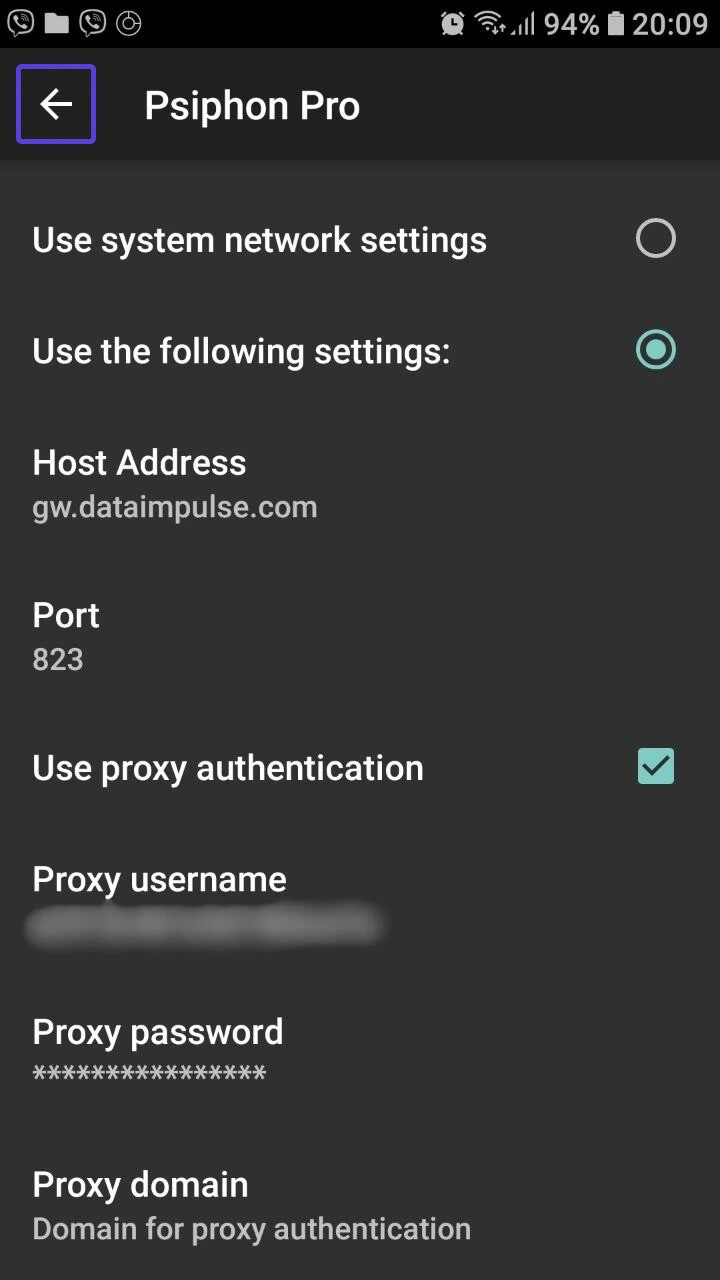
If the “Connect through an HTTP Proxy” feature isn’t active, enable it. Then, choose the “Use the following settings” option.
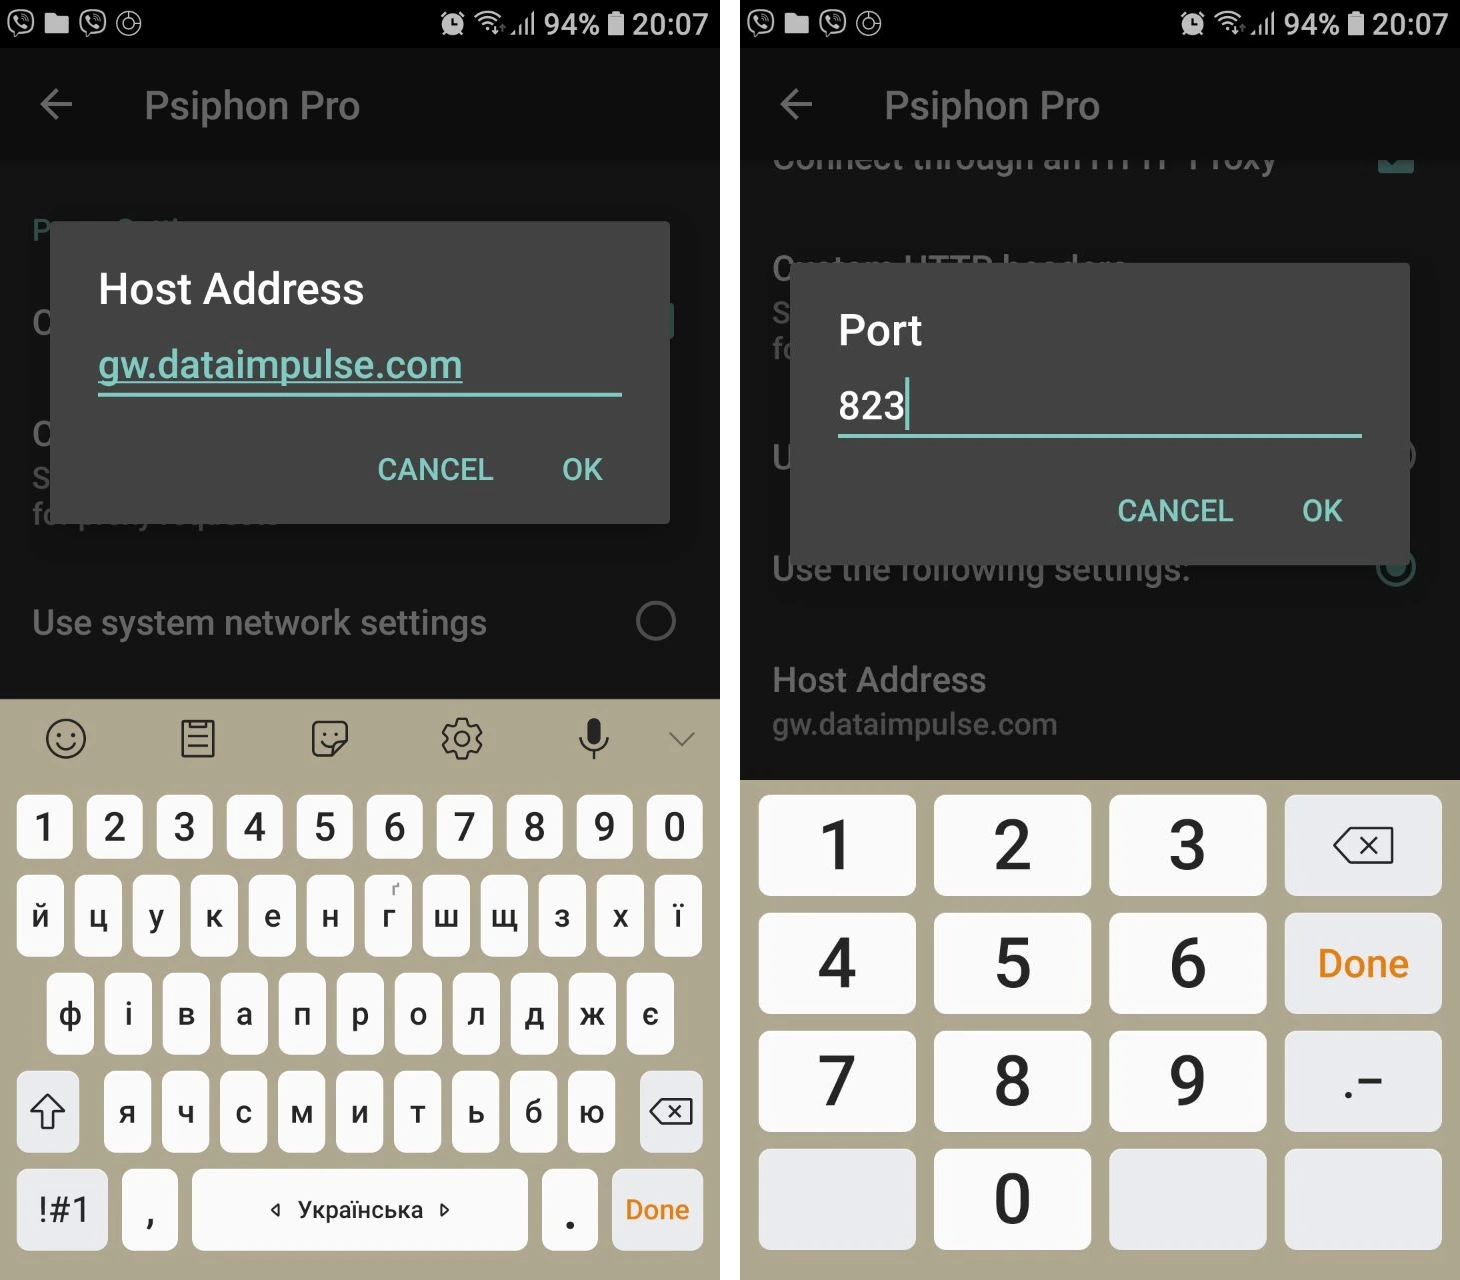
Fill in the “Host Address” and “Port” fields. Click “Ok” to save settings.
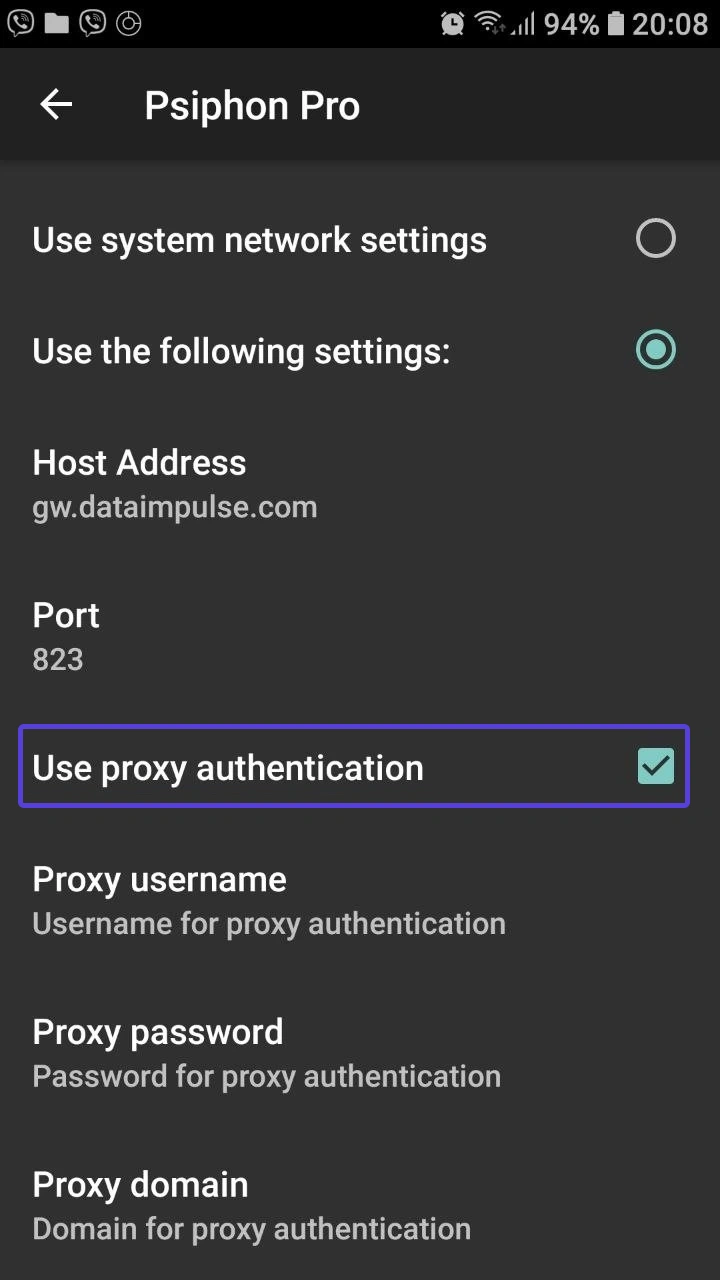
Next, enab le the “Use proxy authentication” feature. When you do so, the next fields will become available.
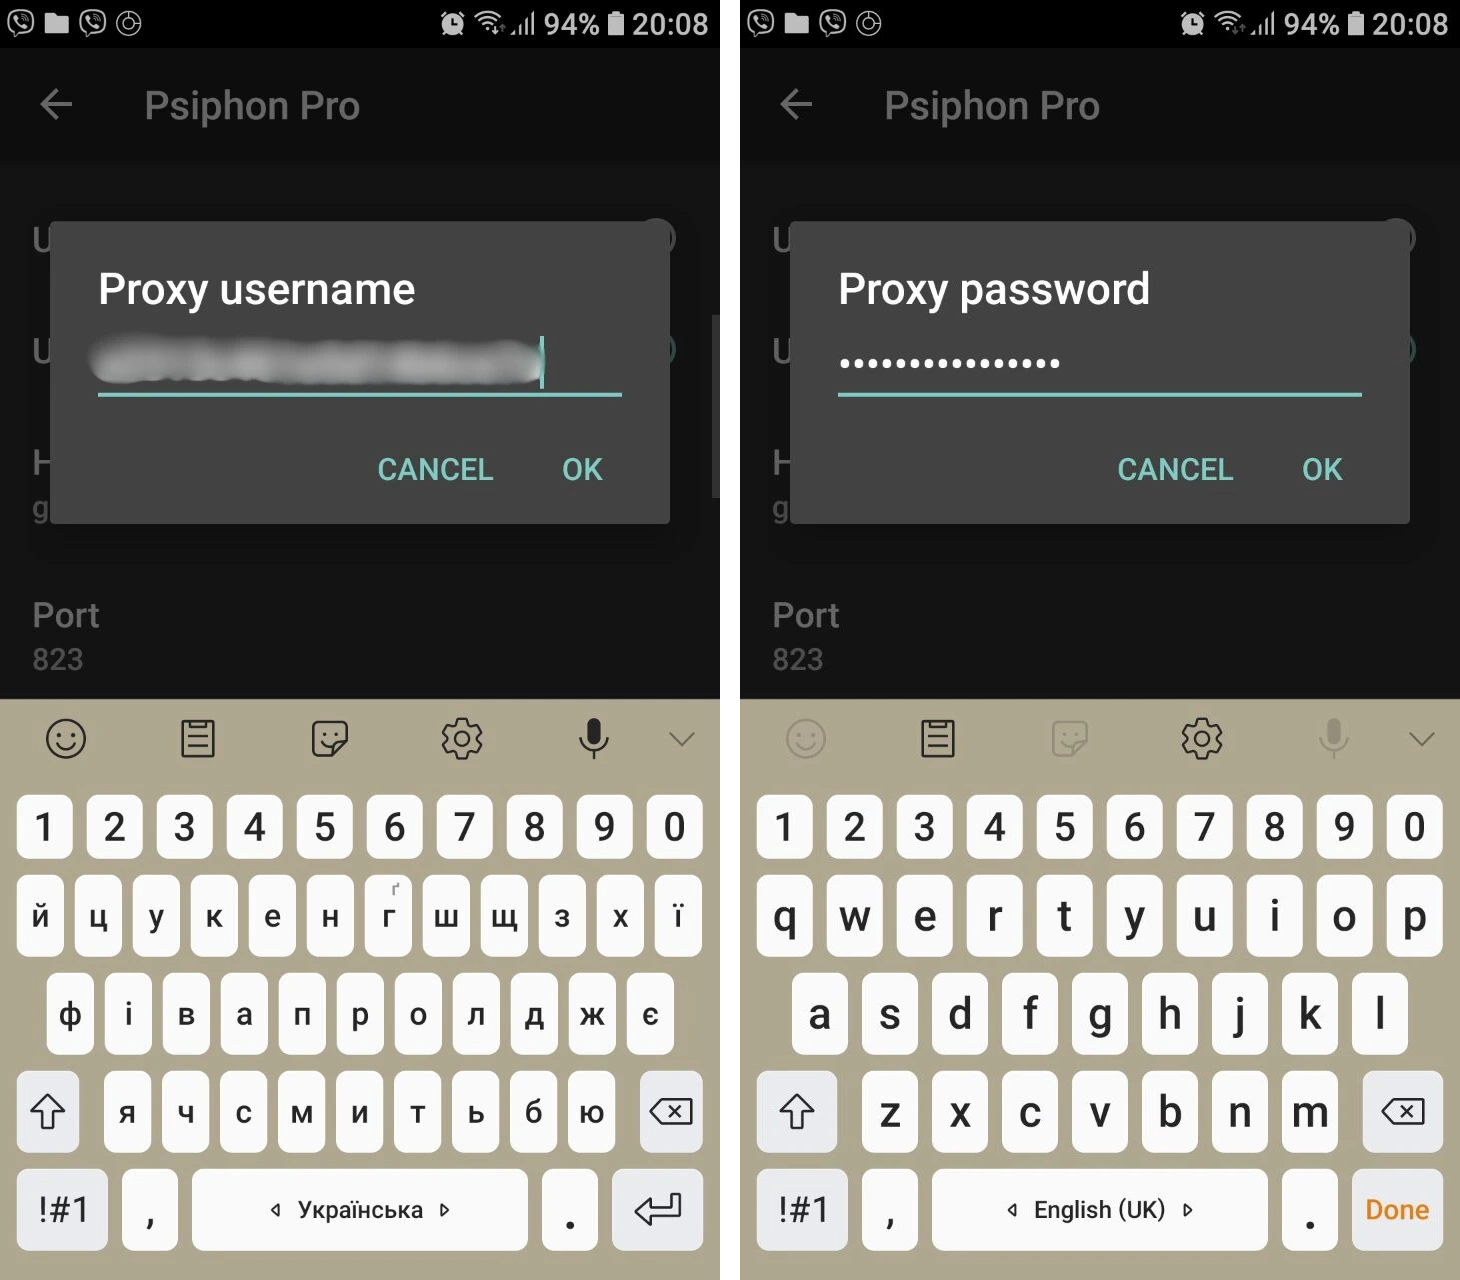
Paste your login into the “Proxy username” field and your password into the “Proxy password” field.
After that, press the arrow sign in the top-left part of the screen to go back. The app will save your settings automatically.
The final step is to press the “Start” button in the bottom-left corner of the screen.
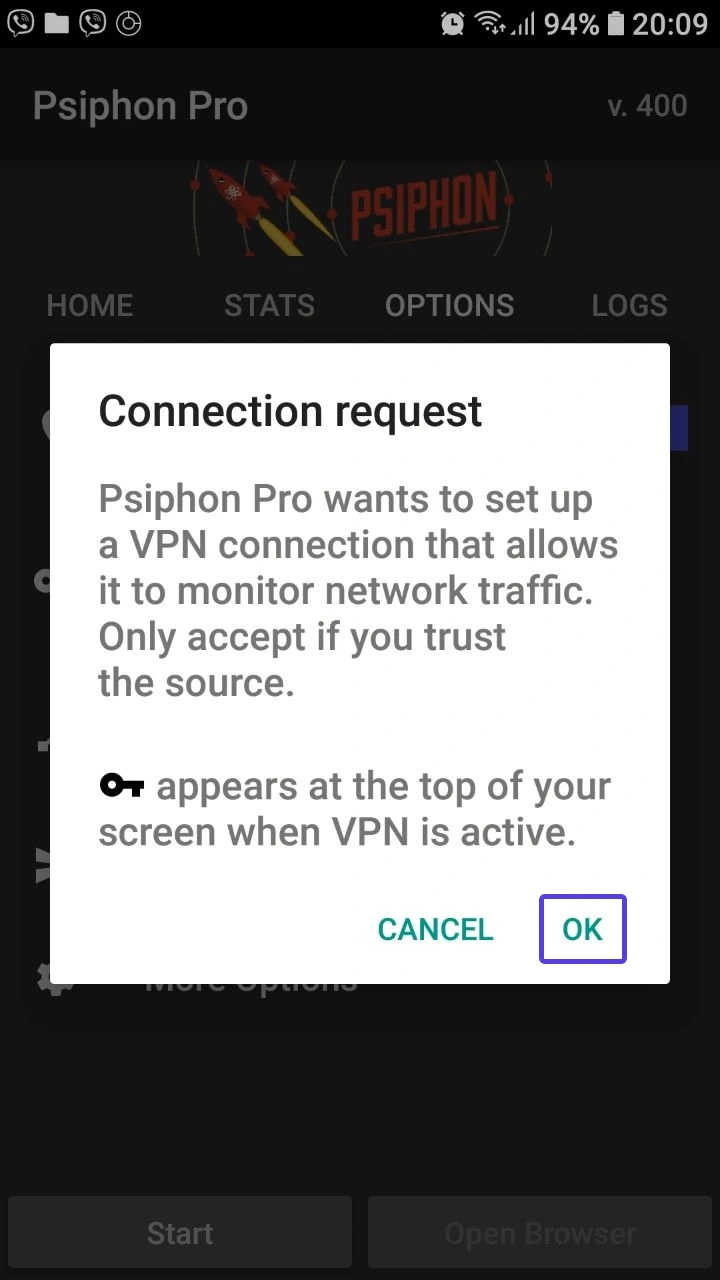
Once you do so, the app may ask for your permission to create a tunnel. Click “OK” to proceed.
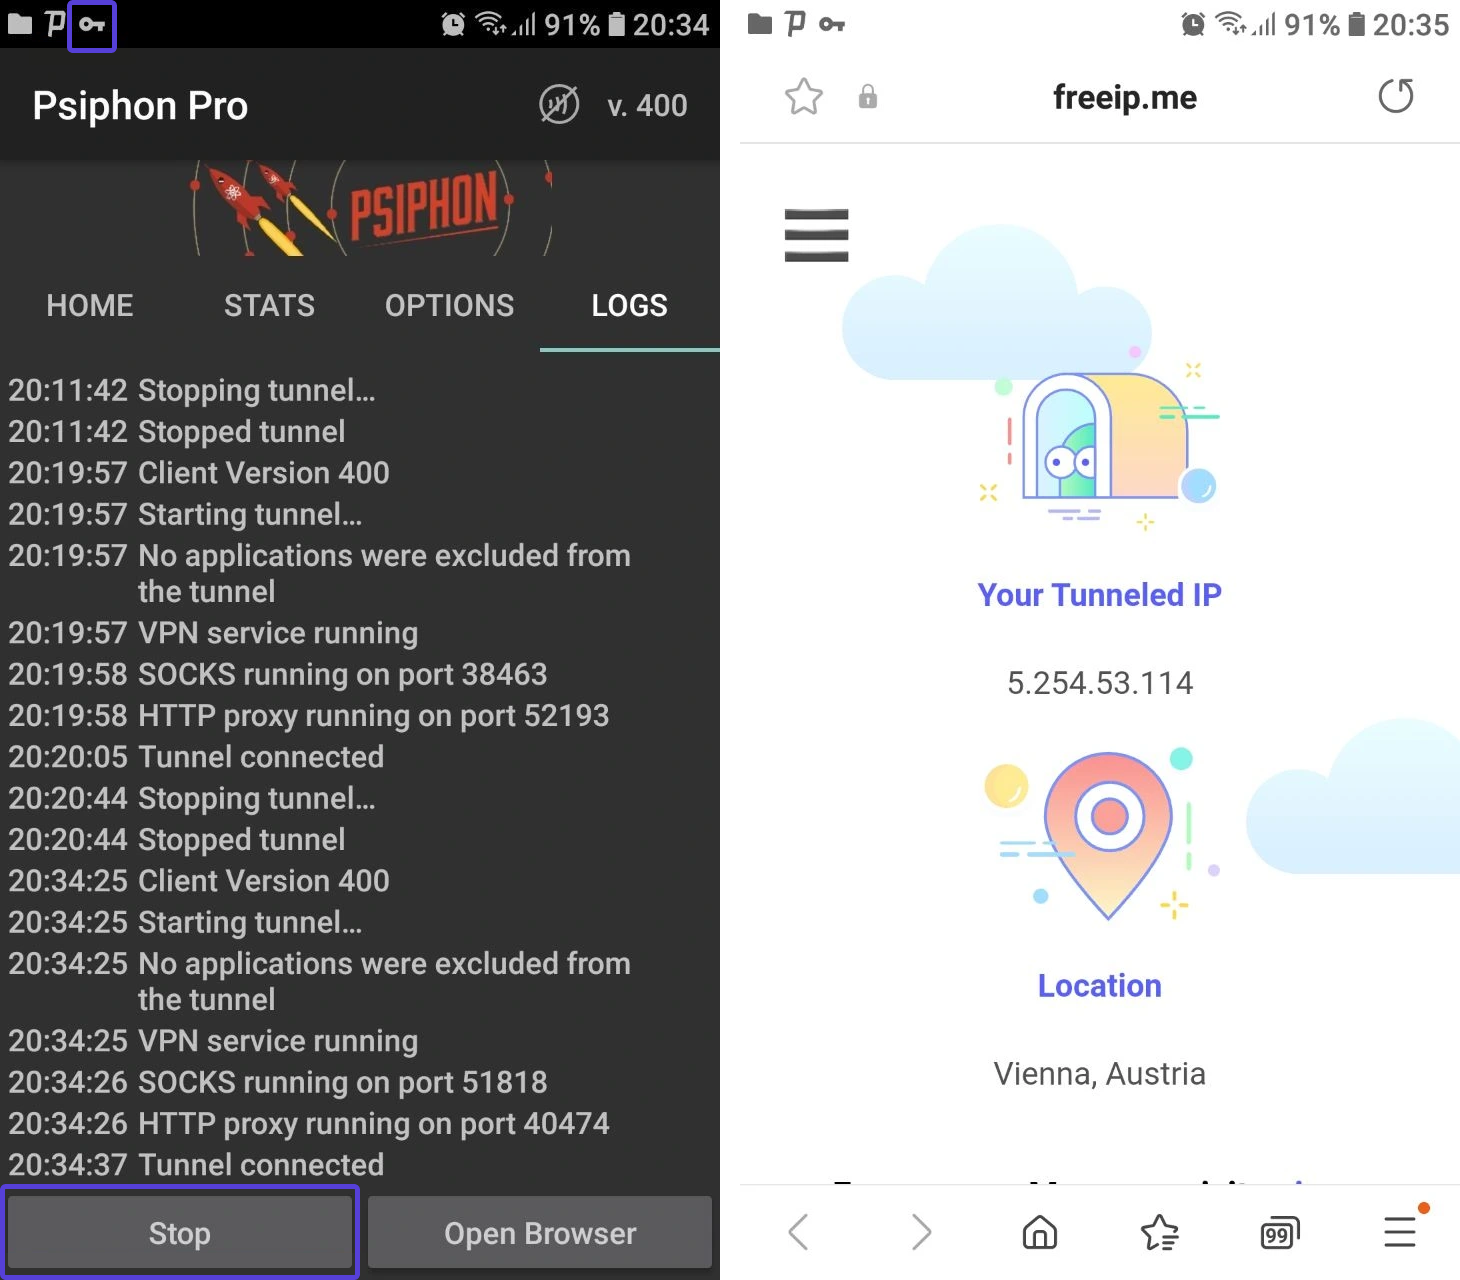
If everything works correctly, you will see a key sign on the notification bar. The app will redirect you to the browser page that shows your tunneled IP and location. If you go back to the app, you will see a detailed text description of what it is doing right now. To stop the app, press the “Stop” button.
That’s what it takes to configure proxies in Psiphon! Now, you can surf the Net without stumbling upon an unreliable connection.

