How to set up proxies in Safari on macOS
NOTE: these guidelines are targeted towards Mac OS users. It is important to be aware that proxy settings may differ between Mac OS X and Windows.
So for Windows users, please refer to the additional instructions provided at this link for further guidance
Safari is a web browser developed by Apple and originally released for the Mac OS X operating system.

Launching the proxy settings
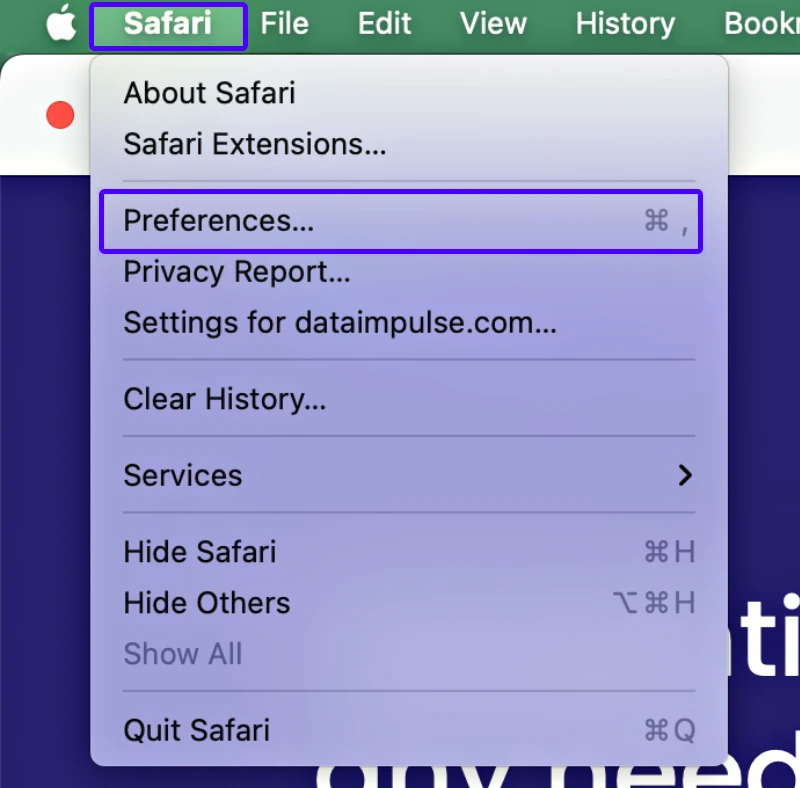
- Launch Safari and navigate to Safari > Preferences.
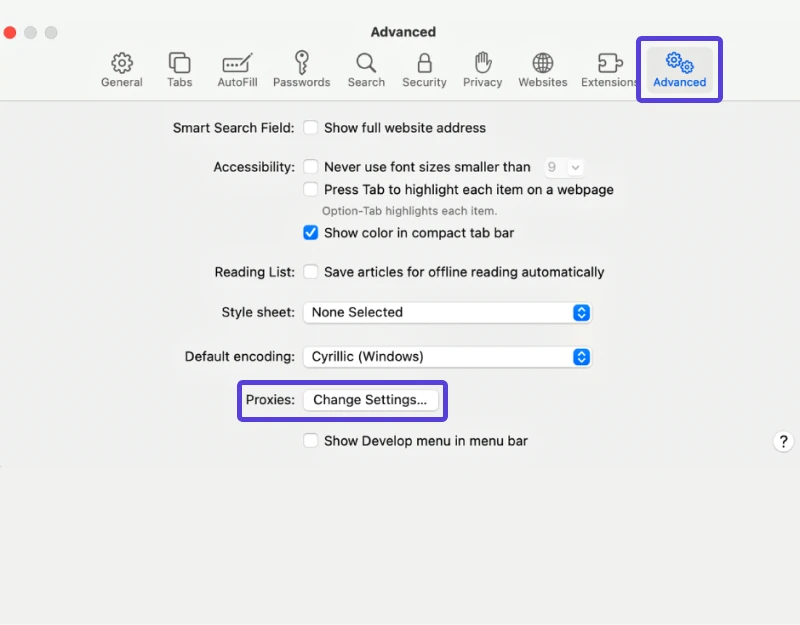
- Next, you need to go to the “Advanced” tab then to the Proxies section and select the option “Change Settings“.
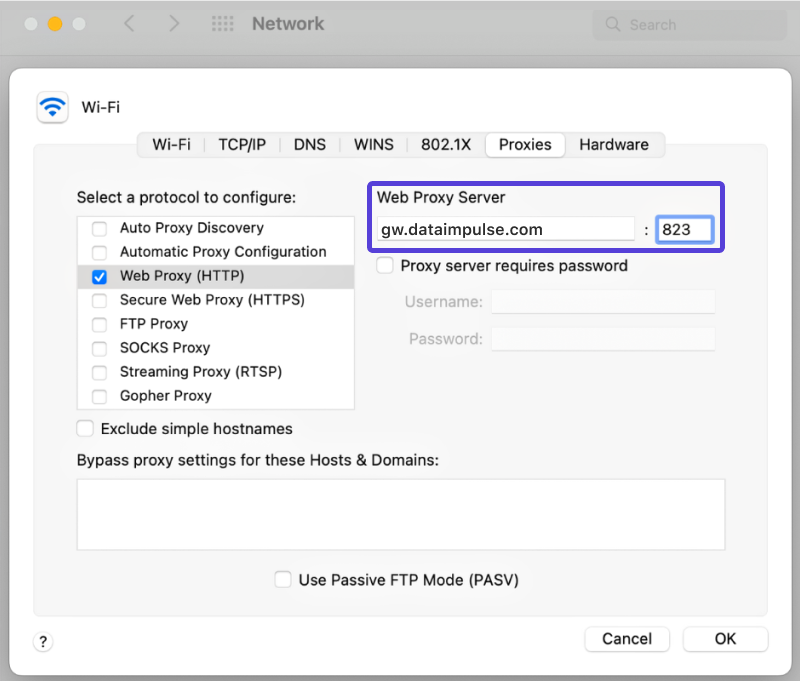
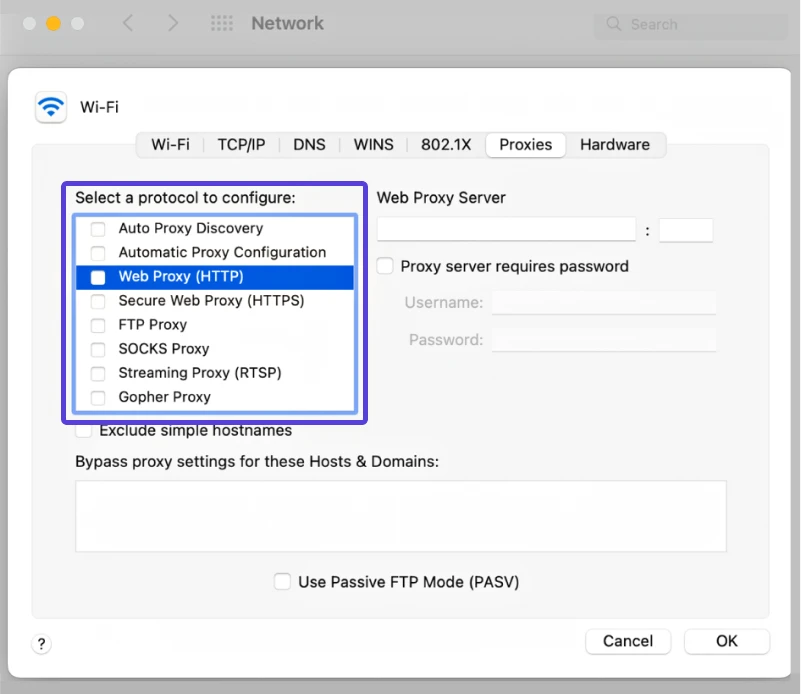
Once the new window appears, you can set up proxies. Keep in mind that this setup will apply to your entire system, so any other browsers or applications you use will connect to the internet through the same proxy server. For additional steps, please consult our guide on integrating proxies with macOS.
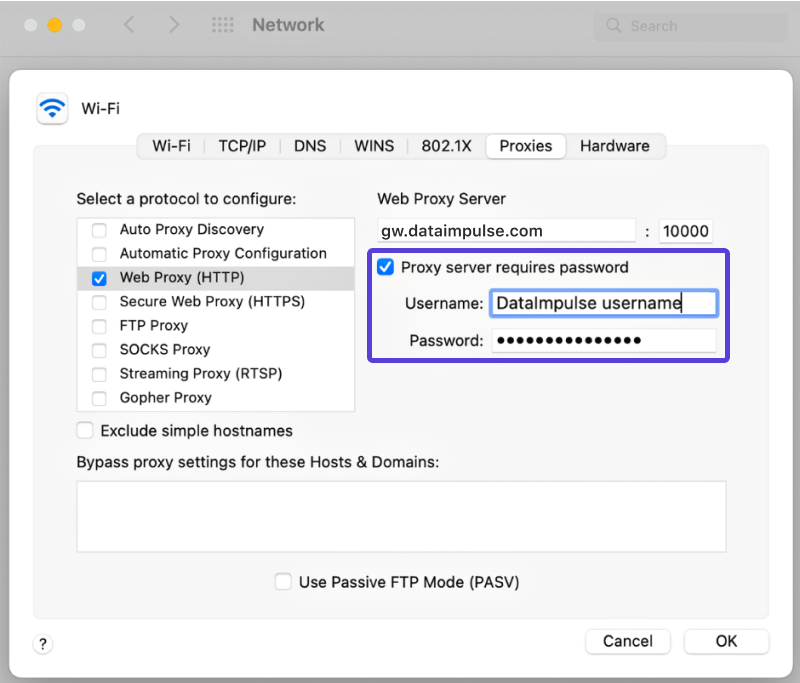
- To configure proxy settings, in the Proxies section select the “Web Proxy (HTTP)” field and enter the proxy server address, port number, username, and password.
After completing the necessary configurations, remember to click the “OK” button to save the settings.
With these simple steps, you can start using proxies on Safari and enjoy safe and fast internet browsing.

