Simple Proxy Integration with DataImpulse
Experience seamless management of Chrome’s proxy settings with the user-friendly SimpleProxy. Effortlessly handle http, http, socks5 protocols. Enjoy the added convenience of automatic proxy settings synchronization.

Configuring proxies using SimpleProxy is a piece of cake. Just follow these straightforward steps:
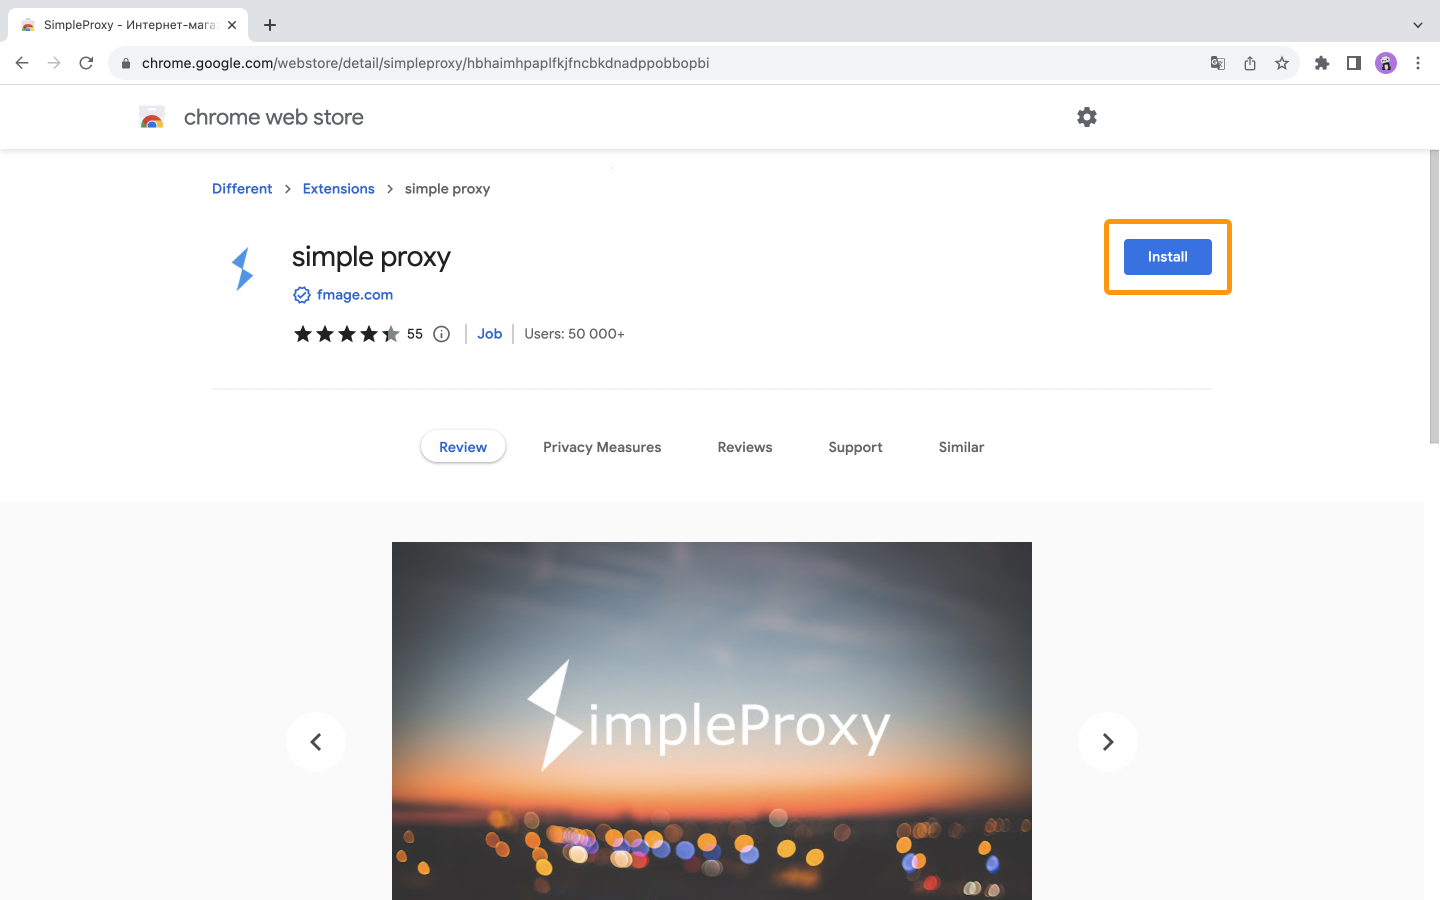
- Install the extension on your Chrome browser.
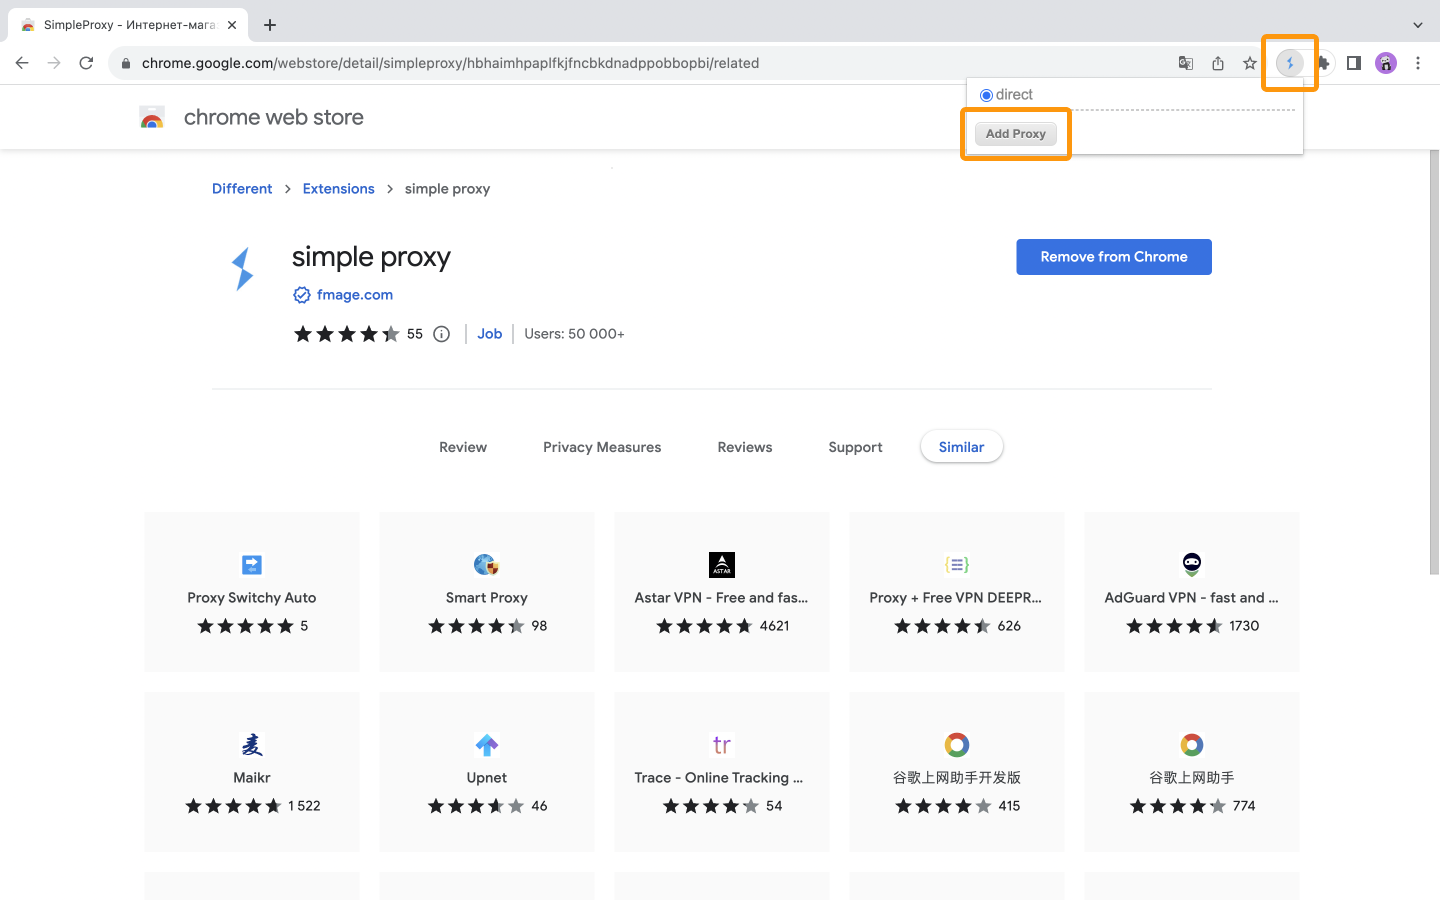
- Click on the extension icon and select “Add Proxy”.
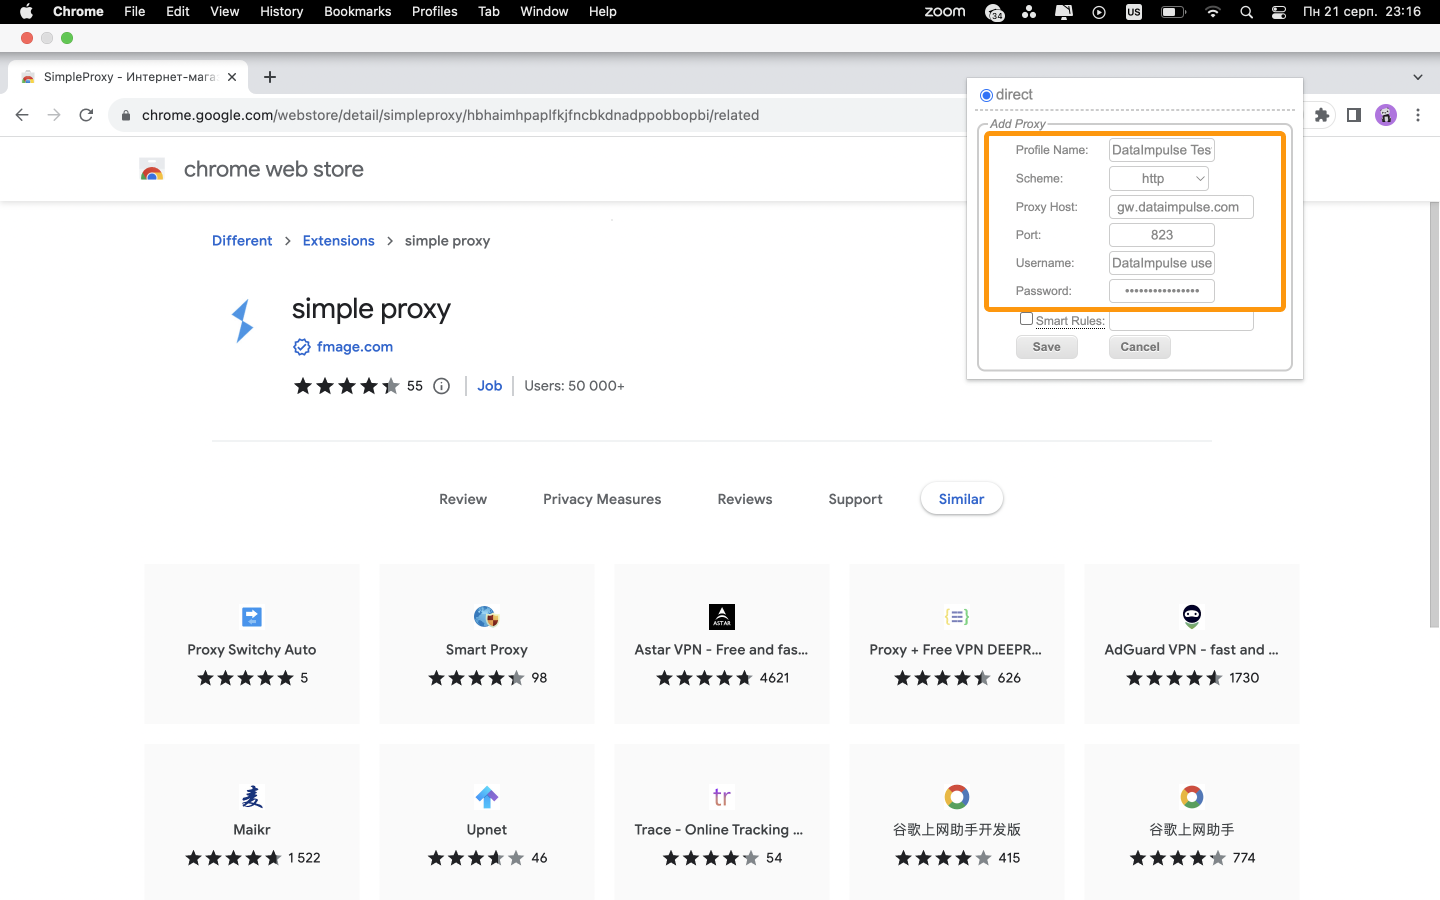
- Fill in the proxy settings and your account info, including your DataImpulse user’s Username and Password. If you have whitelisted IPs, no need to enter login credentials.
Proxy type: HTTP
Proxy host: gw.dataimpulse.com
Proxy port: 823
Username: your DataImpulse username
Password: your DataImpulse password
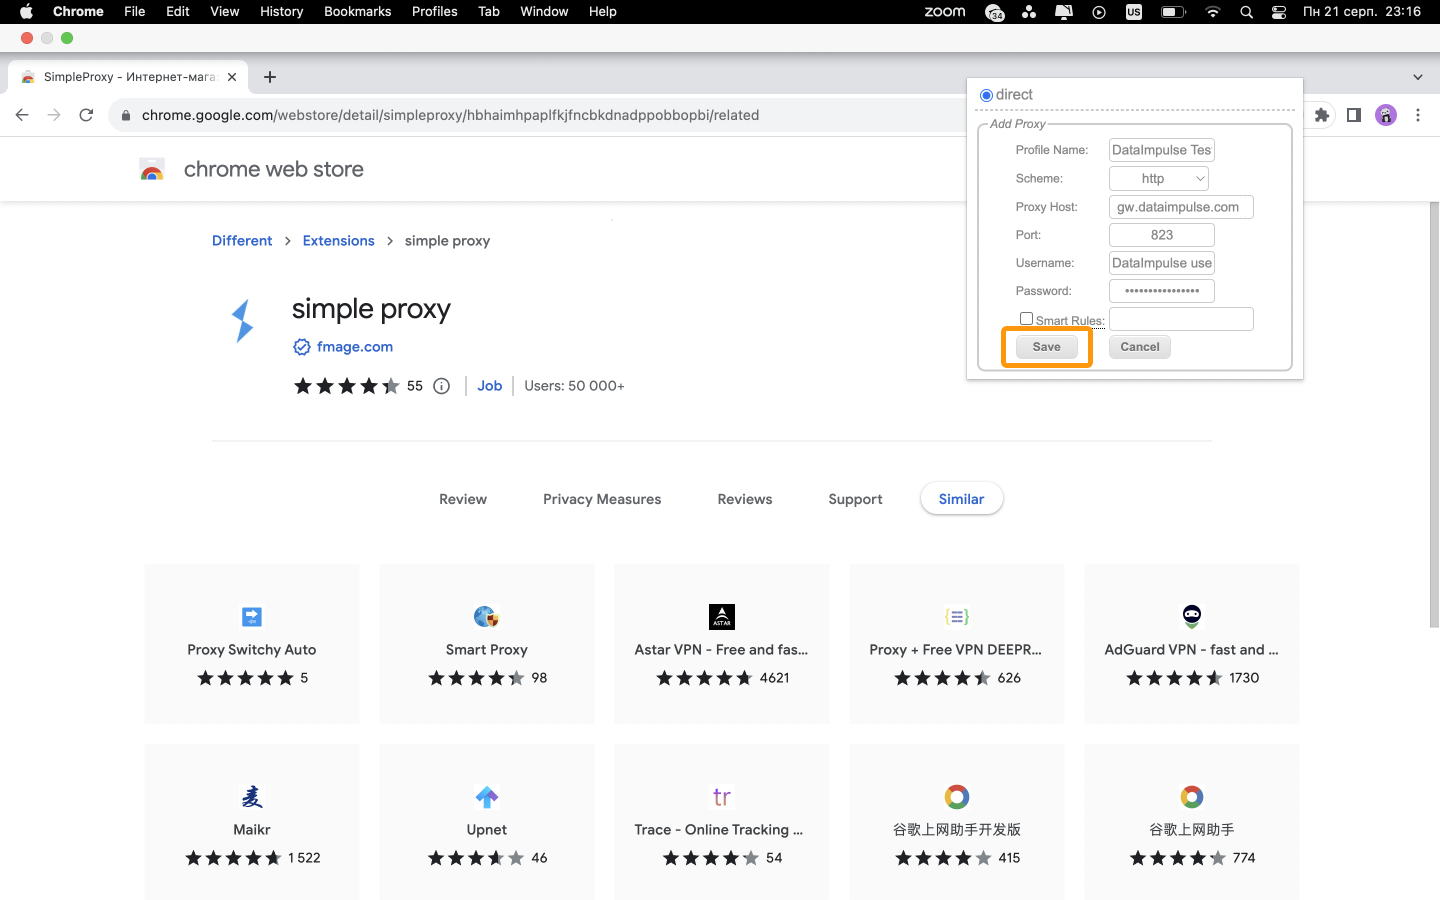
- Save your proxy server profile by clicking the “Save” button. To activate a proxy server, open the SimpleProxy extension icon and choose your preferred proxy profile from the dropdown menu.
Voilà! You’re all set to experience the advantages of utilizing proxies through SimpleProxy.


