Brave Proxy Setup: How to Use DataImpulse Proxies in a Browser
What is a Brave browser?
Brave is a Chromium-based browser that blocks ads, trackers, and other online threats. It protects user data, ensuring complete control over their digital footprint. Thanks to its ad-blocking capabilities, web pages load significantly faster while using fewer system resources. So you get a cleaner, faster, and safer browsing experience without annoying pop-ups. Plus, you can even earn rewards just for browsing. Its built-in blockchain support, including Brave Rewards and an integrated crypto wallet, positions it as an innovative solution. Brave can definitely be considered a compelling alternative to mainstream browsers.
Main benefits of using Brave browser:
- Brave shields for privacy and protection;
- Available in nearly 160 languages;
- Free to use, yet has some great, subscription-based features;
- Brave rewards program;
- Query parameter filtering;
- Client-side encryption for Brave Sync;
- HTTPS automatic upgrades;
- Tor and VPN integration;
- Built-in cryptocurrency wallet and much more!
If you want to integrate DataImpulse Proxies into Brave Browser, here are the steps:
1. First, register on DataImpulse and access your dashboard to begin using our proxies. In the Proxy Service section, choose your preferred plan and make sure to save the proxy details (IP addresses, ports, and authentication credentials) for the next steps.
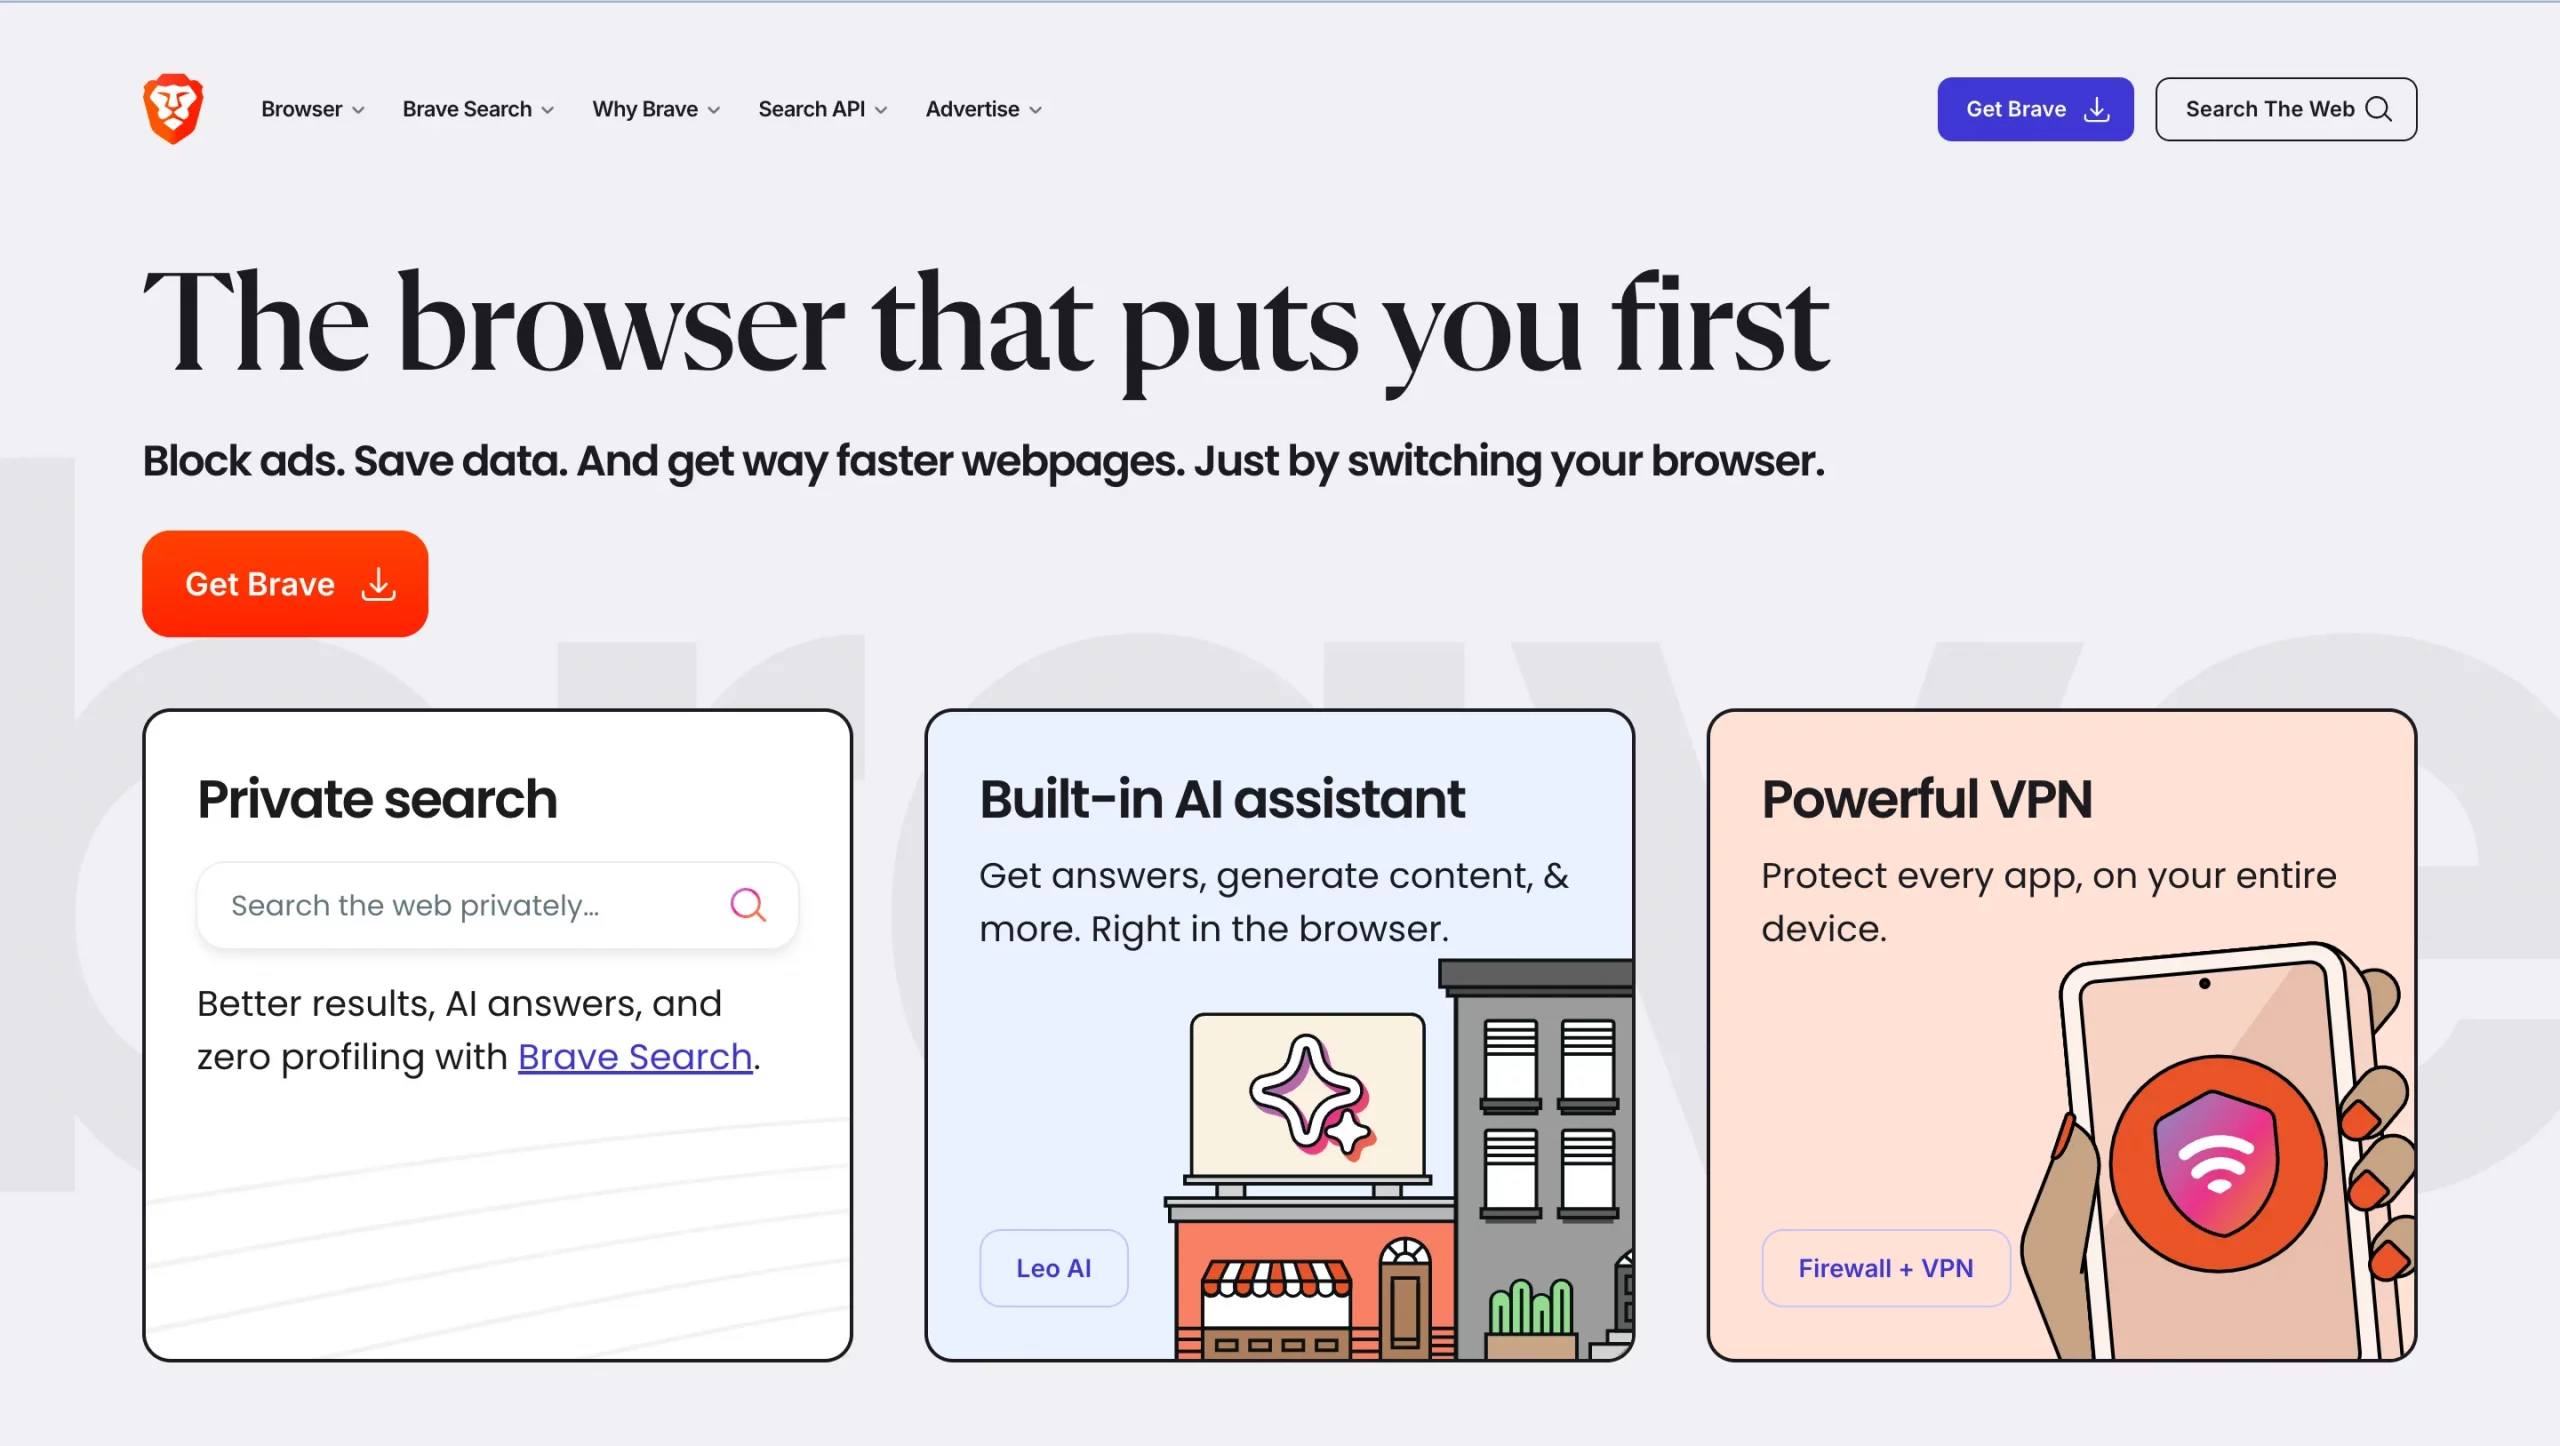
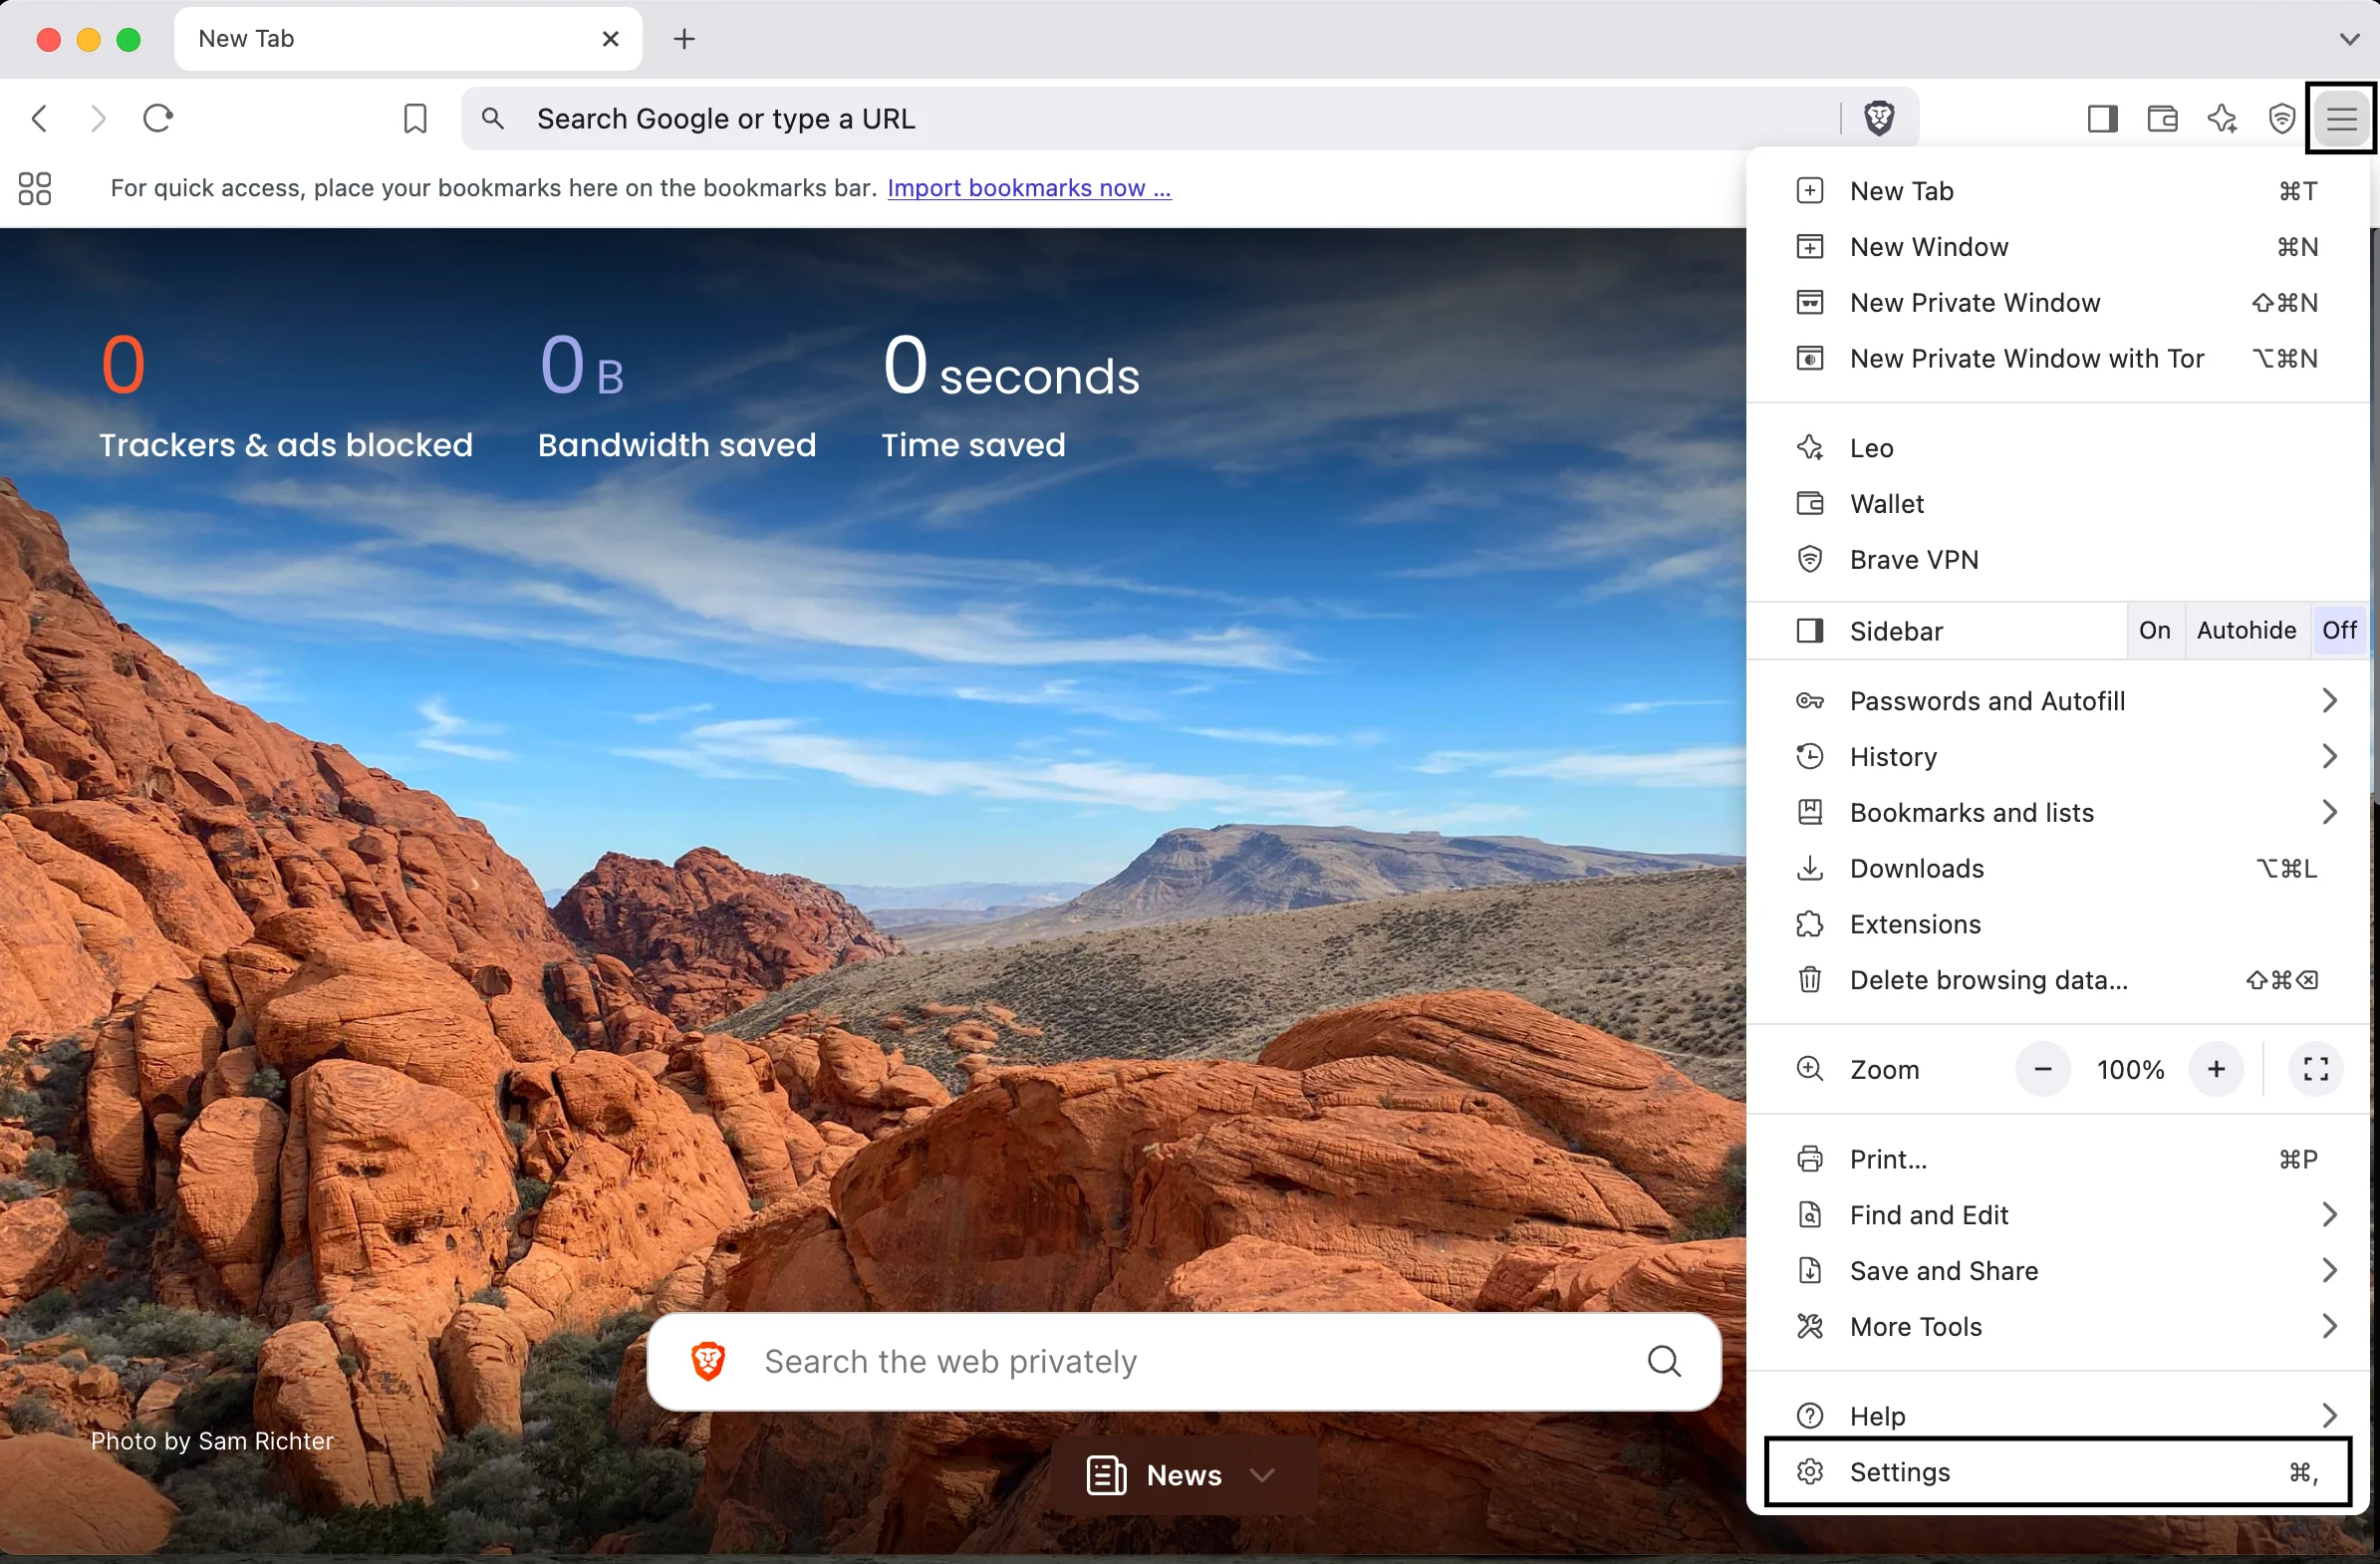
2. Download Brave by clicking ‘Get Brave’ button on their official website. Launch the browser and click on the three-dot menu in the top-right corner. Select Settings.
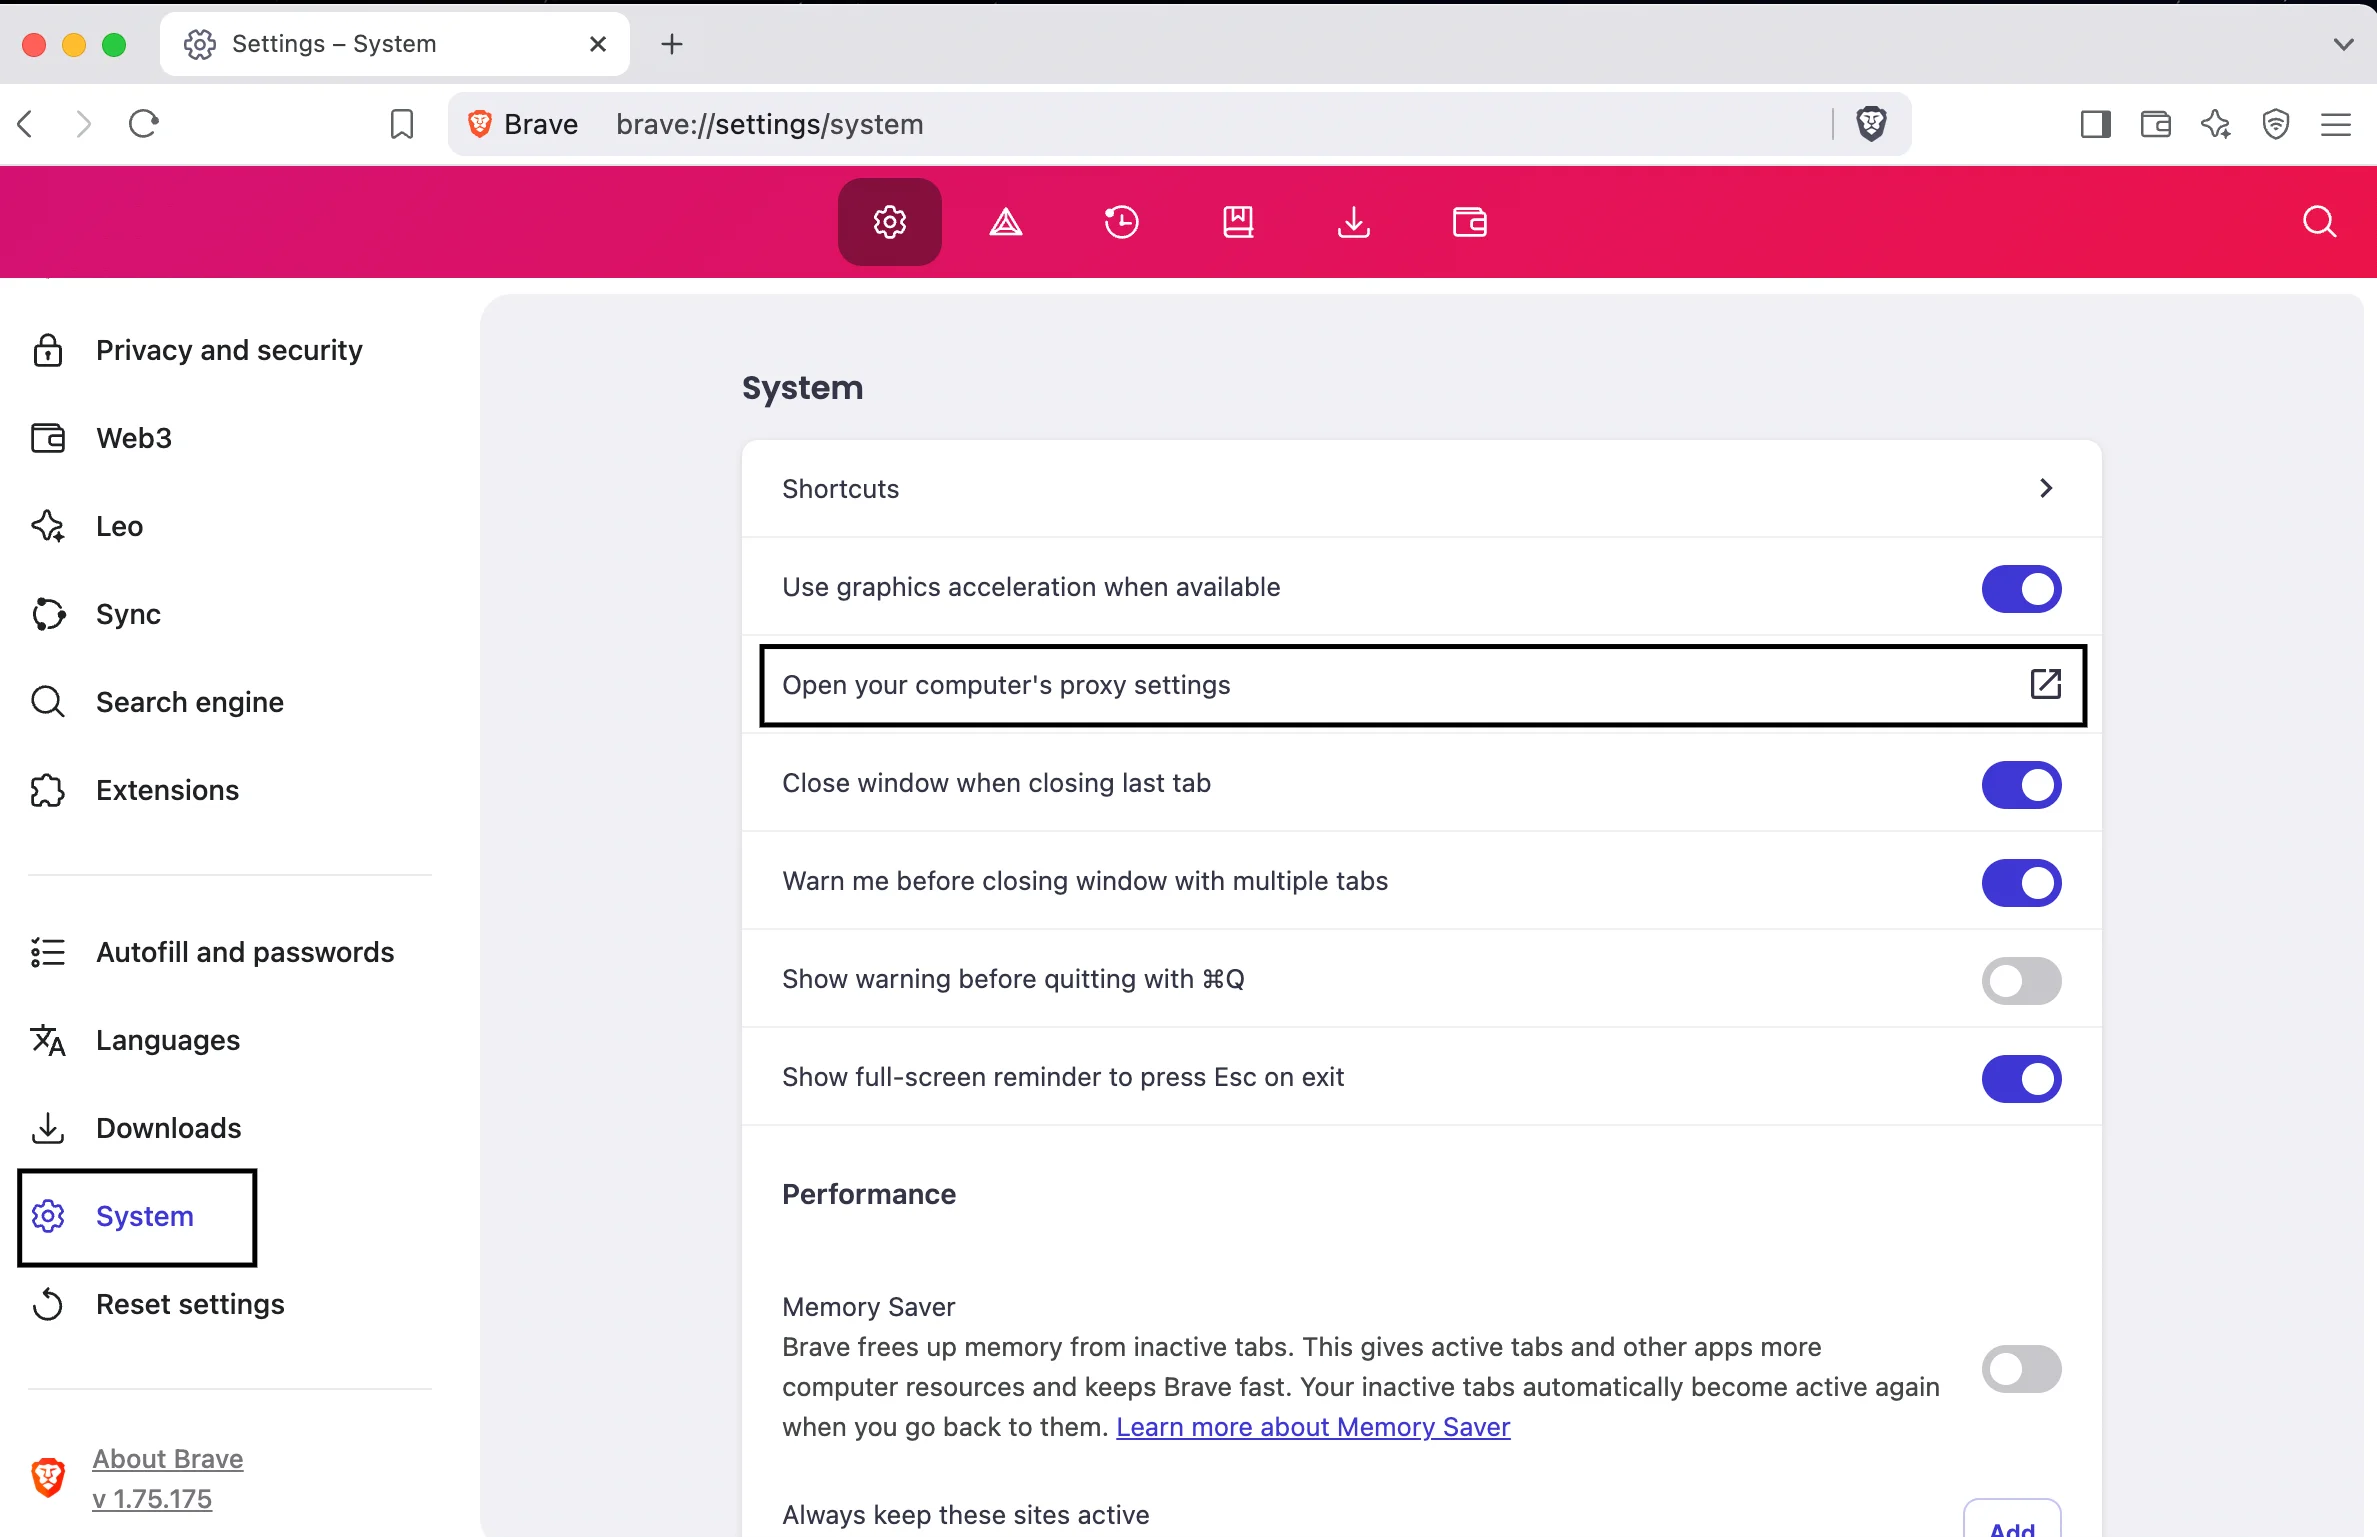
3. Then go to the System section. Click ‘Open your computer’s proxy settings’.
4. Manage proxy details on your operating system:
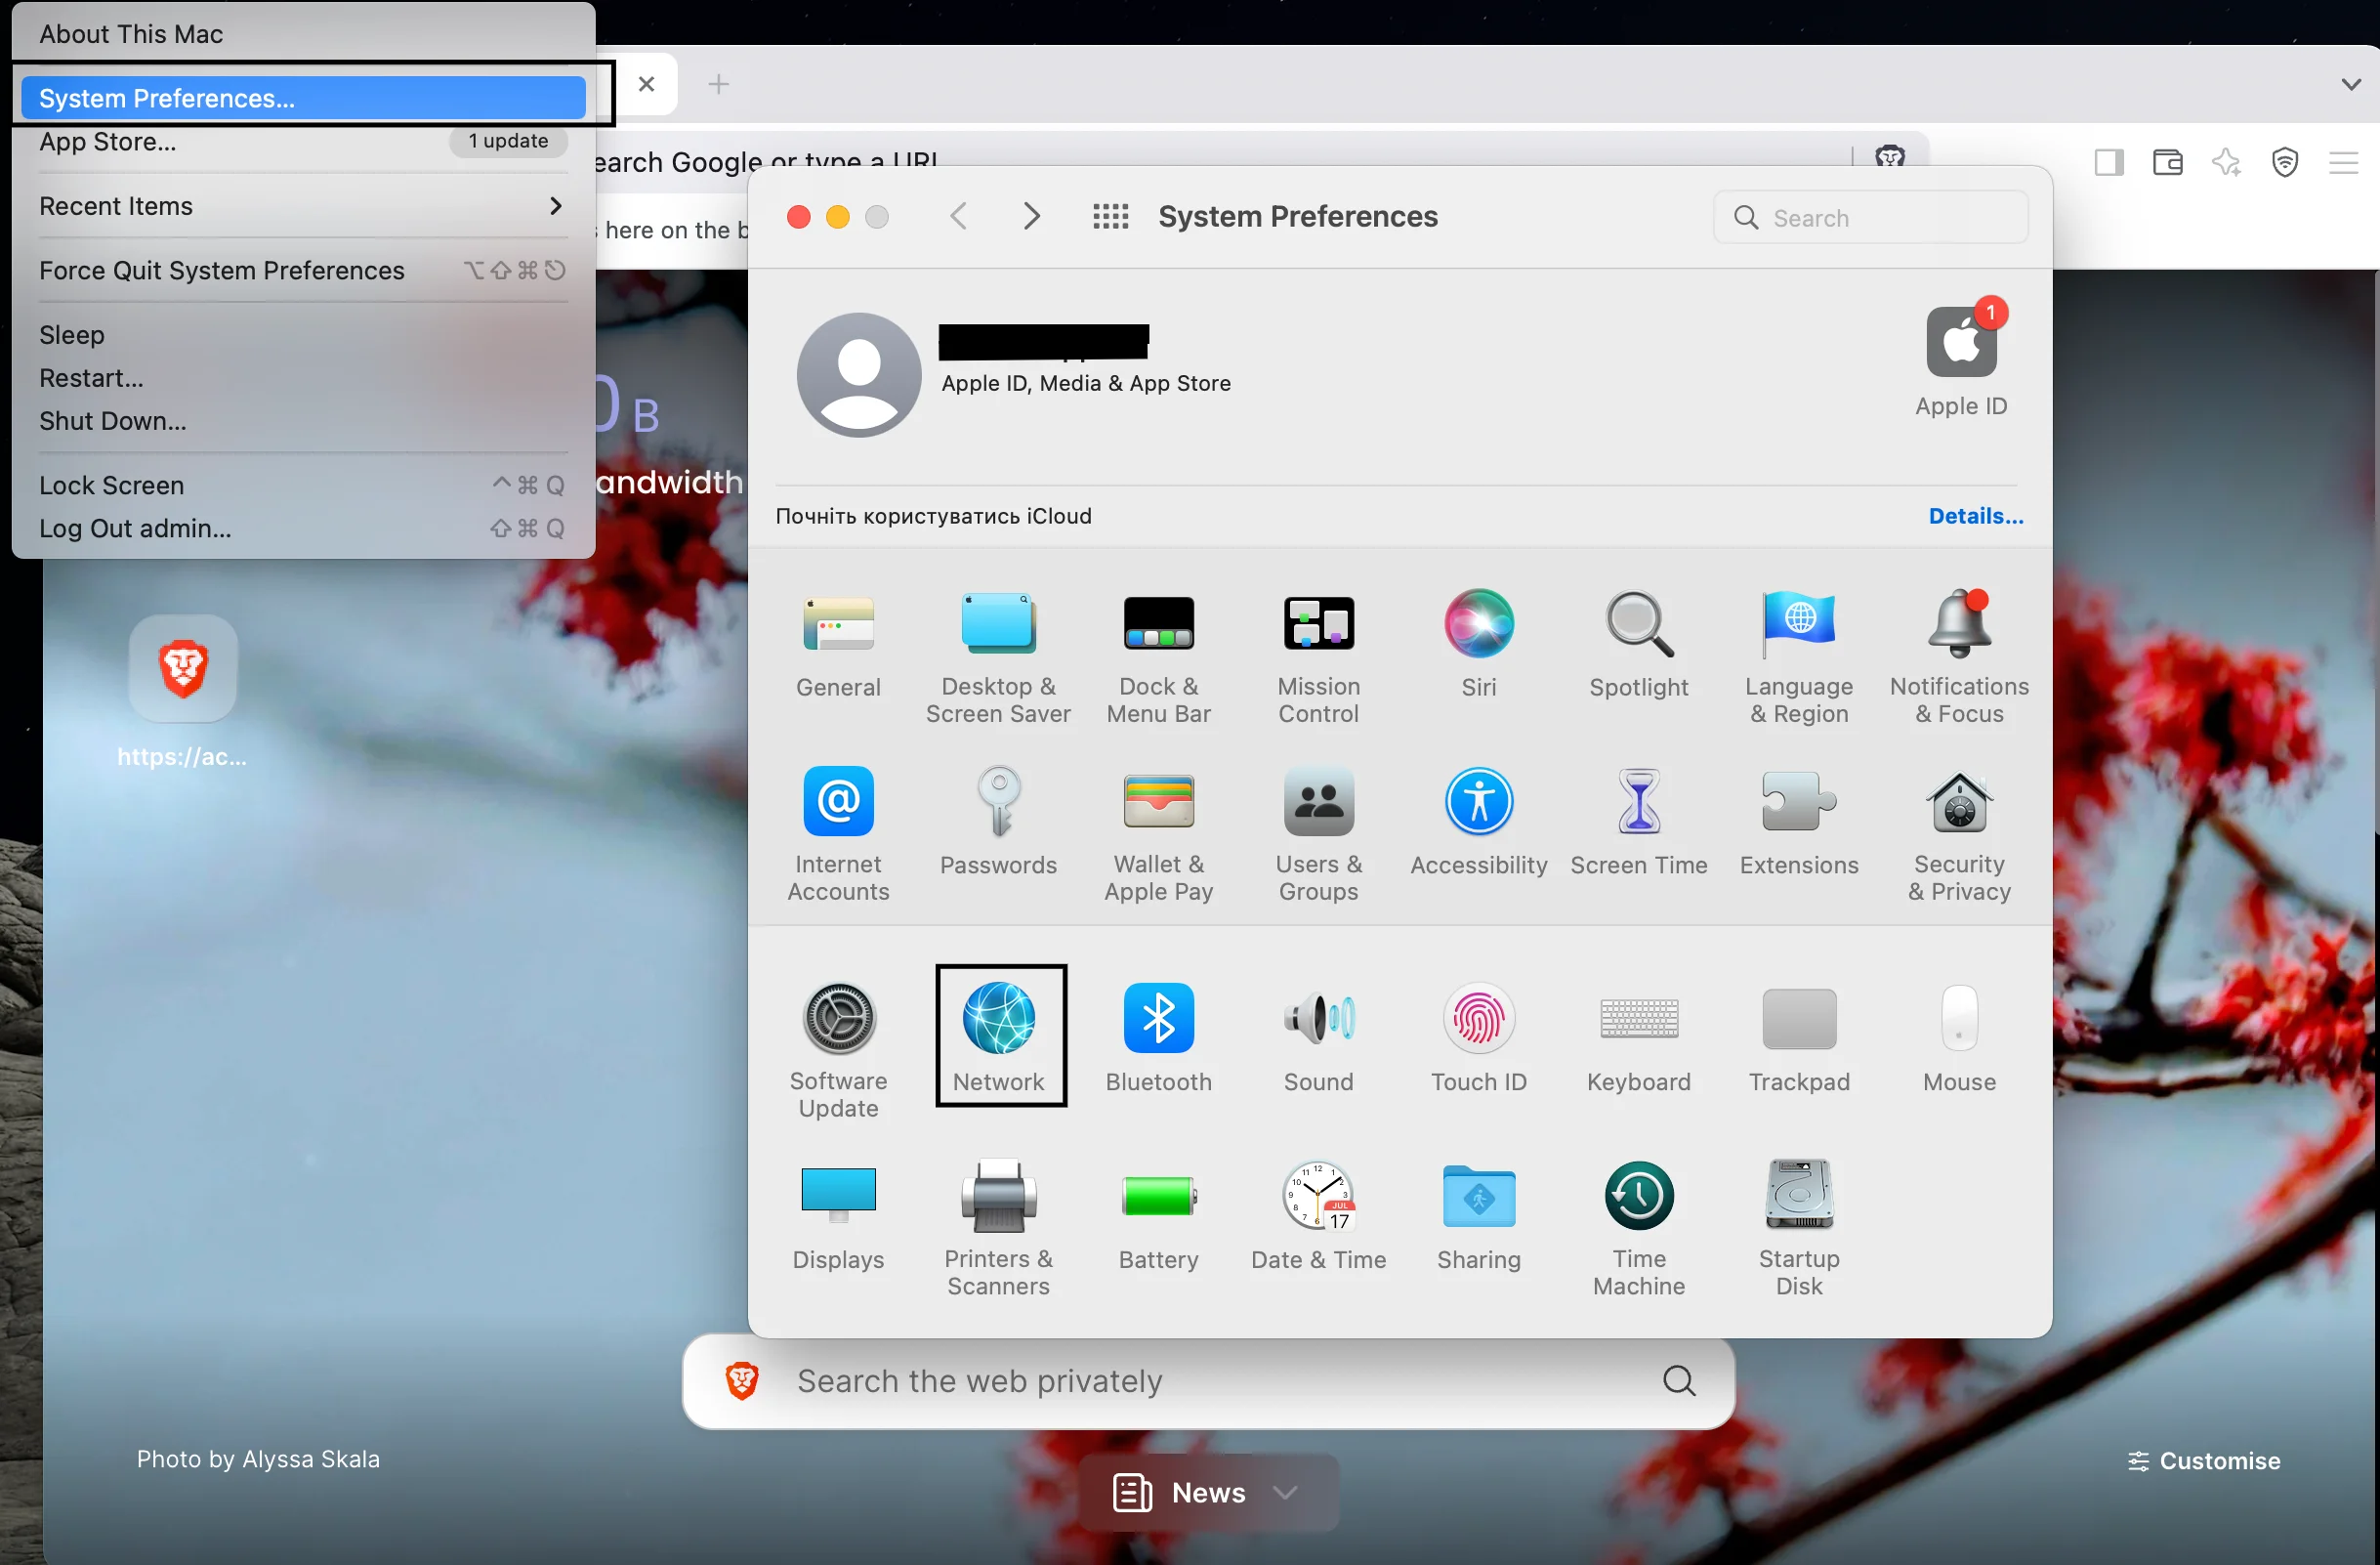
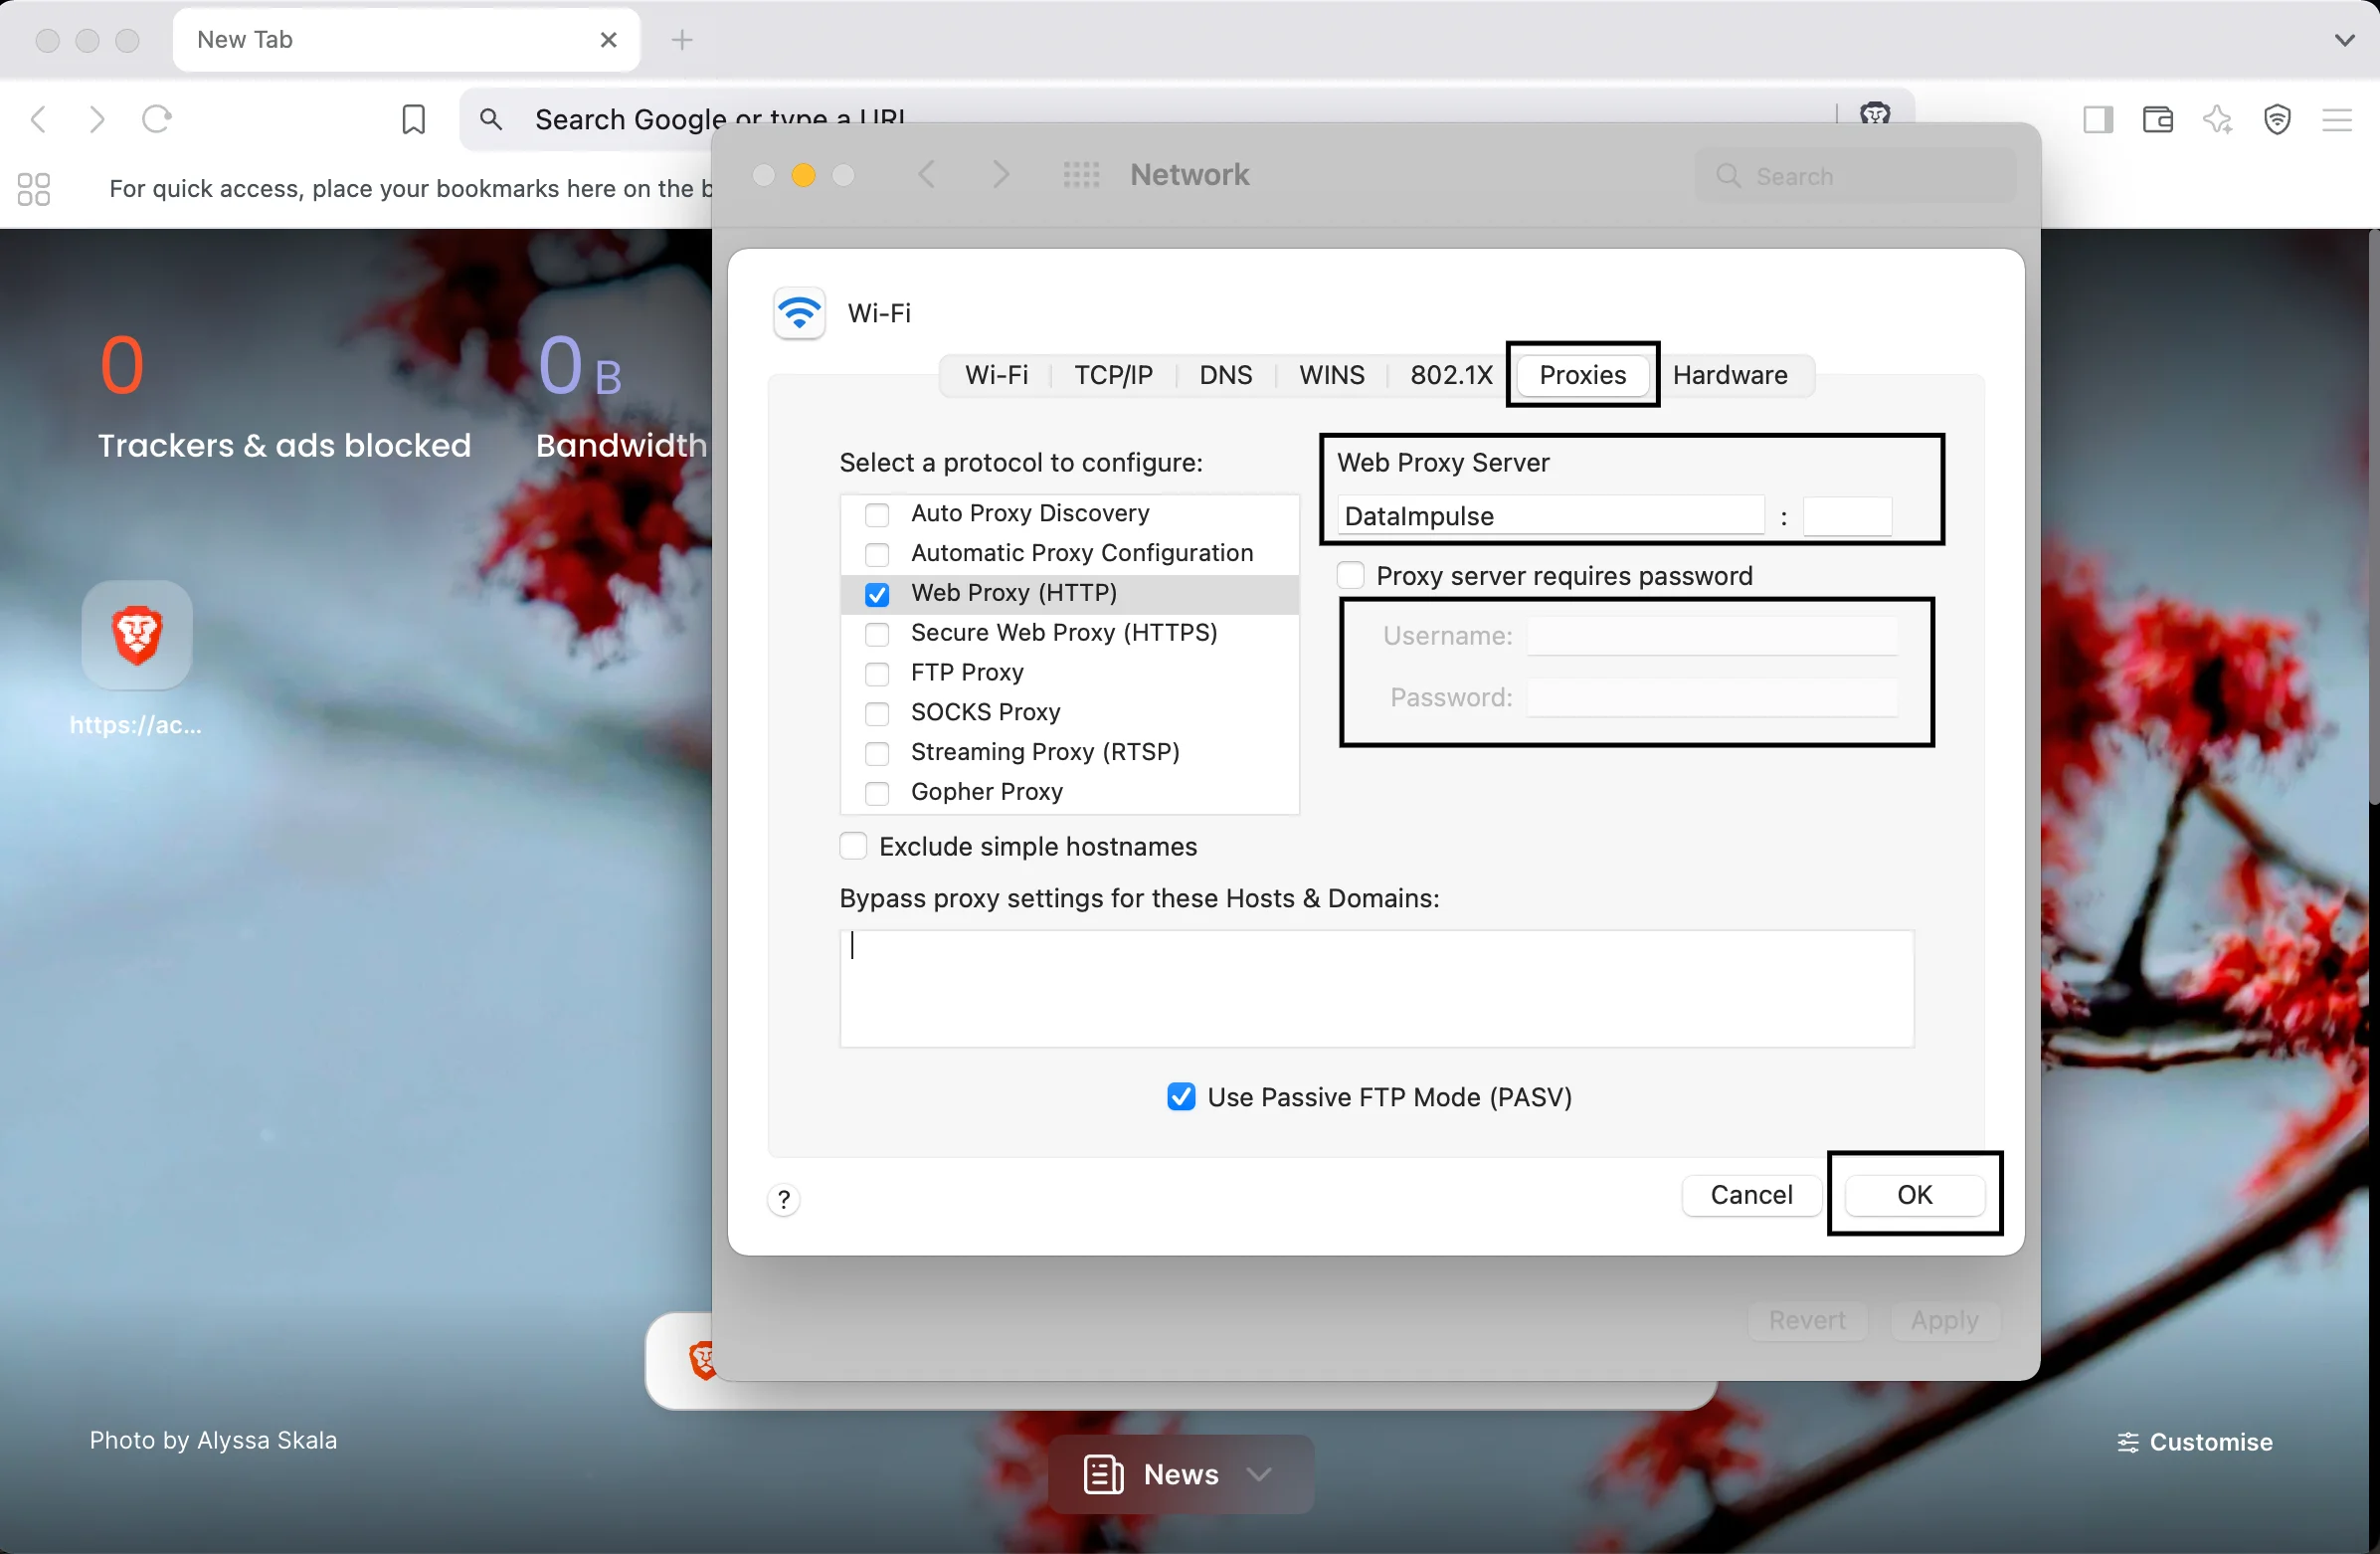
- On macOS: System Preferences → Network → Advanced → Proxies. Select SOCKS5 or HTTP type and enter DataImpulse proxy credentials. Click Ok, then Apply and Save settings.
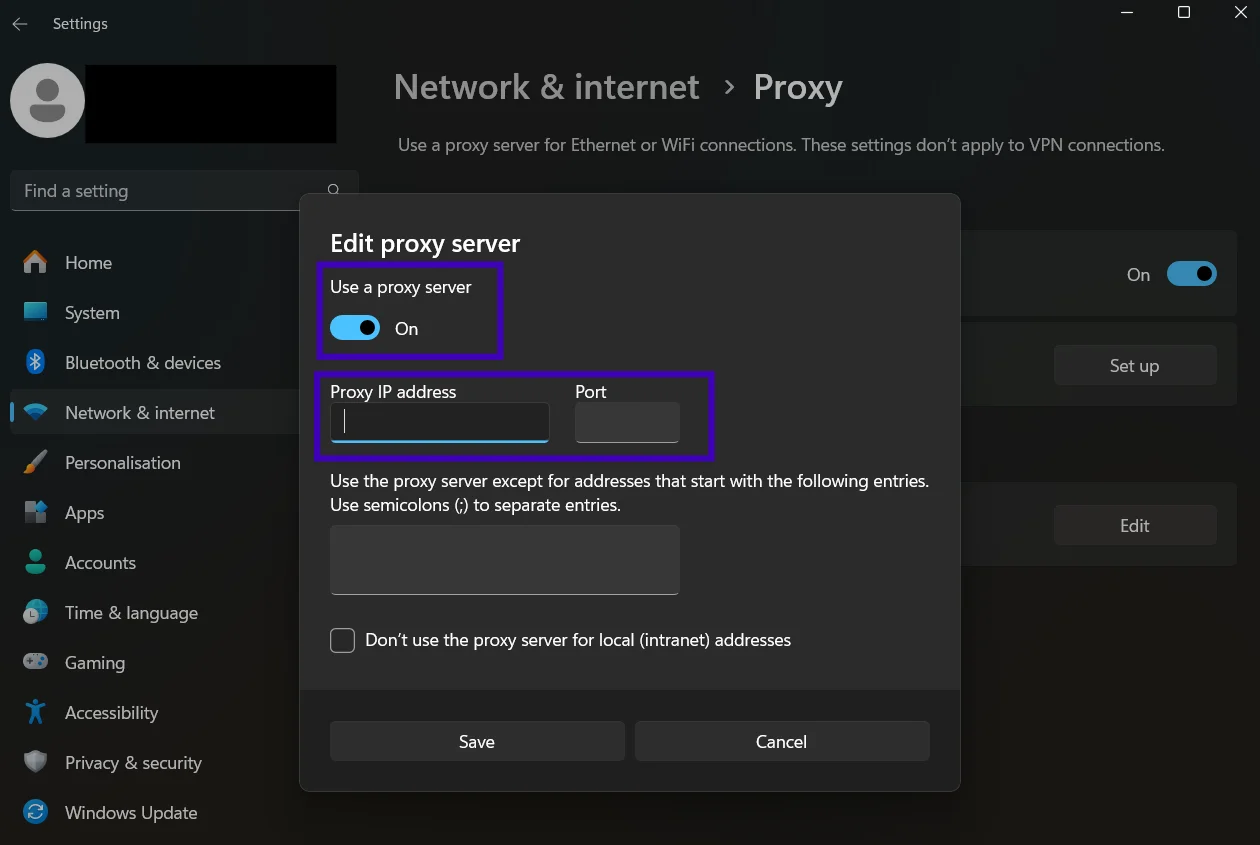
- On Windows: Settings → Network & Internet → Proxy. Choose Manual Proxy Setup and enter your proxy details.
5. Restart Brave to apply the proxy settings.
6. For the final check, open whatismyipaddress.com to see if your connection is routing through the proxy.
That’s it. You’re now successfully connected to the proxy server. Begin surfing the web with premium DataImpulse proxies.
If you want to turn off the proxy in Brave Browser, follow these steps:
To disable your proxy in the Brave browser to save data, you need to:
- Open your system’s network settings and make the changes.
- On macOS, go to System Preferences → Network. Uncheck both the Web Proxy (HTTP) and Secure Web Proxy (HTTPS) boxes.
- On Windows, navigate to Proxy settings. Uncheck the “Use a proxy server” option.
- Click OK to apply the changes. Restart your Brave browser.
If you have issues with your DataImpulse dashboard, read our step-by-step guide or contact our support team.

