In this Article
The need to speed up web scraping and simultaneously avoid triggering anti-bot systems calls for functional scraping tools. Scrapy is one of the most widely used ones. Read further to learn why it’s worth your attention and how to use it effectively.
What is Scrapy, and what are the advantages it offers you?
Scrapy is an open-source Python web crawling framework. It’s popular for a reason, as its advantages include:
- ability to handle multiple requests simultaneously, so web scraping takes less time
- no need to maintain code
- suitable for large-scale projects
- allows customization of request and response handling, such as adding user-agent rotation, handling retries, and managing proxies
- works well with JavaScript-heavy websites and provides features like request delay and auto-throttling to avoid overwhelming servers
- has a built-in item pipeline, so you can extract, store, and save data in various formats, such as JSON, CSV, and XML
- comes with CSS selectors and XPath expressions, allowing you to extract precisely necessary HTML elements
To familiarize yourself with all the Scrapy features, visit its official documentation. In this article, we will focus on how to use Scrapy. We will visit our blog and scrape all the article titles to show you how the tool works.
As web scraping comes with the risk of bans, using crawling tools together with proxies is nothing new. In this tutorial, we will show you how to install and customize Scrapy and how to implement proxies.
Getting ready
Before starting, ensure you have all the necessary programs and tools. For this tutorial, we need:
- Visual Studio Code (or any other IDE that supports Python)
- Python (version 3.10.0 in our case)
- pip (we use version 25.0.1)
You can download VS Code here and install Python from its official website. If you don’t have pip (it is automatically included in Python version 3.4 and later), open your Notebook and save this code into a file get-pip.py:
import urllib.request
import os
import sys
try:
# download get-pip.py
url = "https://bootstrap.pypa.io/get-pip.py"
urllib.request.urlretrieve(url, "get-pip.py")
# install pip
os.system(f"{sys.executable} get-pip.py")
finally:
# remove the script
if os.path.exists("get-pip.py"):
os.remove("get-pip.py")
Then, open the command prompt and navigate to the folder where you saved a file:
cd path/to/your/file
For example, we saved a file in the Documents folder, so our command would look like cd/Documents.
After that, run the following command:
python get-pip.py
To check whether pip works fine, use this command:
pip --version
Now, when you have everything ready, let’s start.
Installing Scrapy and starting a project
First, we need to install Scrapy. To do that, open the command prompt (or you can do that in the VS Code terminal) and run the following command:
pip install Scrapy
Note: If you have installed all the necessary tools but keep seeing the “The term pip isn’t recognized as a name of cmdlet, function, script file, or operable program” sign or other errors in the VS Code terminal, try adjusting the VS Code settings. Go to Terminal>Integrated: Default Profile (you can type terminal integrated into the search bar), change the default profile to the command prompt, and restart VS Code to activate the new settings.
To start a project, navigate to your project folder in the VS Code terminal. In our case, the folder is called Project S, and it’s located in the Documents folder, so we type cd Documents/Project S.
Then, type this command:
scrapy startproject your_project_name
Make sure to replace your_project_name with an actual name. For example, we use dataimpulse_blog.
Next, navigate to the project folder:
cd your_project_name
When you’re there, use this command to create a spider:
scrapy genspider your_spider_name url_domain
In our case, the command looks like scrapy genspider blog_titles dataimpulse.com
Adjusting code
Whether you open your project folder in VS Code or via File Explorer, you’ll see several Python files there. We need to modify them to scrape the necessary data.
First, in the “spiders” folder, open blog_titles.py and replace its existing code with this:
import scrapy
class BlogTitlesSpider(scrapy.Spider):
name = 'blog_titles'
allowed_domains = ['dataimpulse.com']
start_urls = ['https://dataimpulse.com/blog/']
def parse(self, response):
self.logger.info(f"Visited {response.url}")
titles = response.css('h3.blog-title a::text').getall()
for title in titles:
yield {'title': title.strip()}
next_page = response.css('a.next::attr(href)').get()
if next_page:
yield response.follow(next_page, callback=self.parse)
Here, you define the page you need to scrape and the data you want to collect (titles, in this case). You also modify the parse method.
Next, open middlewares.py and paste the following piece of code there:
# Define here the models for your spider middleware
#
# See documentation in:
# https://docs.scrapy.org/en/latest/topics/spider-middleware.html
from scrapy import signals
# useful for handling different item types with a single interface
from itemadapter import is_item, ItemAdapter
class BlogscraperSpiderMiddleware:
# Not all methods need to be defined. If a method is not defined,
# scrapy acts as if the spider middleware does not modify the
# passed objects.
@classmethod
def from_crawler(cls, crawler):
# This method is used by Scrapy to create your spiders.
s = cls()
crawler.signals.connect(s.spider_opened, signal=signals.spider_opened)
return s
def process_spider_input(self, response, spider):
# Called for each response that goes through the spider
# middleware and into the spider.
# Should return None or raise an exception.
return None
def process_spider_output(self, response, result, spider):
# Called with the results returned from the Spider, after
# it has processed the response.
# Must return an iterable of Request, or item objects.
for i in result:
yield i
def process_spider_exception(self, response, exception, spider):
# Called when a spider or process_spider_input() method
# (from other spider middleware) raises an exception.
# Should return either None or an iterable of Request or item objects.
pass
def process_start_requests(self, start_requests, spider):
# Called with the start requests of the spider, and works
# similarly to the process_spider_output() method, except
# that it doesn’t have a response associated.
# Must return only requests (not items).
for r in start_requests:
yield r
def spider_opened(self, spider):
spider.logger.info("Spider opened: %s" % spider.name)
class BlogscraperDownloaderMiddleware:
# Not all methods need to be defined. If a method is not defined,
# scrapy acts as if the downloader middleware does not modify the
# passed objects.
@classmethod
def from_crawler(cls, crawler):
# This method is used by Scrapy to create your spiders.
s = cls()
crawler.signals.connect(s.spider_opened, signal=signals.spider_opened)
return s
def process_request(self, request, spider):
# Called for each request that goes through the downloader
# middleware.
# Must either:
# - return None: continue processing this request
# - or return a Response object
# - or return a Request object
# - or raise IgnoreRequest: process_exception() methods of
# installed downloader middleware will be called
request.meta['proxy'] = spider.settings.get('http://login:password@hostname:port')
def process_response(self, request, response, spider):
# Called with the response returned from the downloader.
# Must either;
# - return a Response object
# - return a Request object
# - or raise IgnoreRequest
return response
def process_exception(self, request, exception, spider):
# Called when a download handler or a process_request()
# (from other downloader middleware) raises an exception.
# Must either:
# - return None: continue processing this exception
# - return a Response object: stops process_exception() chain
# - return a Request object: stops process_exception() chain
pass
def spider_opened(self, spider):
spider.logger.info("Spider opened: %s" % spider.name)
Pay attention to line 81. Here, you need to type your actual credentials in the http://login:password@hostname:port format. To get them, go to the necessary proxy plan in your DataImpulse dashboard. Don’t forget to change your proxy format in the button-right corner. If you have difficulties, don’t hesitate to use our guide on managing your DataImpulse account.
Finally, go to settings.py and make sure it looks like this:
# Scrapy settings for blogscraper project
#
# For simplicity, this file contains only settings considered important or
# commonly used. You can find more settings consulting the documentation:
#
# https://docs.scrapy.org/en/latest/topics/settings.html
# https://docs.scrapy.org/en/latest/topics/downloader-middleware.html
# https://docs.scrapy.org/en/latest/topics/spider-middleware.html
BOT_NAME = "dataimpulse_blog"
SPIDER_MODULES = ["dataimpulse_blog.spiders"]
NEWSPIDER_MODULE = "dataimpulse_blog.spiders"
# Crawl responsibly by identifying yourself (and your website) on the user-agent
#USER_AGENT = "blogscraper (+http://www.yourdomain.com)"
# Obey robots.txt rules
ROBOTSTXT_OBEY = True
# Enable the downloader middlewares
DOWNLOADER_MIDDLEWARES = {
'scrapy.downloadermiddlewares.httpproxy.HttpProxyMiddleware': 110,
'scrapy.downloadermiddlewares.useragent.UserAgentMiddleware': None,
'dataimpulse_blog.middlewares.BlogscraperSpiderMiddleware': 543, # Add your ProxyMiddleware here
}
# Configure maximum concurrent requests performed by Scrapy (default: 16)
#CONCURRENT_REQUESTS = 32
# Configure a delay for requests for the same website (default: 0)
# See https://docs.scrapy.org/en/latest/topics/settings.html#download-delay
# See also autothrottle settings and docs
#DOWNLOAD_DELAY = 3
# The download delay setting will honor only one of:
#CONCURRENT_REQUESTS_PER_DOMAIN = 16
#CONCURRENT_REQUESTS_PER_IP = 16
# Disable cookies (enabled by default)
#COOKIES_ENABLED = False
# Disable Telnet Console (enabled by default)
#TELNETCONSOLE_ENABLED = False
# Override the default request headers:
#DEFAULT_REQUEST_HEADERS = {
# "Accept": "text/html,application/xhtml+xml,application/xml;q=0.9,*/*;q=0.8",
# "Accept-Language": "en",
#}
# Enable or disable spider middlewares
# See https://docs.scrapy.org/en/latest/topics/spider-middleware.html
#SPIDER_MIDDLEWARES = {
# "blogscraper.middlewares.BlogscraperSpiderMiddleware": 543,
#}
# Enable or disable downloader middlewares
# See https://docs.scrapy.org/en/latest/topics/downloader-middleware.html
#DOWNLOADER_MIDDLEWARES = {
# "blogscraper.middlewares.BlogscraperDownloaderMiddleware": 543,
#}
# Enable or disable extensions
# See https://docs.scrapy.org/en/latest/topics/extensions.html
#EXTENSIONS = {
# "scrapy.extensions.telnet.TelnetConsole": None,
#}
# Configure item pipelines
# See https://docs.scrapy.org/en/latest/topics/item-pipeline.html
#ITEM_PIPELINES = {
# "blogscraper.pipelines.BlogscraperPipeline": 300,
#}
# Enable and configure the AutoThrottle extension (disabled by default)
# See https://docs.scrapy.org/en/latest/topics/autothrottle.html
#AUTOTHROTTLE_ENABLED = True
# The initial download delay
#AUTOTHROTTLE_START_DELAY = 5
# The maximum download delay to be set in case of high latencies
#AUTOTHROTTLE_MAX_DELAY = 60
# The average number of requests Scrapy should be sending in parallel to
# each remote server
#AUTOTHROTTLE_TARGET_CONCURRENCY = 1.0
# Enable showing throttling stats for every response received:
#AUTOTHROTTLE_DEBUG = False
# Enable and configure HTTP caching (disabled by default)
# See https://docs.scrapy.org/en/latest/topics/downloader-middleware.html#httpcache-middleware-settings
#HTTPCACHE_ENABLED = True
#HTTPCACHE_EXPIRATION_SECS = 0
#HTTPCACHE_DIR = "httpcache"
#HTTPCACHE_IGNORE_HTTP_CODES = []
#HTTPCACHE_STORAGE = "scrapy.extensions.httpcache.FilesystemCacheStorage"
# Set settings whose default value is deprecated to a future-proof value
REQUEST_FINGERPRINTER_IMPLEMENTATION = "2.7"
TWISTED_REACTOR = "twisted.internet.asyncioreactor.AsyncioSelectorReactor"
FEED_EXPORT_ENCODING = "utf-8"
Here, you enable middleware and adjust other parameters like caching, cookies, pipelines, etc.
Now, the most important moment. Open Terminal and type cd to ensure you’re in the root directory of your project (dataimpulse_blog in our case; you need to look for a folder that contains the scrapy.cfg file – that’s the root directory). Then, use the following command:
scrapy crawl blog_titles -o titles.json
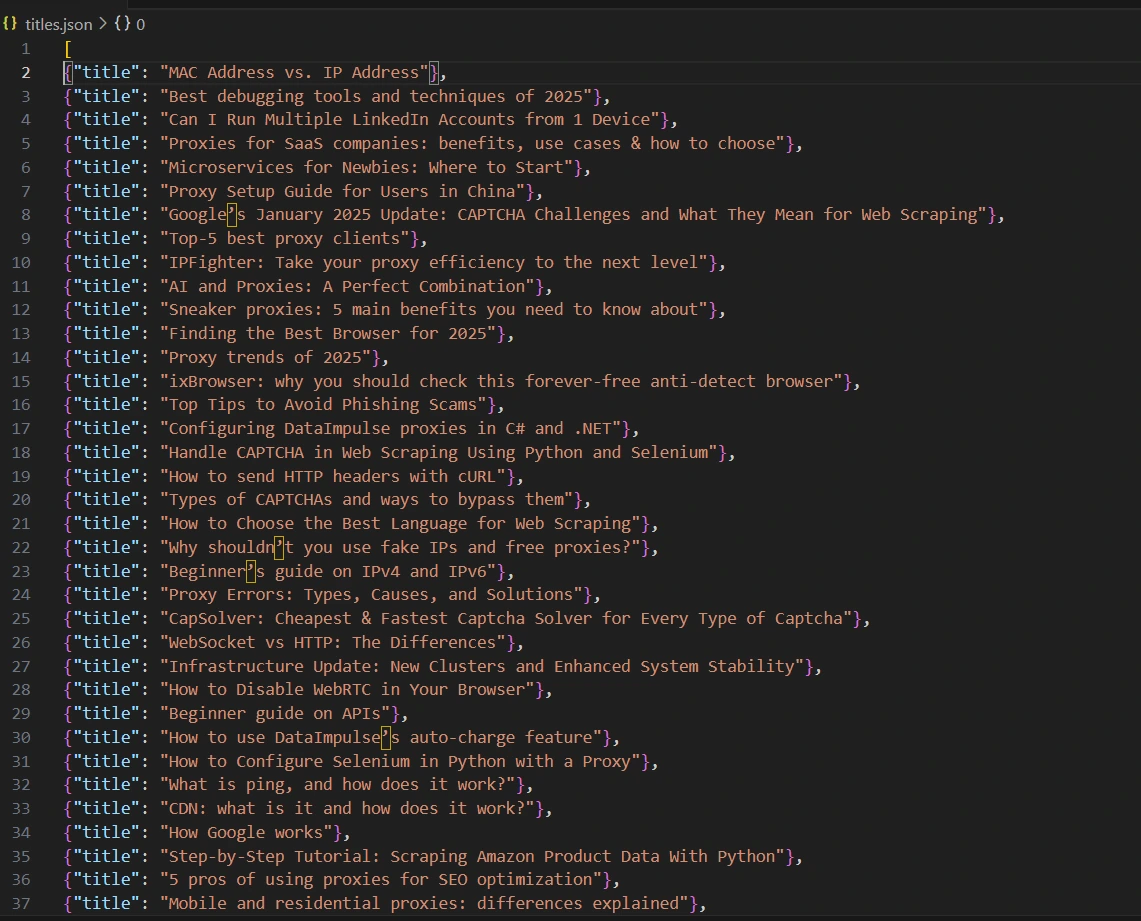
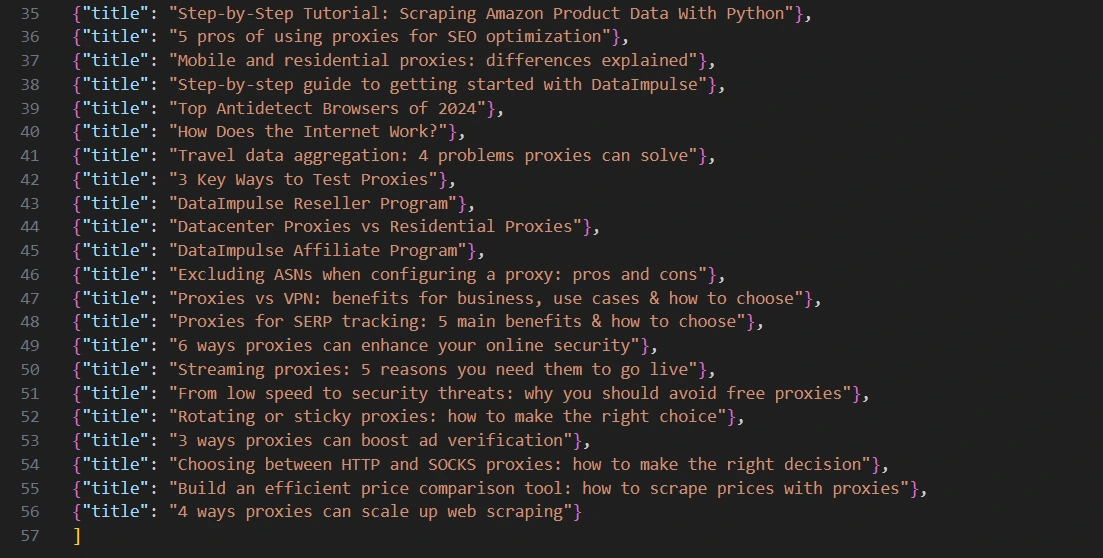
It will run your spider and save all results in a file called titles.json. You can check results by opening the file right in VS Code. That’s what we got:
Now, you’re done! As you can see, Scrapy is easy to use. You can adjust necessary details and leverage proxies for the best results. Of course, the choice of proxies is essential too. DataImpulse offers you legally sourced residential, data center, and mobile proxies at a pay-as-you-go pricing model. You have whitelisted IPs for universal needs without exhausting your budget. Start with us by clicking the “Try now” button or writing us at [email protected].


