
Configuring Proxies in Ghost Browser
Imagine you’re using a web browser for advanced tasks and encountering difficulties like being able to use only a single connection or being unable to manage multiple accounts on the same site simultaneously due to cookies. To prevent such disruptions, you can use custom browsers like Ghost Browser. With Ghost Browser, you can go beyond these limitations and take your browsing experience to the next level by adding proxies. By using proxies, you can perform scraping tasks with different IP addresses, further enhancing your browsing capabilities.

Ghost Browser setup guide:
- Install and open Ghost Browser.
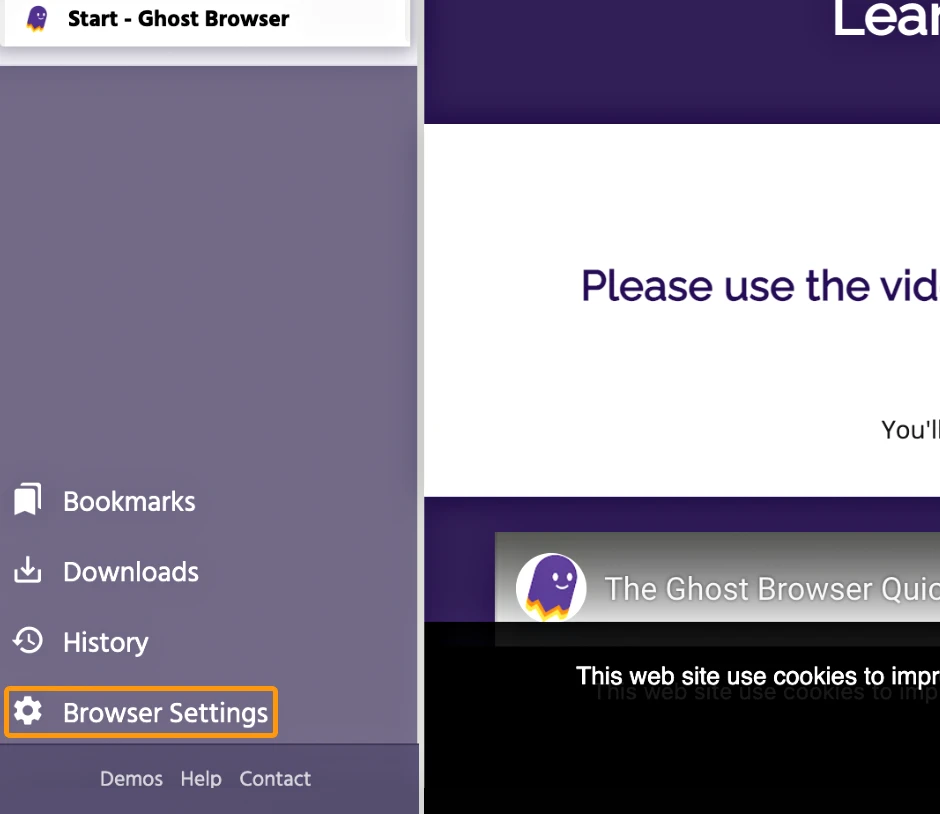
- Click on Browser Settings on the bottom-left of the interface.
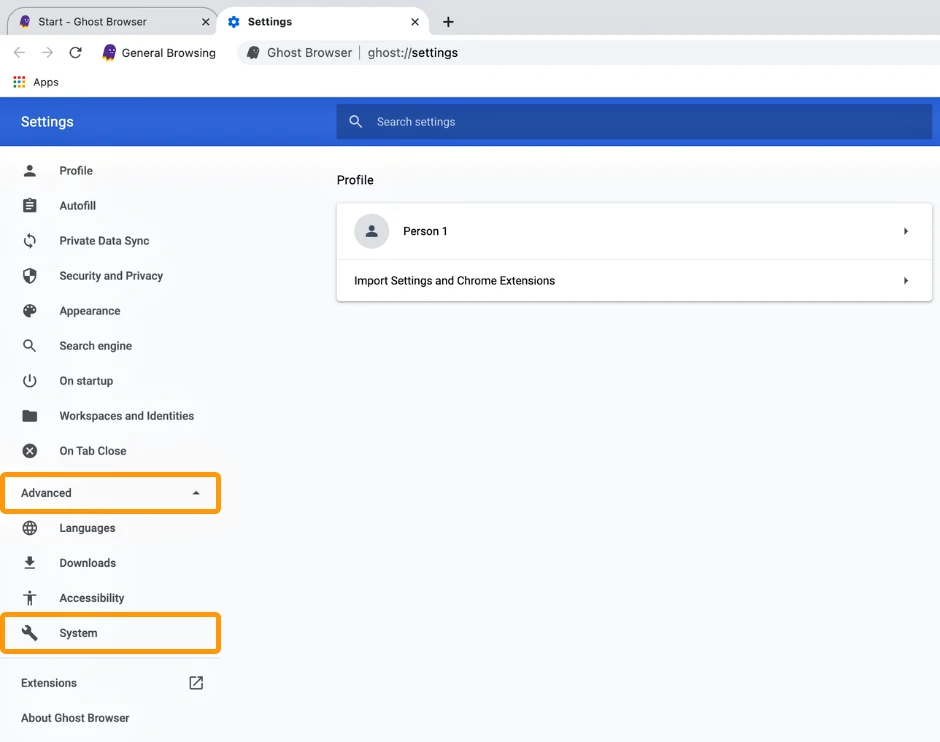
- Select Advanced.
- Choose System.
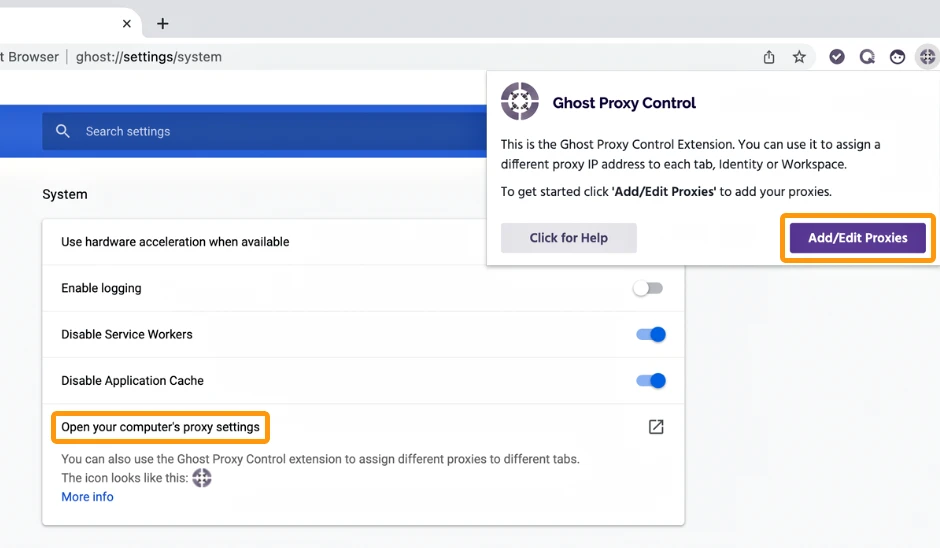
- Click on Open your computer’s proxy settings in the new options that appear.
- Click on the Ghost Proxy Control emblem.
- Select Add/Edit Proxies.
If you want to proceed with the proxy setup tutorial for Windows 10/11, click here.
8. In the new window, choose Add a Single Proxy.

9. Fill the following information:
Host: gw.dataimpulse.com
Port: 823
Username: Proxy plan username
Password: Proxy plan password
If you have whitelisted IPs, no need to enter login credentials.

10. Click Add proxy.

11. Then you will see your proxy in the Proxy List. To enable proxies, you should select the proxy and click the “Enable” button.

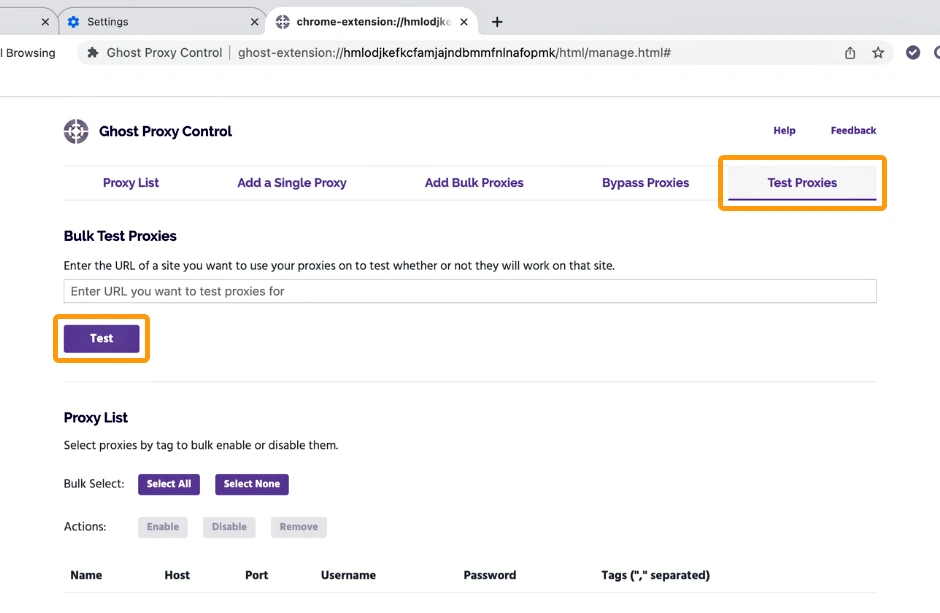
12. If desired, you can test your proxies by clicking on Test Proxies, entering a target URL, and selecting Test.
That’s it! You’ve successfully integrated DataImpulse proxies with Ghost Browser.

 State/City/Zip/ASN Targeting